
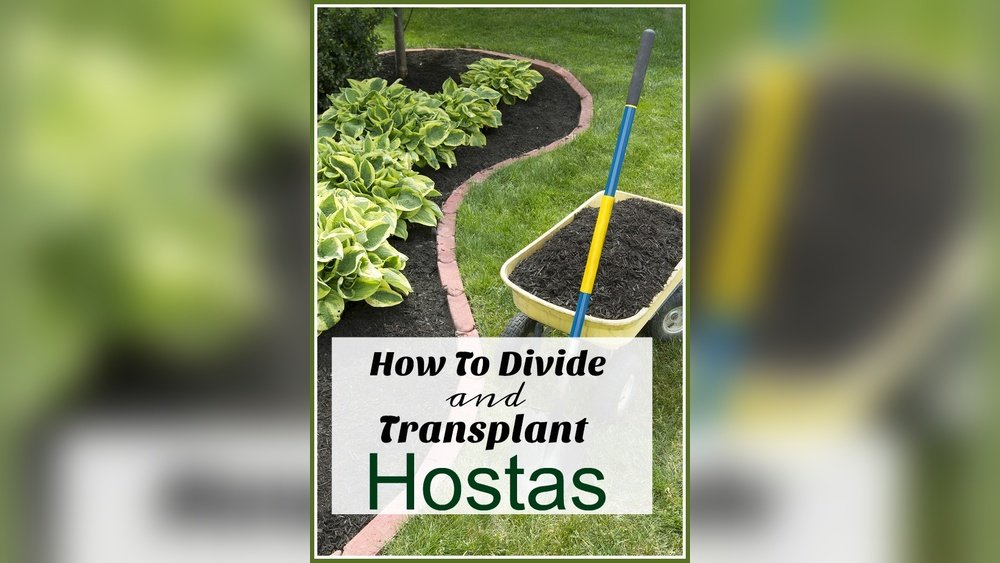
Hostas are one of the most loved shade perennials, famous for their lush foliage and low maintenance needs. Whether you’re a seasoned gardener or just starting out, learning how to transplant hostas correctly can help your plants thrive and even multiply.
Many gardeners worry about damaging roots or disturbing growth, but with the right approach, transplanting hostas can be straightforward and stress-free. In this guide, you’ll discover practical tips, proven techniques, and expert insights to make your hosta transplanting a success—no matter your experience level.
Understanding Hostas: Why And When To Transplant
Hostas grow from thick root systems and can live for decades in the same spot. However, there are several reasons why you might need to move or divide them. Sometimes, they outgrow their space, develop crowded clumps, or need to be relocated for better shade.
Transplanting is also a smart way to rejuvenate older hostas or share plants with friends.
Timing matters. The best seasons for transplanting hostas are spring and early fall. In these periods, the weather is mild, and the plant has time to recover before extreme temperatures arrive. Spring, just as the shoots start to emerge but before leaves fully open, is ideal because the plant is waking up and ready for new growth. Early fall is also safe, giving roots time to settle before winter.
A common mistake is transplanting in the heat of summer. Hostas may wilt and struggle due to heat stress and water loss. If you must move them in summer, provide extra water and shade, but know that recovery will be slower.
Preparing For Transplant: Tools, Site, And Soil
Before you dig up any hosta, it’s important to prepare. Good preparation reduces root shock and helps plants recover quickly.
Tools You’ll Need
- Spade or sharp shovel—for digging around the root ball.
- Garden fork—to loosen soil and lift the clump.
- Hand trowel—for detail work or dividing small sections.
- Pruning shears—to trim dead leaves or roots.
- Watering can or hose—to moisten the soil before and after transplanting.
- Mulch—to protect roots after replanting.
- Gloves—to protect your hands, especially if soil is rough.
Choosing The Right Site
Hostas thrive in partial to full shade. They dislike direct afternoon sun, which can burn their leaves. Pick a spot with morning sun and afternoon shade or dappled sunlight.
Check for good drainage. Hostas hate soggy roots, which can cause rot. Avoid low spots where water collects after rain.
Preparing The New Planting Hole
Make the new hole twice as wide as the root ball and just as deep. This allows roots to spread out easily. Loosen the soil at the bottom and mix in some organic matter (compost or well-rotted manure). This boosts nutrients and improves drainage.
If your soil is heavy clay, add coarse sand or leaf mold to improve texture. For sandy soils, mix in extra compost to retain moisture.
Pro tip: Water the new hole before planting. Moist soil helps roots settle and prevents air pockets.
Credit: www.creeklinehouse.com
Digging Up Hostas: Step-by-step Guide
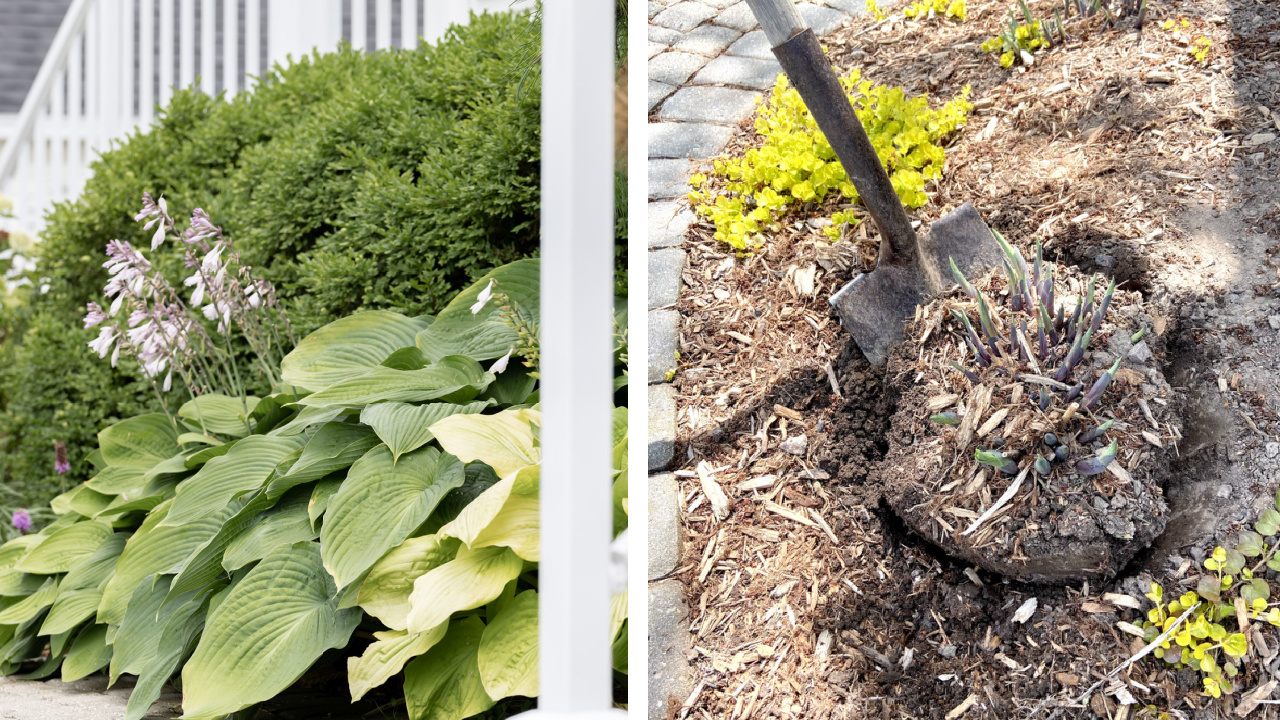
Transplanting starts with digging out the hosta clump. Careful digging is key to avoiding root damage.
- Water the plant deeply the day before. Moist soil makes digging easier and reduces root stress.
- With your spade, dig a wide circle at least 6–8 inches beyond the leaf edge. Hostas have wide, shallow roots.
- Push your spade straight down around the plant, then gently lever under the root ball.
- Lift the clump from the ground, trying to keep as much soil on the roots as possible.
- Shake off loose dirt and check the roots. Trim any rotted or broken roots with clean shears.
A common oversight is digging too close to the crown (the base of the leaves). This can slice roots and delay recovery.
Dividing Hostas: Why And How
Hostas can become crowded over time, forming large clumps with less vigor. Dividing them every 4–5 years keeps plants healthy and encourages new growth.
When To Divide
Spring is best, when shoots are just poking up. Fall, after leaf die-back, is also good. Avoid dividing during blooming or summer heat.
How To Divide
- Place the lifted clump on a tarp or firm surface.
- Decide how many divisions you want. Each division should have at least one growing point (eye) and a healthy root section.
- For small clumps, use your hands to gently separate sections. For larger, tougher clumps, use a sharp knife, spade, or even a small saw.
- Trim away any dead roots or old leaves.
- Keep divisions moist and replant as soon as possible.
Non-obvious insight: Smaller divisions (single eyes) will take longer to fill out, but you’ll get more plants. Larger pieces recover and grow faster, making them better for filling space quickly.
Planting The Hosta In Its New Home
This is the most critical stage. A good planting technique sets your hosta up for years of healthy growth.
Placing The Plant
Set the hosta at the same depth it was growing before. The crown (where leaves and roots meet) should be at soil level—not buried deep, not raised above ground. Planting too deep can cause rot; too shallow, and roots may dry out.
Spread roots out gently in the hole. If roots are circling, tease them loose so they grow outwards.
Backfilling And Watering
Backfill with your improved soil, pressing down gently to remove air pockets. Water the plant well, soaking the soil thoroughly. This settles the roots and ensures good contact with soil.
Add a 2-inch layer of mulch around the plant, but keep it away from the crown to prevent rot. Mulch helps retain moisture and suppress weeds.
Spacing Matters
Hostas vary in size, from small varieties (6 inches across) to giants (more than 4 feet wide). Check your variety and space accordingly. As a rule of thumb, plant small hostas 1–1.5 feet apart, medium hostas 2–3 feet apart, and large hostas 3–4 feet apart.
Here’s a spacing reference:
| Hosta Size | Recommended Spacing | Expected Mature Width |
|---|---|---|
| Small | 12–18 inches | 6–12 inches |
| Medium | 24–36 inches | 18–30 inches |
| Large | 36–48 inches | 30–48 inches |
Planting too close leads to overcrowding and poor airflow, making hostas more susceptible to disease.
Aftercare: Helping Hostas Settle In
Transplanted hostas need extra attention as they recover from the move. The first few weeks are critical.
Watering
Keep the soil consistently moist (but not waterlogged) for at least 3–4 weeks after transplanting. Hostas have shallow roots and can dry out quickly in new locations. Aim for about 1 inch of water per week, through rain or manual watering.
Check soil moisture by sticking your finger 2 inches deep. If it feels dry, water the plant.
Mulching
Maintain a layer of organic mulch (shredded leaves, bark, or straw) around the hosta. This protects roots, keeps weeds down, and improves soil as it breaks down.
Fertilizing
Hold off on fertilizing immediately after transplanting. Wait until you see new growth—usually in 2–4 weeks. Then, use a balanced, slow-release fertilizer (like 10-10-10) applied according to the package. Too much fertilizer early can burn tender new roots.
Protection From Pests
Slugs love hostas, especially stressed new transplants. Protect your plants with slug barriers, traps, or organic pellets. Check leaves for holes and act quickly if you see damage.
Expert tip: Cover new transplants with a temporary shade cloth if the weather turns hot or sunny. This reduces stress and prevents leaf scorch.
Common Mistakes To Avoid
Even experienced gardeners can make errors when transplanting hostas. Here are some frequent pitfalls and how to avoid them:
- Transplanting in extreme heat or drought: This stresses the plant and slows recovery. Stick to spring or early fall.
- Digging too close to the roots: You risk cutting major roots, making it harder for the plant to reestablish.
- Planting too deep or too shallow: Both can cause poor growth or even plant death.
- Not watering enough after transplanting: Dry roots mean slow recovery or death.
- Over-fertilizing right away: Wait for signs of new growth before feeding.
- Ignoring pests: Slugs and deer can quickly destroy stressed hostas.
- Forgetting to mulch: Exposed roots dry out and weeds compete for water.
Non-obvious insight: Some gardeners forget to label or map their new hosta locations, leading to confusion in spring when shoots emerge. Use garden markers to identify varieties, especially if you’re moving several at once.
Rejuvenating Old Hostas: Special Techniques
If your hostas have been in the ground for 10 years or more, you may notice fewer leaves, smaller size, or bare centers. Rejuvenation transplanting can bring them back to life.
- Dig up the entire clump in early spring.
- Divide into several healthy sections, discarding any dead or rotted centers.
- Replant divisions in fresh, improved soil with plenty of organic matter.
- Water well and mulch.
Old hostas sometimes have tough, woody centers that need to be cut out with a saw or large knife. Don’t be afraid to be firm; hostas are resilient and regrow quickly when given space and nutrients.

Credit: www.iscapeit.com
Transplanting Hostas In Pots And Containers
Hostas grow well in containers, making them easy to move and display. When transplanting into pots:
- Choose a container at least 2 inches wider than the root ball, with good drainage holes.
- Use a rich, well-draining potting mix with added compost.
- Place the hosta at the same depth as before, water well, and mulch the surface.
- Keep containers out of direct, harsh sun.
- Potted hostas dry out faster than in-ground plants, so check moisture often.
Pro tip: Overwinter potted hostas by placing them in an unheated garage or burying the pot in the ground to protect roots from freeze-thaw cycles.
Comparing Transplanting: Spring Vs. Fall
Should you move hostas in spring or fall? Each season has advantages and challenges.
| Season | Advantages | Challenges | Best For |
|---|---|---|---|
| Spring | Cool weather, rapid root growth, less transplant shock | Wet soils can be hard to dig, emerging shoots are delicate | Dividing, major moves |
| Fall | Soil still warm, less water loss through leaves | Short time before frost, roots need time to establish | Smaller moves, mild climates |
In most areas, spring is safest. In the South or regions with mild falls, early autumn also works well.
Dealing With Large Or Overgrown Hostas
Very old hostas can become huge and challenging to dig. Here’s how to handle them:
- Water deeply 2–3 days before digging.
- Cut back leaves to 6 inches if needed for easier handling.
- Use two people and leverage with shovels on opposite sides to lift.
- If you can’t move the entire clump, divide in place by slicing through the center and removing a section.
Non-obvious insight: Large hostas often have thick roots that can regrow even if a piece is left behind. If you want to completely remove a plant, dig deep and remove all root pieces.
Hostas And Companion Planting After Transplant
When you move hostas, it’s a good time to think about companion plants. Hostas mix well with other shade lovers like ferns, astilbes, and heucheras. These companions can fill gaps while transplanted hostas recover, and they often share similar water and soil needs.
Avoid planting aggressive ground covers (like English ivy) near new hostas, as they may compete for water and nutrients.
Monitoring And Troubleshooting After Transplanting
Even with the best care, transplanted hostas may show some stress. Here’s what to look for and how to help:
- Wilting or drooping leaves: Usually due to shock or dry soil. Check moisture, add mulch, and provide temporary shade.
- Yellowing leaves: Can be a sign of overwatering or poor drainage. Improve soil and cut back on water if soil is soggy.
- No new growth after 6 weeks: Dig gently to check roots; they may be too deep or rotting. Replant at correct depth if needed.
Most hostas bounce back within a season. Patience is key—full recovery and lush leaves may take a year, especially after hard division.
Sustainable Practices: Sharing And Expanding Your Hosta Collection
Transplanting is the perfect time to share hosta divisions with friends, neighbors, or local plant swaps. This not only spreads beauty but also helps preserve rare varieties.
Label divisions by variety and planting date. This helps track plant performance and makes future transplanting easier.
For gardeners aiming for a low-maintenance, sustainable garden, mass plantings of divided hostas create a lush, weed-suppressing ground cover with minimal effort.
Credit: acultivatednest.com
Table: Quick Hosta Transplanting Checklist
For an at-a-glance reference, use this checklist during your next hosta move.
| Step | What to Do | Why It Matters |
|---|---|---|
| 1 | Choose right season (spring/fall) | Reduces stress, speeds recovery |
| 2 | Water deeply day before | Moist soil, easy digging |
| 3 | Dig wide around plant | Protects roots |
| 4 | Prepare improved hole | Gives roots nutrients, drainage |
| 5 | Set at correct depth | Prevents rot or drying |
| 6 | Water and mulch well | Moisture, weed control |
| 7 | Check and protect from pests | Promotes healthy recovery |
Keep this handy during your garden projects for best results.
Frequently Asked Questions
How Soon After Transplanting Will My Hosta Look Healthy Again?
Most hostas show new growth within 2–6 weeks after transplanting, especially if moved in spring. Full, lush leaves may take one full growing season. If you divided the plant, smaller sections will take longer to fill out compared to larger divisions.
Can I Transplant Hostas In The Summer?
It’s possible but not recommended. Summer heat can cause wilting and slow recovery. If you must move hostas in summer, do so on a cool, cloudy day, water deeply, and provide extra shade for 2–3 weeks afterward.
How Deep Do Hosta Roots Grow?
Hosta roots are mostly shallow, growing 6–18 inches deep, with some larger varieties sending roots out wider than deep. This is why it’s important to dig a wide circle around the plant when transplanting.
What Is The Best Soil For Hostas After Transplanting?
Hostas prefer rich, well-drained soil with plenty of organic matter. A pH between 6.0 and 7.5 is ideal. Mix compost or rotted manure into the planting hole for best results. Avoid heavy clay or pure sand.
Where Can I Learn More About Hosta Varieties And Care?
A reliable resource is the Wikipedia page on Hostas, which covers varieties, growing tips, and more.
—
Transplanting hostas may seem daunting, but with careful planning and a gentle touch, you’ll find it’s one of the most rewarding garden tasks. By following these steps, you ensure your hostas not only survive but thrive in their new location—ready to impress with their beauty year after year.
Whether you’re refreshing an old bed, sharing plants with friends, or expanding your shade garden, the right transplanting technique makes all the difference. Enjoy your gardening journey, and watch your hostas flourish!