
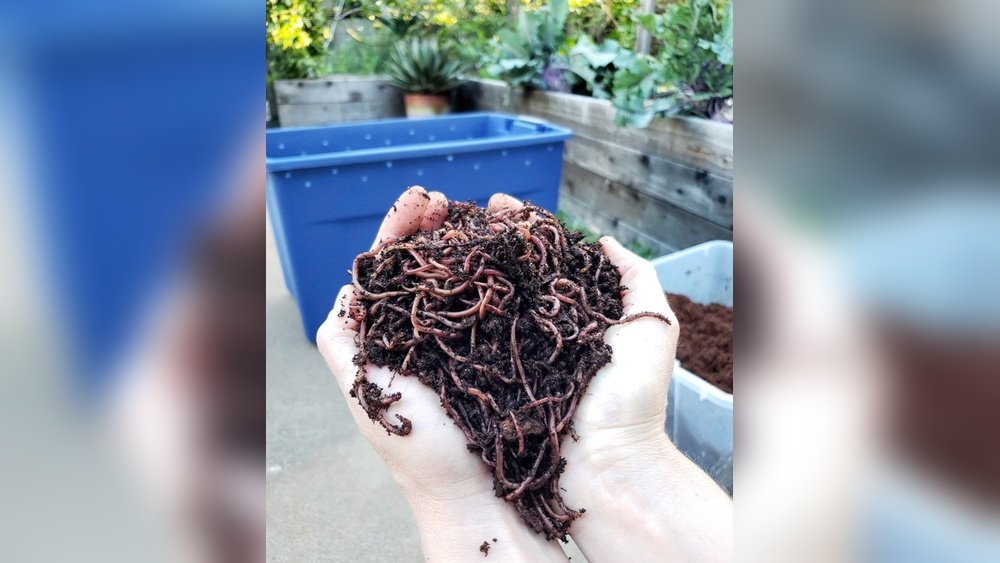
Are you looking for a simple, eco-friendly way to turn your kitchen scraps into rich, natural fertilizer? Making worm compost at home is easier than you think, and it’s a powerful way to boost your garden while reducing waste.
Imagine transforming food leftovers into nutrient-packed soil that your plants will love—all with just a few worms and some easy steps. In this guide, you’ll discover practical tips to create and maintain your own worm compost bin, avoid common mistakes, and get the best results every time.
Ready to start turning waste into garden gold? Let’s dive in and make worm composting a rewarding part of your daily routine.
:max_bytes(150000):strip_icc()/inexpensive-worm-bin-from-plastic-buckets-2540077-06-f084a74b45e44f2b83a8ffe0e9fa77a1.jpg)
Credit: www.thespruce.com
Choosing Worms And Bin
Choosing the right worms and bin is key to a successful worm composting setup. These two factors affect how fast and well your compost breaks down. Picking the right worm species helps the compost process go smoothly. The bin keeps the worms safe and comfortable.
Proper selection makes worm composting easy and efficient. It also prevents common problems like bad smells or escaping worms. Let’s explore the best worm types and how to choose a good compost bin.
Best Worm Species
Red wigglers are the top choice for worm composting. They eat a lot and reproduce quickly. These worms thrive in organic waste and break it down fast.
Another option is European nightcrawlers. They work well but prefer cooler temperatures. They are larger and can handle more food.
Avoid earthworms from your garden. They do not do well in bins. They prefer soil and may die or escape.
Selecting A Compost Bin
Choose a bin with good ventilation. Worms need fresh air to stay healthy. The bin should keep moisture balanced but not too wet.
Plastic bins work well and are easy to clean. Wood bins look natural but may rot over time. Metal bins can get too hot or cold.
Pick a bin size based on your kitchen waste. A small bin fits a few pounds of food daily. Larger bins suit more waste but need more care.
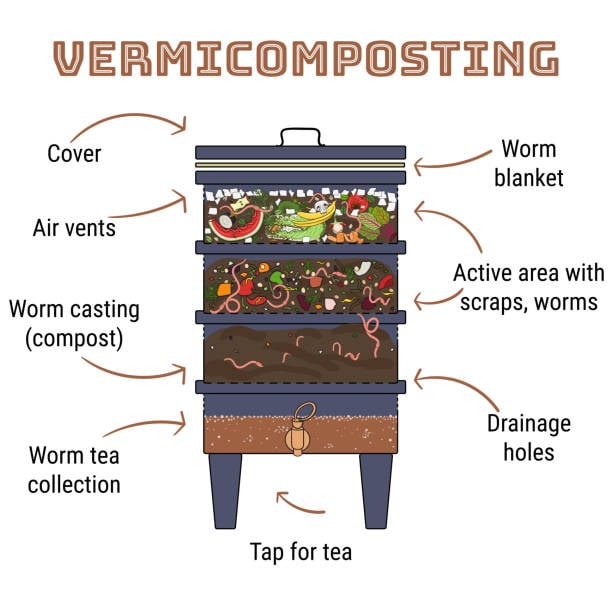
Bins with drainage holes help remove excess liquid. This stops bad smells and keeps worms happy.
Setting Up The Bin
Setting up the bin is the first step to successful worm composting at home. A well-prepared bin creates a safe and healthy environment for your worms. It helps them break down food waste quickly and efficiently. Pay attention to the bin’s size, material, and ventilation. These factors affect the worm’s comfort and activity.
Preparing Bedding Materials
Start with clean, natural bedding materials. Shredded newspaper, cardboard, and dry leaves work well. Avoid glossy paper or colored ink pages. Tear the materials into small pieces for easy worm movement. Moisten the bedding slightly so it feels like a wrung-out sponge. Add a handful of soil or finished compost to introduce helpful microbes. The bedding provides a home and food source for worms.
Maintaining Moisture Levels
Worms need a damp but not soggy environment. Check moisture regularly by squeezing a handful of bedding. It should feel moist but not drip water. Spray water gently if the bin becomes too dry. Avoid overwatering to prevent bad smells and rot. Proper moisture helps worms breathe and digest food efficiently. Keep the bin in a cool, shaded place to maintain steady moisture levels.
Feeding Your Worms
Feeding your worms correctly is key to a healthy worm compost bin. Worms need a balanced diet to produce rich compost. Knowing what to feed, what to avoid, and how often to feed helps keep them active and happy.
Proper feeding also prevents bad smells and pests. It keeps the worm bin clean and efficient. Here are some essential tips for feeding your worms at home.
What To Feed
Feed worms fruit and vegetable scraps like apple peels, carrot ends, and lettuce. Coffee grounds, tea bags, and crushed eggshells work well too. These materials break down easily and provide good nutrients. You can also add shredded newspaper or cardboard for balance.
Foods To Avoid
Do not feed worms meat, dairy, or oily foods. Citrus fruits, onions, and garlic can harm them. Avoid spicy or salty foods because they upset the worms’ environment. These items cause bad smells and attract pests.
Feeding Frequency And Quantity
Feed worms small amounts once or twice a week. Start with one cup of food and watch how fast they eat it. Add more only if they finish quickly. Overfeeding leads to rot and pests. Keep the bedding moist but not wet.
Managing Bin Conditions
Managing the conditions inside your worm compost bin is key to healthy worms and rich compost. Proper care helps worms thrive and speeds up decomposition.
Pay close attention to temperature, airflow, and cleanliness. These factors keep the bin balanced and prevent problems.
Temperature Control
Worms prefer temperatures between 55°F and 77°F (13°C to 25°C). Too hot or too cold slows their activity or kills them.
Keep the bin in a shaded area away from direct sun or freezing winds. Use insulation during cold months if needed.
Airflow And Ventilation
Good airflow prevents the bin from becoming too wet or smelly. Drill small holes in the bin for air to circulate.
Avoid sealing the bin tightly. Turn or fluff bedding regularly to keep air moving. Proper ventilation helps worms breathe.
Preventing Odors And Pests
Avoid odors by not overfeeding worms or adding meat and dairy. These cause rot and attract pests.
Use dry bedding like shredded newspaper to absorb excess moisture. Cover fresh food scraps with bedding to reduce smells.
Check the bin often for fruit flies or ants. Remove pests by adjusting feeding or using natural deterrents.
Harvesting Worm Compost
Harvesting worm compost is an exciting step in worm composting. It means your worms have done their job well. The rich, dark compost they leave behind is full of nutrients. This compost helps your plants grow healthy and strong.
Knowing when and how to harvest is important. It keeps your worm bin healthy and productive. Proper harvesting also ensures you do not lose any worms. Here are some tips to help you harvest worm compost easily.
Signs Compost Is Ready
The compost looks dark and crumbly. It smells earthy, not sour or rotten. You see fewer food scraps left. Worms mostly move to the bottom or sides. The texture feels soft and moist, not wet or dry. These signs show the compost is ready to harvest.
Methods To Separate Worms And Compost
One method is to push the compost to one side of the bin. Add fresh food scraps on the empty side. Worms will move there in a few days. Then, you can take compost from the other side.
Another way is to spread the compost thinly on a tarp under bright light. Worms dislike light and will burrow down. You can scoop the top layer of worm-free compost.
You may also use a sieve or screen to separate worms from compost. Gently shake the compost over the sieve. Worms stay on top, while fine compost falls through.
Troubleshooting Common Issues
Troubleshooting is key to keeping your worm compost healthy and productive. Problems can stop worms from working well. Quick fixes help your compost bin stay balanced and worm-friendly. Watch your bin often and act fast if you see trouble signs.
Overfeeding Problems
Putting too much food can cause bad smells and rot. Worms can’t eat all the food fast enough. Leftover food attracts pests and creates mold. Feed small amounts and wait until worms finish before adding more. Use mostly vegetable scraps and avoid meat or dairy.
Moisture Imbalance
Too much water makes the bin soggy and smelly. It can drown worms and slow composting. Too little water makes the bin dry and worms will leave. Keep the bedding damp like a wrung-out sponge. Add water or dry bedding to fix moisture problems.
Pest Infestations
Fruit flies, ants, and other pests can invade your compost. They come from exposed food or too much moisture. Cover food scraps with bedding to keep pests away. Remove any rotting food quickly. Use traps or natural pest control if pests grow.
Worm Escape Causes
Worms may leave if conditions are bad. Common reasons include too much light, strong smells, or poor moisture. Check for extreme heat or cold too. Fix these by adjusting the bin’s location and care. A happy bin keeps worms inside and working.
Tips For Eco-friendly Composting
Eco-friendly composting helps protect the environment and reduces waste. Using worms to compost at home is simple and effective. Follow some key tips to make your worm composting green and productive. These tips focus on using recycled materials, cutting down food waste, and understanding compost benefits.
Using Recycled Materials
Choose recycled containers for your worm bin. Old plastic bins or wooden boxes work well. Use shredded newspaper or cardboard as bedding. These materials provide carbon that worms need. Avoid using glossy or colored paper. They may contain harmful chemicals. Using recycled items lowers waste and saves money.
Reducing Food Waste
Feed your worms kitchen scraps like vegetable peels, coffee grounds, and crushed eggshells. Avoid meat, dairy, and oily foods as they attract pests. Chop scraps into small pieces for faster composting. Keep a small container in the kitchen for scraps. This cuts down waste going to landfills. Worm composting turns food waste into valuable soil.
Composting Benefits
Worm compost improves soil quality and plant growth. It adds nutrients and helps soil retain moisture. Composting reduces landfill waste and lowers greenhouse gases. It also decreases the need for chemical fertilizers. Worm composting is quiet and odor-free if managed well. This eco-friendly method supports a healthy garden and planet.
Credit: unclejimswormfarm.com

Credit: homesteadandchill.com
Frequently Asked Questions
How To Make A Good Worm Compost?
Create a balanced worm compost by adding vegetable scraps and shredded cardboard. Keep moisture like a damp sponge. Avoid meat, dairy, citrus, and onions. Feed small amounts and ensure proper airflow. Maintain moderate temperature to keep worms healthy and active.
Rotate bins when full for continuous composting.
What Are The 5 Mistakes That People Commonly Make When Composting With Worms?
Common worm composting mistakes include overfeeding, poor moisture control, lacking carbon bedding, adding meat or dairy, and ignoring temperature or ventilation needs.
How Do The Amish Make Compost?
The Amish make compost by layering kitchen scraps, manure, and plant waste. They turn piles regularly to aerate and speed decomposition. They avoid meat and dairy to prevent pests. Moisture stays balanced by adding dry materials like straw. This natural process enriches their soil sustainably.
What Not To Put In Worm Compost?
Avoid putting meat, dairy, oily foods, citrus, onions, salty foods, and excessive garlic in worm compost. These harm worms and attract pests.
Conclusion
Making worm compost at home is simple and rewarding. Keep the bin moist but not soggy. Feed worms small amounts of fruit and vegetable scraps. Avoid adding meat, dairy, or citrus to prevent problems. Use shredded paper or cardboard for bedding and balance.
Turn the compost occasionally to provide air. Watch your worms and adjust care as needed. With patience, you’ll create rich soil for your garden. Worm composting saves waste and helps plants grow healthy. Start small, stay consistent, and enjoy natural gardening benefits.