Are you tired of running outside every day to turn your sprinkler system on and off? Installing a watering timer can save you time, water, and hassle. Learn how to install a watering timer to automate your watering schedule effortlessly.
With a timer, your lawn and garden get the right amount of water automatically, even when you’re not home. In this guide, you’ll learn exactly how to install a watering timer on your sprinkler system step by step. Whether you’re a beginner or just want to upgrade your setup, this simple process will help you control your watering schedule like a pro.
Keep reading to make your watering routine smarter and easier than ever before!
Tools And Materials
Before installing a watering timer on your sprinkler system, gather all necessary tools and materials. Having the right equipment makes the installation easier and faster. It also helps avoid mistakes and damage to your system. This section covers the essential tools, how to choose the right timer, and extra supplies you may need.
Essential Tools
Start with basic tools like a screwdriver and wire stripper. A pair of pliers helps with tight connections. A drill with bits is useful for mounting the timer box. You also need electrical tape to secure wire joints. Finally, a voltage tester ensures power is off before working.
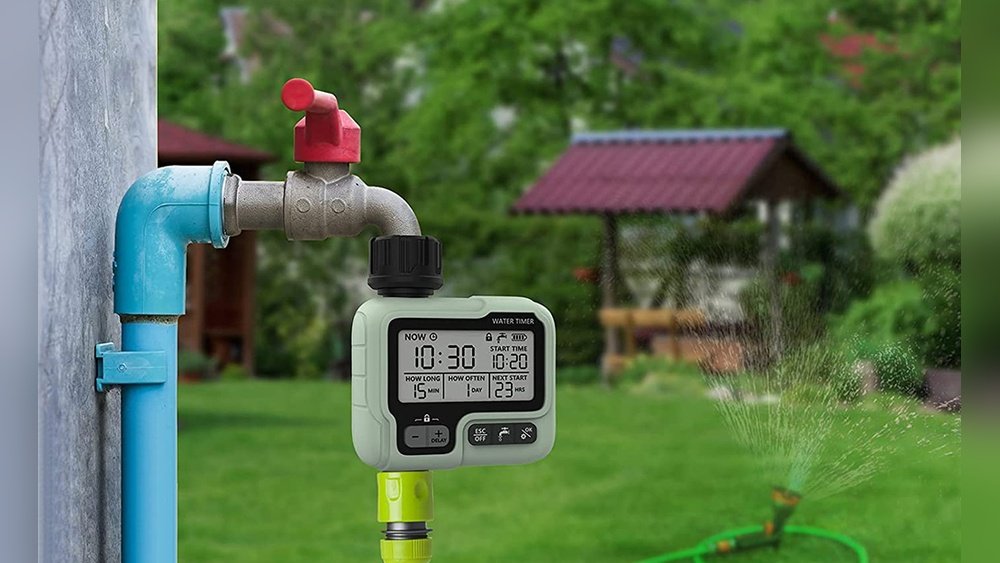
Choosing The Right Timer
Select a timer that fits your sprinkler system and watering needs. Look for one with easy-to-use controls and clear display. Some timers offer weather sensors for smart watering. Check if the timer supports multiple zones for large yards. Choose a model that matches your power source, either battery or plug-in.
Additional Supplies
Besides tools and the timer, gather extra wire for connections. Wire connectors or waterproof wire nuts protect joints from moisture. A mounting bracket or screws might come with the timer or need separate purchase. Keep a small level to ensure proper alignment during installation. It is helpful to have a manual or guide for your specific timer model.

Credit: www.reneesgarden.com
Preparing The System
Preparing your sprinkler system before installing a watering timer is essential. Proper preparation ensures smooth installation and reliable operation. Follow these key steps carefully to get started.
Shutting Off Water Supply
Turn off the main water supply to your sprinkler system. This prevents water flow during installation and avoids leaks. Locate the main valve, often near your water meter or irrigation pump. Close it fully to stop water. Test by opening a sprinkler valve to confirm no water flows.
Locating Existing Wiring And Valves
Identify all wiring connected to your current sprinkler valves. These wires control each watering zone. Remove the timer cover to see the wiring terminals. Trace wires from the timer to each valve in the field. Label wires with tape to avoid confusion later. Inspect valves for damage or leaks before proceeding.
Mapping Your Sprinkler Zones
Create a simple map showing all sprinkler zones in your yard. Mark each zone’s location and the plants it waters. Use numbers or colors to match zones with wiring labels. This map helps set up the timer correctly and adjusts watering schedules. Keep it for future reference and maintenance.
Removing Old Timer
Removing the old timer is the first step in installing a new watering timer. This process requires care to avoid damage to wires or the sprinkler system. Follow simple steps to safely remove the old unit and prepare for the new one.
Disconnecting Power
Turn off the power supply to the timer. Unplug the timer from the electrical outlet or switch off the circuit breaker. Confirm that the timer has no power by checking if the display is off. Safety is key to prevent electrical shock during removal.
Detaching Wiring
Open the timer box to access the wiring. Take a photo or label each wire to remember its position. Use a screwdriver to loosen the wir