To add a zone to an existing sprinkler system, upgrade the manifold and extend piping for the new zone.
Enhancing your sprinkler system by adding a zone can improve your lawn’s irrigation, ensuring your garden receives optimal watering. Whether you're expanding your garden or adjusting to varied plant needs, this guide will walk you through the process of adding a zone with precision and ease. By understanding the step-by-step approach, you can confidently modify your current system to maintain a lush, healthy landscape. Let’s delve into the intricacies of adding a zone to an existing sprinkler system efficiently.
Understanding Your Existing System
Before diving into modifications, understand your current sprinkler system:
- Manifold and Valves: Determine the make and capacity of the existing manifold to see if additional valves can be added.
- Water Pressure and Flow Rate: Measure to ensure the system can handle an additional zone without compromising efficiency.
- Controller Capability: Confirm that your current controller can accommodate another zone. Some systems may require an upgrade or an expansion module.
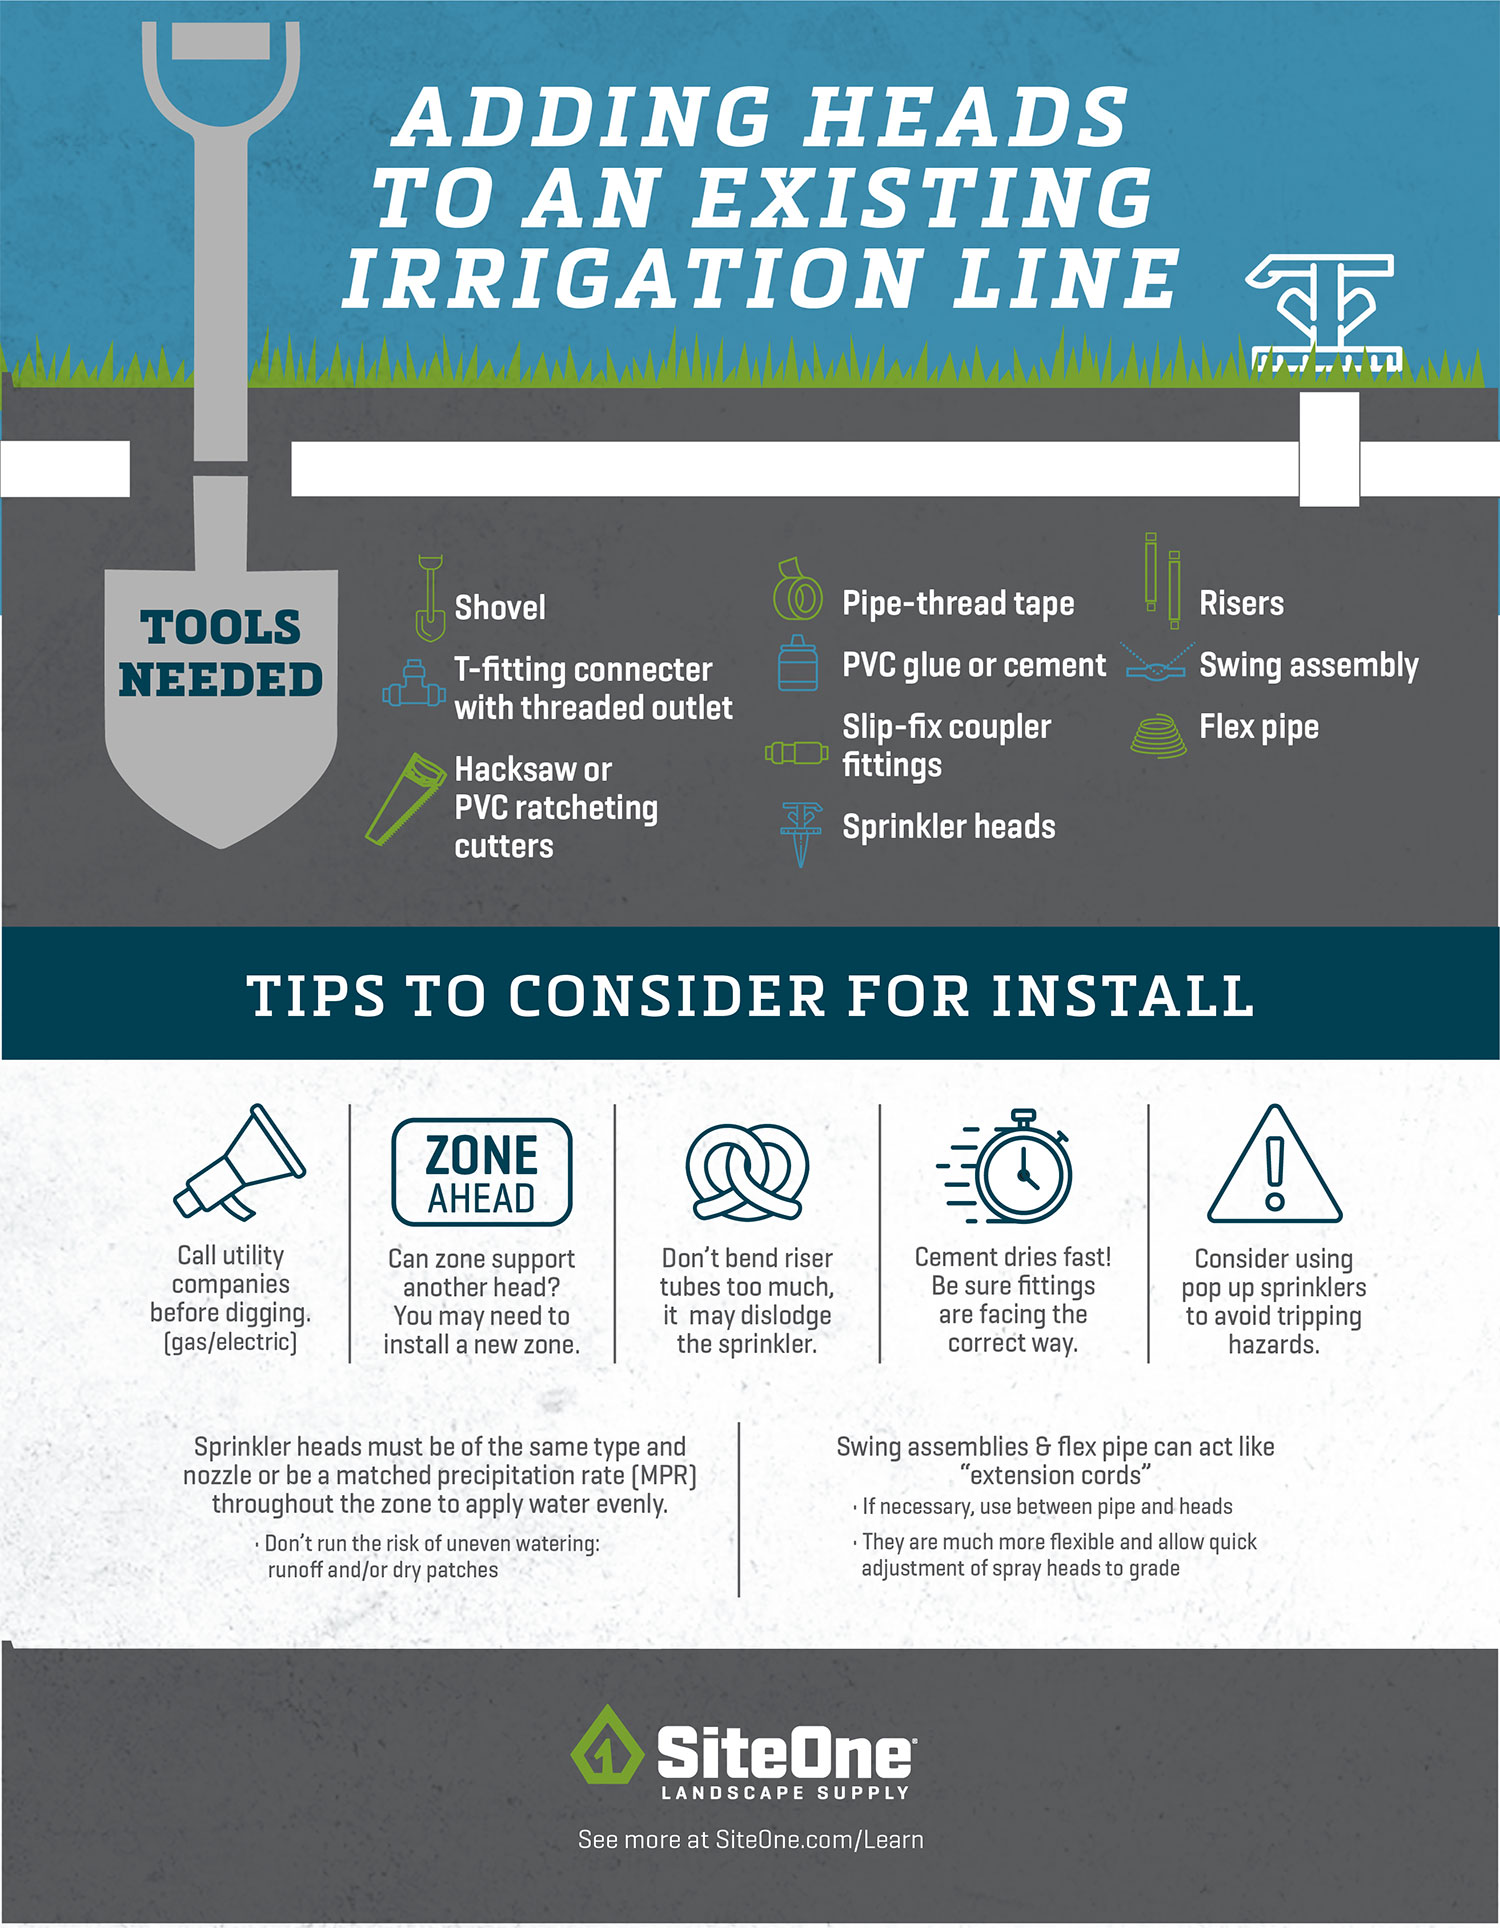
Materials Needed
Gather the following tools and materials to streamline the process:
- Sprinkler valve
- PVC pipes and fittings
- Wire connectors
- Shovel
- PVC cement
- Teflon tape
Step-by-Step Guide
1. Planning the New Zone
- Design Layout: Sketch the new area you plan to irrigate, noting any obstacles and ensuring even coverage.
- Determine Water Needs: Account for plant types and soil conditions to define the new zone’s watering needs.
2. Preparing the Current System
- Shut Off Water: Turn off the water supply to your sprinkler system before making any modifications.
- Access Manifold: Locate your manifold and assess where a new valve can be installed.
3. Installing the New Valve
- Adding a Valve: Use Teflon tape on the threaded ends before connecting the new valve to the manifold. Secure the valve with PVC cement.
- Wire the Valve: Connect the new valve to your controller using appropriate wire connectors. Use a multi-strand wire for easy connections.
4. Extending Piping
- Dig Trenches: Plan and dig trenches from the manifold to the new zone. Ensure the depth is adequate to prevent freezing.
- Lay Piping: Connect the PVC pipes from the valve to the new zone. Use PVC cement for all connections.
5. Testing the System
- Restore Water: Turn the water back on and test the system in the new zone.
- Check for Leaks: Inspect all connections for leaks and adjust as needed.
6. Programming the Controller
- Set Up a New Zone: Program the controller for the new zone, setting the desired watering schedule.
Frequently Asked Questions of How to Add a Zone to Existing Sprinkler System
How do I determine if my controller can handle an additional zone?
Check the controller's specifications or manual. Most controllers list the number of zones they support. If full, consider an expansion module.
Can I add a zone if my manifold is full?
Yes, you can install an additional manifold. Ensure your water source can support the added demand.
Do I need professional help to add a sprinkler zone?
While DIY is possible, consulting a professional can ensure efficiency and address technical aspects if you're unsure.
What should I do if water pressure is low?
Test water pressure and consider installing a booster pump or adjusting the current system layout for improved flow.
How often should I test the new zone?
Test after installation and biannually during maintenance routines to ensure optimal operation.
Conclusion
Adding a zone to your existing sprinkler system can significantly enhance your garden's watering efficiency. Carefully plan, prepare, and execute each step to achieve the best results. Remember, a well-maintained system is key to a flourishing landscape. Ready to take the plunge? Share your experiences in the comments, and don’t forget to subscribe for more gardening tips.