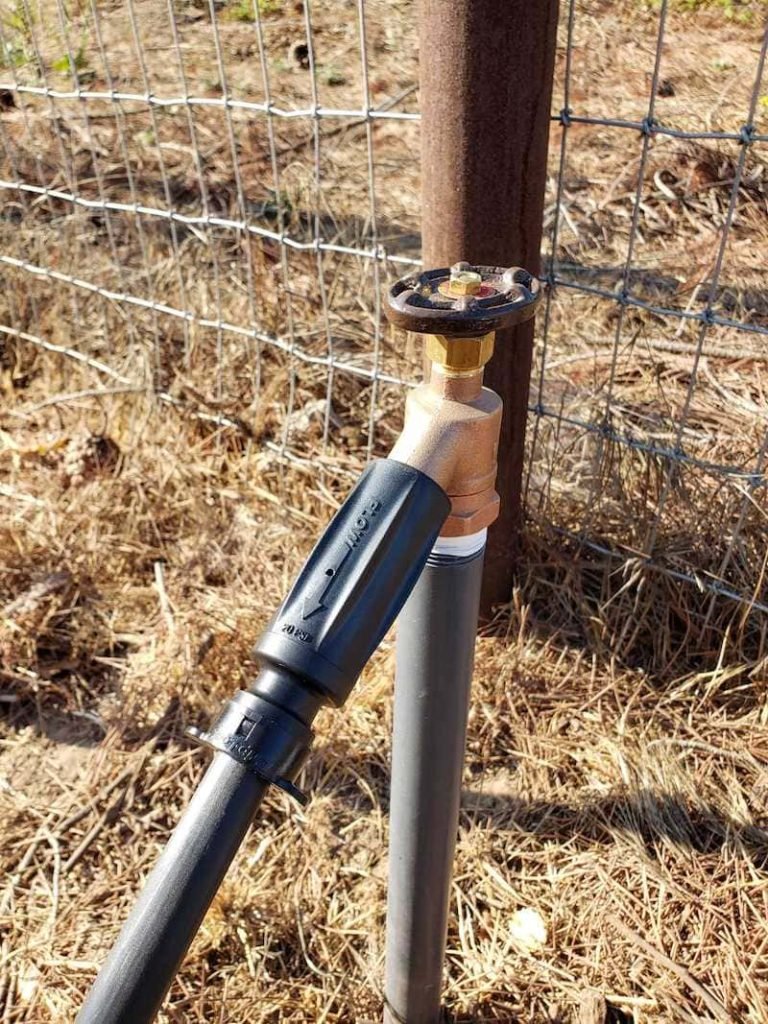
Attach a pressure regulator to control water flow and connect the drip system using a garden hose adapter.
Creating an efficient watering system for your garden can seem daunting, but connecting a drip irrigation system to a hose bib is surprisingly straightforward. Whether you're a seasoned gardener or a weekend warrior, understanding how to connect these two systems will save you time and ensure your plants receive the right amount of hydration. This guide explores the step-by-step process and highlights the benefits, ensuring you're well-equipped to make the most of your gardening efforts.
Understanding Drip Irrigation and Hose Bibs
Drip irrigation is a highly efficient watering method that delivers water directly to plant roots, reducing waste and promoting healthier growth. A hose bib, or outdoor faucet, is where your drip irrigation system can begin. By connecting these components effectively, you create a seamless watering experience.
Tools and Materials Needed
Before starting, gather the following:
- Hose bib (outdoor faucet)
- Pressure regulator
- Backflow preventer
- Hose adapter
- Filter (optional, but recommended)
- Tubing and emitters
- Teflon tape
Step-by-Step Guide to Connecting Drip Irrigation to a Hose Bib
1. Install a Pressure Regulator
- Attach a pressure regulator to your hose bib to ensure the ideal water pressure for the system, typically around 25 PSI.
2. Connect a Backflow Preventer
- Screw a backflow preventer onto the pressure regulator to prevent water contamination.
3. Attach a Hose Adapter
- Use a hose adapter to connect the system's main tubing to the backflow preventer. Make sure fittings are tight to avoid leaks.
4. Add a Filter
- Connect a filter to the hose adapter if using water with potential debris. This prevents clogs and maintains efficiency.
5. Lay the Tubing
- Run the main line tubing through your garden, securing it as needed with stakes.
6. Install the Emitters
- Place emitters near the base of plants, ensuring each receives adequate water.
7. Secure and Test the System
- Secure all connections and switch on the water to check for leaks. Adjust emitters to control water flow if necessary.
Benefits of Drip Irrigation
- Water Efficiency: Minimizes waste by targeting roots.
- Cost-Effective: Reduces water bills over time.
- Improved Plant Health: Consistent moisture reduces plant stress and disease.
Real-Life Example: Simplifying Your Gardening Routine
I recall setting up a drip system in my backyard, initially overwhelmed by the process. However, with patience and following similar steps, my garden thrived with consistent watering, and I enjoyed a lush, green oasis.
Troubleshooting Common Issues
- Leaks: Ensure all connections are secure.
- Clogged Emitters: Regularly clean filters and flush the system.
- Uneven Watering: Recheck emitter placement and adjust as necessary.
Frequently Asked Questions of How to Connect Drip Irrigation to Hose Bib
What pressure should I use for drip irrigation?
Most systems thrive around 25 PSI, but check your emitter specifications.
Can I add a timer to my system?
Yes, attaching a timer to the hose bib automates the watering process.
Do I need a filter?
While optional, a filter prevents clogs and prolongs system life.
How do I prevent algae in my tubing?
Consider using opaque tubing, and regularly flush the system.
What if my water pressure is too high?
Using a pressure regulator ensures the system stays within safe pressure limits.
Conclusion
Connecting drip irrigation to a hose bib transforms your watering routine, bringing efficiency and lush growth to your garden. By understanding the setup and troubleshooting potential issues, you're well-equipped to enhance your gardening efforts. Ready to elevate your gardening game? Start exploring drip irrigation options today, and don't forget to subscribe for more gardening tips and insights!