Transplanting plants can be tricky if you don’t have the right tools or techniques. But with a garden spade in your hands, you’re already halfway there.
This simple tool helps you dig precisely, protect delicate roots, and move your plants safely to their new home. If you want your garden to thrive and grow stronger, knowing how to use a garden spade for transplanting is essential.
Keep reading, and you’ll discover easy steps and expert tips that make moving your plants smooth and successful—no stress, just healthy growth!

Credit: cityofharrah.com
Choosing The Right Spade
Choosing the right garden spade makes transplanting plants easier and safer. The right tool helps protect delicate roots and ensures clean digging. A poor choice can harm plants or make work harder. Focus on spade types, transplanting features, and material quality. These factors affect your success in moving plants.
Types Of Garden Spades
There are several garden spade types. A flat spade has a straight edge for cutting roots. A rounded spade digs into soil easily. A transplant spade is narrow and deep. It helps lift plants without much damage. Choose a spade based on your plant size and soil type.
Features For Transplanting
Look for spades with sharp, thin blades. They cut through soil and roots smoothly. A pointed tip helps reach deep roots. Footrests on the blade make pushing easier. A comfortable handle reduces hand strain. Some spades have ergonomic designs to improve grip.
Material And Durability
Strong materials improve spade life and performance. Steel blades are durable and resist bending. Stainless steel resists rust and stays sharp longer. Handles come in wood, metal, or fiberglass. Fiberglass handles are light and strong. Wooden handles absorb shock but may need more care.

Credit: www.amazon.com
Preparing The Plant For Transplant
Preparing a plant for transplant is an important step for healthy growth. This process helps reduce stress on the plant. It ensures the plant adapts well to its new location. Proper preparation improves the chances of survival after transplanting.
When To Transplant
Choose the right season for transplanting. Early spring or fall is ideal for most plants. Avoid transplanting during hot, dry weather. Transplanting at the right time helps roots establish quickly.
Watering And Soil Conditions
Water the plant deeply a day before transplanting. Moist soil makes digging easier and protects roots. Avoid soggy soil to prevent root damage. Well-watered plants handle transplant shock better.
Trimming Roots And Foliage
Trim long or damaged roots carefully before moving the plant. Cut back some foliage to reduce water loss. This step helps balance root and leaf growth. Use clean, sharp tools to avoid infection.
Using The Spade To Dig
Using a garden spade to dig is a key step in transplanting plants. The spade helps you lift the plant with its roots and soil intact. This keeps the plant healthy and ready to grow in a new spot. Follow simple steps to dig carefully and protect the roots.
Positioning The Spade
Place the spade blade close to the plant’s stem. Leave enough space to dig around the root ball. Hold the handle firmly. Keep the blade vertical for a clean cut. Press the spade straight down into the soil.
Digging The Root Ball
Push the spade deep enough to reach most roots. Gently rock the spade back and forth. This loosens the soil around the roots. Use the spade to lift the root ball out of the ground. Try to keep the soil compact around the roots.
Avoiding Damage To Roots
Work slowly to avoid cutting major roots. Small root damage can be fixed, but big damage harms the plant. Use the spade’s edge carefully near roots. Do not force the spade if it feels stuck. Keep the root ball intact for best transplant results.
Removing And Moving The Plant
Removing and moving a plant with a garden spade requires care and precision. The goal is to keep the roots and soil intact. This helps the plant settle quickly in its new place. Proper technique prevents damage and reduces transplant shock. Use the right tools and gentle handling for best results.
Lifting Techniques
Start by digging a circle around the plant. Use the garden spade to cut through roots carefully. Aim to keep a good amount of soil around the root ball. Slide the spade under the root ball to lift the plant. Lift the plant straight up to avoid breaking roots. Support the root ball firmly with your hands or a cloth.
Handling Delicate Plants
Handle delicate plants with extra care to protect stems and leaves. Hold the plant by the root ball, not the stem. Avoid shaking or dropping the plant during the move. If the soil falls apart, add some moist soil around roots. Keep the plant shaded and cool while moving. Use soft materials to cushion fragile parts if needed.
Transporting Safely
Place the plant carefully in a bucket or tray to carry it. Avoid stacking plants on top of each other. Keep the root ball moist but not soggy during transport. Move the plant quickly to reduce stress. Protect the plant from wind and sun exposure on the way. Settle the plant gently in its new hole for best growth.
Preparing The New Location
Preparing the new location is a vital step before transplanting plants with a garden spade. It ensures the plant will settle well and grow strong in its new home. Taking time to prepare the soil and the planting hole helps reduce transplant shock and encourages healthy roots.
Soil Preparation
Start by clearing the area of weeds and debris. Loosen the soil with the garden spade to improve aeration. Well-aerated soil allows roots to breathe and absorb water easily. Remove any large stones or old roots that may block root growth. This creates a soft and welcoming environment for the plant.
Hole Size And Depth
Dig a hole that matches the plant’s root ball size. The hole should be wide enough to give roots room to spread. It also needs to be deep enough so the plant sits at the same soil level as before. Avoid planting too deep or too shallow to prevent stress on the plant. A properly sized hole supports steady growth after transplanting.
Adding Amendments
Mix organic compost or well-rotted manure into the soil at the bottom of the hole. These amendments add nutrients that help the plant recover and thrive. Avoid using too much fertilizer, which can burn roots. Lightly blending amendments with native soil balances nutrition and drainage. This step provides a healthy start for the transplanted plant.
Planting And Aftercare
Planting and aftercare are crucial steps in transplanting plants successfully. Proper placement and soil handling help plants settle and grow strong. Careful watering and mulching protect the plant and keep the soil healthy. Follow these simple steps for best results after transplanting.
Placing The Plant Correctly
Set the plant in the hole at the same depth as before. Avoid planting too deep or too shallow. Make sure the roots spread out gently inside the hole. Keep the plant upright and steady during placement. Position it to face the same direction it was growing before.
Backfilling And Firming Soil
Fill the hole with soil carefully around the roots. Use your hands to press soil gently but firmly. Avoid leaving air pockets that can dry roots. Firm the soil evenly to support the plant. Do not compact the soil too hard to allow root growth.
Watering And Mulching
Water the plant immediately after backfilling to settle the soil. Use enough water to reach deep roots. Add a layer of mulch around the plant to keep moisture. Mulch also helps control weeds and temperature. Keep mulch a few inches from the stem to prevent rot.
Maintenance Tips
Proper maintenance after transplanting plants ensures they grow strong and healthy. Using a garden spade carefully is just the first step. Following up with good care helps plants adjust well to their new spot. Here are key tips to keep your transplanted plants thriving.
Monitoring Plant Health
Check plants daily for signs of stress or damage. Look for wilting leaves, discoloration, or drooping stems. Early detection helps prevent bigger problems. Water the soil but avoid overwatering, which can harm roots. Keep an eye out for pests or diseases and treat them quickly.
Preventing Transplant Shock
Transplant shock happens when plants struggle to settle after moving. Reduce shock by watering plants immediately after transplanting. Shade young plants from direct sunlight for a few days. Avoid heavy pruning right after transplanting to let plants recover. Keep soil moist but not soggy during this period.
Long-term Care
Feed plants with a balanced fertilizer after two to three weeks. Mulch around plants to keep soil temperature stable and retain moisture. Continue regular watering, adjusting based on weather and soil type. Remove dead or yellow leaves to encourage new growth. Watch plants closely through seasons to adjust care as needed.
Cleaning And Caring For Your Spade
Proper cleaning and care keep your garden spade in top shape. A well-maintained spade works better and lasts longer. Dirt and moisture can cause rust and damage. Regular attention protects your tool and makes transplanting easier.
Cleaning After Use
Remove soil from the blade with a stiff brush. Rinse the spade with water to wash away remaining dirt. Dry the blade thoroughly to prevent rust. Use a cloth to wipe the handle clean as well. Clean your spade after every use for best results.
Sharpening The Blade
Dull blades make digging harder and damage roots. Use a sharpening stone or file to keep the edge sharp. Hold the blade steady and work in one direction. Sharpen both sides evenly for a smooth cut. Sharpen the blade before the planting season starts.
Storage Tips
Store your spade in a dry place to avoid rust. Hang it on a wall or keep it off the ground. Keep the blade covered or inside a sheath if possible. Avoid leaving the spade outside in wet weather. Proper storage helps your spade stay strong and ready.

Credit: us.audocph.com
Frequently Asked Questions
Is October Too Late To Transplant Perennials?
October is late but still possible for transplanting perennials. Act early in the month for best results. Ensure roots stay moist and protect plants from frost to help them establish before winter.
How Do You Use A Garden Spade?
Hold the garden spade firmly, place the blade at the soil surface, then push down with your foot. Lift and turn soil or dig holes for planting. Use it to cut roots and transplant plants carefully. Clean and sharpen the spade after use for best results.
Do Plants Go Into Shock After Transplanting?
Yes, plants often experience shock after transplanting. This stress slows growth and causes wilting or leaf drop. Proper care helps plants recover quickly.
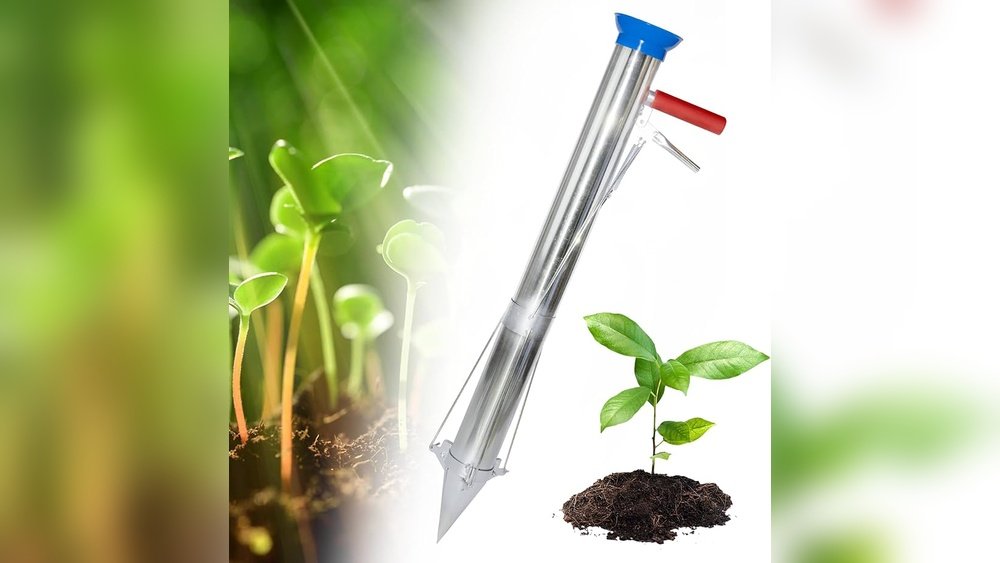
What Is A Transplant Spade?
A transplant spade has a sharp, narrow blade designed to dig deep and preserve roots when moving plants. It features sturdy handles and durable, rust-resistant materials for easy, precise transplanting.
Conclusion
Using a garden spade makes transplanting plants easier and safer. Always dig carefully to protect roots and soil. Choose the right spot and prepare the hole before moving your plant. Clean and sharpen your spade to keep it working well.
With practice, transplanting will become a smooth, rewarding task. Enjoy watching your plants grow happily in their new home.