Creating a rain chain for your downspout is a straightforward and creative DIY project. Transform your home’s exterior while effectively channeling rainwater with this beautiful alternative to traditional downspouts. A rain chain not only enhances the aesthetic of your garden but also offers a functional solution to guide water from your gutters to the ground or a collection basin. In this guide, we’ll explore how to craft a stunning rain chain that not only beautifies your space but fulfills a practical purpose with ease.
What is a Rain Chain?
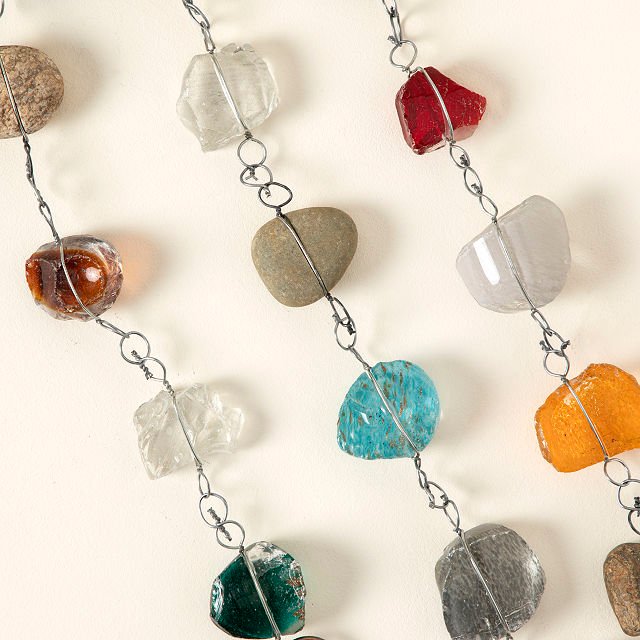
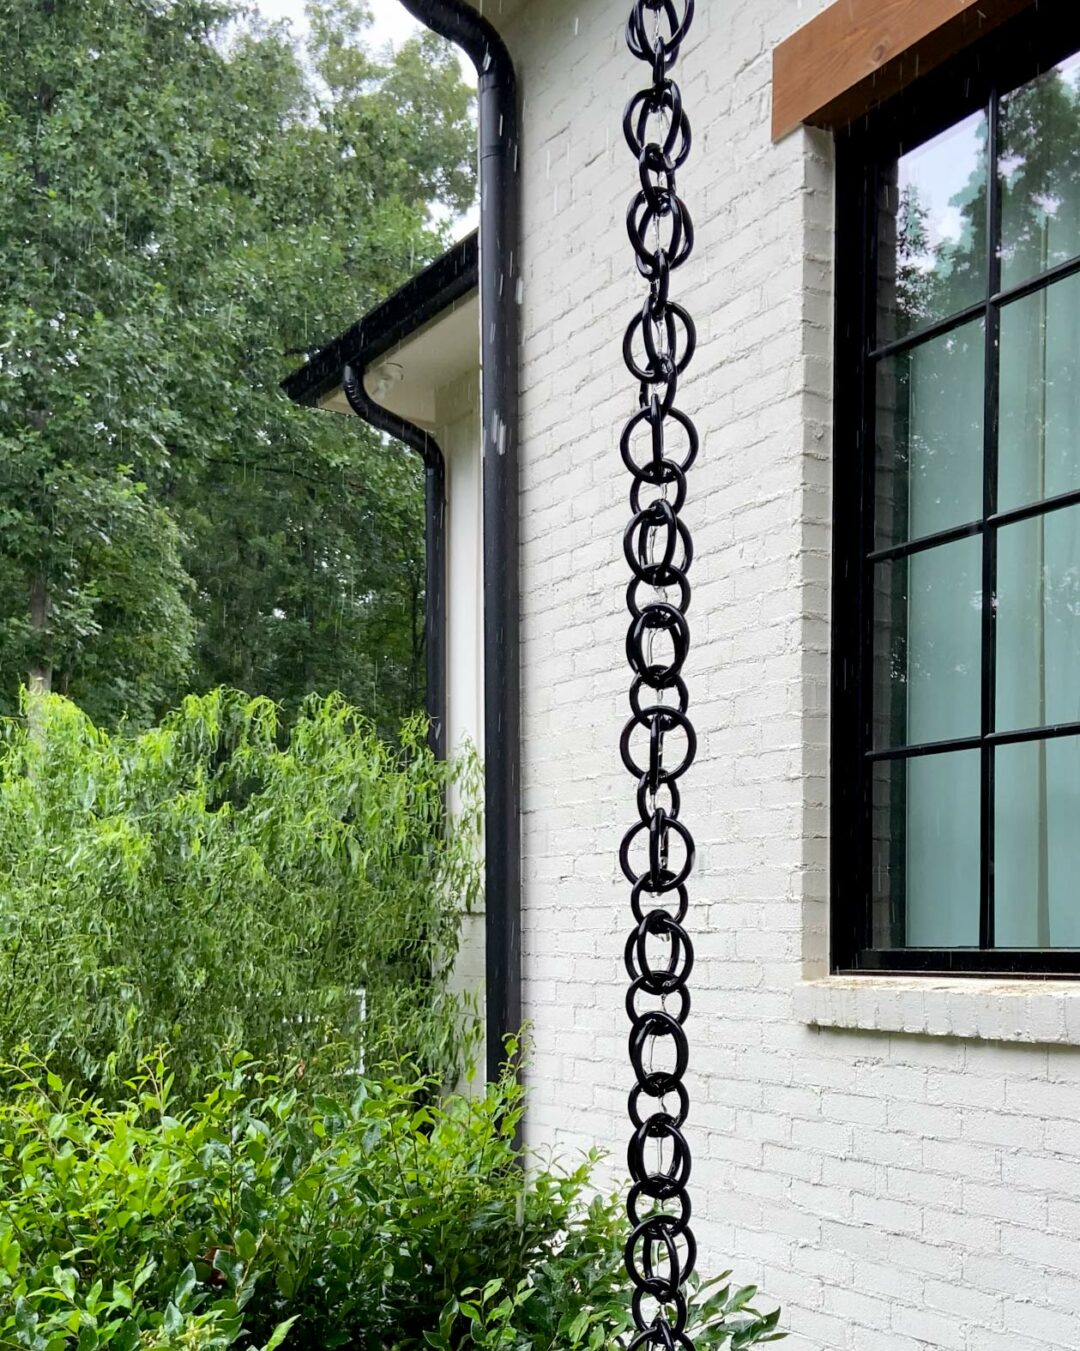
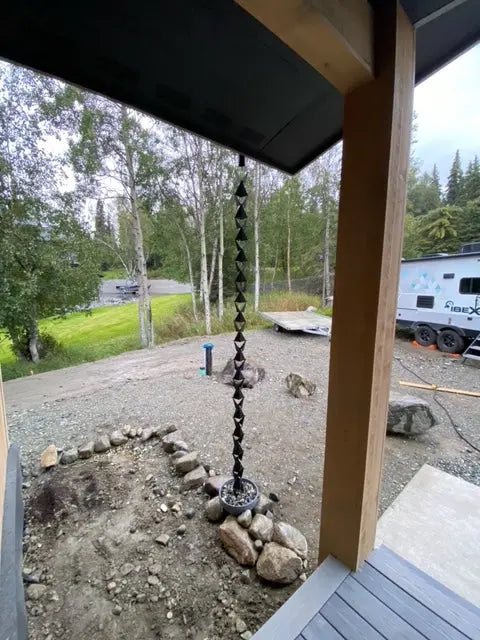
Rain chains are decorative alternatives to traditional downspouts, originating from Japan. They guide the flow of rainwater visually and audibly, creating a soothing ambiance in your garden. As the water cascades down, you enjoy a beautiful show while effectively managing runoff.
Materials Needed for Your DIY Rain Chain
Gather the following materials before starting your project:
- Hollow metal or copper cups
- Metal links or decorative chains
- S-hooks
- A gutter attachment kit
- A basin or splash block (optional)
Step-by-Step Guide to Making a Rain Chain
Step 1: Choose Your Design
Select a design that complements your home. Options range from simple link chains to intricate cup designs. Consider what fits best with your exterior decor.
Step 2: Assemble Tools
You’ll need:
- A drill and bits
- Pliers
- A ladder
- Safety goggles
Step 3: Prepare the Cups
If using cups, drill a hole at the center of each one. Ensure the hole is large enough for water to flow through but small enough to hold a chain.
Step 4: Assemble the Chain
- Attach the cups or decorative links to the chain using S-hooks.
- Ensure each cup or link is evenly spaced for optimal water flow.
Step 5: Install the Rain Chain
- Remove the existing downspout.
- Secure the gutter attachment kit in the gutter hole.
- Hang your rain chain, ensuring it reaches the ground or a splash basin.
Step 6: Test the Setup
Pour water into the gutter to check the flow and adjust if necessary. Ensure the water is guided directly off the roof into the chain without splashing.
Benefits of Rain Chains
Rain chains offer various advantages beyond their visual appeal:
- Aesthetic Enhancement: Adds an artistic element to your house.
- Noise Reduction: Provides a peaceful and calming water stream sound.
- Eco-Friendly: Supports water harvesting and conservation.
Tips for Maintaining Your Rain Chain
- Regularly clean to prevent debris buildup.
- Polish metal components if made of copper or brass to maintain shine.
- Check connections periodically to avoid rust and wear.
Frequently Asked Questions
How do I maintain my rain chain?
Regularly inspect for debris and clean the chain to ensure smooth water flow. Polishing metal chains can preserve their appearance.
Can I use a rain chain in snowy climates?
Yes, but consider opting for durable materials and possibly removing it during heavy snowfall to prevent damage.
What’s the best material for rain chains?
Copper and stainless steel are popular for their durability and aesthetic appeal.
How do I prevent splashing?
Ensure the chain is correctly aligned to direct water. Using a basin at the bottom can also minimize splashing.
Can I install a rain chain without removing my downspout?
Yes, temporarily remove the downspout for installation, then reattach if necessary alongside the chain for dual functionality.
Conclusion
Crafting your own rain chain can be a rewarding project with both practical and aesthetic benefits. From installation to maintenance, these decorative alternatives capture the beauty of rainfall while enhancing your home’s charm. Whether you’re driven by style or sustainability, rain chains offer a unique and engaging way to manage rainwater effectively. Ready to transform your space? Dive into your DIY rain chain project now and let your creativity flow. Explore more ideas, subscribe for updates, or leave a comment with your thoughts!
