Are you tired of spending hours watering your vegetable garden, only to see uneven growth and wasted water? Setting up a drip irrigation system can change everything.
Imagine delivering water directly to each plant’s roots, saving you time, water, and effort while boosting your garden’s health. In this guide, you’ll learn exactly how to plan, install, and maintain a drip irrigation system tailored for your vegetable garden.
Ready to grow smarter and greener? Let’s dive in and make your garden thrive like never before.

Credit: www.familyhandyman.com
Choosing Drip Irrigation Components
Choosing the right drip irrigation components is key to a healthy vegetable garden. The parts you select control water flow and ensure efficient watering. Each component has a specific role. Knowing these roles helps you build a system that saves water and nourishes plants well.
Start by understanding the types of emitters available. Then, pick tubing and fittings that fit your garden layout. Filters and pressure regulators protect the system and keep it working smoothly. Timers and controllers automate watering to save time and effort.
Types Of Drip Emitters
Drip emitters control how water drips to your plants. There are several types to choose from. Button emitters release water slowly and suit small plants. Adjustable emitters let you change the water flow. Pressure compensating emitters keep flow steady even if pressure changes. Choose emitters based on plant needs and garden size.
Tubing And Fittings
Tubing carries water from the main source to the emitters. Polyethylene tubing is common and flexible. Main lines use thicker tubing, while smaller lines use thinner tubing. Fittings connect tubing pieces and create turns or splits. Use tees, elbows, and connectors to match your garden layout. Good fittings prevent leaks and keep water flowing.
Filters And Pressure Regulators
Filters remove dirt and debris from water. Clean water stops emitters from clogging. Install filters at the water source for best results. Pressure regulators reduce water pressure to a safe level. Too much pressure can burst tubing or damage emitters. Use regulators to keep pressure steady and protect your system parts.
Timers And Controllers
Timers automate the watering schedule. Set them to water at specific times and durations. This saves water and ensures plants get regular moisture. Controllers offer advanced options like multiple zones and rain sensors. They allow you to customize watering for different areas. Timers and controllers make drip irrigation easy and efficient.
Planning Your System Layout
Planning your drip irrigation system layout is the first step to success. A well-thought plan saves water and ensures plants stay healthy. It helps you avoid wasting materials and time. Start by understanding your garden’s shape, size, and plant needs. Careful planning makes installation easier and more effective.
Mapping Your Garden Beds
Draw a simple map of your garden beds on paper. Include all shapes and sizes to get an accurate layout. Mark paths and any obstacles that may affect the tubing. This visual guide helps you plan where to run hoses and place emitters. Keep the map nearby for reference during installation.
Marking Plant Locations
Identify where each vegetable is planted on your map. Use symbols or dots to mark these spots clearly. Knowing exact plant locations helps place emitters right where roots need water. Group plants with similar water needs together on the map. This step ensures efficient and targeted watering.
Determining Water Needs
Check how much water each vegetable type needs daily. Leafy greens need more water than root vegetables. Note these needs on your map next to each plant group. Understanding water demand prevents over or underwatering. This planning saves water and promotes strong plant growth.
Designing Hose And Emitter Placement
Plan hose routes to reach all plants easily. Use straight lines and avoid tight bends to keep water flow strong. Place emitters near each plant’s root zone for best results. Use a mix of drip emitters and soaker hoses as needed. Mark these placements on your map for clear guidance.
Assembling The Drip System
Assembling the drip system is a key step in setting up efficient watering for your vegetable garden. This process involves connecting the system to your water source, installing necessary filters and pressure reducers, and laying out tubing and emitters. Proper assembly ensures water reaches every plant with minimal waste.
Connecting To The Water Source
Start by attaching the main supply hose to your outdoor faucet or garden spigot. Use a hose adapter to create a tight connection. Check for leaks by turning on the water briefly. Secure the connection with a hose clamp if needed. This step ensures a steady water flow into your drip system.
Installing Filters And Pressure Reducers
Install a filter right after the water source to catch dirt and debris. This protects the drip emitters from clogging. Next, add a pressure reducer to control water pressure. High pressure can damage the system or cause uneven watering. Both parts screw on easily and improve system performance.
Attaching Main Tubing
Lay out the main tubing along your garden rows where plants grow. Use garden staples or stakes to keep the tubing in place. Cut the tubing to fit your garden size using scissors. Connect tubing sections with connectors, ensuring a snug fit. This tubing delivers water from the source to your plants.
Adding Emitters And Drip Lines
Attach drip emitters or drip lines to the main tubing near each plant. Emitters release water slowly right at the root zone. Punch small holes in the tubing to insert emitters or drip lines. Space emitters based on plant water needs. Test the system by turning on water and watching each emitter drip.
Installing The Drip Lines
Installing the drip lines is a key step in setting up your vegetable garden irrigation. This process delivers water directly to plant roots. It helps save water and keeps plants healthy. Proper installation makes watering easier and more efficient. Follow simple steps to lay, secure, and adjust the tubing for best results.
Laying Out Tubing Along Rows
Start by unrolling the main tubing along your garden rows. Place the tubing close to the base of plants. Ensure it runs straight and covers all the vegetables. Measure the length needed for each row before cutting. Leave some extra tubing for connections and adjustments.
Securing Tubing With Stakes
Use stakes to hold the tubing firmly in place. Insert stakes every few feet along the tubing. This prevents the lines from moving or lifting. Choose stakes made for drip irrigation to avoid damage. Secure tubing gently to keep it from kinking or bending.
Adjusting Emitter Placement
Emitters control where water drips out of the tubing. Place emitters near each plant’s root zone for efficient watering. Adjust their position to match plant spacing. Use emitters with the right flow rate for your plants. Check that each emitter delivers water evenly.
Burying Or Covering Tubing
Bury tubing slightly below the soil surface to protect it. Cover tubing with mulch or soil to reduce evaporation. This also keeps tubing hidden and safe from sun damage. Leave emitters exposed or lightly covered for easy access. Regularly check tubing for leaks or blockages.
Testing And Adjusting Water Flow
Testing and adjusting water flow ensures your drip irrigation system works well. Proper flow helps plants get the right amount of water. It prevents water waste and keeps your garden healthy. Take time to check and fix the system after installation.
Flushing The System
Flush the system before use. Remove end caps and turn on water. Let water run through tubing for a few minutes. This removes dirt and debris that block emitters. Clean tubes help water flow smoothly.
Checking For Leaks
Inspect all connections and tubing for leaks. Look for wet spots or drips outside emitters. Tighten loose fittings or replace damaged parts. Fix leaks quickly to save water and keep pressure steady.
Adjusting Emitter Output
Check each emitter for proper water output. Measure how much water flows in a set time. Adjust emitters by turning the valve or replacing them. Make sure plants get enough water without flooding.
Setting Timer Schedules
Set timers to water at best times, like early morning or evening. Choose duration based on plant needs and soil type. Use shorter, more frequent watering for sandy soil. Adjust schedules as plants grow or weather changes.
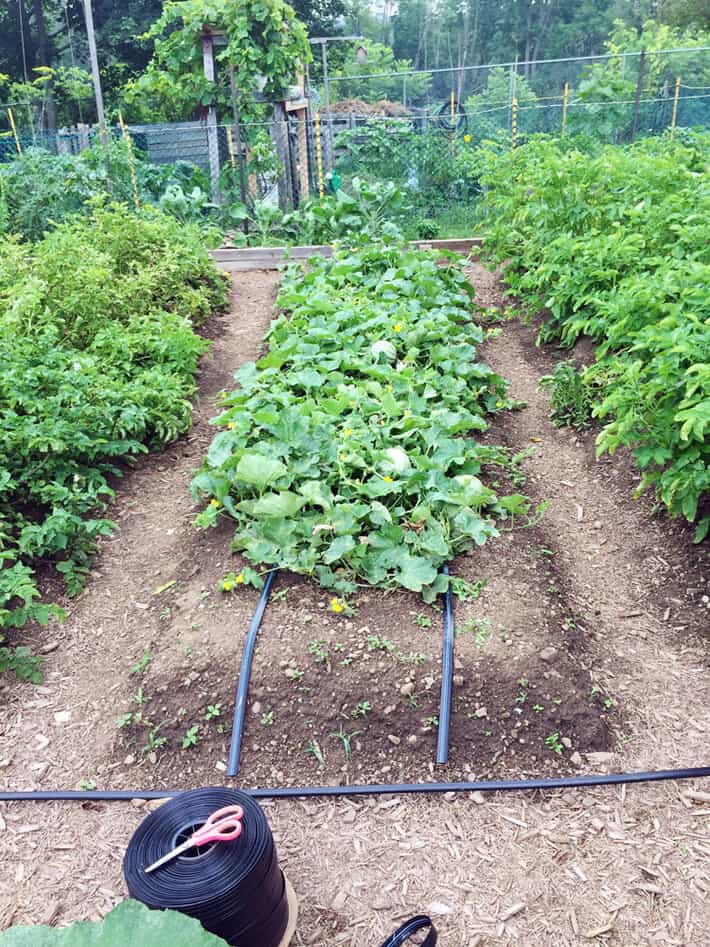
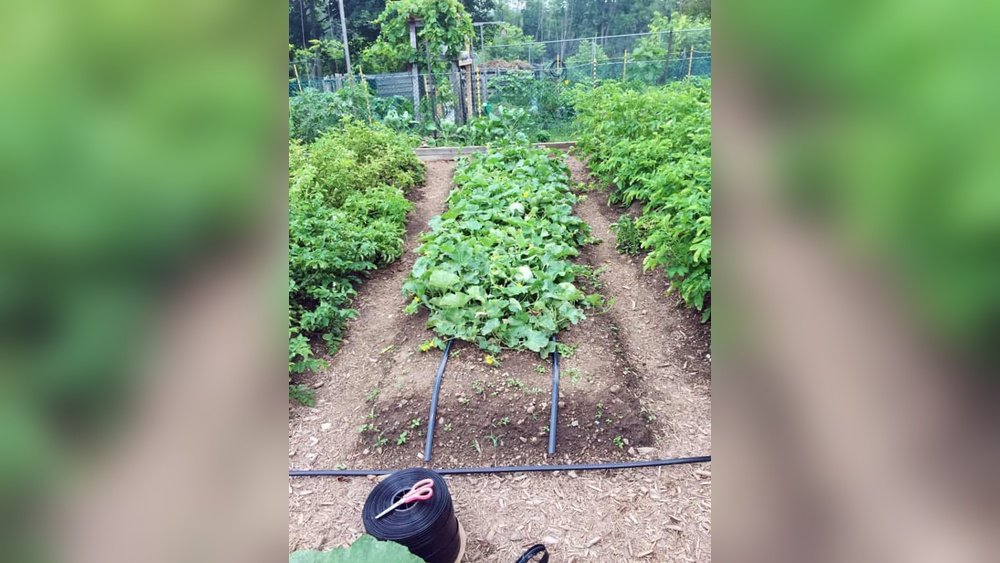
Credit: www.theartofdoingstuff.com
Maintaining Your Drip System
Maintaining your drip irrigation system keeps it running smoothly and your plants healthy. Regular care prevents blockages and damage. It also helps you save water and time. Simple maintenance tasks ensure your system works well all season long.
Cleaning Filters Regularly
Filters stop dirt from clogging your drip lines. Check filters at least once a month. Remove and rinse them with clean water. This keeps water flowing freely to your plants. Clean filters avoid uneven watering and dry spots in your garden.
Winterizing The System
Prepare your drip system for cold weather to prevent damage. Drain all water from pipes and emitters. Store hoses and smaller parts indoors if possible. Cover any remaining outdoor parts to protect from frost. Winterizing extends your system’s life and saves repair costs.
Replacing Damaged Parts
Check your system often for cracks or leaks. Replace broken tubes, emitters, or connectors right away. Damaged parts waste water and reduce irrigation efficiency. Use parts that match your system to keep it working well. Quick repairs stop bigger problems later.
Monitoring Plant Health
Watch your vegetables to see how they respond to watering. Look for signs of too much or too little water. Adjust your drip emitters if plants look dry or soggy. Healthy plants show that your drip system delivers the right amount of water. This helps your garden grow strong and productive.

Credit: www.rainbird.com
Frequently Asked Questions
What Is A Drip Irrigation System For Vegetable Gardens?
A drip irrigation system delivers water directly to plant roots through tubes and emitters. It conserves water and promotes healthy growth in vegetable gardens.
How Do I Plan A Drip Irrigation Layout?
Map your garden, mark plant locations, and design tubing routes. Ensure each plant gets water by placing emitters near roots.
What Materials Are Needed For Installation?
You need tubing, emitters, connectors, a pressure regulator, and a filter. These components ensure efficient water flow and system durability.
How Often Should I Water With Drip Irrigation?
Water frequency depends on plant type and climate. Typically, water deeply 2-3 times per week to keep soil moist but not soggy.
Conclusion
Setting up a drip irrigation system saves water and time in your vegetable garden. It delivers water directly to plant roots, helping vegetables grow healthy and strong. Start with simple planning, then install tubing and emitters carefully. Check the system regularly to avoid clogs and leaks.
Drip irrigation supports efficient gardening, especially in dry areas like Austin, Texas. Enjoy a thriving garden with less effort and better water use.