
When you walk onto a well-kept patio, the beauty of the pavers stands out—clean, bright, and solid. Over time, though, even the best patios can start to look faded, stained, or even uneven. This is especially true if you live in an area with harsh weather, heavy rainfall, or lots of foot traffic.
One of the best ways to protect your investment and keep your outdoor space looking its best is by sealing your patio pavers. It’s a process many homeowners overlook, but sealing can make a huge difference in how long your patio lasts and how good it looks year after year.
Sealing patio pavers isn’t just about looks. It’s also about function. Unsealed pavers can absorb water, grow weeds, or even crack during freeze-thaw cycles. Plus, stains from food, drinks, or dirt can quickly become permanent. By understanding the sealing process, choosing the right materials, and applying sealer the right way, you can boost the longevity and beauty of your patio for years to come.
If you’re ready to learn how to seal patio pavers for longevity, you’re in the right place.
Why Sealing Patio Pavers Matters
Many homeowners wonder if sealing pavers is really necessary. The answer is yes—if you want your patio to last and keep its charm. Sealing acts like a shield over your pavers, protecting them from damage caused by weather, stains, and even insects.
Some key benefits include:
- Protection from stains: Sealed pavers are much less likely to absorb oil, grease, or food spills.
- Water resistance: Sealer prevents water from soaking in, which helps avoid cracks and shifting during freeze-thaw cycles.
- Color enhancement: Many sealers bring out the natural color of your pavers, making them look richer and newer.
- Weed and moss prevention: Sealing fills small gaps and helps prevent weed growth.
- Easier cleaning: Dirt and debris sit on top of the sealer, making routine cleaning simpler.
A study by the Interlocking Concrete Pavement Institute found that sealed pavers can last up to 30% longer than unsealed ones in climates with heavy rainfall or extreme temperatures. In short, sealing is a small step with big rewards for your patio’s longevity.
Understanding Different Types Of Patio Pavers
Before you start sealing, it’s important to know what kind of pavers you have. Different materials need different care and sometimes different sealers. Here are the most common types:
Concrete Pavers
These are the most popular choice for patios. They are affordable, durable, and come in many shapes and colors. However, concrete pavers are porous, meaning they can absorb water and stains easily.
Natural Stone Pavers
Materials like slate, granite, or travertine are beautiful but often more expensive. They can be very porous or almost waterproof, depending on the stone. Some stones, like sandstone, require more frequent sealing.
Brick Pavers
Traditional and charming, brick pavers are made from clay. They are less porous than concrete but still benefit from sealing, especially to prevent moss and mildew.
Porcelain Pavers
These are less common for patios but are growing in popularity. Porcelain pavers are very dense and almost waterproof, so sealing is usually for stain resistance and enhancing color.
Comparing Paver Types
Here’s a quick comparison of key features:
| Paver Type | Porosity | Sealing Frequency | Common Issues |
|---|---|---|---|
| Concrete | High | Every 2–3 years | Stains, color fading, weed growth |
| Natural Stone | Varies (medium-high) | Every 1–3 years | Stains, efflorescence, moss |
| Brick | Medium | Every 2–3 years | Moss, mildew, color fading |
| Porcelain | Very Low | Every 3–5 years (optional) | Stains, slipperiness |
Knowing your paver type will help you pick the right sealer and avoid common mistakes.

Credit: flawlesspressurewashingfl.com
Choosing The Right Sealer For Your Patio
Not all paver sealers are created equal. The right sealer depends on your paver type, climate, and what look you want for your patio. Here’s what you need to know.
Types Of Sealers
- Penetrating Sealers: These soak into the paver and create a barrier inside. They don’t change the look much but offer strong protection against water and stains. Great for people who want a natural look.
- Film-Forming Sealers: These sit on top of the paver, creating a visible layer. They often make colors look richer and add a bit of shine. However, they can be slippery when wet.
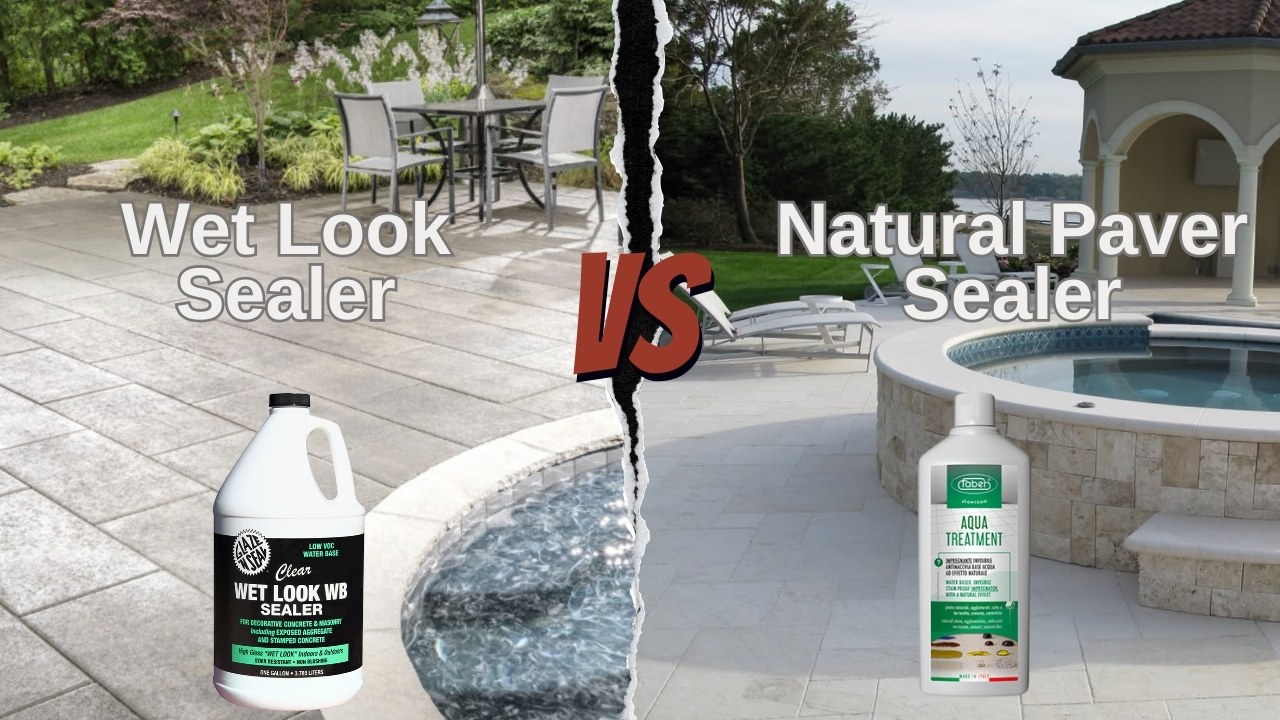
- Wet-Look Sealers: As the name suggests, these sealers give pavers a shiny, “wet” appearance. They enhance color but can make the surface slick.
- Natural Look Sealers: These are usually penetrating and keep the matte finish of the original paver.
Water-based Vs. Solvent-based
- Water-Based Sealers: Easier to apply, safer for the environment, and have less odor. They work well for most residential patios.
- Solvent-Based Sealers: Provide a tougher finish and a glossier look. They are often used in commercial settings or for high-traffic areas but require good ventilation.
Comparing Sealer Types
To help you decide, here’s a side-by-side look:
| Sealer Type | Finish | Protection Level | Slip Risk | Best For |
|---|---|---|---|---|
| Penetrating | Natural/Matte | High | Low | Natural stone, brick |
| Film-Forming | Glossy/Satin | Medium-High | Medium-High | Concrete, decorative patios |
| Wet-Look | Glossy/Wet | High | High | Showcase patios, color enhancement |
| Water-Based | Varies | Medium-High | Low-Medium | DIY, eco-friendly users |
| Solvent-Based | Glossy | Very High | High | Commercial, heavy use |
What Matters Most When Choosing
- Paver material: Always check the manufacturer’s recommendations.
- Desired appearance: Do you want a matte, satin, or glossy finish?
- Local climate: Areas with freeze-thaw cycles need more protection.
- Slip resistance: Important for pool decks or patios used by children.
- Ease of application: Water-based sealers are best for beginners.
Pro tip: Don’t buy the cheapest sealer. Low-quality products often wear away quickly and may even discolor your pavers.
Essential Tools And Materials
Before you start, gather everything you need. Having the right tools makes the job easier and helps you achieve better results.
You’ll need:
- Quality paver sealer (choose based on paver type and desired finish)
- Pressure washer or strong garden hose
- Stiff broom or brush
- Leaf blower (optional, but helpful)
- Roller (for even application) or pump sprayer (for large areas)
- Paint tray (if using a roller)
- Protective gloves and safety glasses
- Masking tape and plastic sheets (to protect nearby surfaces)
- Joint sand (for filling gaps)
- Large sponge or mop (for touch-ups)
- Old clothes (sealer can stain fabric)
- Weather app (to check for rain)
Non-obvious insight: Many people skip the joint sand step. Adding or refreshing joint sand before sealing helps lock the pavers in place and stops weeds from growing.
Credit: ntpavers.com
Preparing Your Patio For Sealing
Preparation is the foundation of a successful sealing job. Skipping steps here leads to poor results, wasted sealer, and even damage.
Cleaning The Pavers
- Remove all furniture and decor: Clear the area so you can work freely.
- Sweep away debris: Use a broom or leaf blower to clear leaves, dirt, and dust.
- Wash the surface: Use a pressure washer or strong hose to remove deep dirt, moss, or algae. For stubborn stains, use a paver-specific cleaner.
- Check for stains: Oil or grease stains need special treatment. Use a degreaser and scrub the area.
- Let it dry fully: This is crucial. Sealer won’t stick to wet surfaces. Let the patio dry for at least 24–48 hours after washing. In humid areas, wait longer if needed.
Non-obvious insight: Water trapped under the pavers can cause “whitening” (a hazy look) after sealing. Always allow extra drying time if it has rained recently.
Fixing Joints And Repairs
- Refill joint sand: Sweep new sand into the gaps between pavers. Use polymeric sand for best results—it hardens when wet, blocking weeds and ants.
- Repair loose or sunken pavers: Lift and reset any uneven stones. If you skip this, sealing will “lock in” the problem.
- Mask off edges: Use masking tape and plastic sheets to protect walls, plants, or pool edges.
Preparation may take most of a day, but it’s worth the effort.
Step-by-step: How To Seal Patio Pavers
Once your patio is clean and dry, you’re ready to seal. Follow these steps for the best outcome.
1. Check The Weather
Sealer needs dry conditions to cure properly. Aim for a day with:
- No rain for 24–48 hours after application
- Temperatures between 50°F and 85°F (10°C–30°C)
- Low wind (to avoid debris blowing onto wet sealer)
2. Test The Sealer
Before applying to the whole patio, test a small, hidden area. Check for color changes and finish. If you like the look, continue.
3. Apply The First Coat
- Roller method: Pour sealer into a paint tray. Use a roller to apply an even, thin layer over the pavers. Work in small sections to avoid lap marks.
- Sprayer method: Fill your pump sprayer and spray the sealer evenly. Use a broom or roller to spread and work it into the surface.
- Edge work: Use a small brush or sponge for corners or tight spaces.
Tip: Do not pour sealer directly onto the pavers—this can cause puddles and uneven coverage.
4. Let It Dry
Allow the first coat to dry for 1–2 hours, or as recommended on the product label. In cool or humid conditions, drying may take longer.
5. Apply A Second Coat (if Needed)
Most patios benefit from a second, thinner coat for extra protection. Repeat the process, making sure the first layer is dry before starting. Wet-look or film-forming sealers especially need this step.
6. Cure Time
Keep the patio free from foot traffic, pets, and rain for at least 24–48 hours. Some sealers may require up to 72 hours to fully cure. Check the label for details.
Common Mistakes To Avoid
- Rushing the drying: Applying sealer to damp pavers can trap moisture and cause cloudiness.
- Too much sealer: Thick layers may not cure and can become sticky or patchy.
- Skipping the test spot: Always test first to avoid surprises.
- Poor cleaning: Any dirt left behind will be sealed in and hard to remove later.
Maintaining Your Sealed Patio For Longevity
Sealing your patio isn’t a one-time job. Proper maintenance keeps your pavers looking fresh and extends their lifespan.
Regular Cleaning
Sweep debris off the surface weekly. For spills or stains, clean immediately with water and mild soap. Avoid harsh chemicals that can break down the sealer.
Resealing Schedule
Most patios need resealing every 2–3 years, depending on use, weather, and sealer type. High-traffic areas or patios exposed to strong sun may need resealing sooner.
Watch For Wear
If you notice dull spots, water soaking in instead of beading on top, or more frequent stains, it’s time to reseal.
Dealing With Weeds And Moss
Even with sealer, some weeds or moss might appear in joints. Remove them quickly, and top up joint sand if needed.
Repairing Small Issues
Fix any cracked or loose pavers as soon as possible. Small problems can get worse if left unattended, especially if water gets underneath.
Expert tip: Use a garden sprayer with a diluted vinegar solution to spot-treat moss or algae. Rinse well after application.
Real-life Examples: Patio Sealing Success
Seeing real-world results can inspire and guide your project. Here are a few examples:
- Case 1: A homeowner in Florida sealed their concrete patio with a water-based, penetrating sealer. After two years of heavy rain and summer heat, the patio showed minimal fading and no weed growth.
- Case 2: In Minnesota, a natural stone patio faced harsh freeze-thaw cycles. The owners resealed every two years and never experienced cracked pavers or shifting, even after ten winters.
- Case 3: A restaurant owner in California used a glossy, film-forming sealer on an outdoor dining area. The sealed surface made cleaning up food spills fast and easy, with no permanent stains after a busy season.
These examples show that the right sealer and good maintenance pay off, no matter where you live or how you use your patio.

Credit: www.acrylux.com
Cost Breakdown: Diy Vs. Professional Sealing
Many homeowners wonder whether to seal their patio themselves or hire a pro. Here’s a look at the costs and what you get for your money.
Diy Sealing
- Sealer cost: $30–$70 per gallon (covers about 150–250 sq ft)
- Tools/supplies: $40–$100 (rollers, sprayer, joint sand, etc.)
- Total DIY cost: $100–$300 for an average patio (200–300 sq ft)
Pros: Lower cost, flexible timing, satisfaction of doing it yourself
Cons: Labor-intensive, easy to make mistakes, no warranty
Professional Sealing
- Average cost: $1.50–$3.50 per sq ft (includes cleaning, sand, and sealer)
- Total pro cost: $300–$1,000+ for an average patio
Pros: Professional results, warranty, faster completion
Cons: More expensive, must schedule with contractor
Diy Vs. Professional Comparison
| Factor | DIY | Professional |
|---|---|---|
| Cost | Low | High |
| Skill Required | Medium | Low (handled by pro) |
| Time | 6–12 hours | 2–4 hours |
| Warranty | No | Yes (usually 1–2 years) |
| Mistake Risk | High | Low |
For most homeowners, DIY sealing is manageable with the right prep. However, if you have a large or valuable patio, hiring a professional can give peace of mind.
Environmental Considerations And Safety
Sealing pavers is safe if you take the right steps, but it’s good to be aware of environmental and health factors.
Eco-friendly Choices
- Choose water-based sealers with low VOC (volatile organic compounds) content. These are safer for you, pets, and the environment.
- Use leftover sealer carefully—do not pour it down drains or into soil.
Safety Tips
- Wear gloves, safety glasses, and a mask when applying sealer.
- Work in well-ventilated areas, especially with solvent-based products.
- Keep children and pets away from the patio until the sealer is fully dry.
For more on eco-friendly sealing, check out this detailed resource from the EPA’s Safer Choice program.
Frequently Asked Questions
How Long Does Patio Sealer Last?
Most sealers last 2–3 years on average, but this depends on weather, paver type, and how much the patio is used. High-traffic or very sunny areas may need resealing more often.
Can I Seal Pavers Myself, Or Should I Hire A Professional?
You can seal pavers yourself if you’re comfortable with basic DIY tasks. Read the instructions carefully and follow the steps in this guide. For large patios or tricky surfaces, a professional may be worth the extra cost.
What Is The Best Time Of Year To Seal Patio Pavers?
Early spring or fall is ideal. Temperatures are moderate, and there’s less chance of rain or extreme heat. Avoid sealing in the middle of summer or just before freezing weather.
Will Sealing Make My Patio Slippery?
Some sealers, especially glossy or wet-look types, can make the surface slippery when wet. If slip resistance is important, choose a penetrating or matte-finish sealer, and ask for products with added grit.
Do I Need To Reapply Joint Sand Every Time I Seal?
It’s a good idea to check and top up joint sand before every sealing. This ensures the pavers are locked in place and helps prevent weeds and ants. If the sand is still solid and full, you may not need to add more.
Sealing your patio pavers is a smart investment—one that pays off with years of low-maintenance beauty and durability. By following these steps, choosing the right products, and keeping up with routine care, you’ll enjoy a patio that looks as good as new for a long time.
Whether you do it yourself or hire a pro, the effort you put in today will protect your outdoor space for many seasons to come.