Every spring, gardeners start planning how to make their yards more beautiful and healthy. If you grow hostas, dividing them in spring is one of the best ways to keep your garden fresh and full. Hostas are known for their lush leaves and are perfect for shady spots.
But over time, these plants can get crowded, grow too large, or stop looking their best. That’s when dividing comes in.
Many people worry about hurting their hostas or making a mess. The truth is, dividing hostas in spring is simple if you know the right steps. It helps the plant stay strong, gives you more plants for free, and can even rescue a dying hosta.
This guide will walk you through every part of the process, from knowing when to divide, choosing the right tools, step-by-step instructions, and fixing common mistakes. You’ll also see practical examples and even get tips that most beginners miss.
Let’s dive in and learn how to divide hostas in spring, so your garden stays healthy, organized, and full of life.
Why Divide Hostas In Spring?
Dividing hostas is not just about keeping them neat. There are several important reasons to do it, especially in spring.
Healthier Plants
Hostas that grow for many years without dividing can become root-bound. This means their roots twist together and compete for water and nutrients. When you divide them, each section gets more space, which leads to stronger growth and brighter leaves.
More Hostas For Your Garden
Every time you divide a hosta, you get more plants. A single large hosta can be split into several new ones. This helps you fill empty spaces, create borders, or share with friends.
Easier Recovery In Spring
Spring is the best time to divide hostas because the weather is cool, and new shoots are just emerging. This means less stress on the plant, and roots recover faster. Divided hostas can settle in and grow strong before summer heat arrives.
Prevent Disease And Crowding
When hostas are too crowded, they are more likely to get fungal diseases or rot. Dividing them opens space for air and light, making the whole bed healthier.
Non-obvious insight: Dividing is also a way to check the roots for pests or rot. You can remove any bad sections before replanting.
When Is The Best Time To Divide Hostas?
Timing is everything when it comes to dividing hostas. While you can technically divide hostas in early fall, spring is the easiest and safest time for most gardeners.
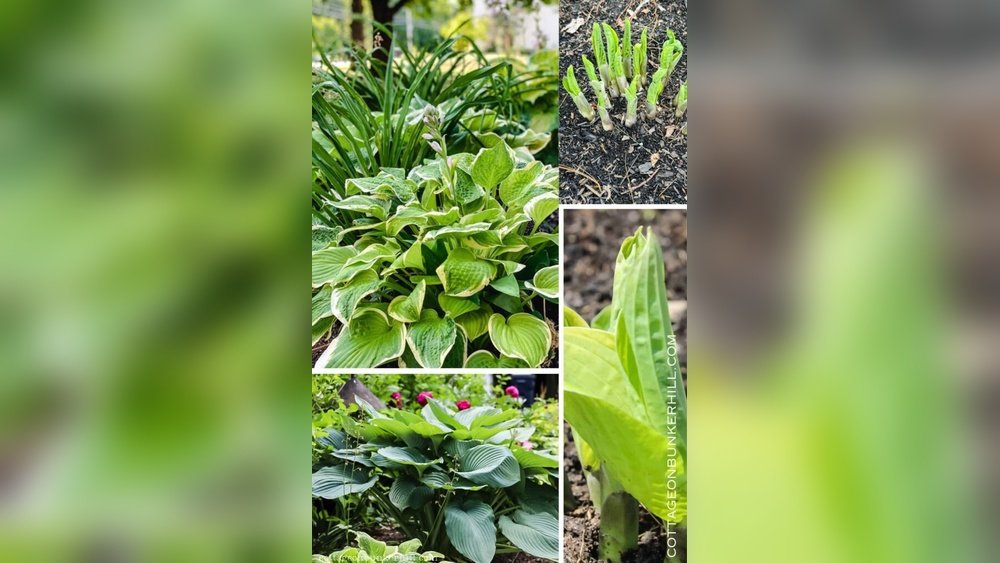
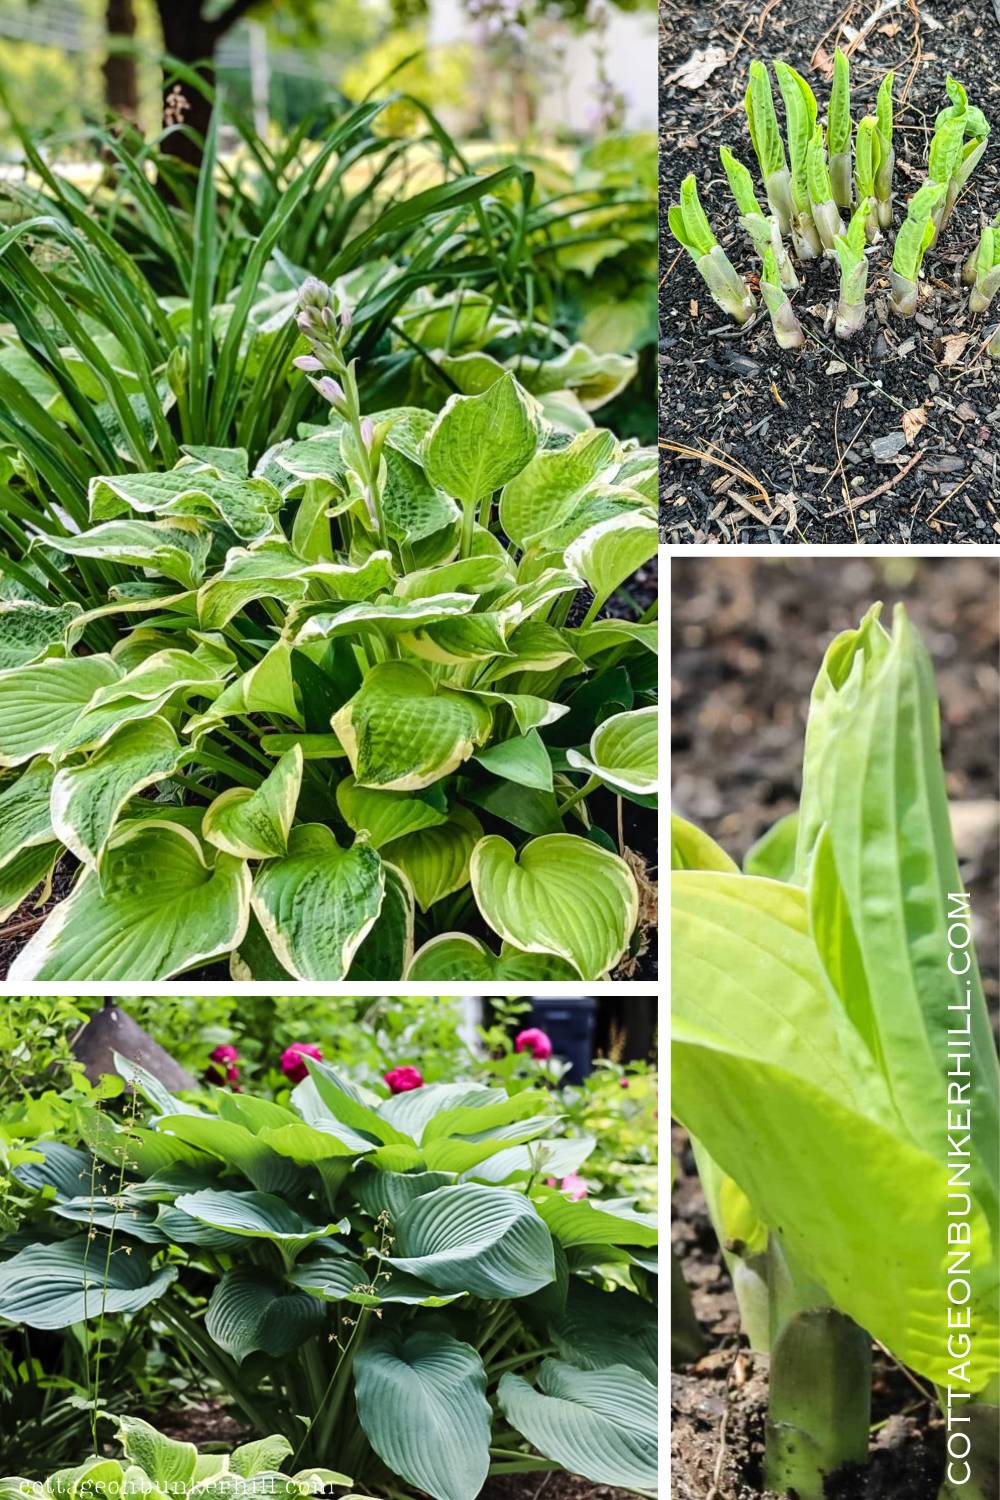
Signs It’s Time To Divide
- The hosta has a large clump with a bald center (no leaves in the middle).
- Leaves are smaller than usual.
- Growth is slow, or the plant looks weak.
- You want to move the plant to a new spot.
Ideal Spring Window
The best time is when you see new hosta shoots poking up, but before the leaves open fully. This is usually from late March to early May, depending on where you live. If you wait until the leaves are big, dividing will be harder and may damage the leaves.
Non-obvious insight: Dividing too early (when the ground is frozen) can slow root recovery. Wait until the soil is workable and the first shoots appear.
Tools And Supplies You’ll Need
Gathering the right tools before you start makes the process quicker and safer for both you and your hostas.
| Tool | Purpose | Tips for Use |
|---|---|---|
| Sharp Spade or Shovel | Digging up the hosta | Pick one with a solid handle and sharp edge |
| Garden Fork | Loosening soil | Good for heavy or clay soils |
| Pruning Saw or Large Knife | Cutting root ball | Clean with rubbing alcohol before use |
| Gloves | Protecting hands | Choose sturdy, waterproof gloves |
| Bucket or Tub | Holding divisions | Fill with water to keep roots moist |
| Mulch | Covering replanted hostas | Helps keep soil cool and moist |
Pro tip: Always use clean tools to prevent spreading disease between plants.
Step-by-step Guide: How To Divide Hostas In Spring
Now, let’s walk through the actual process. Each step is important for a healthy and successful division.
1. Water The Hostas A Day Before
A day before you plan to divide, water the hosta well. Moist soil makes digging much easier and less stressful for the roots.
2. Dig Up The Entire Plant
Use your spade to dig a wide circle around the hosta—about 8 to 12 inches from the main clump. Dig deep enough to get under the root ball, then gently lift the whole plant out of the ground.
Example: For a mature hosta, the root ball can be as wide as a large dinner plate.
3. Shake Off Or Wash Away Soil
Gently shake the plant to remove loose soil. For heavy clay, you can use a hose to wash away soil, making the roots easier to see.
4. Look For Natural Divisions
Hosta crowns often have natural “eyes”—small groups of shoots with their own roots. Look for these eyes, as they are the best spots to divide.
5. Cut Into Sections
Use a sharp knife or pruning saw to cut the root ball into sections. Each section should have at least one healthy eye and a good amount of roots.
- For larger plants, you can divide into 3-5 sections.
- For smaller ones, just cut in half.
Beginner mistake: Don’t make divisions too small. Tiny pieces may not survive.
6. Remove Old Roots Or Rot
Check each section for dead roots, rot, or pests. Trim off any unhealthy parts with your knife.
7. Replant Right Away
Hostas don’t like their roots to dry out. Replant the new divisions as soon as possible.
- Dig a hole twice as wide as the root ball.
- Place the hosta in the hole, spreading roots out.
- Fill with soil and press gently.
- Water well.
8. Mulch And Care
Add 2 inches of mulch around the plant, but don’t cover the crown. This keeps the soil moist and cool.
Pro tip: Shade the hosta for a few days with a cloth or cardboard if it’s sunny. This reduces transplant shock.
How To Choose Where To Plant Divided Hostas
After dividing, you need to give your new hosta sections the best chance to thrive. Picking the right spot is key.
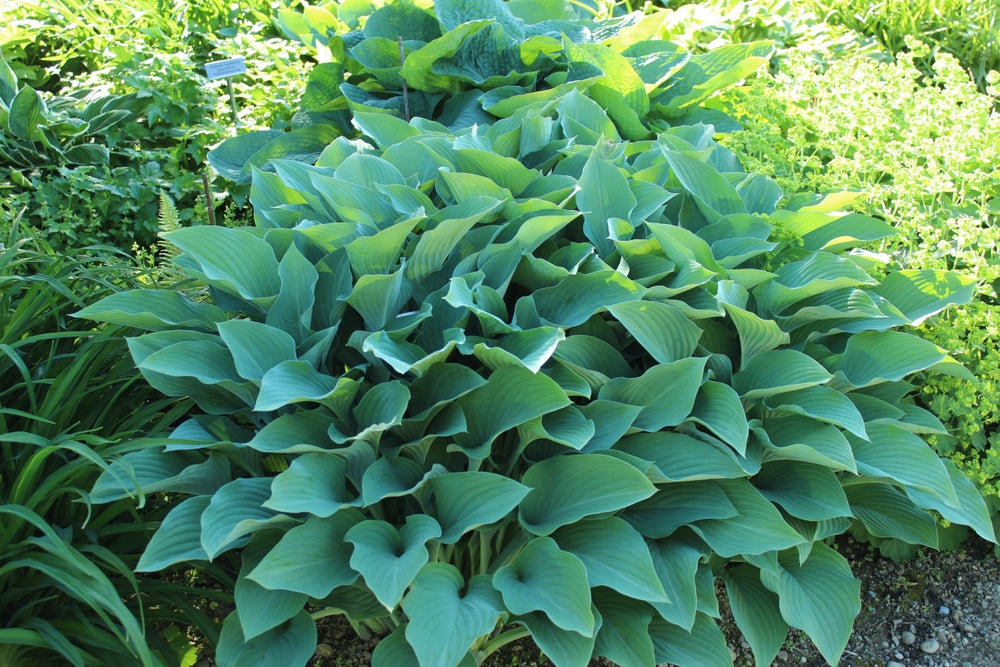
Light Needs
Most hostas prefer partial to full shade. Some newer varieties can handle more sun, but too much will burn the leaves.
| Hosta Type | Sun Tolerance | Best Use |
|---|---|---|
| Green-leaf | Full shade | Woodland gardens, under trees |
| Blue-leaf | Partial shade | Cooler spots, north side of house |
| Gold/Yellow-leaf | Morning sun | Borders, mixed beds |
| Variegated | Dappled sun | Accent plants |
Soil Needs
Hostas like rich, moist, and well-drained soil. If your soil is sandy or heavy clay, mix in compost before planting.
Space
Give each hosta section enough room to grow. Most varieties need 18 to 36 inches between plants.
Beginner mistake: Planting too close makes crowding happen faster.
Water
Hostas like steady moisture, especially just after dividing. Avoid spots where water pools after rain (hostas don’t like “wet feet”).
Aftercare For Divided Hostas
Once you’ve replanted your new hostas, a little extra care will help them settle in and grow strong.
Watering
- Water deeply after planting.
- Keep the soil moist (but not soggy) for the first month.
- In dry weather, water once or twice a week.
Feeding
Hostas are not heavy feeders, but a small dose of balanced slow-release fertilizer can help. Sprinkle it around the base, not on the leaves.
Mulching
A layer of organic mulch, like shredded bark or compost, helps keep roots cool and moist. Reapply each year for best results.
Pest Watch
Slugs and snails love young hosta leaves. Hand-pick them or use iron phosphate pellets if needed.
Pro tip: Crushed eggshells or copper tape around the base can keep slugs away.
Common Mistakes And How To Avoid Them
Even experienced gardeners can make errors when dividing hostas. Here’s how to avoid the most common pitfalls:
- Waiting too long to divide – If the clump is huge and old, the center can die out. Divide every 3–5 years for healthiest plants.
- Dividing when leaves are too big – This damages leaves and slows recovery. Always divide at the “pointy shoot” stage in spring.
- Not watering enough – Dry roots after planting can kill new divisions. Keep soil moist, especially in the first weeks.
- Making divisions too small – Sections with only one tiny eye may not survive. Aim for 2–3 eyes per division if possible.
- Planting too deep – The crown (where roots meet shoots) should be at soil level, not buried.
- Ignoring soil quality – Hostas struggle in poor soil. Add compost or organic matter when replanting.
- Not labeling new plants – If you have different varieties, use plant tags right after dividing.
Example: A gardener divided a blue hosta into 12 tiny pieces to share with friends. Only two survived. Larger divisions work better.
How Often Should You Divide Hostas?
Dividing hostas is not a yearly job for most people. The frequency depends on the variety and your garden goals.
- Every 3–5 years is a good general rule for most hostas.
- Fast-growing varieties may need dividing more often.
- If you want more plants quickly, divide more often.
- For slow growers or if you like big clumps, wait longer.
Non-obvious insight: Some hostas can stay in one spot for over a decade if they have space and are healthy. Only divide when you see signs of crowding or weak growth.
Dividing Hostas: Special Situations
Moving Hostas To A New Location
If you plan to move a hosta, divide it first. Smaller sections transplant more easily and recover faster.
Saving A Hostage From Disease
If a hosta shows signs of crown rot (mushy, smelly base), cut out all affected parts. Disinfect your tools between cuts. Replant only healthy sections in fresh soil.
Dividing Potted Hostas
For hostas in containers, remove the whole plant, gently shake off the soil, and divide as you would in the ground. Repot divisions in fresh potting mix.
Comparing Spring Vs. Fall Division
Some gardeners wonder if dividing hostas in fall is better. Here’s a quick comparison:
| Season | Advantages | Disadvantages |
|---|---|---|
| Spring | – Fast recovery – Easy to see new shoots – Roots establish before summer |
– Risk of late frost – Wet soil can be messy |
| Fall | – Cooler weather – Less sun stress |
– Less time to root before winter – Hard to see divisions in dying foliage |
Pro tip: If you live in a cold climate (zone 5 or lower), spring is much safer. Fall-divided hostas may not survive winter if roots don’t establish.
Credit: www.oneclickplants.co.uk
Propagating Hostas By Division Vs. Seeds
Hostas can be grown from seed, but dividing is almost always better for home gardeners.
| Method | Time to Mature Plant | Genetic Match | Success Rate |
|---|---|---|---|
| Division | 1 season | Exact copy of parent | Very high |
| Seeds | 3–5 years | May vary (not true to type) | Low to moderate |
Non-obvious insight: If you have a rare or patented variety, dividing is the only way to keep the same look.
Troubleshooting Division Problems
Even with the best care, things can go wrong. Here’s how to solve common problems:
- Wilting divisions: Water deeply and shade for a few days.
- Leaves turning yellow: Too much sun, or roots not established. Move to more shade and keep moist.
- No new growth: Be patient. Some divisions take a few weeks to sprout. If still nothing after a month, check for rot.
- Mushy base: Dig up and cut away rotten parts. Use fresh soil and disinfect tools.
Pro tip: Don’t fertilize right after dividing. Wait until you see new growth before feeding.
Eco-friendly And Cost-saving Benefits
Dividing hostas is good for your wallet and the environment.
- No need to buy new plants. Each hosta can give you several new plants for free.
- Less waste. Old, crowded hostas are renewed, not thrown away.
- Supports pollinators. Healthy hostas bloom better, attracting bees and other helpful insects.
Example: A gardener started with 3 hostas and, after 10 years of dividing, had over 30 plants—all from the originals.
Real-world Case Study: A 10-year Hosta Bed Renewal
Martha, a home gardener in Ohio, noticed her hosta bed looked tired. Some clumps had big bald spots in the center. She divided each large plant into 4 pieces in early April, replanted in fresh compost, and mulched heavily. That summer, the bed was fuller, and the leaves were much brighter.
The next year, every division bloomed. Martha even shared extras with her neighbors.
Lesson: Regular division keeps hostas looking their best year after year.
Credit: www.cottageonbunkerhill.com
Resources For Further Reading
For more details on hosta care, including variety guides and advanced propagation, the American Hosta Society is a good place to start. Their site includes detailed advice and research for all levels of gardeners.
american Hosta Society
Frequently Asked Questions
How Do I Know If My Hosta Is Too Old To Divide?
Even very old hostas can be divided, but the center may be hollow or dead. Just remove the old center and keep healthy outer sections. As long as you see healthy eyes (shoots) and roots, divisions will grow.
Can I Divide Hostas If They Already Have Leaves?
Yes, but it’s harder and riskier. Leaves may break, and roots are stressed more. For best results, divide when shoots are just emerging, before leaves open.
How Long Does It Take For Divided Hostas To Look Full Again?
Most divisions will fill out in one growing season. Large sections bounce back faster—sometimes in just a few weeks. Smaller pieces may take a year or two to look mature.
Will Dividing Hostas Change Their Color Or Variegation?
No. Divisions are genetically identical to the parent plant, so colors and patterns stay the same. Only growing from seed can produce different looks.
What If I See Slugs On My New Hostas?
New divisions are tender and can attract slugs. Use organic slug baits, crushed eggshells, or copper tape around the base. Keep mulch away from the crown to reduce hiding spots.
Dividing hostas in spring is a simple, rewarding way to keep your garden healthy, colorful, and growing. With the right timing, tools, and care, you’ll enjoy beautiful hostas for years—and maybe even share the extras with friends.

Credit: www.fayobserver.com