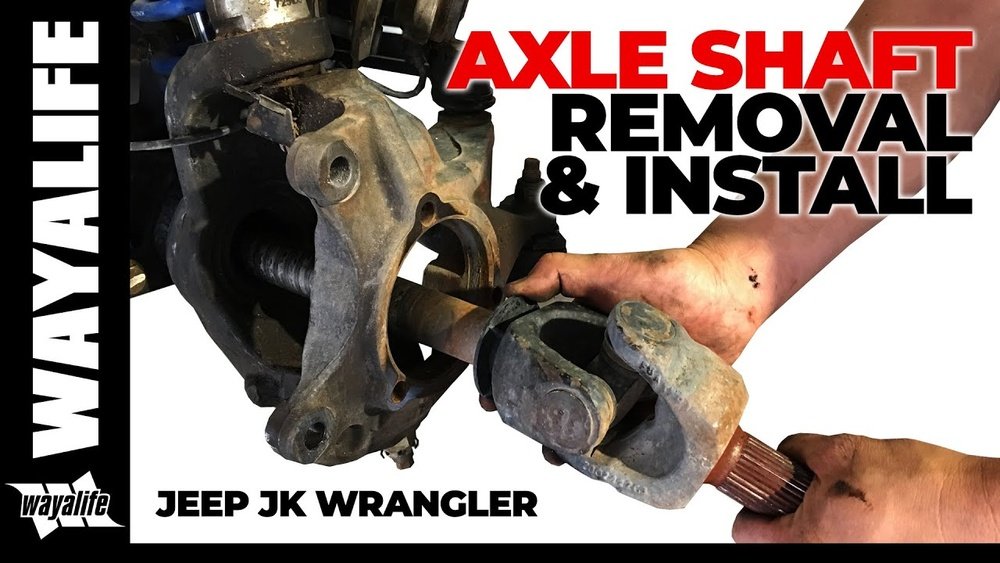
Replacing the axle shafts on your Jeep Wrangler is a job that can seem intimidating, especially if you’re new to vehicle repairs. But with careful steps and the right guidance, you can do it at home and save money. Whether you’re dealing with a broken shaft, upgrading for off-road strength, or just want to know how to handle this essential repair, this guide will walk you through every stage.
You’ll learn what tools are needed, how to avoid common mistakes, and what to check before and after the job. You don’t need to be a mechanic—just have patience, the right parts, and a willingness to learn.
What Are Axle Shafts And Why Replace Them?
The axle shafts in your Jeep Wrangler transfer power from the differential to the wheels. They’re key for making your Jeep move, especially when navigating tough terrain. Over time, axle shafts can wear out, break from heavy off-roading, or twist due to torque stress. A faulty axle shaft means poor performance, strange noises, or even being stranded. Replacing them is vital for safety and reliability.
Axle shafts are not just simple rods; they are engineered parts that endure enormous forces every time you accelerate, turn, or drive over obstacles. When you’re off-roading, the pressure on these shafts increases, especially if you have added bigger tires or a lift kit.
Even daily driving can cause wear, especially as your Jeep ages. A damaged shaft can also lead to collateral damage—bad vibrations can affect bearings, seals, and even other drivetrain parts.
Signs You Need To Replace Your Axle Shafts
- Clunking or clicking noises when turning or accelerating.
- Vibration at certain speeds, especially off-road.
- Grease leaks near the wheels, showing seal failure.
- Visible damage such as twists or cracks on the shaft.
- Loss of power to one or more wheels.
It’s important to note that these symptoms can sometimes be caused by other issues, such as bad wheel bearings, U-joints, or driveshaft problems. However, axle shaft failure is a leading cause of these problems in Wranglers, especially those that see frequent trail use.
Don’t ignore small noises—catching axle shaft wear early can prevent bigger, more expensive repairs. If you’re ever uncertain, it’s better to inspect and be safe.
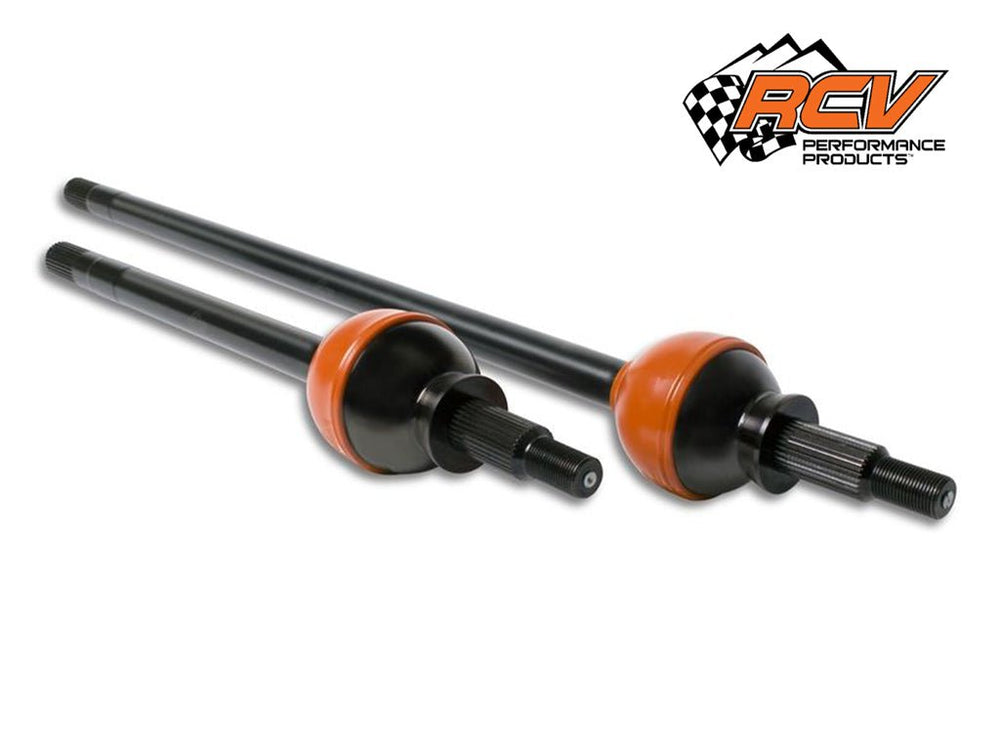
Choosing The Right Replacement Axle Shafts
Before buying new axle shafts, you must know your Jeep’s model, year, and axle type. Jeep Wranglers use different axles, like the Dana 30, Dana 44, and Rubicon’s Dana 44 HD. Each needs specific shafts.
Aftermarket manufacturers offer a variety of choices, but not all fit every Jeep. Some Wranglers built for special editions or with factory upgrades may have different spline counts or axle lengths compared to base models. Always check your build sheet or physically inspect the axle tags for accurate information.
If you’re not sure, measure your existing shaft and count the splines on the end—this simple step prevents ordering mistakes.
Key Factors To Consider
- Axle Type: Check if you have Dana 30, Dana 44, or another axle. This is usually stamped on the differential cover or axle tube.
- Length and Spline Count: Shafts come in different lengths and splines. Count the splines on your old shaft to match. Spline count affects strength and compatibility.
- Material: Chromoly shafts are stronger than stock steel. They resist twisting and breaking under extreme stress.
- Brand Reputation: Choose brands like Yukon, G2, or Mopar for reliability. Well-known brands often provide better support and warranties.
- Price vs. Quality: Cheap shafts can fail quickly. Invest in quality for safety. Spending a bit more up front can save you from doing the job twice.
It’s also important to consider whether your Jeep has open or locking differentials, as certain lockers require specific axle ends. If you plan to add a locker later, get shafts that are compatible with both setups.
| Axle Type | Spline Count | Material | Approx. Price Range |
|---|---|---|---|
| Dana 30 | 27-30 | Steel/Chromoly | $150-$350 |
| Dana 44 | 30-32 | Steel/Chromoly | $250-$500 |
| Dana 44 HD | 32 | Chromoly | $400-$800 |
Common Mistakes When Choosing Axle Shafts
- Not checking spline count.
- Buying shafts for the wrong axle type.
- Ignoring brand reviews.
- Overlooking warranty and support.
Another mistake is not considering the intended use. If you only use your Jeep on highways, heavy-duty shafts may be overkill. But if you plan future upgrades like bigger tires or lockers, buying stronger shafts now saves money later.
Tools And Supplies You Need
Get all tools ready before starting. Missing something can make the job harder or unsafe.
Having the right tools isn’t just about convenience—it’s about safety and preventing damage to your Jeep. Many people try to substitute the correct tool with something “close,” which can damage bolts or parts and make the job longer.
Essential Tools
- Socket set (metric and SAE) to cover all bolt sizes.
- Breaker bar for tough bolts.
- Torque wrench to tighten bolts to spec.
- Screwdrivers for various clips and covers.
- Pry bar for separating parts.
- Hammer for gentle taps.
- Needle nose pliers for clips and pins.
- Jack and jack stands for lifting and securing the Jeep.
- Wheel chocks to prevent rolling.
- Drain pan for catching fluid.
- Shop rags for cleanup.
- Rubber mallet for installing seals without damage.
Replacement Parts And Supplies
- New axle shafts (both sides if needed).
- Axle seals to prevent leaks.
- Differential fluid (check capacity, usually 2-3 quarts).
- Replacement bearings (optional but recommended).
- Gasket or RTV sealant for the differential cover.
- Grease (for bearings and seals).
Having extra rags and gloves helps keep your workspace clean. It’s also smart to have a small parts tray or magnetic bowl for bolts, which are easy to lose.
Safety Gear
- Safety glasses to protect your eyes from debris and fluid.
- Mechanic gloves for grip and protection.
- Work light to see inside the axle housing.
A fire extinguisher nearby is a good safety habit, especially when working with flammable fluids.
Having everything ready avoids delays and mistakes. A smooth workflow means less frustration and a better result.
Preparing Your Jeep Wrangler For Axle Shaft Replacement
Before you remove parts, set up your workspace and make the Jeep safe to work on.
Steps To Prepare
- Park on a level surface and apply the parking brake firmly.
- Place wheel chocks behind wheels for safety. Always chock both sides if possible.
- Loosen lug nuts on the wheel(s) you’ll work on, but don’t remove them yet. This prevents the wheel from spinning while you loosen the nuts.
- Jack up the Jeep using the factory jack points. Never crawl under a vehicle only supported by a jack.
- Set jack stands under the frame, not the axle, for solid support. Shake the Jeep gently to make sure it’s stable.
- Remove wheels and set aside somewhere safe.
Take a few minutes to organize your tools and parts nearby. A clean, well-lit area makes the job easier and safer. Lay out some cardboard or a tarp under the axle to catch fluid and dirt.
Always check your Jeep’s manual for jack points and safety tips. If you’re working in a driveway, let neighbors or family know what you’re doing for extra safety.
Step-by-step Guide To Replacing Jeep Wrangler Axle Shafts
This guide covers both front and rear axle shafts. The process is similar, but the front shafts may involve removing brake calipers and disconnecting the steering knuckle. Read each step carefully.
1. Remove Brake Components
- Unbolt the brake caliper using the socket set.
- Hang it with a wire or bungee cord. Don’t let it dangle by the brake hose—it can damage the hose and create a safety hazard.
- Remove the rotor and set aside.
- For rear axles, you may need to remove the drum brake assembly (if equipped). Sometimes, rear disc brakes have a small drum for the parking brake inside.
If you see any unusual wear on pads or rotors, now is a good time to replace them.
2. Remove Axle Retainers And Hubs
- For front axles, remove the hub bolts (usually 3) and slide out the hub. These bolts can be tight—use a breaker bar if needed.
- For rear axles, access the C-clips inside the differential that hold the shaft. Remove the diff cover, drain fluid, and carefully pull out clips. Use shop towels to keep dirt out of the gears.
Some axles may have bolt-in shafts instead of C-clips. Always check your axle style before starting.
3. Pull Out The Old Axle Shaft
- With retainers removed, gently pull the shaft out. Sometimes a slide hammer is needed if it’s stuck.
- Inspect for damage or wear. Look for pitting, grooves, or twisted splines.
Take a few extra minutes to compare the old and new shafts. Make sure lengths and splines match exactly before installing.
4. Inspect And Replace Seals And Bearings
- Check the axle seals for leaks or wear. A torn seal will leak and let dirt in.
- Replace seals using a seal puller and install new ones with a mallet. Lightly oil the new seal so it slides in smoothly.
- Grease new bearings if installing. If your bearings are pressed on, a shop can swap them for you, or you can rent a bearing puller.
Replacing seals and bearings now saves you from having to repeat the job soon.
5. Install New Axle Shaft
- Slide the new shaft into the axle housing, aligning splines. Take your time to avoid damaging the seal.
- For rear axles, make sure C-clips are properly seated. Spin the shaft gently to help the clips drop into place.
- Reinstall hub (front) or secure shaft (rear). Tighten bolts evenly.
If the shaft doesn’t slide in easily, check for burrs or misalignment. Forcing it can damage new seals.
6. Reassemble Brake Components
- Reinstall rotor and brake caliper. Make sure brake pads are seated correctly.
- Torque bolts to manufacturer specs. Under- or over-tightening can cause future problems.
- Reconnect any sensors or hardware, such as ABS wires. A missing connection may cause warning lights.
If you removed drum brake parts, double-check the parking brake mechanism for smooth operation.
7. Fill Differential With Fluid
- Replace the differential cover using new gasket or RTV. Clean the mating surfaces for a proper seal.
- Fill with recommended fluid until it reaches the fill hole. This step is often messy—work slowly.
- Clean any spills and check for leaks around the cover and seals.
Using the correct fluid type is important. Some differentials need additives for limited-slip operation.
8. Final Checks And Test Drive
- Reinstall wheels and torque lug nuts to spec.
- Lower Jeep from jack stands slowly and remove chocks last.
- Double-check all bolts and connections. Look for leftover parts—nothing should be left over!
- Test drive at low speed, listen for noises, and check for leaks.
A careful test drive helps you catch issues early, before they turn into bigger problems.
| Step | Estimated Time | Difficulty (1-5) |
|---|---|---|
| Removing brakes | 20 minutes | 2 |
| Removing axle shaft | 30 minutes | 3 |
| Replacing seals | 20 minutes | 3 |
| Installing new shaft | 30 minutes | 3 |
| Reassembling brakes | 15 minutes | 2 |
| Filling diff fluid | 15 minutes | 2 |
| Final checks | 10 minutes | 1 |
Practical Tips For Success
Replacing axle shafts isn’t just about following steps—it’s about avoiding mistakes and making the job last.
Two Non-obvious Insights
- Check shaft straightness before installing. Even new shafts can be slightly bent from shipping. Roll the shaft on a flat surface to check for wobble.
- Inspect ABS tone ring (if present). Some shafts have a tone ring for ABS. If damaged, replace it or transfer from old shaft. A missing or broken tone ring will trigger warning lights and disable ABS.
Here’s another tip: Use a thin layer of grease on the seal lip before sliding in the shaft. This reduces initial wear and helps prevent leaks.
Common Mistakes To Avoid
- Forgetting to replace axle seals leads to leaks.
- Not torquing bolts properly can cause them to loosen. Use a torque wrench and follow your Jeep’s manual.
- Using old differential fluid reduces performance and can damage new parts.
- Rushing the job—take your time, double-check everything.
Marking the orientation of parts as you remove them helps ensure everything goes back in the right order. Taking pictures on your phone at each step is a great backup.
Expert Advice
- Always use new seals and fresh fluid.
- Clean all mating surfaces—dirt can cause leaks and poor fit.
- Label bolts and parts as you remove them; Jeep hardware can look similar.
If you’re unsure about a step, look for guidance in Jeep forums or service manuals. There are many experienced owners willing to help.

Credit: revolutiongear.com
Real-world Example: Upgrading For Off-road Use
Let’s say you have a Jeep Wrangler JK used for rock crawling. You want stronger shafts to prevent breakage. You choose chromoly shafts for the Dana 44. The process is the same as above, but you’ll notice:
- Chromoly shafts are heavier and require careful alignment. Take your time sliding them in to avoid damaging seals.
- Off-road upgrades often include new bearings and seals. Shops may press on bearings for you if you don’t have the tools.
- After upgrading, your Jeep can handle larger tires and rougher terrain.
Owners often notice smoother power delivery and fewer breakages after upgrading. Another benefit is peace of mind—knowing your axle shafts are less likely to fail when you’re far from help.
Some users also report less “wind-up” or flex in the drivetrain, which can make the Jeep feel more direct and responsive. If you plan to add lockers or regear your axles, do everything at once to save time and effort.
Comparing Stock Vs. Aftermarket Axle Shafts
Many Jeep owners debate whether to use stock shafts or upgrade. Here’s a comparison for clarity.
| Feature | Stock Shafts | Aftermarket Chromoly Shafts |
|---|---|---|
| Material Strength | Standard steel | High-strength chromoly |
| Cost | Lower ($150-$300) | Higher ($400-$800) |
| Longevity | Good for daily use | Better for heavy off-road |
| Warranty | Limited | Extended, often lifetime |
| Installation | Direct fit | May require extra steps |
If you mostly drive on paved roads, stock shafts are fine. For off-roading, chromoly shafts are worth the investment. Also, chromoly shafts can increase resale value for buyers who care about off-road upgrades.
How Long Does It Take And What Does It Cost?
DIY axle shaft replacement takes about 2–4 hours per side, depending on experience and tools. Mechanic shops can do it faster, but labor costs add up.
- Parts cost: $150–$800 per shaft depending on material and axle type.
- Labor cost: $200–$400 per side at a shop.
- Total cost: $350–$1,200 per side (DIY saves labor).
If you’re upgrading both sides, double the parts and labor cost. Some shops offer package deals if you do front and rear axles together. Factor in new fluid, seals, and possibly bearings when budgeting.
You can save hundreds by doing it yourself, but only if you have basic tools and patience. For complex jobs (like if bearings are pressed on), you might need to pay a shop for that step.
Troubleshooting Common Problems After Replacement
Sometimes, things don’t go as planned. Here’s what to watch for after replacing axle shafts.
Noises Or Vibrations
If you hear strange sounds, check:
- Shaft is seated correctly.
- Bearings are installed properly.
- Bolts are torqued to spec.
Don’t ignore new noises—catching a problem early can prevent further damage.
Leaks
Fluid leaks usually mean:
- Seals weren’t replaced or were damaged during installation.
- Differential cover isn’t tight or gasket is faulty.
Clean up any leaks, check for the source, and fix it immediately. Running low on diff fluid can destroy gears and bearings fast.
Abs Or Brake Warning Lights
If lights come on, check:
- Tone ring is installed and in good condition.
- Sensors are reconnected properly.
Some ABS systems are sensitive—if you forget a wire or leave the tone ring out, you’ll get warning lights right away.
Poor Performance
If Jeep doesn’t drive right:
- Shaft isn’t fully engaged.
- Wrong shaft length or spline count.
Test drive on a quiet road and listen for anything unusual. Double-check your work if anything feels off.
Always recheck your work if you notice problems. A second look now beats a breakdown later.
Credit: www.rustysoffroad.com
Maintenance Tips For Your New Axle Shafts
Keeping your new axle shafts in good shape will make them last longer.
- Change differential fluid every 30,000 miles or after deep water crossings. Dirty or watery fluid wears out parts fast.
- Inspect seals during routine maintenance; replace if leaking. Even small leaks can let dirt in and cause rapid wear.
- Check for play in the wheels—loose shafts can cause trouble. Grab the wheel and wiggle to feel for looseness.
- Grease bearings if applicable. Not all axles have grease fittings, but if yours do, use them.
- Avoid hard launches on pavement, which can twist shafts.
If you off-road often, check shafts and seals more frequently. Keeping a maintenance log helps you track when everything was last serviced.
When Should You Upgrade Axle Shafts?
Sometimes, replacement isn’t enough—you need an upgrade.
Reasons To Upgrade
- Bigger tires: Tires over 33 inches put extra stress on shafts.
- Off-road use: Rock crawling or mudding needs stronger parts.
- Lift kits: Higher lift angles increase strain.
- Higher horsepower: Engine upgrades require better shafts.
If you’ve already broken a shaft once, that’s a sign the next one may not be far behind. Upgrading before your next adventure prevents being stranded. Upgrades also pair well with other drivetrain improvements, like lockers or re-gearing.
Upgrade before you break your stock shafts—prevention is cheaper than repair.
Jeep Wrangler Axle Shaft Replacement By Model Year
Wrangler models change over time. Here’s a quick guide for popular versions.
| Model Year | Front Axle Type | Rear Axle Type | Notes |
|---|---|---|---|
| 1997–2006 (TJ) | Dana 30 | Dana 35/Dana 44 | Check for C-clips in rear axle |
| 2007–2018 (JK) | Dana 30/Dana 44 | Dana 44 | Rubicon uses HD Dana 44 |
| 2018–present (JL) | Dana 30/Dana 44 | Dana 44 | Newer axles, splines vary |
Always check your Jeep’s VIN and axle tags to confirm exact specs before buying shafts. Even within the same model year, special editions or factory options can change axle type and spline count.
Environmental Impact And Recycling Axle Shafts
Axle shafts are made of steel and can be recycled. Don’t just throw old shafts away.
- Take old shafts to a metal recycler.
- Some parts stores accept used shafts for credit or disposal.
- Avoid dumping in landfills.
Recycling saves resources and keeps waste down. Old steel can be melted and turned into new products, reducing the need for mining and energy use. If you’re replacing multiple parts, ask your local recycler if they’ll take everything at once.
For more info on vehicle part recycling, visit EPA Recycling Guide.

Credit: www.youtube.com
Frequently Asked Questions
What Are The Most Common Causes Of Axle Shaft Failure In Jeep Wranglers?
The most common causes are off-road stress, over-sized tires, and high torque from engine upgrades. Water and mud can also cause rust or wear. Regular inspection prevents sudden failure. Sometimes, a failed seal lets dirt in, which quickly destroys the shaft and bearings.
How Do I Know If My Axle Shaft Is Bent Or Broken?
Symptoms include vibration, strange noises, and loss of power to a wheel. You can visually inspect the shaft for bends or cracks after removal. Some shops can test shafts for straightness. If you feel a “thump-thump” as you drive, suspect a bent shaft.
Can I Replace Axle Shafts Without Special Tools?
Basic tools are enough, but a slide hammer helps if shafts are stuck. For rear axles with C-clips, you need tools to open the differential. Specialty tools make the job easier but are not required. For pressed-on bearings, a shop press may be necessary.
Should I Replace Both Axle Shafts At Once?
It’s recommended if one fails, because the other may soon wear out. Replacing both saves time and avoids a second repair. It’s especially smart if you’re upgrading for off-road use. You’ll also save on fluid and gasket costs by doing both sides together.
Are Aftermarket Axle Shafts Better Than Stock?
Aftermarket chromoly shafts are stronger and better for off-roading or larger tires. Stock shafts are fine for daily driving. Choose based on your needs and budget. If you plan to keep your Jeep long-term, stronger shafts are a good investment.
Replacing axle shafts on your Jeep Wrangler is a rewarding job that improves performance, safety, and reliability. With careful steps, the right tools, and quality parts, you can save money and learn valuable skills. Always follow torque specs, replace seals, and check everything twice.
Whether you’re fixing a broken shaft or upgrading for adventure, you’ll keep your Jeep rolling strong.