Growing artichokes from seed is both a science and an art. While many people buy young plants or “crowns,” starting artichokes from seeds gives you more variety, better disease resistance, and the deep satisfaction of nurturing your food from the very beginning.
If you want to fill your garden with the unique beauty and delicious harvest of artichokes, learning the seed-to-harvest process is a rewarding journey. This guide offers clear, practical advice that will help you succeed, even if you are new to gardening or have tried and failed before.
Artichokes are not just vegetables—they are architectural wonders in the garden. Their silvery leaves and large purple flowers add drama to any landscape. But the real magic is in the edible buds, loved by chefs around the world. Growing artichokes from seed takes patience, but with the right techniques, you can enjoy their beauty and flavor in your own backyard.
This article breaks down every step, from selecting seeds to harvesting, with tips and tricks that even experienced gardeners sometimes overlook.
Why Grow Artichokes From Seed?
Artichokes are usually grown from root divisions, but starting from seed offers unique advantages. First, seed-grown artichokes often show better adaptation to your local climate. When a plant grows in your soil from the start, it builds stronger roots and handles weather changes better. Second, you can choose from many more varieties—some seed types are not available as plants. For example, varieties like Imperial Star and Green Globe are bred to produce buds in the first year, a key factor for gardeners in shorter growing seasons.
There’s also a cost benefit. Buying seeds is much less expensive than buying multiple live plants. With just one packet, you can grow enough artichokes for your family and share with friends. Plus, when you grow from seed, you can start the plants indoors and control their environment, leading to healthier transplants.
Understanding The Artichoke Plant
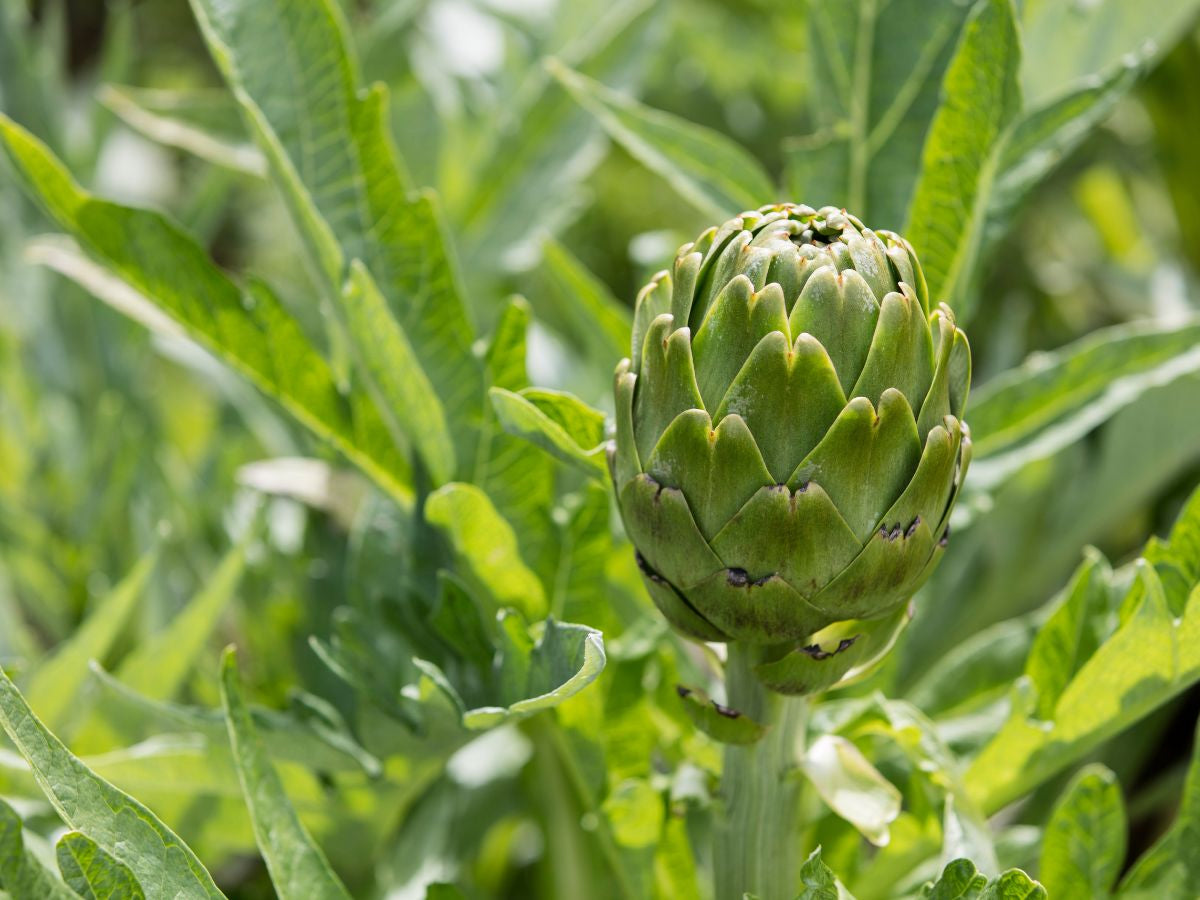
Artichokes (Cynara cardunculus var. scolymus) are perennial vegetables in mild climates, but they are often grown as annuals in colder areas. They need a long growing season—typically 150 to 180 days from seed to harvest. The edible part is the immature flower bud. If not picked, the bud opens into a large purple flower, which is beautiful but no longer edible.
Artichokes prefer cool weather, especially for budding. High summer heat can stress plants, while frost can damage them. Understanding this helps you time your planting for the best results. In the right conditions, a single plant can produce 6–8 buds in its first year and even more in following years.
Choosing The Right Artichoke Variety
Not all artichoke varieties are suitable for growing from seed, especially if you want a good harvest in the first year. Here are some top choices for seed-grown artichokes:
| Variety | Key Traits | Days to Harvest |
|---|---|---|
| Imperial Star | Great for annual culture; produces in first year | 85-100 |
| Green Globe Improved | Classic flavor; reliable bud production | 150-180 |
| Tavor | Uniform buds; disease resistance | 90-100 |
| Colorado Star | Purple color; cold-tolerant | 90-110 |
For gardeners in northern regions, Imperial Star and Tavor are the best options because they don’t need a long period of cold weather (“vernalization”) to produce buds. If you live in a mild climate, you can experiment with more traditional varieties like Green Globe.
When And Where To Start Artichokes From Seed
Timing is crucial. Artichokes need an early start—usually 8–12 weeks before your last expected frost. In most regions of the US, this means starting seeds indoors between late January and early March.
Light is critical for strong seedlings. Choose a sunny windowsill or use grow lights, which give you more control over the day length. Artichokes grow best in full sun after transplanting, so pick a spot in your garden that gets at least 6–8 hours of sunlight daily.
Soil matters, too. Artichokes thrive in rich, well-drained soil with a pH between 6. 5 and 7. 0. Heavy clay or soggy spots can cause root rot, so if your soil is poor, consider raised beds or large containers.
Preparing To Start Seeds Indoors
Gather your supplies before you begin. Here’s what you’ll need:
- Artichoke seeds (fresh seeds germinate best)
- Sterile seed-starting mix (not regular garden soil)
- Seed trays or small pots (2–3 inches wide)
- Plant labels
- Plastic dome or clear cover (optional, helps humidity)
- Spray bottle for watering
Fill trays or pots with seed-starting mix and moisten the soil. Plant seeds ¼ inch deep. Cover lightly with soil, and label each pot with the variety and date.
Artichoke seeds need warmth to sprout—ideally 70–80°F (21–27°C). Using a seedling heat mat speeds up germination. Most seeds sprout in 10–14 days, but germination rates can vary. Don’t get discouraged if not every seed comes up.
The Germination Process: Tips For Success
Getting seeds to sprout is the first big hurdle. Here are a few tips that can make a big difference:
- Soak seeds overnight in water before planting. This softens the seed coat and can boost germination rates.
- Keep the soil moist but not soggy. Too much water causes rot, while dry soil stops sprouting.
- Remove the plastic cover once seedlings emerge. Good airflow prevents mold and “damping off,” a disease that kills young plants.
- Place seedlings under grow lights for 14–16 hours daily. This prevents weak, leggy growth.
One non-obvious trick: After most seeds have sprouted, gently brush your hand over the seedlings a few times a day. This movement strengthens stems and prepares them for outdoor wind.
Growing Seedlings: The First 6 Weeks
As seedlings grow, they need care to develop strong roots and leaves. Thin seedlings to one per pot when they have two true leaves. If you use trays, transplant them into individual pots at this stage.
Fertilize with a diluted, balanced liquid fertilizer every two weeks. Choose a fertilizer with equal numbers (like 10-10-10) for nitrogen, phosphorus, and potassium. Avoid overfeeding—too much can burn young roots.
Keep the soil damp but not wet. Check daily, especially if the air is dry indoors. If seedlings get tall and thin, move them closer to the light source.
Seedlings are ready for the next stage when they have at least 4–5 strong leaves and the weather outside is warming up.
Hardening Off: Preparing For Outdoor Life
Seedlings grown indoors need time to adjust to outside conditions—a process called hardening off. Without it, sudden sun, wind, or temperature changes can shock or kill your plants.
Begin hardening off about two weeks before transplanting. Place seedlings outdoors in a sheltered spot for 2–3 hours the first day. Increase the time outdoors by 1–2 hours each day, gradually moving them into more sunlight.
Watch for signs of stress, like drooping leaves or purple coloring. Bring plants in at night if temperatures drop below 50°F (10°C). After a week or two, your seedlings should be tough enough for life in the garden.
Choosing And Preparing A Planting Site
Artichokes need space—plants can grow up to 4 feet tall and wide. Pick a spot that gets full sun and is protected from strong winds. Artichoke roots are sensitive to waterlogging, so good drainage is key.
Before planting, work compost or well-rotted manure into the soil. Artichokes are heavy feeders and thrive in fertile ground. Aim for at least 2 inches of organic matter mixed into the top 8–12 inches of soil.
If your soil is acidic (pH below 6. 5), add garden lime to raise the pH. Testing your soil before planting saves trouble later.
Transplanting Artichoke Seedlings
Transplant seedlings when the soil has warmed to at least 60°F (16°C) and all risk of frost is past. Space plants 3 to 4 feet apart in rows 4–6 feet apart. Crowded plants compete for light and nutrients, reducing your harvest.
Water seedlings well before planting. Dig a hole slightly larger than the root ball of each seedling. Gently remove the plant from its pot, place it in the hole, and backfill with soil. Firm the soil gently around the base.
Water deeply after transplanting to settle the roots. Mulch around each plant with straw or compost to keep the soil moist and block weeds.
Caring For Artichoke Plants Throughout The Season
Once your seedlings are in the ground, the real work begins. Artichokes need consistent care to grow large, healthy buds.
Watering
Artichokes have deep roots but need regular moisture, especially as buds form. Water plants deeply once or twice a week, soaking the soil to at least 6 inches. In hot, dry weather, increase watering to prevent stress, which can cause small or tough buds.
A layer of mulch helps keep soil moisture even. Avoid overhead watering late in the day—wet leaves can promote disease.
Feeding
Every 4–6 weeks, feed artichokes with a balanced fertilizer or side-dress with compost. For best results, use a slow-release fertilizer at planting, then supplement with liquid feed during the growing season.
Weeding And Mulching
Keep the area around your plants weed-free. Weeds compete for nutrients and water. A mulch layer (2–3 inches) of straw, leaves, or grass clippings blocks weeds and keeps the soil cool.
Supporting Plants
In windy areas, large artichoke plants can topple. Use stakes or garden twine to support plants if needed, especially when heavy with buds.
Common Pests And Diseases
Artichokes are generally hardy, but they are not immune to trouble. Watch for these common pests and diseases:
- Aphids: Small, soft insects on leaves and buds. Wash off with water or use insecticidal soap.
- Slugs and snails: Eat holes in leaves, especially on young plants. Hand-pick at night or use slug traps.
- Botrytis (gray mold): Fuzzy gray spots on buds and leaves. Improve air flow and avoid overhead watering.
- Powdery mildew: White powder on leaves. Remove affected leaves and increase sunlight.
A healthy, well-fed plant resists pests better. Inspect your plants weekly so you can catch problems early.
Flower Bud Formation: The Critical Stage
Artichokes form buds in response to cool weather. For seed-grown artichokes, this usually happens in late spring or early summer, depending on when you started seeds. A few nights below 50°F (10°C) can trigger budding, even in first-year plants.
If your artichoke doesn’t form buds, it may need more time or colder nights. In hot climates, try giving plants a “vernalization” period indoors—move them to a cooler room (around 45°F/7°C) for 10 days before transplanting outside.
Harvesting Your Artichokes
Timing is everything. Harvest buds when they are still tight and firm—before the scales open and the flower starts to show. Cut the main bud with a sharp knife, leaving 1–2 inches of stem. Side buds will form after you cut the central one.
Each plant can produce 6–8 buds the first year (sometimes more). In warm climates, artichokes can produce for several years; in cold regions, treat them as annuals or dig and store the roots for next year.
For the best flavor, cook artichokes soon after harvest. Fresh artichokes have a nutty, sweet taste that is hard to beat.

Credit: seedtofork.com
Saving Seeds From Your Artichokes
If you want to save seeds for next year, let one or two buds open into flowers. After the flower fades, a fuzzy seed head will form. Wait until the head dries on the plant, then cut it and shake out the seeds.
Keep in mind: Seed from hybrid artichokes (like Imperial Star) may not produce plants identical to the parent. For true-to-type seeds, grow open-pollinated varieties and keep different types separated.
Artichokes In Containers: Is It Possible?
Not everyone has a big garden, but you can still grow artichokes in large containers. Choose pots at least 18–24 inches wide and deep. Use a high-quality potting mix, and feed and water regularly—containers dry out faster than garden beds.
Container artichokes need more attention but can be moved to shelter in extreme weather, which is helpful in hot or cold climates.
Comparing Seed-grown Vs. Division-grown Artichokes
If you are still deciding whether to grow from seed or buy divisions, here’s a quick comparison:
| Aspect | Seed-Grown | Division-Grown |
|---|---|---|
| Variety Choice | Wide range, including new hybrids | Limited to what nurseries offer |
| Cost | Low (many plants per packet) | High (each division costs more) |
| Disease Resistance | Often higher, especially from fresh seed | Can carry soil-borne diseases |
| Time to Harvest | First-year with certain varieties | Usually produces faster |
| Adaptation | Better local adaptation | Adapts less quickly |
Seed-grown artichokes offer more control and choice, but require more patience and care in the early stages.
Troubleshooting: Common Problems And Solutions
Even experienced gardeners face problems growing artichokes from seed. Here are some common issues and how to fix them:
- Poor germination: Use fresh seed, maintain soil temperature at 70–80°F, and soak seeds overnight.
- Leggy seedlings: Not enough light. Use grow lights 2–4 inches above seedlings for 14–16 hours daily.
- Yellow leaves: Overwatering or poor drainage. Let soil dry between waterings, and use well-drained mix.
- No buds: Not enough chilling. Try vernalizing seedlings or choose first-year-budding varieties.
- Buds turning brown: Fungal disease or heat stress. Increase air movement, avoid overhead watering, and harvest before heat waves.
One advanced tip: If you want a larger, earlier crop, pinch off the first small bud that appears. This encourages the plant to send up more side shoots, leading to multiple medium-sized buds instead of one large one.
Credit: sowrightseeds.com
Extending The Season: Overwintering Artichokes
In mild climates (USDA zones 8–11), artichokes grow as perennials and can survive winter. In colder zones, protect plants or lift roots for next year.
- In mild climates: After harvest, cut plants back to 6–8 inches. Mulch heavily with straw or leaves to protect from frost.
- In cold climates: Before hard freeze, dig up the root ball and store in damp peat moss in a cool, frost-free place. Replant in spring.
Never skip winter protection if you want your artichokes to return next year. Even a single cold snap can kill unprotected plants.
Practical Tips And Advanced Insights
Growing artichokes from seed is not just about following steps—it’s about understanding what the plant needs at each stage. Here are a few advanced insights that many beginners miss:
- Spacing: Artichokes need space to develop full-sized buds. Crowding leads to small, tight buds and increased disease.
- Early feeding: Seedlings benefit from a light feeding of fish emulsion or seaweed extract, which encourages root growth without burning delicate roots.
- Bud size vs. number: If you want larger buds, pinch off side shoots early. If you want more (but smaller) buds, let all the shoots grow.
- Pollinators: If you let some buds bloom, they attract bees and butterflies, improving pollination in your whole garden.
For more in-depth growing tips and variety information, check out the Wikipedia Artichoke page.

Credit: savvygardening.com
Frequently Asked Questions
How Long Does It Take To Grow Artichokes From Seed?
Most artichoke varieties take 150–180 days from seed to harvest. Early varieties like Imperial Star can produce buds in as little as 85–100 days if started indoors and transplanted at the right time.
Can Artichokes Survive Winter In Cold Climates?
Artichokes are not frost-hardy in most cold climates. In USDA zones 8–11, they overwinter in the ground with mulch. In colder areas, dig up the roots and store them indoors, then replant in spring.
Why Are My Artichoke Buds Small Or Not Forming?
This is often due to insufficient chilling or not enough sunlight. Choose varieties bred for first-year bud production, and make sure plants get at least 6 hours of sun daily. Heat stress and overcrowding can also reduce bud size.
Are Artichokes Hard To Grow From Seed?
Artichokes require patience and care, but they are not difficult if you follow the right steps. Starting indoors, providing enough light, and giving plants space and nutrients are key to success.
Can I Grow Artichokes In Containers?
Yes, you can grow artichokes in large containers (at least 18–24 inches wide and deep). Use rich potting mix, feed regularly, and water deeply to keep plants healthy.
Growing artichokes from seed is a project that pays off in both beauty and flavor. With careful planning, attention to detail, and the tips shared here, you can enjoy your own homegrown artichokes—even in the first year. The journey from tiny seed to impressive, edible flower bud is one of gardening’s most satisfying experiences.