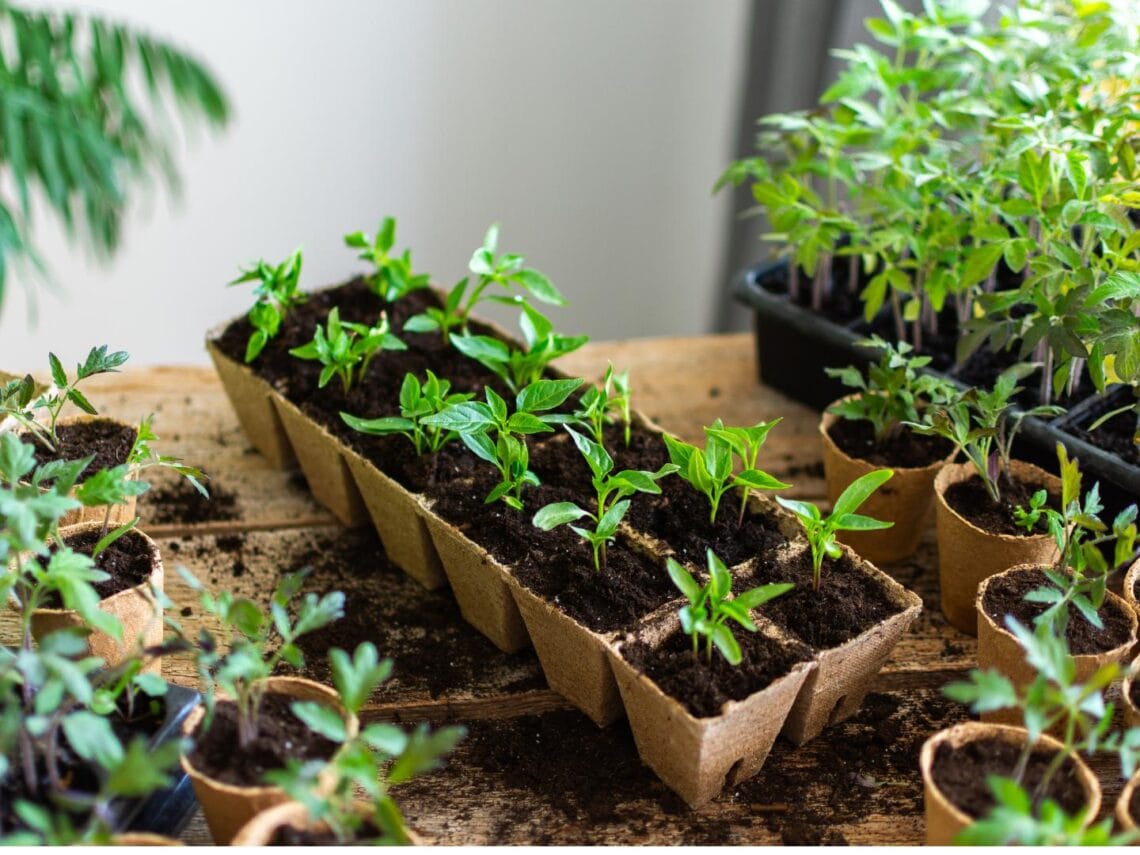
Every gardener has felt the excitement of seeds sprouting—tiny green shoots pushing through the soil, full of promise. But soon, these new plants often grow too close together, fighting for space and light. This is where thinning seedlings becomes essential. If you skip this simple step, your garden can become crowded, weak, and less productive. Many people are unsure how or when to thin seedlings, or worry about making mistakes. If that sounds familiar, you’re not alone.
This guide will walk you through everything you need to know about thinning seedlings: why it matters, the best techniques, the right timing, and tips to avoid common problems. You’ll also find practical examples and a few expert secrets that are rarely discussed. By the end, you’ll feel confident to thin your seedlings correctly and enjoy stronger, healthier plants.
Why Thinning Seedlings Matters
Thinning seedlings is more than just removing extra plants. It’s about giving each plant space to grow, develop roots, and access nutrients. Overcrowded seedlings often compete for resources, and this competition can lead to:
- Weak, spindly growth (known as “leggy” seedlings)
- Higher risk of diseases due to poor air flow
- Smaller harvests or poor flowering
- More pests attracted by stressed plants
Think of it like a crowded elevator—everyone is uncomfortable and struggles to move. Well-spaced plants grow stronger, resist disease, and produce more flowers or vegetables. Even the best seeds won’t reach their potential if they’re too close together.
When To Thin Seedlings
Getting the timing right is key. Thinning too early can damage delicate roots, but waiting too long can stunt growth. The best time to thin is usually:
- When seedlings have two “true leaves” (not the first pair, which are called cotyledons)
- When plants are 2–3 inches tall, depending on the variety
For some fast-growing vegetables, like radishes or lettuce, you may need to thin within 10–14 days. For slower crops, like tomatoes or peppers, you might wait 3–4 weeks.
Signs It’s Time To Thin
- Seedlings are touching or overlapping
- Growth has slowed or leaves look pale
- Plants look stretched or bent as they reach for light
If you’re unsure, it’s better to thin a little late than too early, but don’t wait so long that roots are completely tangled.

Credit: www.cannapot.com
How To Thin Seedlings: Step-by-step
Thinning sounds simple, but there’s a right way to do it. Here’s how to thin seedlings safely and effectively:
- Water seedlings a few hours before thinning. Damp soil reduces root disturbance.
- Choose the healthiest seedlings to keep. Look for sturdy stems, bright green leaves, and no signs of disease.
- Remove extras:
- If seedlings are far apart, gently pull out unwanted plants.
- If crowded, use small scissors to snip off extras at soil level. This prevents root damage to the seedlings you keep.
- Space remaining seedlings according to the seed packet’s instructions or the table below.
| Crop | Final Spacing | When to Thin |
|---|---|---|
| Carrots | 2 inches | 2 weeks after sprouting |
| Lettuce | 6–8 inches | 10–14 days after sprouting |
| Radishes | 1–2 inches | 7–10 days after sprouting |
| Tomatoes | 18–24 inches | 3–4 weeks after sprouting |
| Beets | 3–4 inches | 2–3 weeks after sprouting |
- Firm the soil gently around the remaining seedlings to support them.
- Water lightly to help plants recover.
Special Tip
For root crops, like carrots and beets, always snip unwanted seedlings at the soil line. Pulling can disturb roots and cause misshapen vegetables.
Choosing Which Seedlings To Keep
Not all seedlings are equal. Select the strongest ones for the best results. Here’s what to look for:
- Sturdy stems: Choose seedlings that stand upright.
- Vivid color: Dark green leaves show good health.
- Even growth: Avoid plants that are much taller or shorter than others.
- No damage: Skip seedlings with yellow spots, holes, or twisted leaves.
If you see two healthy seedlings right next to each other, pick the one furthest from the edge of the row or container. This gives it more space to grow.
Thinning Different Types Of Plants
Different plants require different thinning methods. Here’s a quick guide:
Leafy Greens (lettuce, Spinach, Kale)
- Thin to 6–8 inches apart.
- You can eat the thinned seedlings as microgreens.
Root Crops (carrots, Beets, Radishes)
- Thin early, when plants are 1–2 inches tall.
- Always snip, never pull.
Flowers
- Thin to the recommended spacing on the packet.
- Some flowers, like zinnias or cosmos, can be transplanted, but most are best thinned with scissors.
Herbs
- Thin to 4–6 inches apart.
- Basil and cilantro seedlings can be gently transplanted if spaced too close.
Thinning Seedlings In Containers Vs. Garden Beds
Growing in containers or raised beds changes how you thin seedlings. Here’s a comparison:
| Setting | Key Differences | Tips |
|---|---|---|
| Containers | Limited root space, dries out faster | Thin earlier; water often; fertilize lightly |
| Garden Beds | More room for roots, slower drying | Thin at standard times; mulch after thinning |
| Raised Beds | Warmer soil, quick growth | Monitor daily; thin as soon as seedlings touch |
In containers, crowded seedlings compete more for water and nutrients. Don’t hesitate to thin hard—even if it means removing a lot. Your remaining plants will reward you.
Mistakes To Avoid When Thinning Seedlings
Thinning seems easy, but a few common mistakes can set you back. Watch out for these:
- Waiting too long: Overcrowded roots get tangled, making thinning harder and more risky.
- Pulling in dry soil: This damages roots. Always water first.
- Removing the strongest plants: Double-check before snipping.
- Leaving too many plants: Be bold! If the packet says “thin to 6 inches,” do it.
- Transplanting everything: Not all seedlings survive transplanting. Only move strong, undamaged ones.
Beginner insight: Many new gardeners believe more seedlings mean more harvests. Actually, the opposite is true—fewer, well-spaced plants usually yield better.
Thinning Seedlings Indoors Vs. Outdoors
Indoor seedlings are often started in trays or pots, while outdoor ones grow in garden soil. The process is similar, but there are a few differences:
- Indoor seedlings: Often need thinning earlier, as trays fill up fast. Use scissors to avoid root disturbance.
- Outdoor seedlings: Can sometimes be gently pulled, especially if spaced further apart.
If you use soil blocks or plug trays, plant only one seed per cell to avoid thinning later. For seedling trays with several seeds, thin to one plant per cell as soon as possible.
What To Do With Thinned Seedlings
It feels wasteful to throw away healthy plants. The good news: many thinned seedlings are edible or transplantable.
- Eat them: Leafy greens, herbs, and even beet greens are delicious as microgreens in salads or sandwiches.
- Transplant: If you thinned early and roots are not tangled, you can gently move extra seedlings to other parts of your garden.
- Compost: Add thinned plants to your compost pile for future soil health.
Advanced insight: For rare or expensive seeds, transplant the healthiest thinned seedlings into separate pots. With gentle handling, survival rates can be high.
Thinning For Succession Planting
If you want a continuous harvest, try succession planting—sowing seeds every 1–2 weeks. Each time, thin seedlings as usual, and you’ll have fresh crops all season.
- Lettuce: Sow and thin every 2 weeks for constant salads.
- Radishes: Plant and thin every 10 days for steady supply.
This method works best with fast-growing vegetables and keeps your garden productive.
Tools And Supplies For Thinning Seedlings
You don’t need fancy tools, but a few simple items make the job easier:
- Fine-point scissors or snips: For precise thinning without disturbing roots.
- Tweezers: Useful for tiny seedlings or crowded trays.
- Watering can: For moistening soil before and after thinning.
- Seedling dibber: Optional tool for transplanting small seedlings.
Clean tools before use to avoid spreading diseases. Wipe with alcohol if moving between different types of plants.
How To Thin Seedlings Without Hurting The Rest
Gentle handling is important, especially for crowded or valuable seedlings. Here’s how to reduce stress:
- Hold leaves, not stems: Leaves recover faster if damaged; stems may not.
- Water before and after: Keeps soil soft and plants hydrated.
- Work in the evening or on a cloudy day: Less sun stress after thinning.
- Firm soil gently: Prevents root exposure.
If you’re thinning a large area, work in small sections and take breaks to check on your plants.
Credit: homesteadandchill.com
How Many Seedlings To Leave
This depends on the plant and your goals. Always check the seed packet, but general guidelines are:
- Carrots, radishes, beets: One plant every 1–2 inches
- Lettuce, spinach: One plant every 6–8 inches
- Tomatoes, peppers: One plant per cell or pot, transplant to final spacing later
If you want to experiment, leave a few plants closer together and compare their growth. Often, the spaced seedlings will outperform crowded ones.
Troubleshooting Problems After Thinning
Sometimes plants look weak or wilt after thinning. Don’t panic—many will bounce back. Here’s what to do:
- Wilted seedlings: Water gently, provide shade if outdoors.
- Yellow leaves: Wait a few days; if new growth looks green, plants are fine.
- Slow growth: Check for proper spacing and sunlight. Fertilize lightly if needed.
If you see many plants dying, review your thinning process. Did you water first? Did you cut instead of pull? These details make a big difference.
Thinning Seedlings: Common Questions And Myths
Many gardeners hear advice about thinning that isn’t always true. Let’s clear up a few myths:
- “You must thin all at once.” Not true. You can thin in stages—remove the weakest, then thin again later.
- “Don’t eat thinned seedlings.” Many are safe and tasty, especially leafy greens.
- “All plants need thinning.” Some large seeds (beans, corn) can be planted at final spacing and may not need thinning.
Eco-friendly Thinning Practices
Thinning can feel wasteful, but you can reduce your impact:
- Save thinned seedlings as microgreens, or share with friends.
- Compost leftovers to recycle nutrients.
- Sow carefully: Place seeds further apart to reduce the need for heavy thinning.
- Label rows clearly: Avoid accidental over-seeding.
If you use pelleted seeds (seeds coated for easy handling), you may need less thinning.
Data: Effects Of Thinning On Crop Yields
Research proves that thinning improves garden results. For example:
- A study found that thinned carrot beds produced 30% higher yields than unthinned beds.
- Lettuce thinned to 8-inch spacing had 40% fewer disease problems than crowded beds.
- Tomato plants thinned to one per cell grew 25% larger than groups of three.
Here’s a quick comparison of yield differences:
| Crop | Yield (Thinned) | Yield (Unthinned) |
|---|---|---|
| Carrots (per sq ft) | 2 lbs | 1.4 lbs |
| Lettuce (per plant) | 0.5 lbs | 0.3 lbs |
| Radishes (per row ft) | 15 roots | 10 roots |
So, if you want more vegetables or flowers, thinning is a must.
Thinning Alternatives: Do You Always Need To Thin?
There are a few situations where you can avoid or reduce thinning:
- Precision seeding: Plant one seed per spot. This works well for large seeds but is tricky for tiny ones.
- Seed tapes: Seeds are glued to paper at correct spacing. Just lay them in the soil.
- Soil blocks or plug trays: Start one seed per cell for easy transplanting.
However, with small seeds (carrots, lettuce), some thinning is almost always needed.
Real-world Example: Thinning Carrot Seedlings
Carrots are a classic example. Their seeds are tiny, so people often over-seed. If you don’t thin, you’ll get a “hairy” cluster of roots instead of nice, straight carrots.
Here’s a typical process:
- Sow carrot seeds in a row.
- When seedlings are about 2 inches tall, thin to 1 inch apart.
- As they grow, thin again to 2 inches apart, using the small ones as baby carrots.
This two-stage thinning gives you early snacks and a better final harvest.
Advanced Tips For Thinning Success
If you want to go beyond the basics, try these expert tips:
- Pre-moisten soil before planting: Seeds stick better and don’t clump.
- Use a small paintbrush for thinning tiny seedlings—move extras gently aside.
- Mark final spacing with a stick before sowing, as a visual guide.
- Harvest thinned seedlings as baby greens for salads or stir-fries.
And remember: it’s better to thin twice than to try and do it all at once.

Credit: www.budtrainer.com
When Not To Thin Seedlings
A few crops rarely need thinning:
- Beans, corn, peas: Large seeds can be spaced out at planting.
- Squash, pumpkins, melons: Usually planted 2–3 seeds per hill, then thinned to the strongest.
- Potatoes: Planted as tubers, not seeds.
But for most leafy greens, root crops, and annual flowers, thinning is essential.
Frequently Asked Questions
Why Can’t I Just Let All The Seedlings Grow Together?
If you let all seedlings grow without thinning, they compete for light, water, and nutrients. This leads to weak, spindly plants and smaller vegetables or flowers. Crowded conditions also increase disease risk. Thinning gives each plant the space it needs to thrive.
Can I Transplant Seedlings Instead Of Throwing Them Away?
Yes, you can transplant extra seedlings, especially if you thin early and are careful not to damage roots. Herbs, leafy greens, and flowers often transplant well. Water seedlings first and move them on a cloudy day for best results.
How Do I Know Which Seedlings To Remove?
Choose the strongest, healthiest seedlings to keep. Look for upright stems, deep green leaves, and no damage. Remove any that look weak, pale, or twisted. If two healthy seedlings are close together, keep the one with more space around it.
Is Thinning Seedlings Really Necessary?
For most crops, yes. Thinning is key to strong, healthy plants and good yields. Some large-seeded crops like beans or squash can be spaced at planting, but most small-seeded vegetables and flowers need thinning. Skipping this step usually means a weaker, less productive garden.
Where Can I Learn More About Growing Healthy Seedlings?
For more detailed information, check out the University of Minnesota Extension’s seed starting guide. They offer clear, research-based advice for gardeners at all levels.
Whether you’re sowing your first seeds or managing a large garden, learning to thin seedlings correctly is one of the most important skills you can master. It may feel difficult at first—nobody likes removing healthy plants—but the results speak for themselves.
With a few simple steps, you’ll enjoy stronger, healthier, and more productive plants all season long. Happy gardening!