
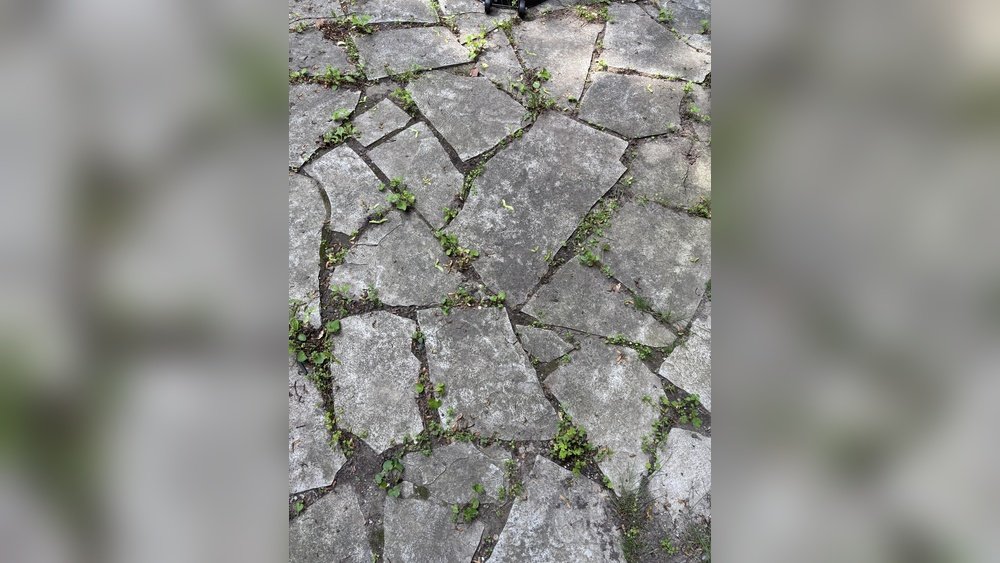
If you have a patio, you probably enjoy spending time outside with family and friends. But after a few years, those patio pavers might start to look uneven or even become a tripping hazard. Uneven pavers can be frustrating—they collect water, make furniture wobble, and spoil the look of your outdoor space. The good news is you don’t need to be a pro to fix them. With the right tools, some patience, and smart planning, you can level uneven patio pavers yourself and restore your patio’s beauty and safety.
This article guides you through everything you need to know—from identifying the cause of unevenness to step-by-step leveling and pro tips that even experienced homeowners sometimes miss. Whether you have a few problem spots or a large area that’s shifted, you’ll learn how to get your patio flat and solid again.
Why Patio Pavers Become Uneven
Patio pavers usually rest on a base of sand or gravel, which gives a smooth surface and helps with drainage. Over time, several things can cause pavers to move or sink:
- Soil movement: Heavy rain, freeze-thaw cycles, or poor drainage can make the ground shift.
- Improper base preparation: If the base wasn’t compacted well or is too thin, pavers may settle unevenly.
- Tree roots: Roots can grow under pavers and lift them.
- Heavy loads: Placing large planters or vehicles on the patio can compress the base.
- Ants or burrowing animals: They can dig under the pavers, causing them to drop.
Understanding the cause helps you choose the best repair method. For example, if poor drainage is the problem, just leveling isn’t enough—you’ll need to fix the drainage too.
Tools And Materials You’ll Need
Before starting, gather the right tools and materials. This makes the process smoother and prevents delays.
| Tool | Purpose |
|---|---|
| Flathead screwdriver or pry bar | To lift pavers safely |
| Rubber mallet | To tap pavers into place without damage |
| Level (2–4 feet) | To check flatness |
| Garden trowel | To adjust sand or gravel base |
| Push broom | To sweep sand into joints |
| Plate compactor (optional) | For large patios, compacts the base evenly |
Materials:
- Replacement sand (polymeric or regular)
- Gravel (if your base needs rebuilding)
- Weed barrier fabric (optional, for root problems)
- Edge restraints (if the border is shifting)
- Gloves and knee pads (for comfort and safety)
Pro tip: Buy a bit more sand and gravel than you think you’ll need. It’s better to have extra than to run out mid-project.

Credit: www.reddit.com
Inspecting And Planning Your Repair
Before you start pulling up pavers, take time to inspect your patio and plan your approach.
Step 1: Identify Problem Areas
Walk across your patio and look for:
- Pavers that rock back and forth
- Dips that collect water after rain
- Raised edges or corners (trip hazards)
- Gaps between pavers
Mark uneven areas with chalk or painter’s tape so you don’t miss any.
Step 2: Check For Underlying Issues
Are there visible signs of ants, weeds, or roots? Is water pooling in one spot? Fixing the surface won’t help if you don’t address these problems. For example, if you find a lot of ants, consider treating the area with an outdoor-safe insecticide before relaying the pavers.
Step 3: Decide How Much To Lift
If only a few pavers are uneven, you can fix them individually. If a whole section has sunk, you’ll need to lift all the affected pavers. For patios with widespread problems, it might be time to rebuild the base in those spots.
Non-obvious insight: Always check the edge restraints (the plastic or metal strips at the patio’s border). If they’ve moved, the problem may return even after leveling.
Step-by-step: How To Level Uneven Patio Pavers
Here’s a clear process for leveling your pavers. This method works whether you have concrete, clay, or natural stone pavers.
Step 1: Remove The Uneven Pavers
- Use a flathead screwdriver or pry bar to gently lift the uneven paver. Insert it in the joint and carefully lever the paver out.
- For large or stuck pavers, use two tools on opposite sides for better control.
- Place removed pavers on a soft surface to avoid chipping.
Tip: Take a photo before removing pavers if the pattern is complex.
Step 2: Inspect And Clean The Base
- Remove any old sand or debris under the paver.
- Check for roots, ant nests, or signs of water damage. Remove any roots and treat pests if needed.
- If the base is wet or muddy, let it dry out before continuing.
Step 3: Add Or Adjust Base Material
- Add coarse sand (like paver sand) to low spots. For deep dips (over 1 inch), use crushed stone or gravel first, then sand.
- Spread the material evenly and compact it firmly. For small areas, a hand tamper works; for bigger sections, rent a plate compactor.
- The base should sit about 1/8 inch higher than the surrounding pavers (it will settle when you replace the paver).
Step 4: Level The Base
- Use a level to check that the repaired spot matches the height and slope of the surrounding patio.
- For drainage, patios usually need a very slight slope (about 1/4 inch per foot) away from buildings.
Step 5: Replace The Pavers
- Set each paver back in place, aligning it with its neighbors.
- Tap gently with a rubber mallet to seat it firmly. If the paver is too high, remove some sand; if too low, add more and retamp.
Step 6: Refill The Joints
- Sweep polymeric sand or regular sand into the joints.
- For polymeric sand, mist the joints lightly with water to activate the binding agent (follow package instructions).
- Recheck the level and adjust if needed.
Step 7: Compact And Finish
- Walk over the repaired area or use a compactor for larger sections.
- Sweep away excess sand.
- Water the area if using polymeric sand to set the joints.
Non-obvious insight: If you have pavers with built-in spacers, make sure sand fills the entire joint. Empty joints can allow pavers to shift again.
Dealing With Large Sinking Areas
Sometimes, the problem isn’t just a few pavers—it’s a whole section that’s dropped several inches. This usually means the base has failed or the soil underneath has settled.
How To Fix Large Sunken Areas
- Remove all pavers in the affected area, carefully stacking them in order.
- Dig out the base material until you reach solid, undisturbed soil.
- Lay new crushed gravel (4–6 inches thick) and compact it in layers.
- Add 1 inch of sand and level it.
- Replace the pavers, tapping them into place, and refill the joints.
Pro tip: Consider installing a geotextile fabric between the soil and gravel. This helps prevent mixing and future settling.
Addressing Pavers Raised By Roots
Tree roots can push pavers up over time, creating dangerous bumps.
- Remove the affected pavers and clear out any roots. Use a pruning saw or loppers to cut them back.
- If roots are large, avoid cutting them all; this can harm the tree. In these cases, consider rerouting the patio or adding a flexible base.
- Replace base material and reset pavers as described above.
Caution: Removing roots near a tree trunk can destabilize the tree or cause it to die. If you’re unsure, consult an arborist.
Fixing Edging Problems
If the patio edges are moving, the whole area can become uneven.
- Check that edge restraints are secure and sit tight against the pavers.
- Reinstall or replace broken restraints.
- Add extra base material under the edges before resetting the pavers.
Edge problems often lead to gaps where weeds grow or sand washes out. Fixing the border prevents repeated repairs.
Leveling Tips For Different Paver Types
Not all pavers behave the same way. Here’s how to adjust your approach for the most common types.
| Paver Type | Leveling Considerations |
|---|---|
| Concrete | Uniform thickness; easy to reset; heavy, so compact base well |
| Clay brick | Often thinner; prone to chipping, so handle with care |
| Natural stone | Irregular shape and thickness; may require extra sand for leveling |
| Porcelain or other manufactured | Very flat; requires precise leveling to avoid rocking |
Non-obvious insight: For irregular stone pavers, use a small trowel and set each piece individually, adding or removing sand as needed for a custom fit.

Credit: www.familyhandyman.com
Preventing Uneven Pavers In The Future
Once your patio is flat again, you want it to stay that way. Here’s how to keep it looking good for years.
Maintain Drainage
- Ensure the patio slopes slightly away from the house.
- Keep gutters and downspouts clear so water doesn’t pool near the patio.
- Fix low spots in your yard that direct water toward the patio.
Control Weeds And Pests
- Use polymeric sand in the joints. It hardens and blocks weeds and ants.
- Remove weeds as soon as they appear.
- Treat ant colonies early before they tunnel under the base.
Protect Edges
- Avoid driving heavy equipment or parking on the patio.
- Re-secure edge restraints if they move.
- Add extra gravel or sand to support the border during repairs.
Seasonal Checks
- Inspect the patio each spring and fall. Fix any wobbly pavers before they get worse.
- In winter, use a plastic shovel instead of metal to avoid chipping pavers.
Common Mistakes To Avoid
Even experienced DIYers make these errors:
- Skipping base compaction: Loose sand or gravel lets pavers shift quickly.
- Adding too much sand at once: This creates a spongy surface. Add and compact in thin layers.
- Ignoring underlying issues: Fix drainage, pests, and roots before relaying pavers.
- Not matching the slope: Patios need a gentle slope for water runoff. A perfectly flat patio can create puddles.
- Improper sand type: Use coarse paver sand, not play sand, for best results.
Pro tip: If you’re unsure about the slope, lay a long board across the patio and place a level on top. The bubble should just touch the line for a 1/4 inch per foot slope.
Credit: landzie.com
How Long Does It Take To Level Patio Pavers?
The time needed depends on the size of the area and the cause of unevenness.
| Project Size | Estimated Time |
|---|---|
| 1–2 pavers | 30–60 minutes |
| Small area (10–20 sq ft) | 2–3 hours |
| Large section (50+ sq ft) | Half to full day |
| Complete patio | 1–2 days (with help) |
Non-obvious insight: Letting the base dry out overnight can make compaction more effective, especially after rain.
When To Call A Professional
Most uneven paver problems are DIY-friendly, but some situations need expert help:
- The patio is sinking due to a major drainage problem or soil collapse.
- Large tree roots are involved and you’re not sure how to proceed.
- The base is clay soil that keeps moving even after repairs.
- You’re physically unable to lift heavy pavers safely.
A professional can rebuild the base, redesign drainage, or handle complex repairs faster. If you’re considering a full patio replacement, a pro can also help choose modern materials and layouts.
Cost Of Leveling Patio Pavers
Doing it yourself is much cheaper than hiring a professional. Here’s a rough breakdown:
- DIY materials: $20–$100 (sand, gravel, polymeric sand, tool rental)
- Professional repair: $5–$15 per square foot (labor and materials)
- Full patio rebuild: $15–$30+ per square foot
If you need to buy or rent a plate compactor, expect to pay $40–$60 per day.
Pro tip: Many hardware stores let you rent tools by the hour, which can save money on small jobs.
Final Thoughts
Leveling uneven patio pavers is a project most homeowners can tackle with patience and the right steps. The key is to fix both the surface and the underlying cause, whether it’s poor drainage, a bad base, or pests. Don’t rush—compact each layer and check levels often.
Small mistakes now lead to big problems later.
With your patio level and strong, you’ll enjoy a safer, better-looking outdoor space for years. And now you know how to keep it that way, too.
If you want more details about paver types and long-term maintenance, the Better Homes & Gardens website has excellent resources.
Frequently Asked Questions
How Do I Know If My Patio Pavers Need To Be Relaid Or Just Leveled?
If only a few pavers are slightly out of place and the base feels firm, you can usually just level them by adding or removing sand. If large areas have sunk or you find the base is soft, it’s best to remove and relay the pavers after fixing the base.
What Type Of Sand Should I Use Under Pavers?
Use coarse paver sand (sometimes called “concrete sand” or “bedding sand”). It allows for proper drainage and compacts well. Avoid fine or play sand—it shifts and washes out easily.
Can I Level Patio Pavers Without Removing Them?
No. You need to lift the uneven pavers to fix the base underneath. Trying to force them level from above can crack or chip the paver and won’t address the cause.
How Often Do I Need To Re-level My Patio Pavers?
With a properly built base and regular maintenance, most patios only need spot leveling every few years. If you have ongoing drainage or root problems, more frequent repairs may be needed until those issues are fixed.
Is Polymeric Sand Better Than Regular Sand For Joints?
Polymeric sand hardens when wet, which helps lock pavers in place and prevent weeds and ants. It’s more expensive but gives better long-term results, especially in climates with heavy rain or freeze-thaw cycles.
Leveling uneven patio pavers takes effort, but with these tips and careful work, you can restore your patio to a smooth, safe, and attractive condition.