
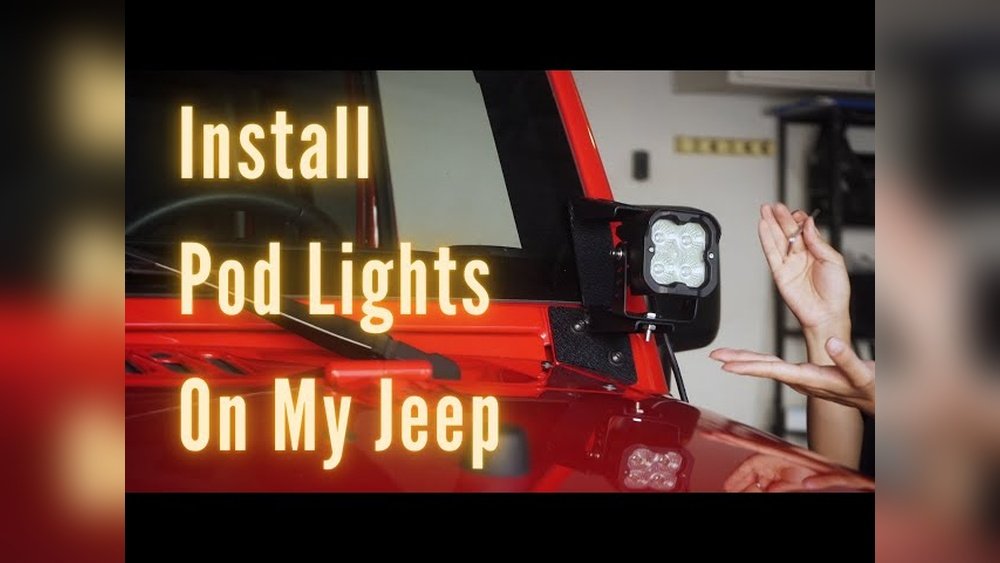
If you drive a Jeep Wrangler, you know how important good lighting is for adventures on and off the road. Pod lights are small, powerful lights you can mount almost anywhere on your Jeep. They help you see better at night, on trails, or in bad weather. Many Jeep owners add pod lights to get a sharp, custom look and better visibility. But installing them can feel confusing if you’re new to vehicle mods.
This guide will help you install pod lights on your Jeep Wrangler with confidence. You’ll learn what tools you need, how to choose the right lights, and the step-by-step process for a safe, durable setup. You’ll also find expert tips and answers to common questions, so you get it right the first time.
Why Add Pod Lights To Your Jeep Wrangler?
Pod lights are popular because they offer real benefits:
- Better visibility at night: They light up dark trails, roads, and campsites.
- Safer driving: You spot obstacles sooner in fog, rain, or snow.
- Custom style: They give your Jeep a unique, rugged look.
- Flexible mounting: You can put them on the hood, bumper, windshield, or roof.
Some Jeep owners use pod lights for work, camping, or emergencies. Others add them for off-road adventures or just for style. No matter your reason, knowing how to install them safely is key.
Choosing The Right Pod Lights
Not all pod lights are the same. Before you start, think about these factors:
1. Light Output And Beam Type
Pod lights use LEDs for strong, efficient light. Check these details:
- Lumens: Higher lumens mean brighter lights. Most pod lights range from 1,200 to 9,000 lumens.
- Beam pattern: Spot beams go far; flood beams light up wide areas. Combo beams offer both.
If you drive fast on trails, spot beams help see far ahead. For slow, technical driving or campsites, flood beams are better.
2. Size And Mounting Location
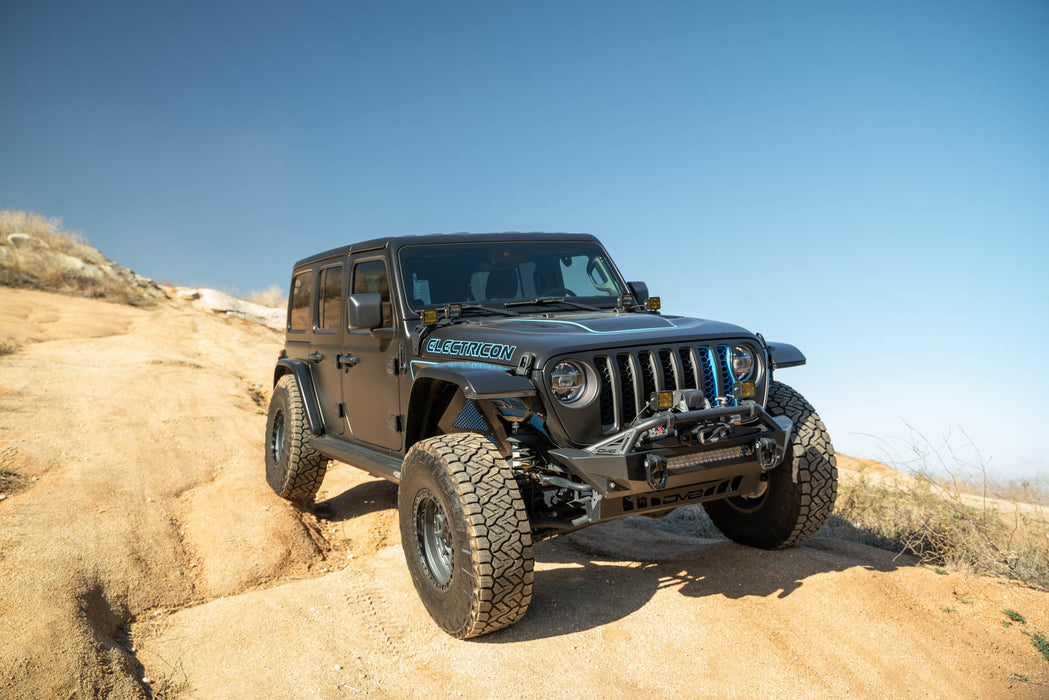
Most pod lights are 2-inch to 4-inch squares or rounds. Think about where you want to install them:
- A-pillar (windshield hinge): Popular spot for extra visibility.
- Front bumper: Good for wide, low light.
- Roof or rack: Maximum spread, but can cause glare.
Check your local laws. Some states have rules about extra lights on vehicles.
3. Build Quality And Waterproofing
Look for lights rated IP67 or IP68. These ratings mean the lights are dust-proof and can handle water.
Aluminum housings and polycarbonate lenses last longer and resist damage from rocks or weather.
4. Wiring And Switches
Some kits come with a wiring harness and switch. If not, you’ll need to buy these separately. Make sure the wiring is thick enough for your lights.
5. Brand And Warranty
Trusted brands like Rigid Industries, Baja Designs, KC HiLiTES, and Nilight are popular among Jeep owners. Look for at least a 1-year warranty.
Example Comparison: Popular Pod Lights
Here’s a quick look at three top pod light options for Jeep Wranglers:
| Brand / Model | Lumens | Beam Type | Waterproof Rating | Warranty |
|---|---|---|---|---|
| Rigid D-Series Pro | 3,168 | Spot / Flood / Combo | IP68 | Limited Lifetime |
| Baja Designs Squadron Sport | 3,150 | Spot / Flood | IP69K | Limited Lifetime |
| Nilight 18W | 1,260 | Flood | IP67 | 2 Years |
Credit: dv8offroad.com
Tools And Materials Needed
Before you start, gather these tools and parts:
- Pod lights (2 or more)
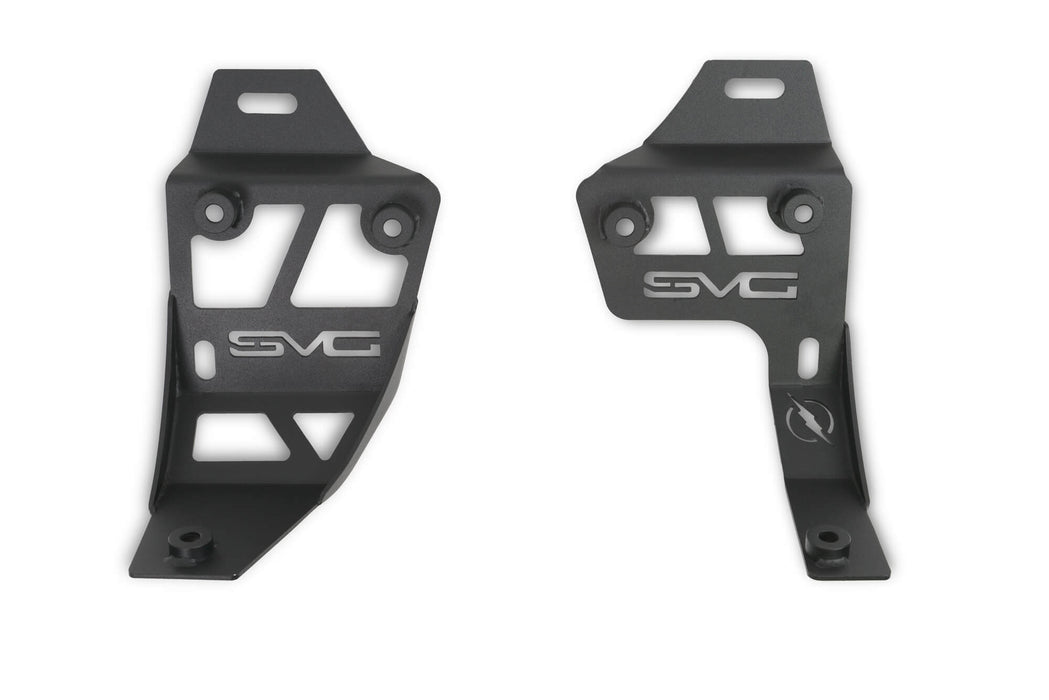
- Mounting brackets (fit your Jeep and light type)
- Wiring harness with relay and fuse
- On-off switch (dash or A-pillar)
- Wire crimper and stripper
- Socket wrench set
- Screwdrivers (flat and Phillips)
- Electrical tape and heat shrink tubing
- Zip ties (for neat wiring)
- Drill (if needed for custom mounts)
- Rust-preventive paint (touch up exposed metal)
You may need extra bolts or washers if your kit doesn’t include them. Always double-check the instructions that come with your lights.
Safety First: Tips Before You Begin
Working with your Jeep’s electrical system means safety matters. Here are key rules:
- Disconnect the battery before any wiring work. This prevents shorts and shocks.
- Wear gloves and eye protection when drilling or cutting.
- Read all instructions for your specific lights and Jeep model.
- Test-fit brackets and lights before drilling any holes.
- Check for wire clearance: Make sure wires won’t rub on hot engine parts or sharp edges.
Many beginners forget to disconnect the battery or skip the test-fit step. This can lead to blown fuses, damage, or even fire.
Step-by-step Guide: Installing Pod Lights On Jeep Wrangler
Let’s walk through the process. This example covers adding a pair of pod lights to the A-pillar (windshield hinge) — a common spot for Jeep Wranglers.
1. Plan Your Mounting Location
Stand by your Jeep and hold the pod lights where you want to mount them. Check:
- Can you open the hood fully?
- Will the lights block your view or windshield wipers?
- Is there room for the bracket and wiring?
Mark the spot with painter’s tape if needed. For most A-pillar setups, you don’t need to drill. The bracket uses existing bolts.
2. Remove The Jeep’s A-pillar Bolts
Open your hood. Find the two bolts at the base of the windshield hinge (each side). Use a socket wrench to remove them. Save the bolts; you’ll reuse them.
If your bracket uses new hardware, follow those instructions.
3. Install The Brackets
Line up the mounting bracket with the holes. Attach it using the bolts you just removed. Tighten them, but don’t over-tighten (you don’t want to strip the threads).
Some brackets let you adjust the angle of the light. Leave them a bit loose so you can aim the lights later.
4. Mount The Pod Lights
Attach each pod light to its bracket. Most use a simple bolt and nut. Adjust the angle so the lights point where you want.
Tighten the bolts securely. Make sure the lights don’t move if you push them.
5. Route The Wiring Harness
Your wiring harness should have:
- A relay (for high power)
- An in-line fuse (for safety)
- Connectors for the lights
- Switch wires (to mount inside the Jeep)
Lay out the harness in the engine bay. Plan your wire path:
- Keep wires away from hot parts (engine, exhaust).
- Avoid sharp edges that can cut wires.
- Use zip ties to hold wires in place.
Start by running the power wire (usually red) toward the battery. Route the switch wire through the firewall (the wall between engine and inside the Jeep). There’s often a rubber grommet you can use. If not, you may need to drill a small hole — be careful not to hit anything important.
6. Connect The Pod Lights
Plug the connectors into your pod lights. If your lights have bare wires, use crimp connectors or solder for a solid connection. Cover connections with heat shrink tubing or electrical tape to keep out water.
7. Wire The Relay And Fuse
- Connect the relay’s power wire (with the fuse) to the positive battery terminal.
- Connect the relay’s ground wire to a clean, unpainted metal spot on the Jeep’s body.
- Connect the relay’s output wires to your pod lights.
Double-check all connections.
8. Install The Switch
Mount the switch inside your Jeep where you can reach it easily — often on the lower dash or A-pillar. Use a drill if needed. Feed the switch wire through the firewall and connect it to the relay harness.
Test-fit everything before making holes.
9. Test The Lights
Reconnect the battery. Turn on the switch. The pod lights should come on with no flicker or delay.
Check for:
- All lights working
- No hot wires or burning smell
- Switch turns lights off and on cleanly
If something doesn’t work, turn off the Jeep, disconnect the battery, and check your wiring.
10. Secure And Finish
Use zip ties to secure all wires. Make sure nothing hangs near moving parts or hot areas.
If you drilled any holes, touch up with rust-preventive paint.
Aim the pod lights where you want — usually just below the hood line so they light up the trail, not the sky.
Common Mounting Options For Jeep Wrangler
Jeep Wranglers are flexible. You can mount pod lights in many places. Here’s a look at the most popular spots:
| Mounting Location | Pros | Cons | Common Uses |
|---|---|---|---|
| A-Pillar / Windshield Hinge | Easy to install, good visibility | May reflect on hood, some wind noise | Trail lighting, daily driving |
| Front Bumper | Low glare, wide spread | Can be blocked by brush guard | Fog, snow, on-road |
| Roof / Light Bar | Maximum coverage, dramatic look | More wind noise, harder wiring | Camping, off-road, night trails |
| Rear (for backup) | Helps with reversing, campsite light | Extra wiring, rare for front lighting | Backup, work lights |
Credit: dv8offroad.com
Wiring Tips And Best Practices
Even high-quality pod lights can fail if the wiring is poor. Follow these best practices:
- Use a relay and fuse. This protects your Jeep’s electrical system.
- Run wires neatly. Avoid moving parts, sharp edges, and heat sources.
- Ground to bare metal. Paint or rust can stop the ground from working.
- Seal all connections. Use heat shrink tubing or quality tape to keep water out.
- Label wires if you may add more lights later.
One detail many skip: If you plan to add more accessories (like a light bar or winch), consider a switch panel system. This gives you one neat control box for all your aftermarket wiring.
Adjusting And Aiming Your Pod Lights
Aiming your pod lights is as important as installing them. Poorly aimed lights can blind other drivers or waste your money.
- Trail lights: Aim just above the hood line for best distance without glare.
- Flood lights: Angle slightly down and out for wide coverage.
- Work or camp lights: Point at the ground or area you want to light.
Adjust at night on a flat surface. Ask a friend to help check the beam pattern.
Maintenance And Troubleshooting
Pod lights are tough, but they need care:
- Clean the lenses regularly to remove dirt and bugs.
- Check bolts and brackets every few months. Off-road bumps can loosen them.
- Inspect wiring for cuts, wear, or loose connections.
If a light stops working:
- Check the fuse first.
- Test the switch and relay.
- Inspect all wiring and grounds.
If you see condensation inside the lens, the seal may be broken. Many brands offer replacement lenses or seals.
Real-world Examples: Jeep Owners’ Pod Light Setups
Hearing from other Jeep owners can help you decide what works. Here are three common setups:
- Simple A-Pillar Pair: Two 3-inch flood pods on the windshield hinge. Great for trail use and easy to install. Most owners report 1-2 hours install time.
- Bumper and Roof Combo: Two spot pods on the bumper for road use, plus a row of floods on the roof rack for camping. Takes longer to wire but covers every angle.
- Switch Panel System: Four pod lights (two front, two rear) wired to a switch panel like sPOD or Switch-Pros. All wiring is clean and controlled from the dash.
Most owners say the biggest improvement is night trail visibility. A few report wind noise from roof mounts above 50 mph, which you can reduce with rubber gaskets.
Common Beginner Mistakes To Avoid
Many first-timers make these mistakes:
- Skipping the relay or fuse: This can fry your Jeep’s wiring.
- Drilling without checking behind: You can hit wires or airbags. Always check!
- Poor grounds: If your lights flicker, the ground is often the problem.
- Over-tightening brackets: This can strip bolts or crack the light housing.
Take your time and check each step. If you’re unsure, ask on Jeep forums or watch install videos for your Wrangler year.
Cost Breakdown: What To Expect
Installing pod lights isn’t free, but it can be affordable if you do the work yourself. Here’s a rough cost guide:
| Item | Low-End Cost | High-End Cost | Notes |
|---|---|---|---|
| Pod Lights (Pair) | $35 | $300+ | Brand and power matter |
| Brackets | $20 | $75 | Model-specific fit |
| Wiring Harness | $15 | $50 | Switch, relay, fuse included? |
| Professional Install | $100 | $300 | Save by DIY |
So, you can spend as little as $70 for a basic DIY install, or over $700 for high-end lights and pro installation.
When To Call A Professional
DIY is rewarding, but sometimes it’s smart to hire a pro:
- If you’re not comfortable with wiring
- If your Jeep has a custom electrical system (like a Rubicon with factory aux switches)
- If you want a clean, hidden install
A good shop has the right tools, and they’ll warranty their work.
Legal And Safety Considerations
Extra lights can help, but every state has rules:
- Some states limit the number of auxiliary lights.
- Lights above the headlights (like on the roof) may need covers on public roads.
- Lights must not blind other drivers.
Check your local DMV or talk with a Jeep club. Always install lights so you can turn them off quickly when you see oncoming traffic.
The National Highway Traffic Safety Administration (NHTSA) offers more details on vehicle lighting standards (NHTSA Lighting).

Credit: www.youtube.com
Upgrading: Adding More Pod Lights Later
If you love your first set, you may want to add more. Here’s how to plan ahead:
- Use a wiring harness with extra capacity.
- Leave space on your switch panel.
- Plan your wire runs so you don’t need to redo everything.
You can mix spot, flood, and work lights for the perfect setup.
Environmental Factors: Off-road And Weather
Pod lights face mud, rain, snow, and sun. Look for these features for best durability:
- IP67 or IP68 waterproof ratings
- Powder-coated housings to resist rust
- UV-resistant lenses (won’t yellow in sun)
If you drive through deep water, always check your lights and wiring after.
Can I Use Factory Switches?
Some Jeep Wranglers come with auxiliary switches from the factory (Rubicon, Sahara, and some Sport S models). These are pre-wired for accessories.
If you have them:
- Use the wiring guide in your owner’s manual.
- Connect your pod lights’ power wire to the assigned aux wire.
- You may not need a separate relay or fuse.
This setup is neat and keeps your Jeep’s dash uncluttered.
Adding A Switch Panel For Multiple Lights
If you plan to run four or more lights, a switch panel makes life easier. Popular options include sPOD, Switch-Pros, and Auxbeam.
Benefits:
- All controls in one place
- Built-in fuses and relays
- Cleaner wiring
These cost more up front ($200–$600), but are worth it for serious off-roaders or anyone who hates messy wires.
Troubleshooting: Why Won’t My Pod Lights Work?
If your pod lights don’t turn on, check these:
- Is the fuse blown? Replace if needed.
- Did you connect the ground wire to bare metal?
- Is the switch wired correctly?
- Are the battery terminals tight?
- Are all connections sealed and plugged in?
If you still have trouble, test each part (light, relay, switch) separately. Sometimes a relay clicks but doesn’t pass power.
Protecting Your Investment
Pod lights aren’t just for show — they’re a tool. Protect them:
- Add light covers for driving on-road.
- Clean after every off-road trip.
- Check for water or dirt inside the lens.
- Store your Jeep in a garage or use a car cover if possible.
Quality lights last for years with basic care.
Final Thoughts
Installing pod lights on your Jeep Wrangler is a smart upgrade. You get more visibility, safer driving, and a look that stands out. The process isn’t hard, but it does require attention to detail, the right tools, and some planning.
Remember to pick pod lights that fit your needs and your Jeep. Always wire safely, and check your work before hitting the road. With the right setup, you’ll be ready for any night trail, storm, or adventure.
Frequently Asked Questions
How Many Pod Lights Can I Legally Install On My Jeep Wrangler?
Most states let you add two to four auxiliary lights on your Jeep, but the rules change by location. Check your local DMV or police website for the latest rules. Some states require covers on lights above the headlights when driving on the road.
Can I Wire Pod Lights Directly To The Battery Without A Relay?
It’s not recommended. Relays protect your Jeep’s wiring and switches from high current. Without a relay, you could melt wires or blow fuses. Always use a relay and fuse with aftermarket lighting.
Will Installing Pod Lights Void My Jeep’s Warranty?
Adding pod lights won’t void your entire warranty. But if you damage the electrical system during install, repairs may not be covered. Use plug-and-play harnesses and follow instructions to avoid problems.
Do I Need Professional Help To Install Pod Lights?
Most Jeep owners can do this upgrade with basic tools and patience. If you’re unsure about wiring, it’s smart to ask a pro. Shops will guarantee their work and avoid mistakes.
Can I Use Pod Lights As Headlights?
Pod lights are made for off-road or auxiliary use. They’re not legal as main headlights in most places. Use them as a supplement, not a replacement, for factory headlights.
With this guide, you’re ready to light up your Jeep Wrangler safely and in style. Enjoy your next adventure — day or night!