Growing potatoes in bags at home is an easy and rewarding way to enjoy fresh potatoes, even if you have limited space. You don’t need a garden—just a sunny spot, some bags, and the right soil. Whether you live in an apartment or have a small backyard, this method lets you harvest delicious potatoes with little fuss.
Today, I’ll guide you step by step, sharing practical advice and expert tips to help you succeed. Along the way, you’ll discover common mistakes beginners make, how to choose the best materials, and ways to maximize your potato yield. Let’s dig in and learn how to grow potatoes in bags like a pro.
Why Grow Potatoes In Bags?
Growing potatoes in bags offers unique benefits compared to traditional gardening. First, space-saving is a big advantage. You don’t need a large plot; just a patio, balcony, or porch works. Bags are portable, letting you move them to follow the sun or protect from heavy rain.
Another benefit is control over soil quality. In the ground, soil can be heavy, clay-rich, or full of pests. With bags, you create the ideal environment. You also reduce risks from common diseases like blight, because bags are easier to keep clean and isolated.
Harvesting is simpler, too. Instead of digging up hard soil, you just tip the bag and pick out your potatoes. This is especially helpful for people with mobility issues or those who want a mess-free experience.
One non-obvious insight: Growing in bags can lead to higher yields per square foot than ground planting. The roots grow more efficiently in loose, well-drained soil, and you can stack bags vertically if space is tight.
Another unique advantage is flexibility with timing. If weather changes suddenly, you can move bags indoors or under shelter, protecting your crop from frost or excessive rain. This is not possible with potatoes planted directly in the ground.
Bag growing also allows you to experiment with different varieties at once. You can plant several bags, each with a different type, and compare which potatoes grow best in your conditions. This helps you learn quickly and adapt your growing methods.
Choosing The Right Potato Varieties
Not all potatoes grow equally well in bags. Some varieties are better suited for container growing. You want potatoes that produce lots of tubers in small spaces and mature quickly.
Best Types For Bag Growing
- Early potatoes: Mature in 10–12 weeks. Examples: ‘Red Pontiac’, ‘Yukon Gold’, ‘White Rose’
- Second early potatoes: Ready in 12–14 weeks. Examples: ‘Charlotte’, ‘Kennebec’, ‘Caribe’
- Maincrop potatoes: Take longer, about 16–20 weeks. Examples: ‘Russet Burbank’, ‘Maris Piper’, ‘Desiree’
Early and second early types are ideal for bags because they need less time and space. Maincrop potatoes can work if you have large bags and patience.
Potato Variety Comparison
Here’s a quick comparison to help choose the best type:
| Variety | Growth Time | Yield per Bag | Flavor | Skin Color |
|---|---|---|---|---|
| Yukon Gold | 10–12 weeks | Medium–High | Buttery | Yellow |
| Red Pontiac | 10–12 weeks | High | Earthy | Red |
| Russet Burbank | 16–20 weeks | Very High | Starchy | Brown |
| Charlotte | 12–14 weeks | Medium | Nutty | Yellow |
Key tip: Choose certified seed potatoes. These are disease-free and produce better yields. Avoid supermarket potatoes, as they may carry diseases or not sprout well.
Another detail: Some varieties, like ‘Red Pontiac’, have a thin skin that is easy to clean and cook. Others, like ‘Russet Burbank’, are better for baking or frying because of their starchy texture. If you prefer salads, ‘Charlotte’ is a good choice for its waxy texture and nutty flavor.
For families or people who want to harvest quickly, early varieties are best. If you want a larger, later crop for storage, maincrop potatoes are suitable. Mixing types in different bags can extend your harvest season.
Credit: www.harrisseeds.com
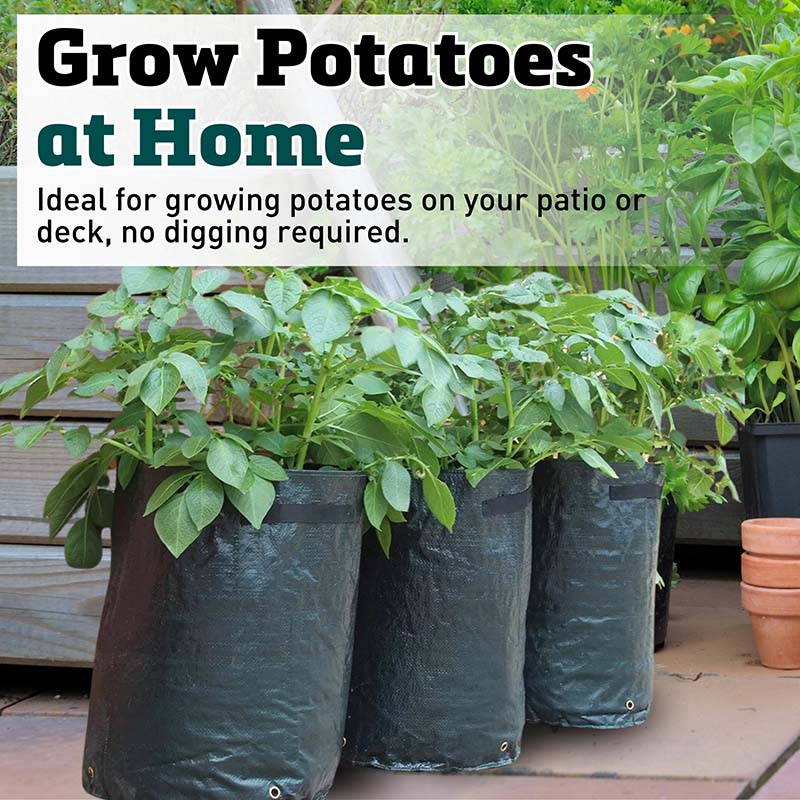
Selecting The Best Bags For Growing
The bag you choose affects your potato crop. Different materials and sizes suit different needs. Let’s look at the main options.
Types Of Bags
- Fabric grow bags: Breathable, lightweight, and reusable. Root systems get more air, reducing rot.
- Plastic bags: Cheap and easy to find. They retain moisture but can get too hot.
- Burlap sacks: Natural and biodegradable. They drain well but may dry out quickly.
- Old compost bags: Recycling at its best. Make holes for drainage.
Some people use large buckets or tubs if bags aren’t available. The key is drainage—always make sure excess water can escape.
Ideal Bag Size
A good bag should hold at least 5–10 gallons (20–40 liters). This gives enough room for roots and tubers. For bigger crops, use 15–20 gallons (60–80 liters).
If your space is very limited, even a 3-gallon (12-liter) bag can work for just one plant, but yields will be smaller. Beginners often try to grow too many potatoes in a small bag, which leads to crowded roots and poor harvest.
Bag Comparison Table
Here’s a quick look at how common bag types compare:
| Bag Type | Cost | Durability | Drainage | Best for |
|---|---|---|---|---|
| Fabric Grow Bag | Medium | High | Excellent | High yield |
| Plastic Bag | Low | Medium | Good | Budget |
| Burlap Sack | Low | Low | Very good | Eco-friendly |
| Compost Bag | Free | Medium | Good | Recycling |
Non-obvious tip: Bags with handles are easier to move. If you plan to shift bags as your plants grow, choose bags with sturdy handles.
Another detail: Some fabric bags come with a flap at the bottom, allowing you to harvest potatoes without tipping the bag. This is handy for picking a few potatoes at a time, rather than harvesting all at once.
Preparing The Soil Mix
The right soil is crucial for healthy potatoes. Potatoes need loose, well-drained soil that holds moisture but doesn’t get soggy.
Ingredients For The Mix
- Potting soil: Provides structure and nutrients
- Compost: Adds organic matter, improves growth
- Perlite or sand: Helps drainage
- Slow-release fertilizer: Supports long-term growth
A typical mix: 60% potting soil, 30% compost, 10% perlite/sand.
Soil Mix Recipe
For a 10-gallon bag:
- 6 gallons potting soil
- 3 gallons compost
- 1 gallon perlite or sand
- 1/4 cup slow-release fertilizer
Mix all ingredients thoroughly. The soil should feel light and crumbly.
Adding worm castings is another non-obvious way to boost soil quality. Worm castings provide gentle nutrients and help retain moisture. They’re especially useful in bags, where nutrients wash out more quickly.
Ph And Fertility
Potatoes grow best in soil with a pH of 5.0–6.0. Test your soil if possible. If the pH is too high, add peat moss to lower it.
Common mistake: Using garden soil in bags. It compacts easily, holds too much water, and can carry pests. Always use a fresh, loose mix.
Another tip: If you notice the soil drying out too fast, add coconut coir. It helps retain moisture without causing sogginess. This is especially useful for burlap sacks and fabric bags.
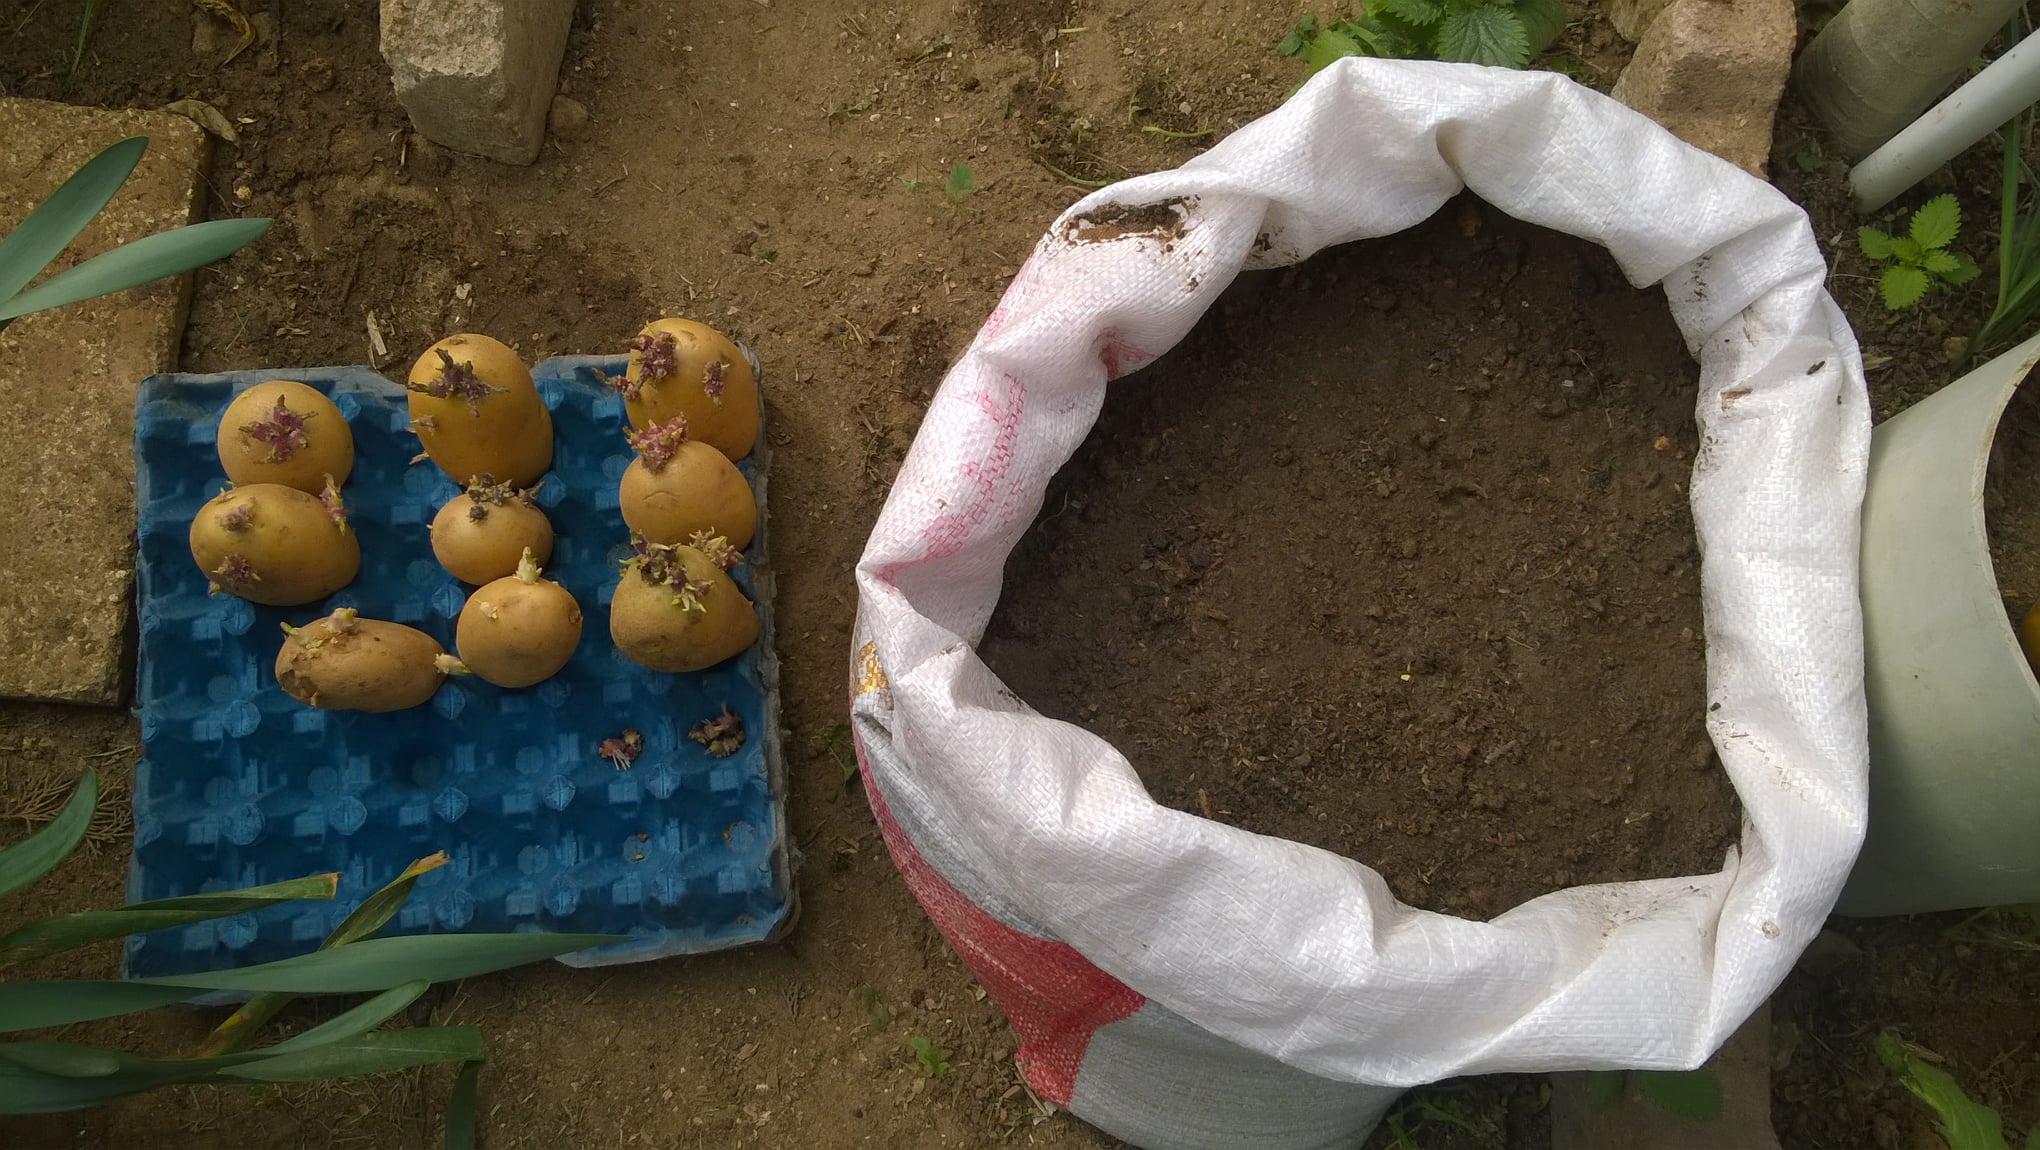
Chitting Seed Potatoes
Chitting means sprouting your seed potatoes before planting. This speeds up growth and boosts yields.
How To Chit
- Place seed potatoes in a cool, light spot (not direct sun).
- Stand them with the most eyes facing up.
- Wait 2–4 weeks until short, thick sprouts appear.
Sprouts should be 1/2–1 inch (1–2 cm) long before planting. Longer sprouts break easily.
Pro tip: Chitting is not strictly necessary, but it helps you get an earlier harvest.
A practical example: If you plant chitted potatoes in mid-March, you may harvest by early June. Un-chitted potatoes planted at the same time might not be ready until late June. This can make a big difference if you want potatoes for summer meals.
Planting Potatoes In Bags
Now you’re ready to plant. Here’s how to do it step by step.
Step-by-step Instructions
- Fill the bag: Put 4–6 inches (10–15 cm) of soil mix at the bottom.
- Add seed potatoes: Place 2–3 seed potatoes on top, spaced evenly.
- Cover with soil: Add 3–4 inches (8–10 cm) of soil over the potatoes.
- Water lightly: Moisten the soil, but don’t soak it.
- Place the bag in sun: At least 6 hours of sun per day is ideal.
As the plants grow, you’ll need to add more soil.
If your seed potatoes are large, you can cut them into pieces, making sure each piece has at least one “eye. ” Let cut pieces dry for a day before planting to avoid rot.
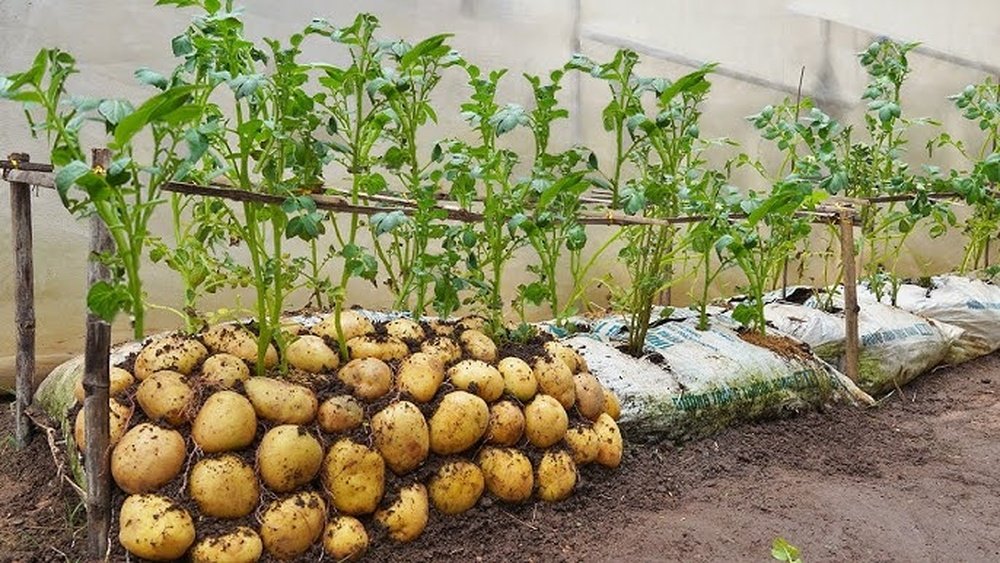
Hilling Up
When stems reach 6–8 inches (15–20 cm), add more soil to cover the lower stems, leaving leaves exposed. Repeat every 1–2 weeks until the bag is full.
Why hilling matters: Potatoes form along buried stems. Hilling encourages more tubers and protects them from sunlight (which turns them green and toxic).
If you forget to hill, you’ll get fewer potatoes, and some may turn green and unsafe to eat. Hilling also keeps weeds down and supports the stems as they grow tall.

Credit: www.youtube.com
Caring For Potato Plants
Potato plants need regular care for best results. Here’s what to watch for.
Watering
Potatoes need consistent moisture, especially during tuber formation. Water until the soil feels moist but not soggy. Overwatering causes rot; underwatering leads to small tubers.
- For a 10-gallon bag, aim for 1–2 quarts (1–2 liters) per watering.
- Check the soil daily during hot weather.
If you’re unsure, stick your finger into the soil. If it feels dry two inches below the surface, it’s time to water.
Feeding
After 4–6 weeks, start feeding with a balanced liquid fertilizer every 2–3 weeks. Organic options like fish emulsion or seaweed extract work well.
Another tip: Potatoes benefit from extra potassium. Look for fertilizers labeled “high in potassium” or add wood ash sparingly. Too much nitrogen makes leafy plants but fewer tubers.
Sunlight
Potatoes need 6–8 hours of sun daily. If your spot is shady, move the bag to a sunnier place.
If sunlight is limited, use reflective surfaces (like white walls) to bounce more light onto the plants.
Pest And Disease Prevention
Common problems include:
- Aphids: Spray with soapy water.
- Blight: Remove infected leaves, keep bags dry.
- Wireworms: Avoid using raw manure.
Regularly inspect plants. Early action prevents bigger issues.
Expert tip: Rotate bags each year to different spots if possible. This prevents soil-borne diseases.
Another insight: Bags can be placed on benches or shelves, making it harder for some pests (like slugs) to reach your potatoes.
Harvesting Your Potatoes
Knowing when and how to harvest is key. Harvest too early, and potatoes are small. Wait too long, and they may rot.
Signs Potatoes Are Ready
- Early varieties: Harvest when plants flower and leaves turn yellow.
- Maincrop varieties: Wait until the leaves die back completely.
Most potatoes are ready 10–20 weeks after planting, depending on variety.
If you want “new potatoes” (small, tender tubers), you can carefully dig into the bag after flowering and take a few without disturbing the plant.
Harvesting Steps
- Stop watering 1–2 weeks before harvest. This hardens the skins.
- Tip the bag onto a tarp or large container.
- Gently sift through the soil to collect potatoes.
- Brush off excess soil. Don’t wash until ready to eat.
Yield expectation: A 10-gallon bag can produce 5–10 pounds (2–4 kg) of potatoes, depending on variety and care.
If harvesting with children, let them help—digging for potatoes is like a treasure hunt and makes gardening fun for the whole family.
Storing And Using Home-grown Potatoes
Home-grown potatoes taste best fresh. For longer storage, follow these steps:
Storing
- Cure potatoes by leaving them in a cool, dark place for 1–2 weeks.
- Store in paper bags or baskets, not plastic (which traps moisture).
- Keep at 45–55°F (7–13°C). Avoid refrigeration.
Stored potatoes last 2–4 months. Check regularly and remove any that sprout or rot.
If you live in a hot climate, store potatoes in a cellar or insulated box. High temperatures cause sprouting and spoilage.
Using Potatoes
Potatoes from bags can be:
- Boiled
- Roasted
- Mashed
- Used in salads
Because they’re fresh, they have thin skins and a sweet flavor.
Non-obvious insight: Smaller, “baby” potatoes are especially tender and flavorful. Harvest some early for a gourmet treat.
Another tip: Bag-grown potatoes are perfect for grilling whole or adding to stews, since they’re often cleaner and more uniform in size.
Troubleshooting Common Problems
Growing potatoes in bags is simple, but problems can still occur. Here’s how to solve the most frequent issues.
Small Potatoes
Cause: Not enough water, cramped bags, or poor soil.
Solution: Use larger bags, water consistently, and improve soil with compost.
Another reason: Too many seed potatoes in one bag. Stick to 2–3 per 10-gallon bag for best results.
Yellow Leaves
Cause: Overwatering, underwatering, or nutrient deficiency.
Solution: Check soil moisture, feed with balanced fertilizer, and adjust water.
If leaves have spots, check for disease like blight. Remove affected leaves and improve air flow.
Rotting Tubers
Cause: Poor drainage or overwatering.
Solution: Make sure your bag has drainage holes. Water only when soil is dry.
If your bag sits on a hard surface, raise it with bricks or blocks to improve drainage.
Green Potatoes
Cause: Potatoes exposed to sunlight.
Solution: Always hill up soil to cover tubers. If potatoes turn green, don’t eat them.
Some bags have thin sides—cover them with a cloth or place them in shade to prevent light leaks.
No Sprouts
Cause: Cold temperatures or bad seed potatoes.
Solution: Use certified seed potatoes and keep bags in a warm spot.
If temperatures drop below 50°F (10°C), move bags indoors or cover them at night.
Credit: permies.com
Maximizing Your Potato Yield
Want more potatoes from each bag? Here are proven tips:
- Use big bags: More soil means more tubers.
- Chit seed potatoes: Sprouted potatoes grow faster.
- Hill up regularly: Adds space for tubers to form.
- Feed well: Fertilize every few weeks.
- Rotate locations: Avoid repeating in same spot every year.
Data insight: Studies show that yield increases by 25–40% when using high-quality compost and regular hilling.
Another tip: Mulch the top of the soil with straw or leaves. This helps retain moisture and keeps tubers cool, improving growth.
Comparing Bag Vs. Ground Potato Growing
Wondering how bag growing compares to traditional garden methods? Here’s a summary.
| Factor | Bags | Ground |
|---|---|---|
| Space Needed | Minimal | Large |
| Yield per Square Foot | High | Medium |
| Pest Control | Easy | Hard |
| Mobility | Portable | Fixed |
| Effort | Low | High |
Expert advice: If you’re short on space, or want potatoes without digging, bags are the best option.
Another insight: In wet climates, bag-grown potatoes avoid soil compaction and waterlogging, which often ruin ground crops.
Environmental And Health Benefits
Growing potatoes at home is good for you and the planet. You control what goes into the soil—no chemicals unless you choose. Potatoes are rich in vitamin C, potassium, and fiber, supporting a healthy diet.
Bag growing uses less water than traditional gardening. It also reduces food miles, since you’re harvesting right at home.
Non-obvious benefit: You can reuse bag soil for other crops like tomatoes or peppers, further reducing waste.
Another health benefit: Home-grown potatoes are fresher and may have higher nutrient content compared to store-bought ones that have been in storage for months.
Practical Tips For Success
Here are some final tips from experienced growers:
- Label each bag with the variety and planting date. This helps track growth and harvest times.
- Start early in spring for the best yields.
- If you have pets or kids, keep bags out of reach to avoid disturbance.
- For urban growers, bags can be placed on rooftops, patios, or even inside near sunny windows.
If you want to grow potatoes year-round, try using bags indoors with grow lights. This is a practical way to enjoy fresh potatoes even in winter.
Frequently Asked Questions
How Many Potatoes Can I Grow In One Bag?
A 10-gallon bag usually produces 5–10 pounds (2–4 kg) of potatoes, depending on the variety and care. Planting 2–3 seed potatoes per bag is best for optimal yield.
Do I Need To Water Every Day?
Not always. Check the soil daily. If the top inch feels dry, water. In hot weather, you may need to water daily; in cooler periods, every 2–3 days is enough.
Can I Reuse The Soil In My Bag Next Year?
Yes, but mix in fresh compost and check for pests or diseases first. It’s better to rotate crops—grow tomatoes or peppers in old potato soil to prevent disease buildup.
What If My Potatoes Turn Green?
Green potatoes are exposed to sunlight and contain solanine, which is toxic. Don’t eat green potatoes. Prevent this by always covering tubers with soil.
Where Can I Buy Certified Seed Potatoes?
Certified seed potatoes are available at garden centers, farm supply stores, or online. For more information, visit the Wikipedia Seed Potato page.
Growing potatoes in bags at home is simple, fun, and productive. With the right bags, soil, and care, you’ll enjoy tasty, healthy potatoes right from your patio or balcony. Follow these steps, avoid common mistakes, and you’ll harvest a rewarding crop—even in the smallest space.
Whether you’re a beginner or experienced gardener, bag-growing potatoes is a smart choice for fresh food and a greener lifestyle. Happy growing!