When winter ends, your snow blower has done its job. But what you do next matters. Storing your snow blower correctly for summer keeps it ready for next winter, prevents damage, and saves you money. Many people just park their machine in the garage, but this can lead to problems: rust, fuel issues, and even broken parts. With the right steps, your snow blower will last longer and work better. This guide shows you how to store your snow blower for summer with practical, step-by-step advice.
Why Summer Storage Matters For Your Snow Blower
Leaving your snow blower unused for months can cause problems. Moisture can rust metal parts, old fuel can clog the engine, and dirt can damage moving parts. Proper summer storage helps:
- Protect your investment: Snow blowers are expensive.
- Prevent costly repairs: Fixing a broken snow blower is not cheap.
- Keep your machine reliable: It starts easier in winter.
Many people forget that snow blowers need care even when not in use. A little effort now saves headaches later. Even if you used your snow blower only a few times, small amounts of snow and salt can hide in cracks, starting the rusting process.
Over time, neglecting storage can lead to jammed controls, stuck chutes, or a machine that simply won’t start when you need it. A well-stored snow blower often outlasts neglected ones by several seasons.
Step-by-step Guide: How To Store Your Snow Blower For Summer
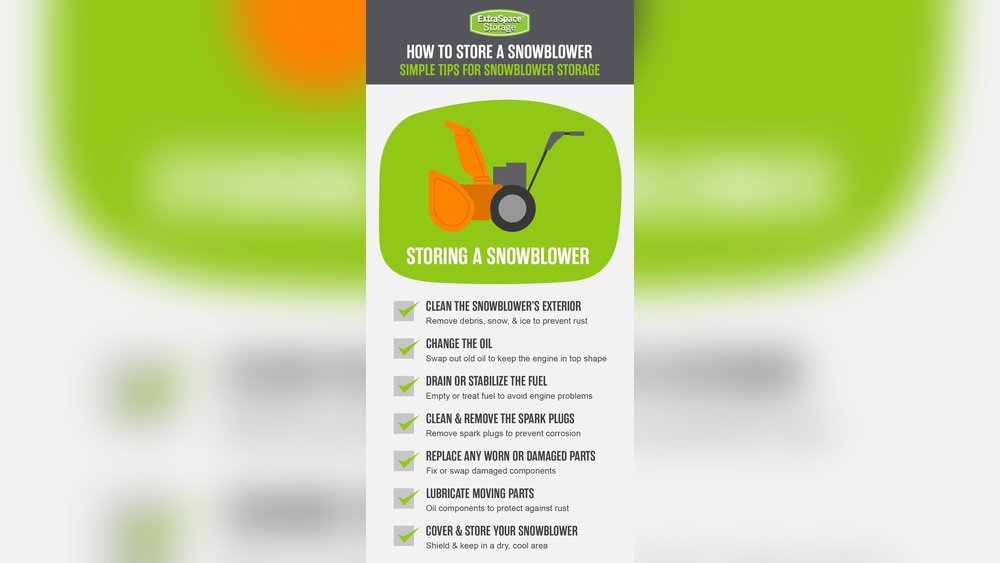
Storing your snow blower is not difficult, but you must follow the right steps. Here is a complete process to help you.
1. Clean Your Snow Blower Thoroughly
Before storing, remove all dirt, salt, and snow residue. These can cause rust and corrosion.
- Use a brush to remove loose dirt and debris.
- Wipe down the exterior with a damp cloth.
- For stubborn buildup, use a mild detergent.
- Clean the auger, chute, and impeller.
- Let all parts dry completely.
Expert tip: Many beginners skip cleaning, thinking it’s not important. Dirt left on your machine can eat away at the metal and ruin paint.
Cleaning also helps you spot hidden damage, like bent auger blades or small cracks. Sometimes, chunks of ice or gravel get stuck in the impeller or housing and go unnoticed. If left, these can cause further damage or make the machine hard to start.
Take a few extra minutes to inspect under the housing and inside the chute, where wet snow and salt often collect and cause hidden corrosion.
2. Drain Or Stabilize The Fuel
Old fuel is one of the biggest causes of snow blower problems. Gasoline can break down and form deposits that clog the carburetor.
Two options:
- Drain the fuel tank: Run the engine until it stops. This removes all fuel.
- Add fuel stabilizer: If you prefer to keep fuel in the tank, add a stabilizer. This prevents gas from breaking down.
Common mistake: Leaving fuel in the tank without stabilizer. This causes starting problems next winter.
If you drain the fuel, remember to also drain the carburetor bowl (usually a small screw at the bottom of the carburetor). Many people forget this step, but it helps prevent sticky deposits in tiny fuel passages. For those who use stabilizer, run the engine for a few minutes after adding it.
This pulls stabilized fuel into the carburetor and prevents gumming. Even premium gasoline degrades over time, especially if your storage area gets warm. Stabilizing or draining fuel is a small task that saves hours of frustration later.
3. Change The Oil
Changing oil before storage keeps the engine healthy. Old oil can contain dirt and water, which damage engine parts.
- Warm up the engine (just a few minutes).
- Drain the old oil.
- Replace with fresh oil recommended by the manufacturer.
Non-obvious insight: Oil changes remove moisture that builds up during winter, preventing rust inside the engine.
If your snow blower has been used heavily, check the oil filter (if present) and replace it as well. Newer snow blowers often have easy-drain plugs, making the process simple. Old, dirty oil can turn acidic, which slowly eats away at metal components.
Make sure to wipe any spilled oil from the body of the machine, as it can attract dust and grime during storage. Proper oil disposal is important too—most local recycling centers accept used oil.
4. Inspect And Replace Parts
Check parts that wear out during winter. Replace if needed:
- Spark plug: Remove, inspect, and replace if dirty or damaged.
- Belts: Look for cracks or wear.
- Shear pins: Check for damage.
- Auger paddles and scraper bar: Make sure they are not worn out.
Experienced advice: Many repairs are easier during summer when shops are less busy. You avoid winter rush and delays.
Check all cables and controls for smooth operation. Move the handles, levers, and chute controls to ensure nothing is sticking or binding. Lubricate cables if needed. If you notice frayed or stiff cables, now is the time to replace them.
Inspect the drive system for worn or loose parts. If your snow blower has adjustable skid shoes, check for uneven wear and flip or replace them. Regular inspection prevents small problems from becoming expensive repairs.
5. Lubricate Moving Parts
Lubrication prevents rust and keeps parts moving smoothly.
- Apply oil or grease to the auger shaft, drive gears, and chute control.
- Use manufacturer-recommended lubricants.
Non-obvious insight: Lubricating now prevents parts from seizing up during storage.
Don’t forget hinge points, axles, and any exposed metal. For best results, use a spray lubricant that displaces moisture and leaves a protective film. It’s a good idea to spin the auger and move the chute after lubricating, so oil or grease spreads evenly.
Some owners also apply a thin coat of rust inhibitor to bare metal parts for extra protection. If your snow blower has a chain drive, check and lubricate the chain as well.
6. Protect The Snow Blower From Moisture
Moisture is the enemy of metal. It causes rust and corrosion.
- Store your snow blower in a dry place.
- Use a waterproof cover.
- If possible, raise the machine off the ground with blocks or pallets.
Moisture can rise from concrete floors, especially in garages and sheds. By lifting the snow blower slightly, you reduce the risk of rust forming underneath. Avoid wrapping the machine tightly in plastic, as this can trap moisture and increase the risk of mold.
If you live in a very humid area, consider using a moisture absorber or silica gel packs inside the cover. Regularly check for condensation inside the cover during summer.
7. Remove The Battery (for Electric Models)
If you have an electric or battery-powered snow blower:
- Remove the battery.
- Store it in a cool, dry place.
- Charge it to around 50% before storage.
Batteries left in machines can drain and become unusable.
For lithium-ion batteries, extreme temperatures can shorten lifespan. Never store batteries in direct sunlight or near heat sources. If your snow blower uses a lead-acid battery, check the water level (if possible) and top off with distilled water. Keeping batteries in a stable environment helps them last longer, and partial charging prevents deep discharge, which can permanently damage lithium batteries.
8. Check Tires And Pressure
Flat tires are common after storage. Check tire pressure and inflate if needed.
- For air-filled tires, use a pump to reach recommended pressure.
- For solid tires, inspect for cracks.
Over-inflated or under-inflated tires can cause uneven wear or make the snow blower hard to push. If you have pneumatic tires, check for slow leaks by listening for escaping air or using a soapy water test. For tubeless tires, consider adding a sealant before storage if you have had issues with leaks in the past.
Rotating the tires once a month during storage can prevent flat spots.
9. Cover The Snow Blower
A good cover keeps dust and moisture away.
- Use a fitted cover made for snow blowers.
- Avoid plastic tarps that trap moisture.
- Make sure the cover allows air flow.
Choose a cover with breathable fabric to prevent condensation. Some covers have vents to allow moisture to escape. If you use your garage for other work, a cover also protects your machine from sawdust, spills, or accidental knocks. Double-check that the cover fits snugly but is not so tight that it rubs against controls or sharp edges.
10. Store Safely And Securely
Where you store your snow blower matters.
- Choose a place away from chemicals and fertilizers.
- Avoid areas with rodent activity (they can chew wires).
- Keep the machine out of direct sunlight.
Experienced tip: Garages and sheds work well, but basements can trap moisture.
If you store your snow blower near garden tools or other equipment, leave enough space to prevent accidental bumps or falls. Place the blower on a mat or pallet if your storage area floods easily. Consider marking the storage spot, so you don’t pile items on top of the machine by mistake.
Securing the snow blower with a cable lock is a smart idea if theft is a risk.
Comparison: Gas Vs Electric Snow Blower Summer Storage
Different types of snow blowers need slightly different care. Here is a quick comparison:
| Feature | Gas Snow Blower | Electric Snow Blower |
|---|---|---|
| Fuel care | Drain or stabilize gasoline | Remove battery |
| Oil change | Required | Not needed |
| Parts check | Spark plug, belts | Power cords, battery |
| Moisture risk | High (metal parts) | Medium (electronics) |
| Cover needed | Yes | Yes |
Gas models often need more attention. Electric models are simpler, but batteries are sensitive to storage conditions. For both types, always follow the manufacturer’s manual for extra steps.
How Climate And Location Affect Snow Blower Storage
Your local climate changes how you store your snow blower. If you live in a humid area, rust is a bigger problem. If your summers are dry, dust can build up.
Humid Climates
- Use dehumidifiers in storage areas.
- Check for rust every month.
Humidity speeds up rust. In coastal or rainy regions, check under the cover and in hidden corners for signs of corrosion or mold. Applying a rust inhibitor or silicone spray on metal parts gives extra protection.
Dry Climates
- Clean dust off the machine.
- Lubricate parts to prevent dryness.
Dust can work into gears or bearings and cause wear. Frequent dusting and oiling of moving parts prevent squeaks and early failure. Covering the machine also keeps out insects and spiders, which sometimes nest inside.
Cold Climates
- Avoid storing outside.
- Protect from freeze-thaw cycles.
Frequent changes in temperature can cause condensation inside the engine or electrical parts. If your storage area is not heated, try to insulate the snow blower or add a small space heater for temperature-sensitive models.
Real-world example: In Minnesota, many owners store snow blowers in heated garages to avoid rust and keep parts flexible.

Credit: www.youtube.com
Mistakes To Avoid When Storing Your Snow Blower
Many people make simple errors that damage their machines. Avoid these common mistakes:
- Leaving fuel untreated: Causes engine problems.
- Storing in damp places: Rust and corrosion can ruin parts.
- Ignoring oil changes: Old oil damages the engine.
- Not covering the machine: Dust and moisture get inside.
- Forgetting battery care: Batteries can fail if left inside electric models.
- Skipping part inspection: Broken parts get worse over summer.
Another mistake is not reading your owner’s manual. Each snow blower can have unique needs. Also, don’t forget to check under the machine—sometimes salt and debris stick to the base or wheels, causing hidden rust or rot.
Practical Tips For Long-term Snow Blower Storage
Sometimes you need to store your snow blower for more than just one summer. These extra tips can help:
- Remove all attachments: Store blades and accessories separately.
- Check machine every month: Look for leaks, rust, or rodent damage.
- Store manuals and keys together: You’ll need them next winter.
- Record maintenance: Write down what you did before storage.
Non-obvious insight: Rodents love to nest in unused machines. Check for signs and block entry points.
If you plan to store your snow blower for a year or longer, loosen drive belts to prevent them from taking a set. For electric models, check battery charge every few months. You can also coat exposed bolts with a thin layer of grease for extra rust protection.
Some owners place mothballs or dryer sheets inside the cover to repel pests, but avoid using anything that could damage plastic or rubber.
Data: How Proper Storage Extends Snow Blower Life
Studies show that proper storage adds years to your snow blower’s life. Here’s a summary:
| Storage Quality | Average Lifespan (years) | Repair Frequency (per year) |
|---|---|---|
| Poor Storage | 5-7 | 2-3 |
| Moderate Storage | 8-10 | 1-2 |
| Proper Storage | 12-15 | 0.5-1 |
Proper storage can reduce repairs by over 50% and extend the life by up to 8 years.
These numbers are averages, but with good care, some snow blowers have lasted over 20 years. Regular maintenance and careful storage can even increase resale value if you decide to upgrade later.
Snow Blower Storage Checklist
Here’s a simple list to help you remember key steps:
- Clean all parts
- Drain or stabilize fuel
- Change oil
- Inspect and replace worn parts
- Lubricate moving parts
- Remove battery (electric models)
- Check tire pressure
- Cover machine
- Store in dry, secure place
Following this list ensures nothing is missed.
Print this list and keep it near your snow blower or taped to your storage shelf. Each step makes a real difference.

Credit: www.guardianstorage.com
Costs And Savings: Why Proper Storage Pays Off
People often ignore storage because they think it’s too much work. But proper storage saves money:
- Repair costs: Average snow blower repair is $150–$300.
- Replacement costs: New machines cost $500–$2,000.
- Storage supplies: Covers and stabilizers cost $20–$50.
Data shows: Spending $30 on storage supplies can prevent $200–$400 in repairs.
Small investments—like a quality cover or a can of oil—help avoid expensive repairs, such as carburetor rebuilds or belt replacements. Many repair shops are busiest at the start of winter, so avoiding breakdowns saves both money and time. If you sell your snow blower in the future, a well-maintained machine gets a much better price.
Eco-friendly Snow Blower Storage Tips
Thinking about the environment? You can make your storage process greener:
- Use biodegradable lubricants.
- Recycle old oil at local centers.
- Choose covers made from recycled materials.
- Avoid chemical rodent repellents; use natural deterrents.
Experienced tip: Proper storage also reduces waste by extending your machine’s life.
Some stores now offer plant-based or non-toxic lubricants. When cleaning, use rags you can wash and reuse. If you use a dehumidifier or moisture absorber, pick reusable products. Reducing chemical use is better for your health and the planet.
How To Store Attachments And Accessories
Many snow blowers have extra attachments. These need storage too:
- Clean and oil all accessories.
- Store in labeled bins or shelves.
- Keep small parts in zip bags.
Non-obvious insight: Attachments left dirty can rust and become unusable.
If you have drift cutters, snow cabs, or tire chains, inspect and lubricate them before storage. Labeling bins makes it easy to find parts next winter. Small hardware, like shear pins and washers, can get lost easily—use clear bags or small containers and store them with your owner’s manual.
Preparing For Next Winter: What To Do After Storage
When summer ends, your snow blower needs a quick check before use:
- Charge or install battery.
- Check fuel and oil levels.
- Inspect for rust or rodent damage.
- Test moving parts.
Pro tip: Run the machine for a few minutes to check for problems before the first snow.
A test run before the first storm gives you time to fix issues—like a dead battery or sticky controls—without rushing. If you used a cover, shake it out and let it air dry before reusing. Reattach any accessories or attachments you removed for storage.

Credit: www.youtube.com
Advanced Storage Tips For Heavy-duty Snow Blowers
If you own a commercial or heavy-duty machine:
- Use anti-rust sprays on metal parts.
- Disconnect electrical connections.
- Consider professional maintenance.
Experienced advice: Commercial machines need deeper inspection—schedule a maintenance check before storage.
Heavy-duty blowers often have more complex drive systems and hydraulic parts. Grease all fittings, check hydraulic fluid levels, and inspect bearings for wear. If your machine has a maintenance log, update it with all work done before storage.
Comparison: Diy Vs Professional Snow Blower Storage
Some people prefer to store their snow blower themselves. Others choose professional services. Here’s how they compare:
| Factor | DIY Storage | Professional Storage |
|---|---|---|
| Cost | $20–$50 | $100–$300 |
| Time | 1–2 hours | Drop-off and pickup |
| Quality | Depends on your effort | High (trained staff) |
| Convenience | Requires personal effort | Easy, but pricier |
| Customization | Can match your needs | Standard procedures |
DIY storage is cheaper and flexible. Professional storage is easier but costs more.
Some shops offer pick-up and delivery. If you struggle with maintenance or have a complex snow blower, professional storage may be worth it for peace of mind.
Safety Tips For Snow Blower Storage
Safety matters during storage:
- Wear gloves when handling sharp parts.
- Avoid using fuel indoors.
- Keep storage area free from flammable items.
- Ensure children can’t access the machine.
Non-obvious insight: Many injuries happen during maintenance, not operation. Stay careful.
Unplug electric models before working on them. If you store gasoline, use approved containers and keep them away from heat or sparks. Never smoke or use open flames when working with fuel or oil.
Common Questions About Snow Blower Storage
Many owners have doubts about storing their snow blower. Here are clear answers.
Frequently Asked Questions
How Long Can I Store My Snow Blower Without Starting It?
Most snow blowers can be stored for 6–8 months if you follow proper storage steps. If you keep fuel in the tank, use a stabilizer. For electric models, remove and charge the battery every 3 months.
Should I Drain Fuel Or Use A Stabilizer?
Both methods work. Draining fuel prevents clogging, while stabilizer keeps fuel fresh. Choose the method that fits your routine. Draining is safer, but stabilizer is easier for quick winter startup.
Is It Safe To Store My Snow Blower Outside?
Outdoor storage is not recommended. Moisture, sunlight, and temperature changes can damage the machine. If you must store outside, use a waterproof cover and raise the machine off the ground.
What Should I Do If I Find Rust On My Snow Blower After Storage?
Clean the rusted area with a wire brush. Apply rust remover or oil. If the rust is deep, consider professional repair. Regular inspection prevents rust from spreading.
How Can I Prevent Rodents From Damaging My Snow Blower?
Store the machine in a sealed area. Block entry points. Use natural repellents like peppermint oil. Avoid leaving food or seeds near your snow blower.
—
Storing your snow blower for summer is easy if you follow these steps. Clean, inspect, and protect your machine, and it will serve you for years. Don’t forget to check local climate effects and use the right methods for your model. Proper storage saves money, prevents damage, and keeps you ready for the next winter. For more tips, visit Consumer Reports. Take care of your snow blower, and it will take care of you when the snow comes again.