Solar path lights are a simple way to make your yard look beautiful and safer at night. These lights use energy from the sun, so you don’t need wires or electricity. You can put them along walkways, driveways, gardens, or anywhere you want soft light after dark.
If you’re new to outdoor lighting, installing solar path lights might sound tricky, but it’s actually easy if you follow the right steps. This guide will walk you through everything—from choosing lights to placing them, fixing common mistakes, and making sure they work for years.
You’ll find practical advice, examples, and even a few things most beginners don’t know. Whether you want to improve your home’s look, help guests find their way at night, or simply enjoy an eco-friendly upgrade, this article will help you install solar path lights confidently.
Understanding Solar Path Lights
Solar path lights are designed for outdoor use. They have small solar panels on top that collect sunlight during the day. At night, they use stored energy to light up the area. Most models have LED bulbs, which last longer and use less power than old bulbs.
The lights are usually waterproof and made to survive rain, snow, and heat.
Key Components
- Solar panel: Collects sunlight and turns it into energy.
- Rechargeable battery: Stores the energy for nighttime use.
- LED bulb: Gives off light when it gets dark.
- Light sensor: Turns the light on automatically at sunset.
- Housing: Protects all the parts from weather.
Some solar path lights are brighter, some are softer. You can find them in many shapes—round, square, lantern-style, or even decorative designs.
How Solar Path Lights Work
During the day, the solar panel collects sunlight. It changes this light into electricity and charges the battery inside. When the sun goes down, the sensor detects darkness and turns the LED bulb on. The battery powers the bulb until morning or until the energy runs out.
A typical solar path light can run for 6–10 hours after a full day of sun. More sunlight means longer lighting time at night.
Why Install Solar Path Lights?
Solar path lights are popular for many reasons. Here’s what makes them a good choice for any home:
- Easy installation: No wires, no digging trenches—just push them into the ground.
- Eco-friendly: They use renewable energy, not electricity from power plants.
- Low cost: Once installed, they don’t add to your energy bills.
- Safety: Bright paths help prevent trips and falls.
- Security: Lights make your yard less attractive to trespassers.
- Beauty: They highlight plants, walkways, and landscaping features.
Many homeowners also like that solar lights can be moved anytime. If you change your garden layout or walkway, just pull out the lights and place them somewhere else.
Choosing The Right Solar Path Lights
Picking the best solar path lights is important. Not all lights are equal, so you need to think about your needs, budget, and style.
Factors To Consider
1. Brightness (lumens)
Most solar path lights are between 5 and 50 lumens. Soft light is good for decoration; bright light is better for safety. For main walkways, choose lights with at least 20 lumens.
2. Battery Capacity
Bigger batteries mean longer lighting time. Look for lights with a battery that can last 8–10 hours after a sunny day.
3. Solar Panel Quality
Panels made from monocrystalline materials work better in low light. Cheaper models often use polycrystalline panels, which are less efficient.
4. Material And Durability
Stainless steel and heavy-duty plastic survive harsh weather better than thin plastic. If your area gets snow or rain, choose sturdy housing.
5. Style And Finish
Match the lights to your garden’s style. Some lights are modern, some are traditional, and others are fun or decorative.
6. Weather Resistance
Look for lights marked as IP65 or higher—these resist water and dust well.
7. Price And Warranty
Prices range from $20 to $100 per set. Check for warranties of at least 1 year.
Comparing Types Of Solar Path Lights
Here’s a quick comparison of common types:
| Type | Brightness (Lumens) | Material | Panel Type | Average Price (USD) |
|---|---|---|---|---|
| Basic Stake Light | 5–10 | Plastic | Polycrystalline | 20–40 |
| Premium Lantern Style | 20–50 | Metal/Glass | Monocrystalline | 60–100 |
| Decorative Color Light | 5–15 | Plastic | Polycrystalline | 30–50 |
Non-obvious insight: Many buyers focus only on brightness. But the panel quality matters more for long-term performance, especially in shady areas.
Mistakes To Avoid When Buying
- Don’t buy only based on looks. Check the technical specs.
- Avoid very cheap models; they often break after one season.
- Not all “waterproof” lights survive heavy rain. Look for real IP ratings.
Planning Your Solar Path Light Layout
Before installing, decide where to place your lights for the best effect. Careful planning avoids wasted time and money.
Steps To Plan
1. Walk Your Yard At Night
Notice where it’s darkest and where you want light. Paths, steps, driveway edges, and garden borders are common spots.
2. Measure Your Path
Use a tape measure to know how many lights you need. Most lights are placed 6–8 feet apart.
3. Sketch A Layout
Draw your walkway and mark spots for each light. This helps you buy the right amount and prevents overcrowding.
4. Consider Sunlight
Solar lights need direct sun to charge. Avoid placing them under trees, bushes, or near tall fences.
5. Think About Obstacles
Make sure you’re not placing lights where they’ll be hit by lawn mowers, bikes, or cars.
Example Layout For A 24-foot Path
If your walkway is 24 feet, and you want lights every 6 feet:
- 24 ÷ 6 = 4
- You need 5 lights (one at each end and three in between).
Beginner tip: Always buy one extra light in case you need to adjust your layout or replace a broken one.
Tools And Materials Needed
Most solar path lights don’t need special tools. But having a few things ready makes installation smoother.
Common Tools
- Small shovel or garden spade
- Tape measure
- Gloves (to protect your hands)
- Screwdriver (if your lights need assembly)
- Level (optional, for perfectly straight lights)
Materials
- Solar path lights (the number you planned)
- Plastic or metal stakes (usually included)
- Ground anchors (for soft or sandy soil)
- Cleaning cloth (to wipe solar panels)
If your ground is rocky or hard, a hammer and sturdy stake may help. For very soft ground, you may need ground anchors to keep lights from tipping.
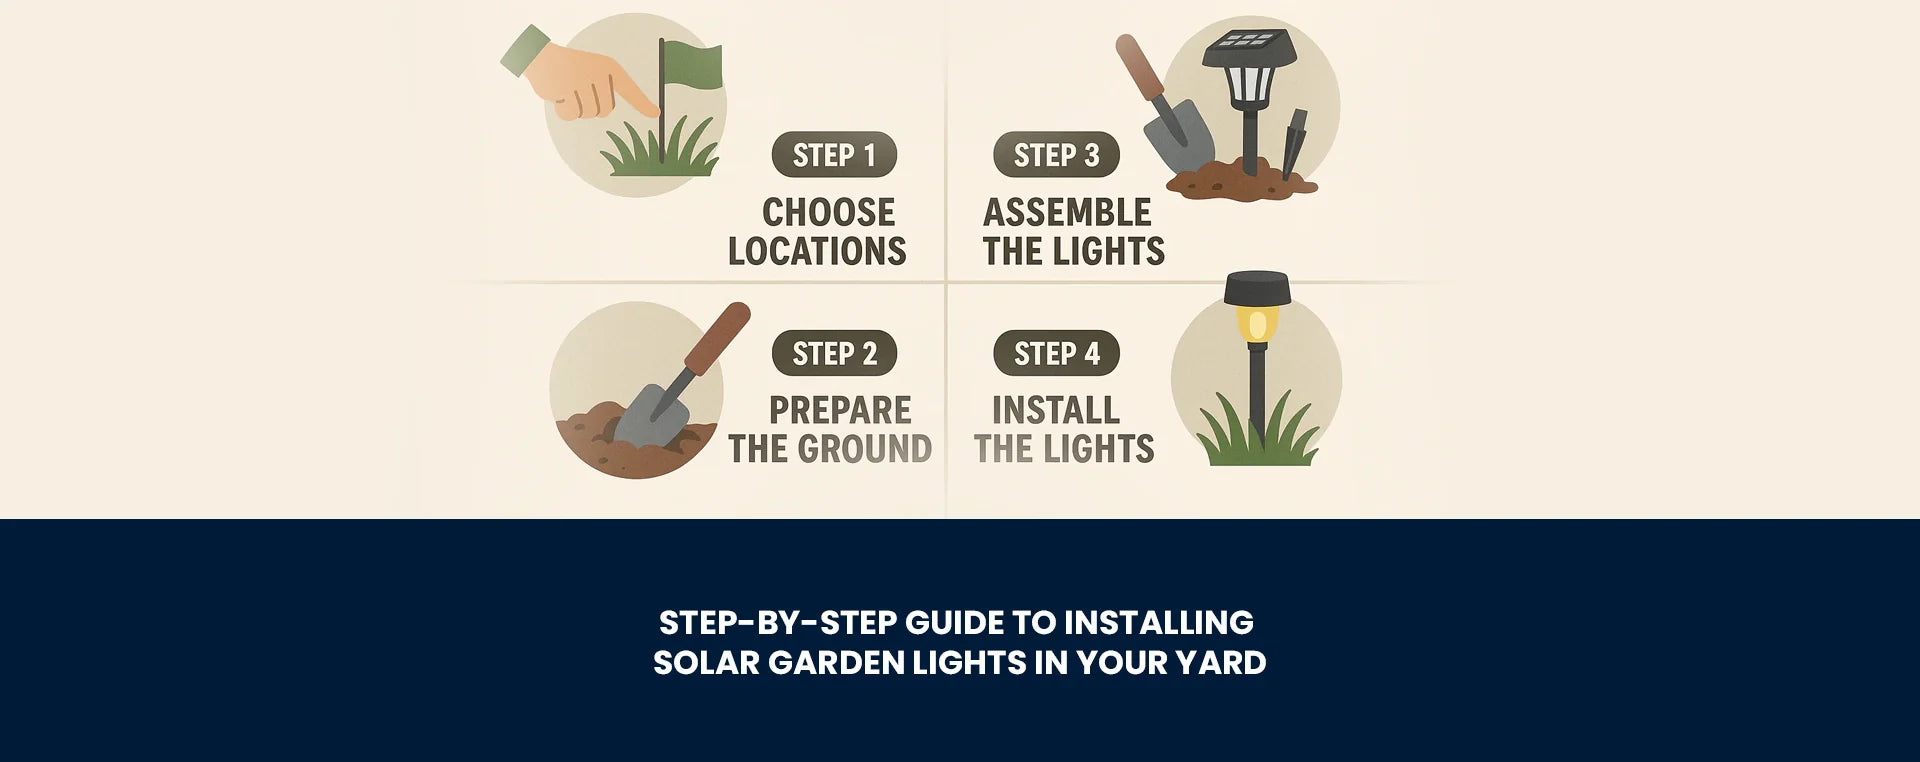
Step-by-step Installation Guide
Installing solar path lights is simple if you follow these steps. Doing it right the first time saves you from fixing things later.
Step 1: Assemble Your Lights
Most solar path lights come in pieces: the light head, the stake, and sometimes a connector. Follow the instructions in the box.
- Snap or screw the head to the stake.
- Check the battery is installed and connected.
- Remove any plastic film from the solar panel—many people forget this.
Non-obvious insight: If you leave the plastic on the panel, your lights will never charge properly.
Step 2: Prepare The Ground
Clear leaves, rocks, and debris from the area. For each spot:
- Use a shovel to make a small hole.
- Loosen the soil so the stake can go in easily.
- For rocky ground, dig deeper or use a hammer carefully.
If the ground is frozen or very dry, pour a little water to soften it before digging.
Step 3: Place The Stakes
Push each stake into the hole. The stake should be straight and stable. If your lights lean, use a level to fix them.
- Stakes should go at least 4–6 inches deep.
- Make sure the solar panel faces up and is not blocked by plants or objects.
Step 4: Attach The Light Head
Put the light head onto the stake. It should click or screw in place firmly. If the head wobbles, check for loose connectors.
Step 5: Space Your Lights Evenly
Measure the distance between each light. Most paths look best with lights 6–8 feet apart.
- Too close: Lights may look cluttered.
- Too far: The path may not be bright enough.
Adjust spacing as needed. Stand back and look at the layout before finishing.
Step 6: Test Your Lights
Solar lights need a full day of sun to charge. After installation:
- Wait until night.
- Check if all lights turn on automatically.
- If some don’t work, check the battery or make sure the panel is clean.
Beginner tip: If you have cloudy weather, it may take 2–3 days for lights to reach full brightness.
Tips For Perfect Results
Getting your solar path lights to look great and work well takes a bit more than just sticking them in the ground. Here are some expert tips:
1. Angle The Panels
If your lights allow, tilt the solar panel toward the south (in the US) for maximum sunlight.
2. Clean Panels Regularly
Dirt, dust, or bird droppings can block sunlight. Wipe panels every 2–4 weeks.
3. Check Batteries Once A Year
Rechargeable batteries lose power over time. Replace them yearly to keep your lights bright.
4. Avoid Shade
Even partial shade cuts charging power by 50% or more.
5. Use Mixed Styles
Combine different light designs for a unique look—don’t be afraid to mix modern and classic styles.
6. Protect During Winter
If your area gets heavy snow, remove the lights and store them until spring.
7. Mark With Flags
If you mow your lawn, use small flags to remember where the lights are. Many beginners break lights while mowing.
Troubleshooting Common Problems
Solar path lights are simple, but sometimes they don’t work as expected. Here’s how to fix typical issues:
Lights Don’t Turn On
- Check battery: It may be dead or not connected.
- Panel is dirty: Clean with a soft cloth.
- Blocked sensor: Make sure nothing covers the light sensor.
Lights Are Dim
- Old battery: Replace with a new rechargeable battery.
- Panel shaded: Move the light to a sunnier spot.
Lights Turn On During Day
- Sensor malfunction: Try resetting the light or replacing the sensor.
- Panel covered: Remove any leaves or objects blocking light.
Lights Lean Or Fall
- Loose stake: Push deeper or use a ground anchor.
- Soft soil: Pack soil around the stake tightly.
Lights Don’t Last All Night
- Low battery capacity: Upgrade to a larger battery if possible.
- Insufficient sun: Move lights to a sunnier area.
Expert tip: Most troubleshooting is solved by cleaning the panel and replacing the battery.

Credit: www.amazon.com
Maintaining Solar Path Lights
A little care keeps your solar path lights working and looking good for years. Maintenance is easy but important.
Routine Maintenance
1. Clean Panels Monthly
Use a damp cloth. Avoid harsh cleaners.
2. Check For Damage
Look for cracks, loose parts, or corrosion. Replace broken pieces.
3. Replace Batteries Annually
Old batteries can leak or lose power. Use the same type as the original.
4. Protect From Extreme Weather
In heavy storms, bring lights inside.
5. Adjust Placement
If plants grow and shade the lights, move them to a sunny spot.
Seasonal Care
- Spring: Inspect lights after winter. Clean, check batteries, and replace any broken parts.
- Summer: Clean panels more often due to dust.
- Autumn: Remove fallen leaves around lights.
- Winter: Store lights indoors if your area gets snow or freezing rain.
Data Table: Battery Types And Lifespan
Here’s a quick look at common battery types and how long they last.
| Battery Type | Average Lifespan | Replacement Cost (USD) | Common in |
|---|---|---|---|
| NiMH AA | 12–18 months | 5–8 | Basic stake lights |
| Li-ion 18650 | 18–24 months | 10–15 | Premium lantern style |
| NiCd AA | 6–12 months | 5–7 | Older models |
Non-obvious insight: Upgrading to Li-ion batteries often makes older lights brighter and last longer.
Enhancing Your Outdoor Space With Solar Path Lights
Solar path lights do more than just light a walkway. You can use them to:
- Highlight garden features like statues or fountains.
- Frame patios, decks, or pools.
- Guide guests along driveways or steps.
- Create patterns or shapes with different colored lights.
Example: Some homeowners use solar lights to spell words or create designs in their yard for special occasions.
Combining Solar Path Lights With Other Lighting
For larger yards, mix solar path lights with low-voltage wired lights. Wired lights are brighter and can be used for security, while solar lights add soft, decorative touches.
Expert tip: Don’t rely on solar lights for main security lighting; use them to make your home welcoming and attractive.
Credit: www.hardollenterprises.com
Comparing Solar Vs. Wired Path Lights
If you’re still deciding, here’s a quick comparison:
| Feature | Solar Path Lights | Wired Path Lights |
|---|---|---|
| Installation | Easy, no wires | Complex, requires wiring |
| Cost | Low, no energy bill | High, plus electricity usage |
| Brightness | Medium | High |
| Maintenance | Clean panel, replace battery | Replace bulbs, check wiring |
| Eco-friendly | Yes | No |
| Flexibility | Move easily | Fixed |
For most homeowners, solar path lights are the best choice for ease and eco-friendliness.
Advanced Tips For Experienced Users
If you want your solar path lights to stand out or last longer, try these advanced ideas:
1. Upgrade Batteries
Use higher-capacity rechargeable batteries for longer light.
2. Add Reflectors
Put small reflectors behind the light to boost brightness on the path.
3. Paint Stakes
Match the stakes to your garden color for a custom look.
4. Install Smart Sensors
Some advanced lights allow you to adjust brightness or turn on/off with a remote.
5. Solar Panel Boosters
If your area is shady, attach a small extra solar panel to your light.
Expert tip: You can connect some solar lights to a single larger panel for extra charging power, especially in cloudy climates.
Credit: beyondsolar.net
Safety Precautions
Solar path lights are safe, but a few precautions help avoid problems:
- Don’t install lights where people may trip.
- Make sure stakes are deep enough to avoid falling.
- Don’t use damaged batteries; they can leak.
- If you have pets, choose sturdy lights that won’t tip easily.
Beginner tip: Always check for underground pipes or wires before digging, even for small holes.
Environmental Benefits
Installing solar path lights helps the environment:
- No electricity needed—reduces carbon footprint.
- LED bulbs last longer and use less energy.
- Batteries can be recycled; don’t throw them in the trash.
According to the US Department of Energy, LED solar lights use up to 75% less energy than traditional bulbs. This makes them a smart choice for eco-friendly homes.
Where To Buy Solar Path Lights
You can find solar path lights at:
- Home improvement stores (like Home Depot, Lowe’s)
- Online retailers (Amazon, Walmart)
- Specialty lighting stores
- Garden centers
When buying online, check reviews and ratings. Look for warranty information and real customer photos.
For more details on solar energy and outdoor lighting, visit US Department of Energy.
Frequently Asked Questions
What If My Solar Path Lights Don’t Get Enough Sun?
If your yard is shady, your lights may not charge well. Try moving them to a sunnier spot or use lights with monocrystalline panels. Some advanced models have larger panels for better charging in low light.
How Do I Replace The Batteries?
Most solar path lights have a small door or cover under the light head. Open it, remove the old battery, and put in a new rechargeable one. Always use the same type (NiMH, Li-ion, etc. ) And check the size.
Can Solar Path Lights Be Used In Winter?
Yes, but their performance drops if there’s less sunlight or snow covers the panels. In areas with heavy snow or freezing rain, store the lights indoors until spring to prevent damage.
Are Solar Path Lights Safe For Pets And Children?
Solar path lights are safe, but small parts can break off if pulled. Choose sturdy models and install them away from play areas. If you have curious pets, pick lights with strong stakes.
How Long Do Solar Path Lights Last?
Most solar path lights last 2–3 years if you maintain them. LED bulbs rarely burn out, but batteries need replacement every 1–2 years. Quality materials and good care help them last longer.
Solar path lights are an easy, affordable way to upgrade your outdoor space. With the right planning and a few simple steps, you can enjoy beautiful paths, safer walkways, and a greener home. Remember to choose quality lights, place them wisely, and maintain them for lasting results.
Whether you’re a beginner or an experienced homeowner, installing solar path lights is a project you can complete in a single afternoon—and enjoy every night for years to come.