
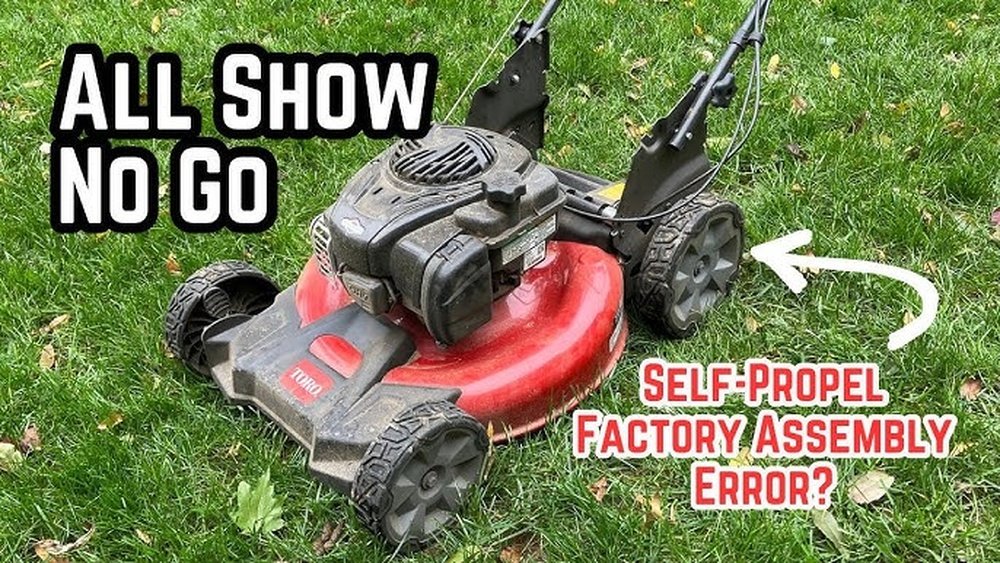
Replacing the self-propelled lawn mower belt may sound difficult, but with the right guide, most people can do it in their own garage. If your mower isn’t moving as smoothly as before, or the drive system feels weak, a worn or broken self-propelled belt is often the reason. Changing it is a task that can save you both time and money compared to a repair shop. This article will walk you through every step, from preparation to completion, and explain common pitfalls to avoid. Even if you’re not a mechanic, you’ll get the confidence to handle this project yourself.
Understanding The Self-propelled Lawn Mower Belt
Self-propelled lawn mowers use a drive belt to connect the engine to the wheels. When this belt wears out, the mower might slow down, make strange noises, or stop driving altogether. The belt is a critical part that transfers power, so a damaged belt means you’ll be pushing instead of gliding.
Most self-propelled mowers use a rubber or composite V-belt. This part can crack, stretch, or even snap after many hours of use. Replacing it will restore the mower’s performance.
Signs Your Belt Needs Replacing
- The mower moves slowly or not at all
- You hear squealing, slipping, or grinding noises
- The drive control feels loose or unresponsive
- Visual cracks, fraying, or glazing on the belt
Ignoring these signs can lead to more expensive repairs, as a broken belt may damage other components.
Tools And Materials You’ll Need
Gathering the right tools before starting saves frustration. Here’s what you should have:
- Replacement belt (exact type for your mower model)
- Socket set (usually metric and standard)
- Screwdrivers (flat and Phillips)
- Pliers
- Wrench set
- Work gloves
- Eye protection
- Brush or rag (for cleaning debris)
Some mowers may require a special tool for pulley removal, but most household toolkits are enough. Always check your owner’s manual for model-specific needs.
Safety First: Preparing For The Job
Before you touch any part of your mower, safety must come first. Lawn mowers are machines with sharp blades and heavy parts.
- Disconnect the spark plug wire. This prevents accidental starting.
- Make sure the fuel tank is nearly empty, or drain it to avoid spills.
- Wear sturdy gloves and eye protection.
- Work on a flat, stable surface.
Many beginners forget to disconnect the spark plug, which can be dangerous. Taking a few minutes for safety steps helps you avoid injuries.
Step-by-step Guide: How To Replace A Self-propelled Lawn Mower Belt
Let’s get into the process itself. While models differ, the following steps cover the most common lawn mowers, including popular brands like Honda, Toro, Craftsman, and Husqvarna.
1. Remove The Mower Deck
First, tip the mower on its side with the air filter and carburetor facing up to prevent leaks. Use a wrench or socket to remove the blade bolt and then carefully take off the blade. This gives you access to the belt and pulleys.
On some mowers, you’ll need to remove a belt cover or shield. Look for screws or clips holding it in place.
2. Locate And Examine The Belt
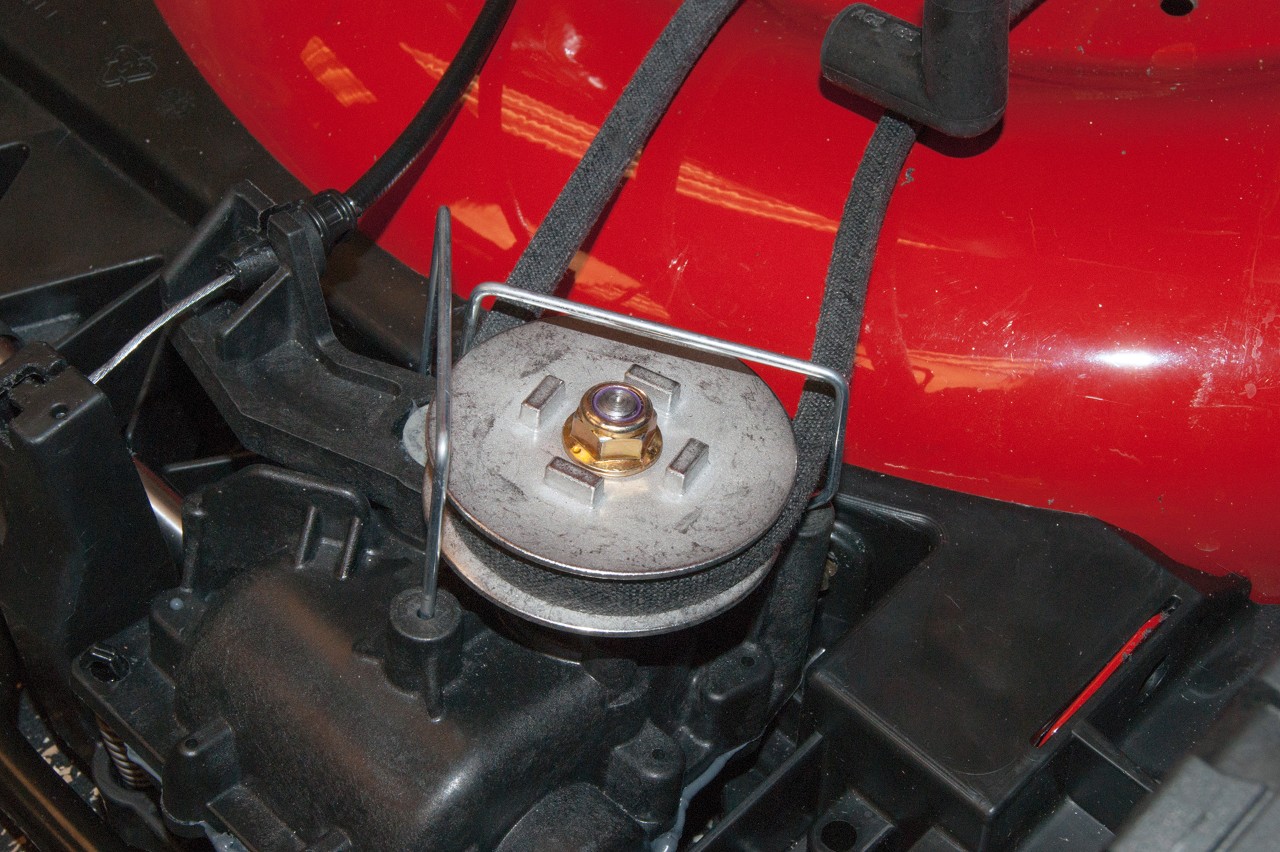
With the cover off, you’ll see the drive belt wrapped around two pulleys: one on the engine crankshaft and one on the drive system near the wheels. Examine how the belt is routed. Taking a quick photo with your phone can help you remember the arrangement.
3. Remove The Old Belt
Gently slide the belt off the engine pulley first. You may need to loosen or remove the tension spring or bracket. Then, pull the belt off the transmission pulley. If the belt is stuck, rock the pulley back and forth while pulling.
If your mower has a tensioner, make sure to relieve the tension before removing the belt. For some models, you might need to remove a wheel or another cover.
4. Clean The Belt Area
Debris, grass, or buildup can damage the new belt. Use a brush or rag to clean the pulleys and surrounding area. Double-check for worn or damaged pulleys, as these can cause premature belt failure.
5. Install The New Belt
Line up the new replacement belt according to your earlier photo or the owner’s manual diagram. Start with the transmission pulley, then route the belt around the engine pulley. Make sure the belt sits fully in the pulley grooves.
If there’s a tensioner, reattach or adjust it so the belt is snug but not too tight. Reinstall any covers, springs, or clips you removed earlier.
6. Reassemble The Mower
Put the blade back on, tightening the bolt to the recommended torque (usually 30-40 ft-lbs, but check your manual). Double-check all covers and guards are secure. Stand the mower upright.
7. Final Checks And Testing
Reconnect the spark plug wire and add fuel if needed. Start the mower and engage the self-propel system. The mower should move smoothly, and the drive lever should feel responsive.
If you hear any unusual noises or the mower doesn’t move, shut it off and check your installation. Sometimes, the belt can slip off or twist during reassembly.
Credit: www.vetrallaservizi.it
Comparison: Common Belt Types And Lifespan
Choosing the right belt is important for performance and durability. Here’s a quick comparison of the most common belt materials:
| Belt Type | Material | Average Lifespan | Best For |
|---|---|---|---|
| Standard V-Belt | Rubber | 2-3 years | Most residential mowers |
| Kevlar Reinforced | Kevlar fiber & rubber | 3-5 years | Heavy-duty or commercial |
| Polyurethane | Plastic composite | Up to 6 years | High wear environments |
Most homeowners use standard rubber belts, but upgrading to a Kevlar-reinforced belt can be a smart choice if you mow large areas or want extra durability.
Typical Costs And Savings
Doing this repair yourself can save a surprising amount of money. Here’s a breakdown:
| Option | Parts Cost | Labor Cost | Total Cost |
|---|---|---|---|
| DIY | $12–$30 | $0 | $12–$30 |
| Repair Shop | $12–$30 | $50–$90 | $62–$120 |
By replacing the belt yourself, you save on labor, which is usually the most expensive part.
Two Mistakes Beginners Often Make
- Forgetting the Belt Routing: Many people remove the old belt without noting its path. Always take a photo or sketch before removal. Even a small routing mistake can cause the drive system to fail or wear out the new belt quickly.
- Not Checking Pulley Condition: Worn or rough pulleys can shred a new belt in weeks. Run your finger around each pulley (with gloves on) and feel for sharp edges or grooves. Replace damaged pulleys before installing the new belt.
Troubleshooting: If The Mower Still Doesn’t Move
After replacing the belt, sometimes the mower still refuses to drive. Here are a few quick checks:
- Is the belt routed correctly and tensioned properly?
- Are the pulleys clean and turning freely?
- Is the drive cable or lever working, not stretched or broken?
- Did you reinstall all covers and guards?
If all these seem correct, consult your owner’s manual or contact the manufacturer’s support line.
Practical Tips For A Smoother Job
- Lay out each part in the order you remove them. This helps during reassembly.
- If your mower has a belt guide, make sure the new belt sits inside it.
- Use a torque wrench for blade bolts to avoid under-tightening or stripping.
- Replace the belt at the start of mowing season for best results.
When To Call A Professional
Most belt replacements are manageable, but if your mower has a hydrostatic drive, complex transmission, or you’re not comfortable with mechanical work, it’s okay to seek professional help. Some repairs involve removing gears or adjusting linkages, which can be tricky.
Credit: www.youtube.com
Example: Replacing A Belt On A Honda Hrr216
For a Honda HRR216, the process includes removing the rear wheel, taking off the debris shield, and loosening the transmission pulley. This model uses a Kevlar-reinforced belt for extra strength. The job takes about 40 minutes if you have the right tools.
If you have a different mower, always check the owner’s manual for model-specific instructions.
Useful Resources
If you want more information on how self-propelled mower systems work, or need diagrams, you can visit this Wikipedia page on lawn mowers.

Credit: www.amazon.com
Frequently Asked Questions
How Often Should I Replace My Lawn Mower’s Self-propelled Belt?
Most belts last 2-5 years depending on use and quality. Inspect the belt every season for cracks or stretching. Replace it if you notice wear, loss of drive, or noise.
What If My New Belt Keeps Slipping Off?
If the belt slips, check for incorrect routing, worn pulleys, or missing belt guides. Also, make sure the tension is correct. A loose belt will not transfer power properly.
Can I Use Any Belt, Or Does It Have To Be A Specific Type?
Always use the exact belt type and size recommended for your mower. Universal belts often don’t fit right and can cause damage. Check your mower’s manual or look up the model number.
Is Replacing The Belt Dangerous?
With basic safety steps—disconnecting the spark plug, draining fuel, and wearing gloves—the job is safe for most people. Avoid the blade area and work on a stable surface.
Why Does My New Belt Wear Out Quickly?
Quick wear is usually caused by damaged pulleys, incorrect installation, or debris caught in the drive system. Clean everything before installing, and always check pulley condition.
Replacing your lawn mower’s self-propelled belt may look intimidating, but with patience and careful steps, it’s a project most homeowners can do. The key is to stay organized, follow each step, and double-check your work. With a new belt installed, you’ll enjoy smoother mowing and save money on repairs.