
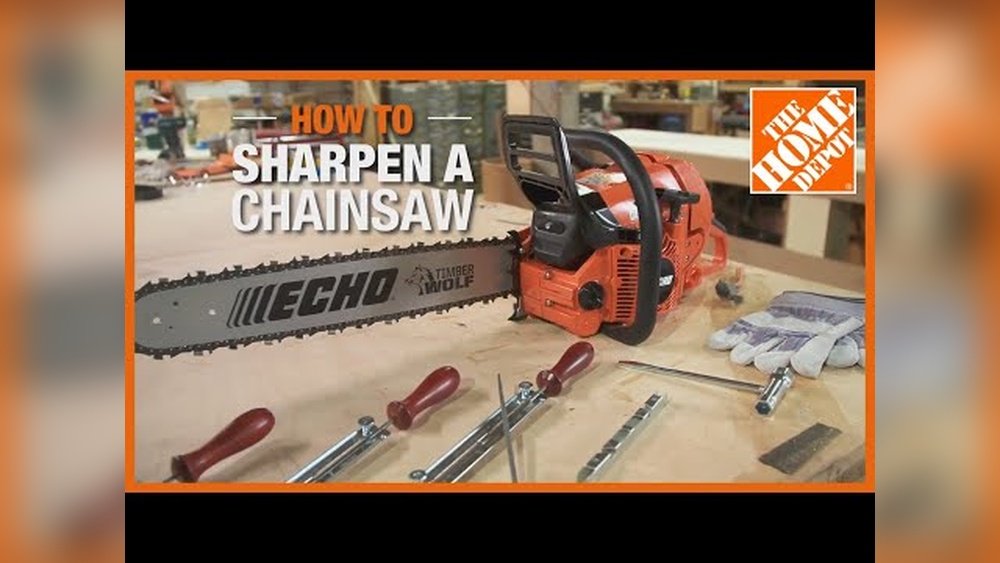
A chainsaw is a powerful tool for cutting trees, firewood, or pruning large branches. But even the best chainsaw loses its edge after hours of work. When the chain becomes dull, cutting becomes slow, dangerous, and frustrating. Sharpening your chainsaw chain at home is not only possible—it’s smart, cost-effective, and keeps your tool in top shape.
Many people worry that sharpening a chainsaw is too technical, or that it requires expensive equipment. In reality, with the right guidance and a few basic tools, anyone can learn how to sharpen a chainsaw chain safely and effectively. This guide walks you through each step, from understanding your chain to choosing the right sharpening method.
You’ll learn tips to avoid common mistakes, how to get the perfect cutting edge, and how to keep your chainsaw performing like new.
Whether you use your chainsaw for landscaping, firewood, or professional forestry, keeping the chain sharp is essential for safety and efficiency. Dull chains increase the risk of kickback, strain your saw’s motor, and make every job harder. This article explains everything you need to know, using clear language and practical examples.
By the end, you’ll feel confident sharpening your chainsaw chain at home and ready to handle the toughest jobs.
Why Chainsaw Chain Sharpening Matters
A sharp chainsaw chain is more than a convenience—it’s a must for safety and performance. When your chain is sharp, your saw cuts cleanly with less effort. You’ll notice:
- Faster cutting: A sharp chain slices through wood quickly, reducing work time.
- Less wear on the saw: The motor does not have to work as hard, which extends its life.
- Safer operation: Dull chains are more likely to slip or cause dangerous kickback.
- Cleaner cuts: Sharp teeth make smooth cuts, important for tree health and firewood quality.
Using a dull chain can be risky. It forces you to push harder, which can lead to accidents. It also creates more heat and dust, and can damage both your saw and the wood you’re cutting.
When To Sharpen Your Chainsaw Chain
Knowing when your chainsaw needs sharpening is just as important as knowing how. Here are some clear signs:
- The saw produces fine sawdust instead of wood chips.
- You need to press down hard for the saw to cut.
- The chainsaw pulls to one side while cutting.
- Smoke appears even though the chain is lubricated.
- The chain bounces or rattles during operation.
Most users find they need to sharpen the chain after every few hours of cutting, but the frequency depends on wood type, chain quality, and use conditions. Hitting rocks, dirt, or metal can dull the chain instantly.
Understanding Chainsaw Chain Types And Anatomy
Before sharpening, it’s important to know your chain type and how it works. Chainsaw chains come in several designs, but the main parts are:
- Cutters: The sharp teeth that do the cutting.
- Drive links: Fit into the chainsaw bar.
- Rakers (depth gauges): Control how much wood the cutters remove.
The two most common chain types are:
- Full chisel: Square-cornered teeth, fast cutting, but dull quickly.
- Semi-chisel: Rounded corners, slower cutting, but stay sharp longer.
Chains also vary in pitch (distance between links) and gauge (thickness of the drive link). Check your chainsaw manual or the chain itself for markings.
Example: How To Find Your Chain Type
Look for numbers stamped on the drive links or the box. For example, “. 325” pitch and “. 050” gauge are common sizes. Knowing these numbers ensures you buy the correct file and avoid mistakes.
Tools You Need For Sharpening A Chainsaw Chain
Sharpening your chainsaw at home does not require expensive equipment. Here’s what you need:
- Round file: Matches your chain’s cutter size (e.g., 5/32″, 3/16″, or 7/32″).
- File guide: Helps hold the file at the correct angle.
- Flat file: For adjusting the rakers.
- Depth gauge tool: Ensures rakers are set correctly.
- Vise or clamp: Holds the chainsaw bar steady.
- Protective gloves and safety glasses.
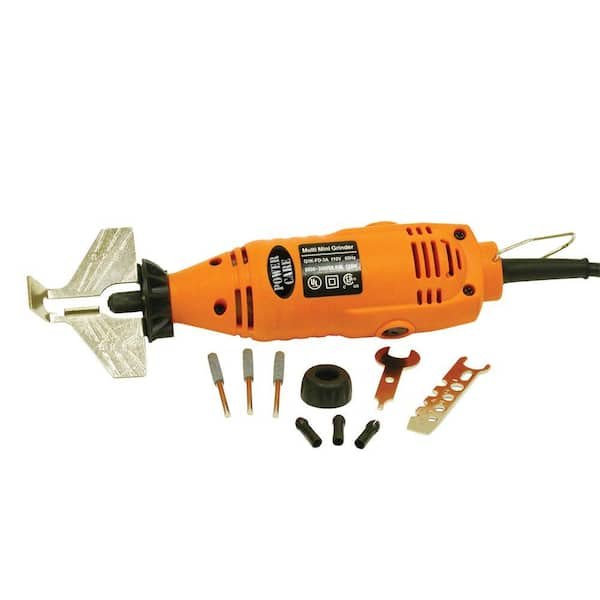
Some users prefer electric chain sharpeners for speed and consistency, but hand filing is the most affordable and portable method.
Chainsaw File Size Chart
To help you match the right file to your chain, here’s a quick reference:
| Chain Pitch | File Diameter (inches) |
|---|---|
| 1/4″ | 5/32″ |
| .325″ | 3/16″ |
| 3/8″ | 7/32″ |
| .404″ | 7/32″ |
Preparing To Sharpen Your Chainsaw Chain
Before sharpening, take a few minutes to prepare. This makes the process safer and more accurate.
- Clean the chain: Remove dirt, oil, and sawdust with a brush or rag.
- Inspect for damage: Check for broken or badly worn cutters. Replace the chain if needed.
- Secure the chainsaw: Use a vise or clamp to hold the bar steady.
- Mark your starting point: Use a marker or chalk on the first cutter to avoid sharpening the same tooth twice.
Wearing gloves protects your hands from sharp cutters and metal filings. Safety glasses keep debris out of your eyes.
Step-by-step Guide: How To Sharpen A Chainsaw Chain By Hand
Sharpening by hand is the most common method for homeowners and professionals alike. Here’s a clear, step-by-step process:
1. Set The File In The Guide
Place the round file in the file guide, matching the angle recommended for your chain (usually 25° or 30°). The guide helps you keep the file level and at the right depth.
2. Position The File
Rest the file on the cutting edge of the first cutter, making sure it matches the factory angle. Usually, one-quarter of the file diameter should be above the top plate.
3. File With Smooth Strokes
Push the file through the cutter, away from your body, using smooth, even strokes. Apply gentle pressure and lift the file on the return stroke—never drag it back. Count your strokes (usually 3 to 8 per tooth) and use the same number for each cutter.
4. Sharpen Every Other Tooth
Chainsaw chains have left and right cutters in an alternating pattern. Sharpen all cutters on one side first, then turn the saw around and do the other side.
5. Check For Consistency
After sharpening, all cutters should be the same length and angle. Uneven teeth can cause the saw to pull to one side.
6. Adjust The Rakers (depth Gauges)
After every 2-3 sharpenings, check the raker height. Use a depth gauge tool and a flat file to lower any raker that sits above the tool. Rakers that are too high make the saw cut poorly; too low can make it grab and kick back.
7. Clean And Oil The Chain
After sharpening, brush off metal filings and apply chain oil. This protects the chain and ensures smooth operation.
Quick Reference: Hand Sharpening Checklist
- Secure the saw and bar.
- Mark your starting tooth.
- Use the right file size and guide.
- Maintain the correct angle.
- Same number of strokes per tooth.
- Check and adjust rakers as needed.
Credit: www.homedepot.com
Using An Electric Chainsaw Sharpener
For those who sharpen chains often, or want extra precision, an electric chainsaw sharpener is a great investment. These machines use a grinding wheel to sharpen each cutter quickly and accurately.
How Electric Sharpeners Work
The chain fits into a special holder. You set the correct angle and depth, then lower the spinning wheel onto each cutter. Adjustments allow you to match the original cutter shape exactly.
Pros And Cons Of Electric Sharpeners
| Advantages | Disadvantages |
|---|---|
| Fast and consistent sharpening | More expensive than hand files |
| Good for high-volume users | Requires electricity and a workspace |
| Precise angle and depth adjustment | Bulkier, less portable |
When To Use Electric Sharpeners
- Sharpening many chains regularly.
- Restoring very dull or damaged chains.
- Getting a precise, factory-like edge.
Many hardware stores offer electric sharpening as a service, but owning your own unit saves time and money in the long run.
Common Mistakes And How To Avoid Them
Many beginners make similar errors when sharpening chainsaw chains. Avoid these pitfalls:
- Wrong file size: Using the wrong size file changes the cutter shape, making the chain cut poorly.
- Incorrect angle: Too steep or too shallow can cause the saw to cut crooked or grab.
- Uneven cutters: Filing some cutters more than others leads to vibration and poor performance.
- Forgetting the rakers: If you never adjust them, your chain will stop cutting well even if the teeth are sharp.
- Too much pressure: Let the file or grinder do the work—pushing hard can damage the cutters.
- Not cleaning the chain: Dirt and oil can gum up files and grinders, reducing sharpness.
A non-obvious insight: many users fail to realize that even a “new” chain sometimes benefits from a quick touch-up. Chains are not always perfectly sharp out of the box.
How Often Should You Sharpen A Chainsaw Chain?
Frequency depends on what and how you cut. For most homeowners, sharpening after every 2-3 tanks of fuel is a good rule. If you hit dirt, ice, or rocks, sharpen immediately.
Professional tip: Carry a round file in your pocket or toolbox, and touch up the cutters before they become very dull. This saves time and effort compared to waiting until the chain is blunt.
How To Sharpen A Chainsaw Chain Without A File
Sometimes you may not have a file available. In emergencies, you can use a small diamond sharpening rod or a Dremel tool with a grinding stone attachment. These methods are less precise than a proper file but can restore some cutting power until you can do a full sharpening.

Credit: www.youtube.com
Chainsaw Sharpening Angles Explained
Maintaining the correct angle is key to a sharp, safe chain. The most common angles are:
- Top plate angle: 25° to 35°, depending on chain type.
- Side plate angle: Usually 80° to 85°.
- File tilt angle: Sometimes 10°, especially for full chisel chains.
Check your chain’s manual or manufacturer’s website for the recommended angles. Using a file guide helps you keep these angles correct.
Example Angle Settings
| Chain Type | Top Plate Angle | File Diameter |
|---|---|---|
| Full chisel | 25°-30° | 7/32″ |
| Semi-chisel | 30°-35° | 3/16″ |
Safety Tips For Chainsaw Sharpening
Working with sharp chains and metal tools requires care. These safety tips help prevent injury:
- Always wear gloves to protect from sharp cutters.
- Work in good light so you can see what you’re doing.
- Secure the chainsaw so it cannot move or fall.
- Keep fingers away from the file and cutters during sharpening.
- Wear safety glasses to block metal shavings or dirt.
If you use a grinder or electric sharpener, always follow the manufacturer’s safety instructions.

Credit: www.youtube.com
How To Sharpen Chainsaw Chain In The Field
Sometimes you must sharpen your chain outdoors, far from your workshop. Here’s how to do it safely and effectively:
- Carry a pocket round file and guide in your tool belt or bag.
- Turn off the saw and engage the chain brake before sharpening.
- Use a tree stump or log to support the bar if you don’t have a vise.
- Work slowly and carefully, keeping your body and hands away from the cutting edge.
Field sharpening will not be as perfect as bench sharpening, but it restores enough sharpness to finish the job.
How To Know When It’s Time To Replace Your Chain
Even with regular sharpening, every chain wears out eventually. Replace your chain if:
- Cutter length is less than 4mm (about 1/8″).
- Multiple cutters are broken or missing.
- Cracks appear in the links or cutters.
- The chain will not stay sharp, even after sharpening.
A new chain is a smart investment for safety and cutting performance. Old, worn chains are more likely to break or cause injury.
Storing And Maintaining Your Chainsaw Chain
Proper storage and maintenance keep your sharpened chain in good condition:
- Clean and dry the chain after use to prevent rust.
- Store in a dry place, ideally in a sealed container or bag.
- Oil the chain before storage.
- Inspect regularly for damage or wear.
These habits extend the life of your chain and reduce the need for frequent sharpening.
Environmental And Cost Benefits Of Sharpening At Home
Sharpening at home saves money and reduces waste. Instead of buying a new chain or paying for professional sharpening, you can reuse your chain many times. This lowers your carbon footprint and keeps old chains out of landfills.
For example, sharpening your chain just five times instead of buying new can save $50–$100 per year for a typical homeowner. For professionals, the savings are even greater.
Sharpening Chainsaw Chain: Quick Troubleshooting Guide
If your chain is not cutting well after sharpening, check these factors:
- Cutters are too short or uneven: File all cutters to the same length.
- Wrong file angle: Double-check with a guide.
- Rakers too high: Lower with a flat file and depth gauge tool.
- Chain installed backward: Make sure the sharp edge faces forward.
- Chain too loose or too tight: Adjust chain tension for safe operation.
These simple checks solve 90% of post-sharpening problems.
Chainsaw Chain Sharpening Kits: Are They Worth It?
Many stores sell sharpening kits with files, guides, and depth tools. These kits are a good investment for beginners because:
- All tools are matched to your chain size.
- Guides make it easier to hold the correct angle.
- Instructions are included for safe use.
Kits are available for under $25 and last for years with normal use.
When To Seek Professional Chainsaw Sharpening
If your chain is badly damaged or you want the most precise edge, consider professional sharpening. Many hardware stores and saw shops offer this service. It usually costs $5–$10 per chain.
Professional sharpeners use high-quality grinders and can fix problems like uneven cutters or damaged links. However, for routine maintenance, home sharpening is fast, easy, and affordable.
Advanced Tips: Getting The Perfect Edge
For extra-sharp performance, try these advanced tips:
- Finish with a fine diamond file for a mirror-like edge.
- Polish the side plates with a strop or fine sandpaper.
- Check chain tension after sharpening—files can slightly stretch the chain.
- Sharpen before the chain gets dull. Frequent light touch-ups are easier than fixing a badly worn chain.
Many experts use a simple magnifying glass to check edge quality after sharpening.
Real-world Example: Sharpening A Chainsaw Chain At Home
Let’s say you have a Stihl MS170 with a .325″ chain. You notice cutting slows down after splitting a load of firewood.
- Check the chain: Mark the first cutter and clean the chain.
- Use a 3/16″ round file in a file guide set at 30°.
- File each cutter with 5 smooth strokes, same number for all.
- Turn the saw and repeat for the other side.
- Check and lower rakers with a depth gauge tool.
- Oil and reinstall the chain.
After sharpening, your saw cuts faster, with less effort and smoother chips. You avoid the cost and wait of a shop visit.
Chainsaw Sharpening And Local Conditions
Sharpening needs can change depending on your region or climate. For example:
- Hardwood vs. softwood: Cutting hardwood (like oak or maple) dulls chains faster than softwoods (like pine).
- Sandy soil: Chains dull quickly if you cut trees with roots in sandy soil.
- Cold climates: Ice and frozen wood are tough on chains and need frequent sharpening.
- Urban areas: More likely to hit nails or wire embedded in trees.
Adjust your sharpening routine based on local challenges.
How To Find More Information
If you want more details about chainsaw maintenance, safety, and sharpening, the Oregon Tool website has excellent guides and videos. See their official resource here: Oregon Products.
Frequently Asked Questions
How Do I Know If My Chainsaw Chain Is Dull?
You’ll notice the saw cuts slowly, makes fine sawdust instead of chips, and may smoke or pull to one side. You’ll need to press hard for the saw to cut. These are all signs it’s time to sharpen the chain.
Can I Sharpen A Chainsaw Chain Too Many Times?
You can sharpen a chain many times until the cutters become too short—usually when there’s less than 4mm left. After that, the chain should be replaced for safety and performance.
Is Hand Filing Better Than Electric Sharpening?
Hand filing is cheaper and more portable. Electric sharpeners give more consistent results, especially for badly worn chains. Both methods work—choose based on your budget and needs.
What Is The Correct Angle For Sharpening A Chainsaw Chain?
Most chains use a 25° to 35° top plate angle. The exact number depends on your chain type and the wood you cut. Check the chain or saw manual for the recommended angle.
How Do I Avoid Uneven Chain Sharpening?
Use a file guide, count your strokes, and always sharpen all cutters to the same length. Mark your starting point so you don’t miss or double-sharpen any tooth.
Sharpening your chainsaw chain at home is a practical skill that saves time, money, and frustration. With the right tools and a little practice, you can keep your saw running at peak performance for every project.