
A leaf blower can make yard work faster and easier, but only if it’s working at its best. One part that gets worn out or damaged over time is the impeller—the fan-like component that creates the air flow. Sometimes, you can replace just the impeller tips instead of the whole impeller, saving time and money. Doing this right keeps your machine efficient, safe, and quiet. But many homeowners worry: is it difficult? Can you do it yourself? What tools do you need? This guide answers all those questions, walks you through each step, and gives expert tips to help you avoid common mistakes.
Understanding Leaf Blower Impellers
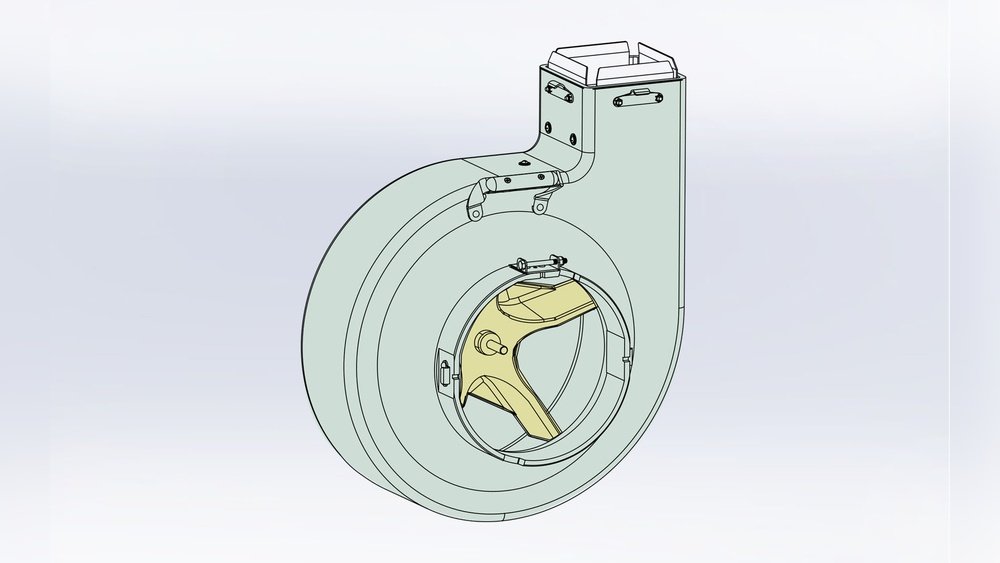
The impeller in a leaf blower is a spinning wheel with blades or vanes. As it turns, it sucks in air and pushes it out at high speed. The tips of the impeller blades do the most work—they cut through leaves, small twigs, and debris. Over time, these tips can wear down, crack, or even break off, reducing the blower’s power and efficiency.
Signs Your Impeller Tips Need Replacing
You may need to replace the impeller tips if you notice:
- The blower isn’t moving as much air as before.
- Unusual vibrations or noises.
- The blower struggles with normal amounts of leaves.
- Visual cracks, chips, or bends in the impeller tips.
Replacing the tips is usually faster and less expensive than buying a whole new impeller or blower. Some brands even sell replacement tip kits.
Types Of Leaf Blower Impellers And Tips
There are several types of impellers and tips, depending on your blower’s design.
| Type | Material | Common Brands | Tip Replacement? |
|---|---|---|---|
| Plastic Impeller | Polycarbonate, ABS | Black+Decker, Toro | Rarely (usually full replacement) |
| Metal Impeller | Aluminum, Steel | Stihl, Husqvarna | Often (replaceable tips) |
| Hybrid (Plastic+Metal) | Mixed Materials | Echo, Makita | Sometimes |
Plastic impellers are lightweight and cheap but tend to wear faster. Metal impellers are more robust and often allow for tip replacement, which is why they’re common in commercial or heavy-duty models.
Tools And Materials Needed
Before starting, gather these items:
- Replacement impeller tips (specific to your blower model)
- Screwdrivers (Phillips and flathead)
- Socket set or wrenches
- Pliers (needle-nose and regular)
- Clean cloths or shop rags
- Small brush or compressed air
- Gloves and safety glasses
- Thread locker (optional, for screws/bolts)
- Manufacturer’s manual (for diagrams and part numbers)
Tip: Always buy genuine or high-quality aftermarket tips. Cheap parts may wear out quickly or not fit well.
Preparing For The Job
Proper preparation prevents mistakes and injuries.
- Unplug or Remove Battery: For electric blowers, unplug from power. For cordless, take out the battery. For gas models, remove the spark plug wire so the engine can’t start accidentally.
- Clean the Blower: Use compressed air or a brush to remove dust and debris. This keeps dirt from falling into the motor or fan housing.
- Work in a Well-Lit Area: Impeller tips are small, and screws can get lost easily. Good lighting and a tidy workspace help.
- Photograph Before You Start: Take clear photos of the impeller and housing before disassembly. These will help you remember how things fit back together.
Step-by-step: How To Replace Leaf Blower Impeller Tips
This process covers most brands with replaceable tips (like Stihl, Husqvarna, Echo, and some Makita models). Always check your manual for model-specific instructions.
1. Access The Impeller Housing
Remove the blower tube and any guards or covers. Most covers are held by several screws or clips. Set screws aside in a small container.
Tip: Some plastic covers may snap off with gentle pressure. Don’t force them—look for hidden screws under stickers or rubber plugs.
2. Remove The Old Impeller Tips
With the impeller exposed, inspect how the tips are attached. Usually, they are bolted, screwed, or clipped to the ends of the impeller vanes.
- Use the correct screwdriver or socket to loosen and remove the fasteners.
- Carefully pull the old tip straight off. If it’s stuck due to debris or corrosion, use pliers gently.
- Note the position and orientation of each tip—some are directional.
Non-obvious Insight: On some models, the tips are different lengths or angles. Mixing them up can cause vibration or poor air flow.
3. Clean And Inspect The Impeller
Before installing new tips:
- Wipe down the impeller with a clean rag.
- Use a brush or compressed air to remove built-up dirt or stuck leaves.
- Check the impeller vanes for cracks or bends. If the main impeller is damaged, replacing tips alone may not solve the problem.
4. Install The New Tips
- Line up the new tip with the hole or slot on the impeller.
- Press or slide it in place, aligning as shown in your photos.
- Insert and tighten the fastener. If your manual recommends, add a drop of thread locker to the screw or bolt to keep it from loosening.
- Repeat for all tips, ensuring each is secure and matches the others in orientation.
Practical Example: On a Stihl BR series blower, the metal tips slide into slots and are held with a small set screw. If you overtighten, you may strip the screw or bend the tip.
5. Reassemble And Test
- Replace the impeller cover and all screws or clips.
- Reconnect the spark plug (gas), battery, or plug in the blower.
- Start the blower at low speed and listen for unusual sounds. If you hear rattling, shut it off and check tip installation.
- Gradually increase speed. The blower should sound smoother and move more air than before.
Non-obvious Insight: After replacement, expect a slight “burn-in” period. The new tips may make a faint scraping sound for a few minutes as they seat themselves. This should stop quickly.
Common Mistakes To Avoid
Many DIYers make the same errors. Watch out for these:
- Mismatched Tips: Using different styles, lengths, or brands of tips can cause imbalance and wear.
- Overtightening Fasteners: Stripped screws or cracked impeller vanes are hard to fix and require extra parts.
- Skipping Cleaning: Dirt left behind can quickly damage new tips or reduce airflow.
- Forgetting Safety Steps: Not disconnecting power is dangerous. Always take safety seriously.
- Losing Small Parts: Screws and clips can vanish easily. Use a cup or tray for small parts.
When To Replace The Whole Impeller
If the main impeller is:
- Severely bent or cracked
- Making contact with the housing (even after tip replacement)
- Worn in the center or at mounting points
…it’s time to replace the entire impeller. Continuing to use a damaged impeller can damage the motor or cause unsafe vibrations.
How Often Should You Replace Impeller Tips?
There’s no fixed schedule, but most homeowners find that impeller tips last 2–5 years depending on use. If you use your blower for heavy cleanup (like after storms or for commercial work), check tips every season.
Tip: Inspect impeller tips every spring before heavy use. Early replacement prevents surprise breakdowns.

Credit: www.amazon.com
Choosing The Right Replacement Tips
Not all impeller tips are the same. Here’s what matters most:
| Factor | Why It Matters | What to Look For |
|---|---|---|
| Material | Durability, weight | Match original (steel for metal, plastic for plastic) |
| Fit | Proper airflow, no vibration | Exact model number compatibility |
| Brand | Warranty, reliability | OEM or trusted aftermarket |
| Price | Value for money | Cheaper isn’t always better—balance quality and cost |
Common Buyer Mistake: Some people buy tips based only on size. But the shape and angle are just as important for performance.
Safety Tips For Impeller Replacement
Working with power tools always carries risk. Protect yourself:
- Wear safety glasses to prevent debris from hitting your eyes.
- Use gloves to avoid cuts on sharp impeller edges.
- Always disconnect power before opening the housing.
- Keep children and pets away from your workspace.
- If you feel uncertain, consult a professional or watch official repair videos.
Tip: If your blower is under warranty, check if self-repair is allowed. Some brands may void coverage if you open the housing yourself.

Credit: www.amazon.com
Troubleshooting After Replacement
Sometimes, things still don’t run smoothly after replacing impeller tips. Here’s what to check:
- Unusual Noise or Vibration: Double-check that all tips are secure, matched, and installed in the correct direction.
- Low Airflow: Make sure the housing and tube are clean and not blocked. Confirm you used the correct replacement tips.
- Blower Won’t Start: Verify all wires and safety switches are reconnected, especially on electric models.
- Tips Keep Coming Loose: Use thread locker and avoid over-tightening. Cheap hardware can vibrate loose—buy quality screws if originals are worn.
Upgrading Impeller Tips: Is It Worth It?
Some owners consider upgrading to stronger or longer-lasting tips (for example, switching from standard to high-strength steel). This can boost durability, especially for heavy use, but may increase weight or change airflow. Always consult your manual or manufacturer before upgrading. Not all blowers are designed for heavier tips, and using incompatible parts can void your warranty.
Environmental Considerations
Old impeller tips, especially metal ones, can often be recycled. Don’t toss them in the trash—check your local recycling center’s rules. Plastic tips may need to go in regular garbage unless marked as recyclable.
Non-obvious Insight: Some cities have special collection days for small engine parts and metal. Recycling helps reduce waste and may even earn you a small return.
How Much Does It Cost To Replace Impeller Tips?
On average, replacement tips cost $10–$40 for a set, depending on material and brand. Labor is free if you do it yourself. A full impeller replacement can cost $40–$100 plus installation, so replacing just the tips is much more affordable.
Tip: Check prices from different suppliers. Sometimes, buying directly from the manufacturer is cheaper than local hardware stores.
Credit: www.cyclonerake.com
Professional Vs. Diy: Which Is Right For You?
If you’re handy with tools, replacing impeller tips is a straightforward project. It usually takes 30–60 minutes. However, if you’re not comfortable opening power tools, or if your blower is still under warranty, professional repair may be safer.
Professional service typically costs $30–$60 in labor. Factor in travel time and possible delays if parts are out of stock.
Maintenance Tips To Extend Impeller Life
To avoid frequent replacements, follow these steps:
- Clean the blower regularly.
- Avoid sucking up rocks or large sticks, which can damage tips.
- Store indoors to prevent rust and corrosion.
- Check tips for wear every season and replace as needed.
- Use at the correct speed—running at maximum power for long periods wears parts faster.
Practical Example: Homeowners who use their blower mostly for dry, light leaves see much less tip wear than those who clear wet, heavy debris or small twigs.
Real-world Example: Step-by-step On A Husqvarna 350bt
Let’s walk through a real example for a popular model.
- Disconnect spark plug wire and remove blower tube.
- Unscrew and lift off the impeller cover (6 Phillips screws).
- Inspect impeller: The Husqvarna 350BT has three replaceable metal tips, attached with hex bolts.
- Remove bolts and slide off old tips. Compare new tips to old—check for matching size and curve.
- Clean impeller and housing with a brush.
- Install new tips, tightening bolts firmly but not excessively.
- Replace cover and reconnect spark plug wire.
- Test: Blower runs smooth, no vibration, airflow restored.
This process applies to many brands with minor changes.
Leaf Blower Impeller Tip Replacement: Pros And Cons
Here’s a quick summary of the advantages and disadvantages:
| Pros | Cons |
|---|---|
| Cheaper than full impeller replacement | Some models don’t allow tip-only replacement |
| Quick DIY project | Small screws/parts can be tricky |
| Extends blower life | Wrong tips can cause imbalance |
| Environmentally friendly (less waste) | Not a solution for badly damaged impellers |
Where To Find Replacement Impeller Tips
You can buy tips from:
- Authorized dealer/service centers
- Manufacturer websites
- Online retailers (Amazon, eBay, Home Depot)
- Local hardware stores (for common brands)
Always match your model number. If you’re unsure, contact customer service or visit a repair forum. Some reputable forums and resources, such as eReplacementParts, provide diagrams and part numbers for many brands.
The Value Of Regular Inspection
Checking your impeller tips at least once per season can prevent bigger, costlier problems later. Early detection lets you replace tips before they fail completely, reducing the risk of motor strain or dangerous imbalances. Mark your calendar or set a phone reminder to check your blower each spring and fall.
Frequently Asked Questions
How Do I Know If My Leaf Blower Has Replaceable Impeller Tips?
Check your blower’s user manual or look for screws/bolts at the ends of the impeller blades. Metal impellers often use replaceable tips, while many plastic models require full replacement. If in doubt, search for your model number on the manufacturer’s website or parts diagram.
Can I Use Universal Impeller Tips On Any Leaf Blower?
No. Impeller tips must match the size, shape, and mounting style of your blower’s impeller. Universal tips may not fit securely or could cause vibration and damage. Always use parts listed as compatible with your exact model.
Is It Safe To Run My Blower With One Broken Impeller Tip?
It’s not safe. A missing or damaged tip creates imbalance, which can damage the motor, housing, and other impeller blades. It can also make the blower noisy and less effective. Replace broken tips as soon as possible.
How Tight Should The Impeller Tip Screws Be?
Screws should be snug but not overtightened. Too loose and the tips may fly off; too tight and you can strip threads or crack plastic. If your manual gives a torque value, use a torque wrench. Otherwise, “firm hand tight” is a good guideline.
Will Replacing Impeller Tips Void My Warranty?
It depends on your brand and warranty terms. Some brands allow owner maintenance, others require service by an authorized dealer. Check your manual or warranty card before starting work. If unsure, call customer support.
Taking good care of your leaf blower’s impeller tips is an easy way to get better performance and longer life from your machine. With the right tools and this step-by-step guide, you can confidently tackle the job yourself. Remember: a little effort now saves bigger repairs later. If you ever feel stuck, don’t hesitate to ask for help or visit an official resource like Stihl’s How-To page for more support. Happy blowing!