Planting hydrangeas can transform any garden with their big, beautiful blooms and lush green leaves. These popular shrubs are loved for their easy care and long flowering period. But to get the best results, you need to know more than just digging a hole and adding water.
The way you plant your hydrangeas will decide how healthy and colorful they become. This guide will show you, step by step, how to plant hydrangeas correctly—so they thrive for years, not just a season. Along the way, you’ll also learn practical tips, avoid common mistakes, and understand what really matters for success.
Why Planting Hydrangeas Correctly Matters
Hydrangeas are not just attractive; they are also adaptable. But poor planting can mean weak growth, fewer blooms, and disease problems. Proper planting increases the chances your hydrangea will:
- Grow faster
- Produce more flowers
- Resist common pests and diseases
- Live longer
Many gardeners make simple mistakes, like planting too deep or choosing the wrong spot. These errors can take years to fix—or even kill your plant. Getting it right from the start saves time and money.
Choosing The Right Hydrangea Variety
Hydrangeas come in several types. Each has its own needs and look. Some grow big and wild, while others are small and neat. Picking the right variety is the first and maybe most important step.
Main Types Of Hydrangeas
Here’s a quick comparison of the most popular types:
| Type | Bloom Shape | Best For | Hardiness (USDA) |
|---|---|---|---|
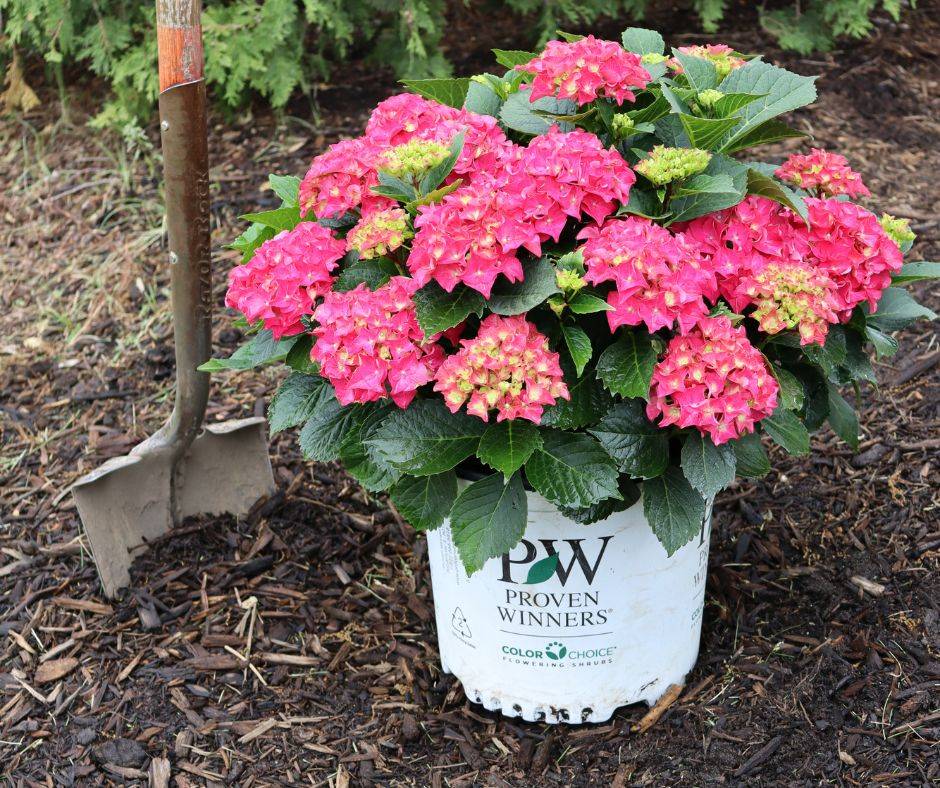
| Bigleaf (H. macrophylla) | Ball or lacecap | Containers, borders | 6–9 |
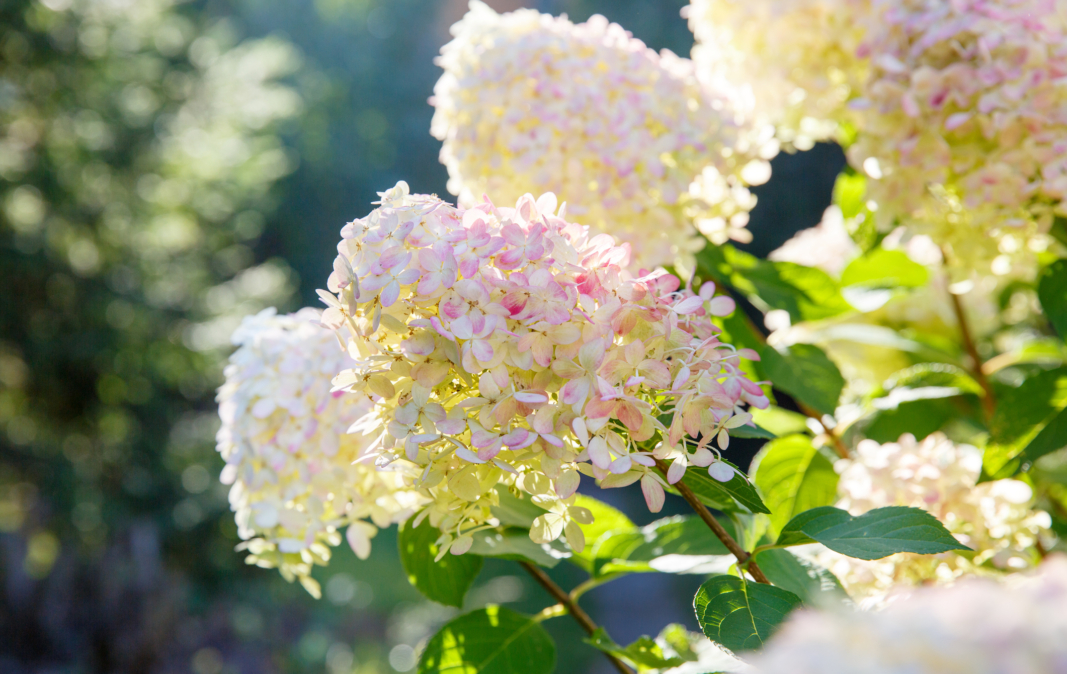
| Panicle (H. paniculata) | Cone | Sunny spots, hedges | 3–8 |
| Smooth (H. arborescens) | Round | Shade, woodland | 3–9 |
| Oakleaf (H. quercifolia) | Cone | Hot, dry sites | 5–9 |
| Climbing (H. anomala) | Flat clusters | Walls, fences | 4–8 |
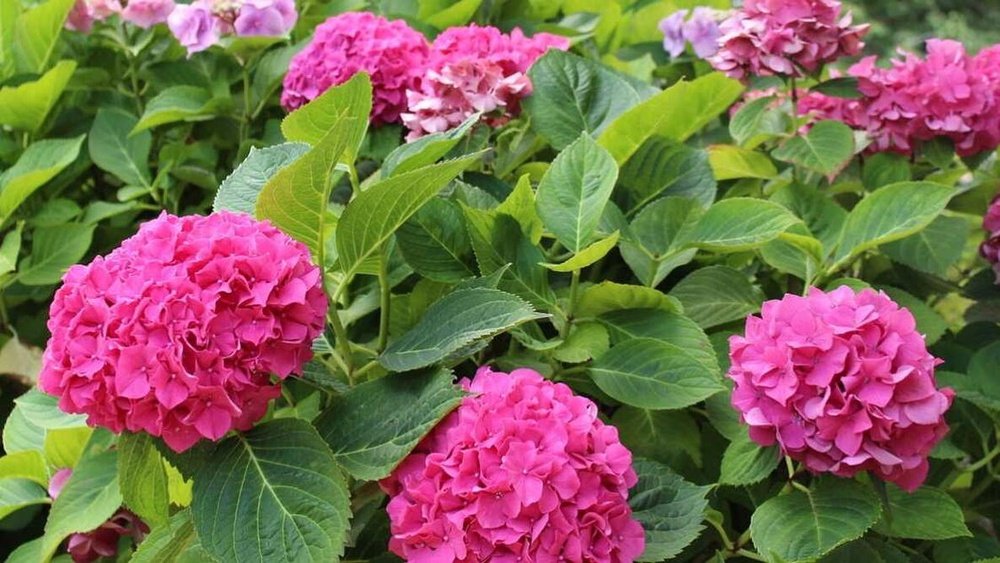
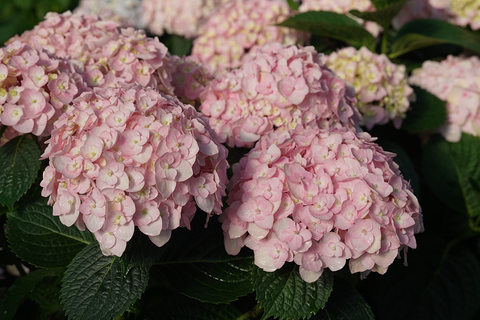
Bigleaf hydrangeas are famous for blue or pink flowers, depending on your soil. Panicle hydrangeas are tough and handle sun better. Smooth hydrangeas like shade and bloom on new wood. Oakleaf hydrangeas have bold leaves and do well in dry places. Climbing hydrangeas are perfect for vertical gardens.
What To Consider
- Climate: Check your USDA zone. Not all hydrangeas survive cold winters or hot summers.
- Space: Some grow over 6 feet tall and wide, others stay compact.
- Flower Color: Bigleaf types can change color with soil, but others can’t.
- Sunlight: Some need shade, some love sun.
- Soil Type: Most hydrangeas prefer rich, moist soil, but some adapt better to clay or sand.
Before buying, read the plant tag or ask the nursery. If you plan carefully, your hydrangea will need less care and reward you with more blooms.
When Is The Best Time To Plant Hydrangeas?
Timing is key for planting hydrangeas. Plant at the wrong time, and your shrub may struggle to establish roots or even die.
Planting Seasons
- Spring: The best time in most places. The soil is warming, rain is common, and roots have months to grow before winter.
- Fall: Another good time, especially in mild climates. The soil is still warm, but air is cooler, so there’s less stress on the plant.
- Summer: Only plant in early summer, and only if you can water often. Hot, dry weather is risky.
Why Not Plant In Winter?
Hydrangeas need time to grow roots before the ground freezes. Planting in winter means the roots can’t grow, and your plant may die.
Special Tips
- In very hot places, plant in early spring or late fall to avoid heat stress.
- In cold areas, spring planting is safer so roots are strong before winter.
- Avoid planting during a heatwave or drought.
How To Choose The Right Spot
Hydrangeas are flexible but picky about location. The right spot can mean the difference between a few flowers and a spectacular show.
What Hydrangeas Need
- Light: Most hydrangeas like morning sun and afternoon shade. Too much sun burns leaves, too little means fewer flowers.
- Shelter: Wind can dry out or break stems. Plant near a fence or wall for protection.
- Drainage: Roots hate soggy soil. Avoid low spots where water collects.
- Room to Grow: Check the mature size and give each plant enough space. Crowding causes disease.
Mistakes To Avoid
- Planting too close to trees (roots compete for water)
- Planting under roof edges where heavy water can damage them
- Putting them in full shade (means weak stems and few blooms)
Example
In the southern US, hydrangeas do best on the east side of a house. They get cool morning light and escape harsh afternoon sun.
Credit: hydrangea.com
Preparing The Soil For Hydrangeas
Healthy soil is the secret to strong hydrangeas. Good soil helps roots grow, holds the right amount of water, and supplies nutrients.
Testing And Amending Your Soil
- Test pH: Hydrangeas like slightly acidic soil (pH 5.5–6.5). Bigleaf hydrangeas can change flower color based on pH.
- Check Drainage: Dig a hole 12 inches deep. Fill with water. If it drains in less than 2 hours, drainage is good.
- Add Organic Matter: Mix compost, leaf mold, or aged manure into your soil. This feeds the plant and improves structure.
Changing Flower Color
- Blue Flowers: Add aluminum sulfate to lower pH.
- Pink Flowers: Add lime to raise pH.
Insight: Changing flower color is not instant. It can take a full season or more to see results.
How Deep And Wide To Dig
- The hole should be 2–3 times wider than the root ball, but no deeper.
- Loosen the soil at the bottom and sides for easy root growth.
| Hydrangea Size | Hole Width | Hole Depth |
|---|---|---|
| Small (1-gallon pot) | 18–24 inches | Same as pot |
| Large (3-gallon pot) | 30–36 inches | Same as pot |
Non-obvious tip: Don’t add fertilizer to the hole. It can burn new roots. Mix it into the soil after planting.
How To Plant Hydrangeas: Step-by-step
Now you’re ready to plant. Follow these steps for the best results.
1. Water Before Planting
Give your hydrangea a good drink an hour before planting. Wet roots handle transplanting better.
2. Remove The Plant From The Pot
Gently tip the pot and slide out the root ball. If roots are circling, tease them apart with your fingers.
3. Place In The Hole
Set the root ball in the center. The top of the root ball should be level with the surrounding soil—never deeper.
4. Backfill With Soil
Fill the hole halfway with your improved soil. Press gently to remove air pockets. Add the rest of the soil and press again.
5. Water Thoroughly
Water until the soil is soaked. This settles the soil around the roots.
6. Add Mulch
Spread 2–3 inches of mulch (like pine bark or shredded leaves) around the base. Keep mulch a few inches from the stem to prevent rot.
7. Stake If Needed
Tall or floppy varieties may need a stake for support in their first year.
8. Label Your Plant
If you’re planting several types, use a label. Many look alike until they flower.
Key insight: It’s better to plant a little high (root ball slightly above soil level) than too deep. Deep planting causes rot.
Credit: hydrangea.com
Watering Hydrangeas After Planting
Water is vital for new hydrangeas, but how much and how often depends on your conditions.
General Guidelines
- First 2 weeks: Water every 1–2 days unless it rains.
- First season: Water deeply 1–2 times per week.
- Hot weather: Increase watering, but let the soil dry slightly between.
Signs Of Too Little Or Too Much Water
- Too little: Wilting, brown leaf edges
- Too much: Yellow leaves, mushy stems
Best Practices
- Water early in the morning.
- Avoid wetting the leaves to reduce disease risk.
- Use a soaker hose for even moisture.
Hidden danger: Overwatering is just as harmful as drought. Roots need air as well as water.
Fertilizing Hydrangeas: What Works Best
Hydrangeas don’t need much fertilizer, but the right nutrients can boost growth and blooms.
When To Fertilize
- First year: Wait until you see new growth before feeding.
- Established plants: Feed once in early spring and again in late spring.
What Type To Use
- Use a balanced, slow-release fertilizer (like 10-10-10).
- For blue flowers, pick a fertilizer low in phosphorus.
- For pink, use one high in phosphorus.
How To Apply
- Scatter fertilizer on the soil, not against the stem.
- Water well after feeding.
Example: A handful of compost in spring is often enough for most garden soils.
Common Mistakes
- Over-fertilizing: Causes lots of leaves, few flowers.
- Fertilizing late in summer: Promotes new growth that can be killed by frost.
Credit: www.merrifieldgardencenter.com
How To Transplant Hydrangeas
Sometimes you need to move a hydrangea—maybe it’s outgrown its space or needs more sun.
When And How To Move
- Best time: Early spring or fall, when the plant is dormant.
- Water the plant well a day before.
- Dig a wide circle around the roots.
- Lift gently, keeping as much soil as possible.
- Replant quickly at the same depth.
- Water thoroughly and mulch.
Survival Tips
- Prune back some stems to reduce stress.
- Shade the plant for a week if moving in hot weather.
- Keep soil moist but not soggy.
Non-obvious insight: Hydrangeas are tough, but moving them during bloom season can stop flowers for a year.
Planting Hydrangeas In Pots And Containers
Not everyone has garden space. Hydrangeas grow well in large pots if you follow a few special rules.
Choosing The Right Pot
- At least 18 inches wide and deep.
- Has drainage holes at the bottom.
Potting Mix
- Use a high-quality mix, not garden soil.
- Add extra compost for nutrients.
How To Plant
- Fill pot halfway with mix.
- Place plant so root ball is 1 inch below rim.
- Fill around roots and press down.
- Water well.
Care Tips
- Water more often than garden plants.
- Feed monthly with liquid fertilizer.
- Move pots out of harsh sun or wind.
Overwintering Potted Hydrangeas
- In cold zones, protect pots from freezing. Move to a garage or wrap with burlap.
Data point: Container hydrangeas usually need repotting every 2–3 years.
Spacing Hydrangeas For Best Growth
Crowding is a common mistake. Good spacing means better air flow, less disease, and more blooms.
How Far Apart?
| Type | Suggested Spacing |
|---|---|
| Bigleaf | 3–6 feet |
| Panicle | 6–8 feet |
| Smooth | 4–6 feet |
| Oakleaf | 4–6 feet |
| Climbing | 6–10 feet from walls |
- For hedges: Space closer (3 feet) for a thick look.
- For single specimens: Give maximum space for a natural shape.
Why It Matters
Tight planting means poor air flow, which increases fungal disease. Plus, plants compete for water and nutrients.
Mulching And Weed Control
Mulch is more than decoration. It keeps roots cool, holds water, and stops weeds.
Best Mulch Types
- Pine bark
- Shredded leaves
- Pine needles
- Wood chips
How To Apply
- Spread 2–3 inches deep in a circle under the plant.
- Keep mulch a few inches from the main stem.
- Renew mulch each spring.
Weed Control
- Hand-pull weeds before they grow big.
- Avoid hoeing near roots to prevent damage.
- Mulch does most of the work.
Practical tip: Don’t use black plastic under hydrangeas—it blocks air and encourages root disease.
Common Planting Problems And Solutions
Even with care, things can go wrong. Here are the most frequent issues and how to fix them.
1. Wilting After Planting
Cause: Shock or dry roots
Fix: Water deeply. Provide shade if possible. Most recover in 1–2 weeks.
2. Yellow Leaves
Cause: Overwatering or poor drainage
Fix: Let soil dry out. Improve drainage with compost.
3. No Blooms
Cause: Too much shade, wrong pruning, or over-fertilizing
Fix: Move to sunnier spot, prune at the right time, reduce fertilizer.
4. Root Rot
Cause: Wet, soggy soil
Fix: Improve drainage, plant higher, use less water.
5. Sunburned Leaves
Cause: Too much direct afternoon sun
Fix: Move to a spot with afternoon shade or use shade cloth.
Uncommon insight: Sometimes hydrangeas drop leaves after planting. If new leaves appear, don’t panic—this is normal as the plant adjusts.
Caring For Hydrangeas After Planting
Your hydrangea is now in the ground. The next steps make sure it stays healthy and blooms every year.
First Year Care
- Water regularly, especially during dry spells.
- Watch for pests like aphids or spider mites.
- Remove dead flowers (deadheading) to keep the plant tidy.
Pruning
- Bigleaf: Prune after flowering (late summer).
- Panicle and smooth: Prune in late winter or early spring.
- Oakleaf: Prune after flowering.
Note: Wrong pruning can remove next year’s flowers. Always check your hydrangea type before cutting.
Winter Protection
- In cold areas, add extra mulch around roots.
- Don’t prune in fall—wait until spring.
- For bigleaf types, cover with burlap if extreme cold is expected.
Fertilizing
- Feed lightly—too much food can harm more than help.
- Organic fertilizers are safe and gentle.
Monitoring
- Check leaves weekly for spots or mildew.
- Remove any diseased parts quickly.
Hydrangea Companion Planting Ideas
Hydrangeas look great alone, but pairing them with the right plants can make your garden shine.
Good Companions
- Hostas: Their big leaves look nice under hydrangeas.
- Ferns: Add texture and love similar shade.
- Azaleas: Enjoy the same soil and bloom at different times.
- Heuchera: Colorful leaves brighten shady spots.
Avoid Planting With
- Tall grasses (compete for water)
- Deep-rooted trees (steal nutrients)
- Aggressive vines (can choke hydrangeas)
Creative tip: Use low groundcovers under hydrangeas to hide bare stems and keep weeds down.
How To Plant Hydrangea Seeds Or Cuttings
Most people buy hydrangeas as small plants. But you can also grow them from seeds or cuttings.
Growing From Seeds
- Seeds take 2–3 years to bloom.
- Start indoors in winter.
- Sow on the surface—don’t cover with soil.
- Keep moist until they sprout.
Growing From Cuttings
- Take a 5–6 inch cutting in early summer.
- Remove lower leaves.
- Dip in rooting hormone.
- Plant in moist potting mix.
- Cover with plastic to keep humid.
- Roots form in 2–4 weeks.
Pro insight: Cuttings from new, green growth root better than old, woody stems.
Hydrangea Planting For Special Purposes
Hydrangeas are not just for garden beds. Use them in different ways for unique effects.
Hedges
Plant panicle or smooth hydrangeas in a row. Space 3–4 feet apart for a thick, flowering hedge.
Foundation Plantings
Use bigleaf or oakleaf types near your home’s walls. They soften hard lines and add color.
Mixed Borders
Combine with roses, perennials, or evergreens for year-round interest.
Vertical Gardens
Climbing hydrangeas cover walls, fences, or arbors with white flowers.
Containers
Small varieties are best for pots on patios or balconies.
Sustainable And Organic Planting Tips
More gardeners want to grow plants in eco-friendly ways. Hydrangeas fit well with sustainable methods.
- Use organic compost instead of chemical fertilizer.
- Mulch with leaves or bark from your own yard.
- Collect rainwater for watering.
- Avoid pesticides—attract birds and ladybugs to eat pests.
By planting and caring for hydrangeas naturally, you protect pollinators and soil life.
Frequently Asked Questions
How Do I Change My Hydrangea’s Flower Color?
Bigleaf hydrangeas change color based on soil pH. For blue flowers, make the soil more acidic (add aluminum sulfate). For pink flowers, make the soil more alkaline (add lime). Other types, like panicle or oakleaf, do not change color. The process takes several months to a year.
Can Hydrangeas Grow In Full Sun?
Some types, like panicle hydrangeas, handle full sun if the soil is moist. Most others need protection from hot afternoon sun. Too much sun causes leaf burn and poor blooms. In hot regions, morning sun and afternoon shade are best.
Why Are My Hydrangea Leaves Turning Yellow?
Yellow leaves can mean overwatering, poor drainage, or a lack of nutrients. Check the soil. If it is soggy, let it dry out before watering again. If the soil is dry, water well. If older leaves turn yellow, try a light feeding with balanced fertilizer.
How Long Do Hydrangeas Take To Bloom After Planting?
Most hydrangeas bloom the first or second year after planting, if cared for well. Plants grown from seeds may need 2–3 years. Proper sunlight, water, and pruning all affect blooming.
Can I Plant Hydrangeas Near My House?
Yes, hydrangeas are good for foundation plantings. Make sure the spot gets some sun, has good drainage, and is not under heavy roof runoff. Leave space for mature size—roots need room to grow.
Planting hydrangeas is a rewarding experience, bringing color and life to any garden. By choosing the right variety, preparing the soil, and giving your plant the care it needs, you’ll enjoy beautiful flowers for years. For more in-depth tips and information, visit the Royal Horticultural Society. Now, with this guide, you’re ready to plant hydrangeas correctly and watch them thrive.