Are you tired of spending your mornings dragging hoses and worrying if your garden is getting enough water? Installing an automatic garden watering system can change all that.
Imagine your plants getting just the right amount of water, exactly when they need it, without you lifting a finger. Whether you have a small backyard or a sprawling garden in Austin, Texas, setting up an automatic watering system is easier than you think—and it saves you time, water, and effort.
In this guide, you’ll discover simple, step-by-step instructions to install a system that keeps your garden healthy and thriving all season long. Ready to make watering effortless? Let’s dive in!

Credit: www.youtube.com
Choosing The Right System
Choosing the right automatic garden watering system is key to keeping your plants healthy and saving water. Selecting the best system depends on your garden size, plant types, and local climate. It also matters how much time and effort you want to spend on setup and maintenance. Understanding different systems helps you pick one that fits your garden perfectly.
Types Of Automatic Watering Systems
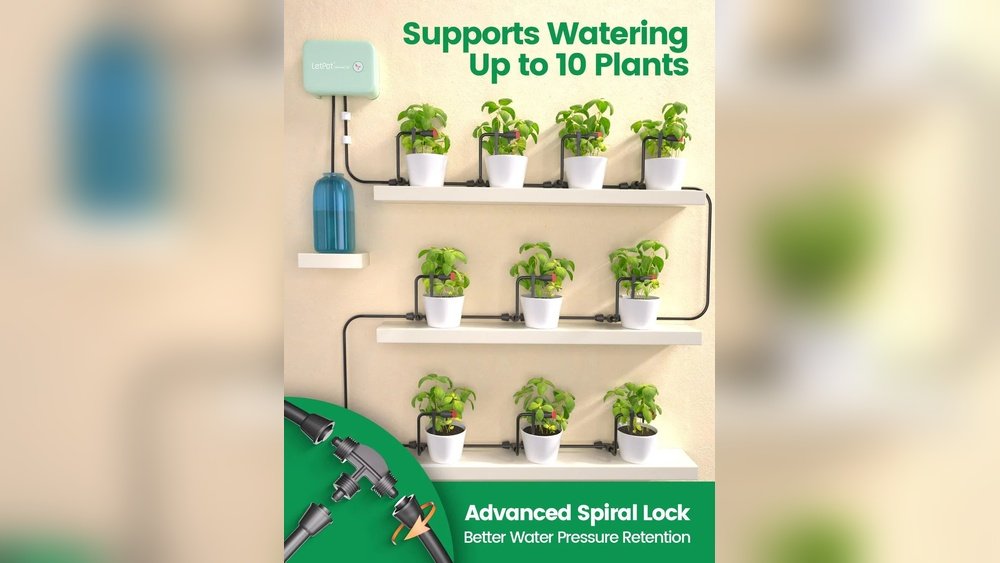
Several types of automatic watering systems exist. Drip irrigation delivers water directly to plant roots. It reduces water waste and prevents leaf diseases. Sprinkler systems spray water over large areas quickly. They work well for lawns and flower beds. Soaker hoses release water slowly along their length. They suit garden rows and shrubs. Each type suits different garden layouts and plant needs.
Assessing Garden Needs
Start by measuring your garden area. Note the types of plants you grow. Some plants need more water than others. Check your soil type too. Sandy soil drains fast and needs frequent watering. Clay soil holds water longer. Also, consider sun exposure. Plants in full sun require more water. Think about your daily schedule and how much time you can spend maintaining the system.
Budget Considerations
Automatic watering systems come in various price ranges. Simple drip kits are usually affordable and easy to install. Sprinkler systems with timers and sensors cost more but offer convenience. Factor in the cost of water-saving devices. Remember to include expenses for pipes, connectors, and timers. A higher upfront cost can save money on water bills later. Choose a system that fits your budget and garden needs.
Gathering Materials
Before installing an automatic garden watering system, gathering the right materials is vital. Having everything ready saves time and avoids interruptions. The list includes basic parts needed to build the system and tools for installation. Optional upgrades improve the system but are not required. Below is a clear guide to help you prepare.
Essential Components
- Water timer or controller to automate watering schedules
- Main supply tubing to carry water from the source
- Drip emitters or sprinkler heads to deliver water to plants
- Connectors, tees, and elbows for joining tubing
- Filter to prevent clogs from dirt or debris
- Pressure regulator to maintain correct water pressure
- End caps to close tubing ends
Optional Upgrades
- Rain sensor to stop watering during rain
- Soil moisture sensor for smarter watering control
- Backflow preventer to protect water supply
- Fertilizer injector to feed plants through irrigation
- Wireless controller for remote system management
Tools Required
- Hose cutter or sharp scissors for clean tubing cuts
- Drill with hole saw bit for mounting parts
- Pliers to tighten fittings
- Flat screwdriver for clamps and connectors
- Teflon tape to seal threaded connections
- Measuring tape to plan tubing layout
- Shovel or trowel for shallow trenching
Planning Your Layout
Planning your layout is the first step to a successful automatic garden watering system. A well-thought-out plan helps you save water and ensures every plant gets enough moisture. Taking time to design the system reduces errors and makes installation easier.
Mapping The Garden
Start by drawing a simple map of your garden. Mark all plant beds, trees, and lawn areas. Note the size and shape of each section. This map guides where to place watering lines and sprinkler heads. Accurate mapping avoids dry spots and water waste.
Water Source Location
Identify where your main water source is located. It could be an outdoor faucet or a rainwater tank. The closer the source to your garden, the easier the installation. Check if the water pressure is strong enough to run the system. Low pressure may require a pump.
Zoning For Efficient Coverage
Divide the garden into zones based on plant types and water needs. Group plants with similar watering requirements together. Create separate zones for lawns, flower beds, and vegetable patches. Zoning allows you to water each area properly and save water.
Installing Main Lines
Installing the main lines is a crucial step in setting up an automatic garden watering system. These lines carry water from the source to different parts of your garden. Proper installation ensures efficient watering and avoids leaks or water loss. Follow these steps carefully to create a strong foundation for your system.
Laying Pipes Or Tubing
Start by planning the route for your pipes or tubing. Avoid sharp bends to maintain good water flow. Dig shallow trenches along the planned path. Lay the pipes flat in the trenches. Use connectors to join pipes securely. Cover the pipes with soil once they are in place. This protects them from damage and keeps your garden neat.
Connecting To Water Supply
Find a reliable water source, such as an outdoor faucet or main water line. Turn off the water before making any connections. Attach a backflow preventer to stop water from flowing backward. Connect the main line to the water source using a suitable adapter. Tighten all fittings to prevent leaks. Test the connection by briefly turning on the water.
Ensuring Proper Pressure
Water pressure affects how well your system works. Check the water pressure with a pressure gauge. Most systems need 30 to 50 psi for optimal performance. Install a pressure regulator if the pressure is too high. Low pressure may require a booster pump. Adjust or replace components to maintain steady pressure. This helps water reach all parts of your garden evenly.
Setting Up Emitters
Setting up emitters is a key step in installing an automatic garden watering system. Emitters control how water reaches your plants. They deliver water directly to the roots, saving water and keeping plants healthy. Proper setup ensures even watering and avoids dry spots or overwatering.
Drip Emitters Vs Sprinkler Heads
Drip emitters release water slowly near plant roots. They work well for flower beds and vegetable gardens. Sprinkler heads spray water over a wide area. They suit lawns or large garden spaces. Choose drip emitters for precise watering. Use sprinkler heads for broad coverage.
Placing Emitters For Coverage
Place emitters close to each plant’s base. For drip systems, space emitters evenly along rows. For sprinklers, adjust placement to cover all plants. Avoid placing emitters too close to paths or hard surfaces. Check that no area is left dry. Good placement saves water and helps plants grow strong.
Adjusting Flow Rates
Control the water flow from each emitter. High flow rates suit thirsty plants or dry soil. Low flow rates prevent water waste on small or slow-growing plants. Use adjustable emitters to fine-tune flow. Test your system and adjust flow rates as needed. Proper flow keeps soil moist but not soggy.
Adding Automation Controls
Adding automation controls to your garden watering system makes watering easier and efficient. These controls help manage water flow without needing daily attention. You can set schedules, adjust watering based on weather, and even control the system remotely. This saves water and keeps plants healthy.
Timers And Controllers
Timers allow you to set specific watering times. They turn the system on and off automatically. Controllers offer more options, like setting different schedules for various garden zones. This customization ensures each plant gets the right amount of water.
Sensors For Weather And Soil
Weather sensors detect rain, temperature, and humidity. They stop watering during rain or high humidity to save water. Soil sensors measure moisture levels in the ground. They trigger watering only when the soil is dry. These sensors prevent overwatering and keep plants happy.
Smartphone Integration
Smartphone apps let you control the watering system from anywhere. You can change schedules, check system status, and receive alerts. This feature adds convenience and helps you respond quickly to changing weather or plant needs. Managing your garden watering has never been easier.
Testing The System
Testing the automatic garden watering system is a crucial step after installation. It ensures the system works properly and your plants get the right amount of water. This process helps spot any issues early and saves water.
Checking For Leaks
Turn on the system and watch all pipes and connections. Look closely for water dripping or pooling. Even small leaks can waste water and reduce pressure. Fix leaks by tightening fittings or replacing damaged parts. Repeat the check until no leaks appear.
Monitoring Water Distribution
Observe how water spreads over your garden. Make sure all plants receive enough water. Some areas might get too much or too little. Adjust sprinkler heads or drip emitters to balance coverage. Good distribution keeps plants healthy and soil moist.
Adjusting Settings
Set the watering schedule based on plant needs and weather. Choose the right duration and frequency for watering cycles. Shorter, frequent watering helps new plants. Longer, less frequent watering benefits established plants. Use timers or controllers to manage these settings easily.

Credit: www.greenhousemegastore.com
Maintenance Tips
Maintaining your automatic garden watering system keeps it running smoothly. Regular care prevents clogs and leaks. It helps your garden stay healthy with even watering. Follow simple steps to extend your system’s life and efficiency.
Seasonal Checks
Check your system at the start of each season. Inspect pipes, hoses, and connections for cracks or damage. Look for leaks or broken parts that need fixing. Test the timer and sensors to ensure proper operation. Winterize the system before cold weather to avoid freeze damage.
Cleaning Emitters
Emitters can get clogged with dirt or minerals. Remove emitters and soak them in vinegar to dissolve buildup. Use a small brush or toothpick to clear blocked holes. Rinse well before reinstalling. Clean emitters improve water flow and protect plants from uneven watering.
Troubleshooting Common Issues
Uneven watering may signal clogged emitters or low water pressure. Check for leaks causing pressure loss. Replace damaged hoses or connectors. If the timer doesn’t run, change batteries or reset it. Clear debris from sensors to ensure accurate watering schedules.
Diy Vs Professional Installation
Choosing between DIY and professional installation for your automatic garden watering system depends on many factors. Both options have pros and cons. Understanding these differences helps you make the best decision for your garden and budget.
When To Hire Experts
Call a professional if your garden is large or has complex zones. Experts handle tricky layouts and uneven terrain well. Hire them if you want a reliable system fast. Professionals also help avoid common installation mistakes.
Choose DIY if your garden is small and simple. Basic kits are easy to install with clear instructions. DIY suits those who enjoy hands-on projects and want to save money.
Cost And Time Comparison
DIY installation costs less upfront. You only pay for materials and tools. It takes more time, especially if you lack experience. Expect several hours or even days to finish.
Professional setup costs more due to labor fees. The price varies by system size and complexity. Pros finish the job quickly, often within a day. This saves time and effort for busy homeowners.
Benefits Of Professional Setup
Professionals ensure proper system design for water efficiency. They test and adjust all parts to prevent leaks and blockages. Experts provide warranties and ongoing support. This reduces future repair costs and hassle.
They also advise on the best watering schedule for your plants. Proper setup improves garden health and conserves water. Professionals use quality materials and follow local codes.

Credit: www.youtube.com
Frequently Asked Questions
How To Install An Automatic Irrigation System For A Garden?
Plan your garden layout and water needs. Install a timer and connect it to a water source. Lay drip lines or sprinklers evenly. Secure tubing with stakes and test the system. Adjust settings for optimal watering schedules and coverage.
What Is The 30/30 Rule For Irrigation?
The 30/30 rule for irrigation means watering for 30 minutes, then waiting 30 minutes before watering again. This prevents runoff and promotes deep soil absorption.
Can I Build My Own Automatic Watering System?
Yes, you can build your own automatic watering system. Use timers, sensors, or microcontrollers for easy garden irrigation. Choose based on your budget and skills.
What Is The 1/2/3/2:1 Watering Method?
The 1/2/3/2:1 watering method involves watering plants in cycles: 1 minute, then 2, then 3, then 2 minutes, followed by 1 minute. This technique prevents runoff and promotes deep soil absorption. It helps roots grow stronger by allowing gradual water intake.
Conclusion
Installing an automatic garden watering system saves time and water. It keeps plants healthy and growing strong. Follow simple steps for easy setup and maintenance. Check your system regularly for leaks or clogs. Adjust watering schedules to fit seasonal needs.
Enjoy a thriving garden with less effort and stress. This system helps you care for plants even when busy. Start today and watch your garden flourish beautifully.