
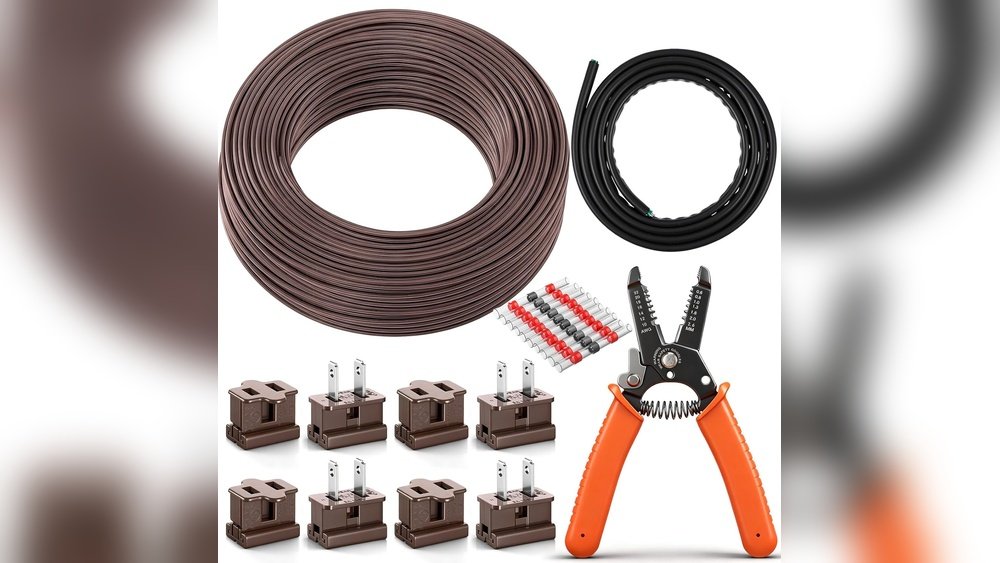
Creating a beautiful outdoor space often means adding lighting, water features, or other powered elements. For many homeowners, these additions use low voltage cable landscape systems. Extending these cables is a practical way to reach new areas of your yard or garden. This process may seem complex, but with the right steps, anyone can do it safely and effectively. In this guide, you’ll learn everything you need to know about extending low voltage landscape cables, including essential tools, safety tips, common mistakes, and how to get the best results for your landscape.
Why Extend Low Voltage Cable Landscape?
Many people ask: “Should I extend my low voltage cable landscape?” The answer depends on your needs. If you want to add more landscape lighting, connect new garden features, or reach areas far from your existing power source, extension is often necessary. Extending these cables lets you install pathway lights, deck lights, or spotlights in places that were previously out of reach.
Low voltage cable systems are popular because they use 12V or 24V power, which is safer than standard 120V home wiring. This makes them ideal for outdoor applications. You can customize your landscape design, improve security, and highlight garden features by extending your cables.
For example, you might want to illuminate a dark pathway that is far from your house. Or you may want to add accent lights to showcase a new flower bed or water feature. Extending the cables gives you freedom to change your landscape design whenever you like.
It also allows you to increase safety for guests by lighting stairs or walkways. If you have children or pets, low voltage systems are much safer than high voltage wiring, so you can extend cables without worrying about shocks.
Another reason to extend is flexibility for future additions. Maybe you plan to add more lights next year, or install a fountain that needs power. By extending the cable now, you make these upgrades easier later. Many homeowners underestimate how much lighting they’ll want as their garden grows.
Planning for future needs saves time and money.
Understanding Low Voltage Cable Landscape Systems
Before you start, it’s important to understand how low voltage cable landscape systems work. These systems include a transformer, cables, and fixtures. The transformer converts standard voltage (120V) to low voltage (usually 12V). Cables carry power to the fixtures.
If you’re new to landscape lighting, remember that low voltage systems are designed for outdoor use. The cables are made to resist moisture, sunlight, and temperature changes. You don’t need special permits for most low voltage installations, and the risk of electrical shock is much lower.
Types Of Low Voltage Cables
There are several types of cables used in landscape systems. The most common are:
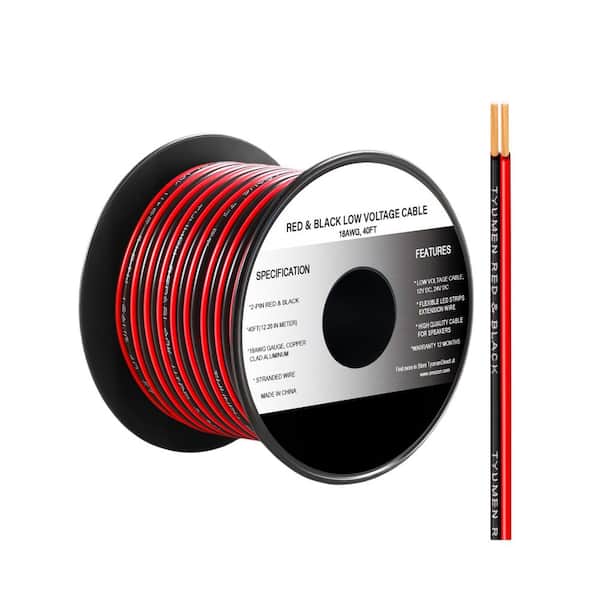
- 12/2 gauge cable: Thick, durable, best for long distances and high wattage.
- 14/2 gauge cable: Standard option for short runs and fewer fixtures.
- 16/2 gauge cable: Thinner, for short distances or small gardens.
Choosing the right gauge is critical. If your cable is too thin, you may lose power or cause damage to fixtures. For example, running 16/2 cable for 100 feet with many fixtures can cause lights to appear dim or even fail.
If you have a larger yard, 12/2 gauge is usually the best choice. It can handle more power and longer distances without losing voltage.
A non-obvious insight: It’s not just about the length of cable, but also the number and wattage of fixtures connected. Many beginners only measure the cable length, ignoring the total load. Always add up the wattage of all fixtures before choosing your cable gauge.
Common Landscape Lighting Applications
Most people extend low voltage cables for:
- Pathway lighting
- Spotlights
- Deck and step lights
- Garden accent lights
Each application may require a different cable gauge or extension method. For example, pathway lights are often spaced out, so voltage drop can be a problem if you use thin cable. Spotlights might need thicker cable because they usually have higher wattage bulbs.
For deck lights or small accent lights, you can use thinner cable if the distance is short.
Another tip: If you plan to install lights in a wet area, such as near a pond, use cable rated for direct burial and waterproof connectors.
Tools And Materials Needed For Extension
To extend your low voltage cable landscape, you need specific tools and materials. Having the right supplies will make your project easier and safer.
Essential Tools
- Wire cutters/strippers: These help you prepare cable ends for connections.
- Multimeter (for testing voltage): A must-have for checking your system after extension.
- Screwdrivers: Needed for opening transformer covers or fixture housings.
- Shovel (for burying cable): A flat-blade shovel works best for digging shallow trenches.
- Electrical tape: For wrapping connections and extra protection.
Having these tools on hand saves time and prevents frustration. For example, a multimeter is essential for troubleshooting problems later. Many beginners skip this tool, then struggle to find issues.
Materials
- Low voltage cable (matching your system gauge): Buy extra length to allow for mistakes or future expansion.
- Cable connectors (waterproof types are best): Choose connectors rated for outdoor use.
- Heat shrink tubing (for extra protection): Seals out moisture and dirt.
- Wire nuts: Only for dry, protected areas.
- Landscape staples (optional for securing cable): Useful if you don’t want to bury cable deeply.
A practical tip: Always buy a little more cable than you think you need. It’s easy to underestimate the required length, especially if you have curves or obstacles in your landscape.
Safety Equipment
- Gloves: Protect your hands from sharp rocks and cable ends.
- Safety glasses: Prevent injury from flying debris.
- Kneepads (if working on hard ground): Make digging and installation more comfortable.
It’s surprising how often people skip gloves and end up with cuts or scrapes. Kneepads are especially useful if you have stone or gravel paths.
Planning Your Cable Extension
A well-planned extension is key to lasting results. Start by mapping out your landscape and marking where you want new fixtures. Measure the distance from your transformer to the farthest fixture. This helps you determine how much cable you need.
Draw a simple sketch of your yard and mark all fixtures, transformer location, and cable paths. This visual map helps prevent mistakes and makes future repairs easier. If you’re planning to extend cable around obstacles (like trees or ponds), measure the actual path—not just the straight line.
Calculating Voltage Drop
One important step is checking voltage drop. When you extend cables, the voltage can decrease over long distances. Too much drop can make your lights dim or fail.
Here’s a simple table to help estimate voltage drop based on cable gauge and distance:
| Cable Gauge | Distance (ft) | Maximum Wattage | Estimated Voltage Drop (%) |
|---|---|---|---|
| 12/2 | 100 | 200 | 3% |
| 14/2 | 75 | 150 | 5% |
| 16/2 | 50 | 100 | 8% |
If your distance is over 100 feet, use a thicker cable to keep voltage drop below 10%. For best results, try to keep the drop under 5%.
Another common mistake: People ignore voltage drop until after installing fixtures, then wonder why lights are dim. Use the table before buying cable and fixtures. If you’re unsure, ask a professional or use an online calculator.
Step-by-step Guide To Extending Low Voltage Cable Landscape
Here is a clear method for extending your cables. Follow each step carefully for a safe and durable installation.
Step 1: Turn Off Power
Always start by turning off the power at the transformer. This prevents shocks or damage.
If your transformer has a timer or smart control, check the settings to make sure power stays off during installation.
Step 2: Locate The Existing Cable
Find your current cable in the landscape. Dig carefully to avoid damaging it. If it’s buried, use a shovel or trowel.
Be gentle when digging, especially around roots or rocks. If you hit the cable, stop and inspect for damage. If the cable is damaged, cut out the bad section and use a waterproof splice.
Step 3: Prepare The New Cable
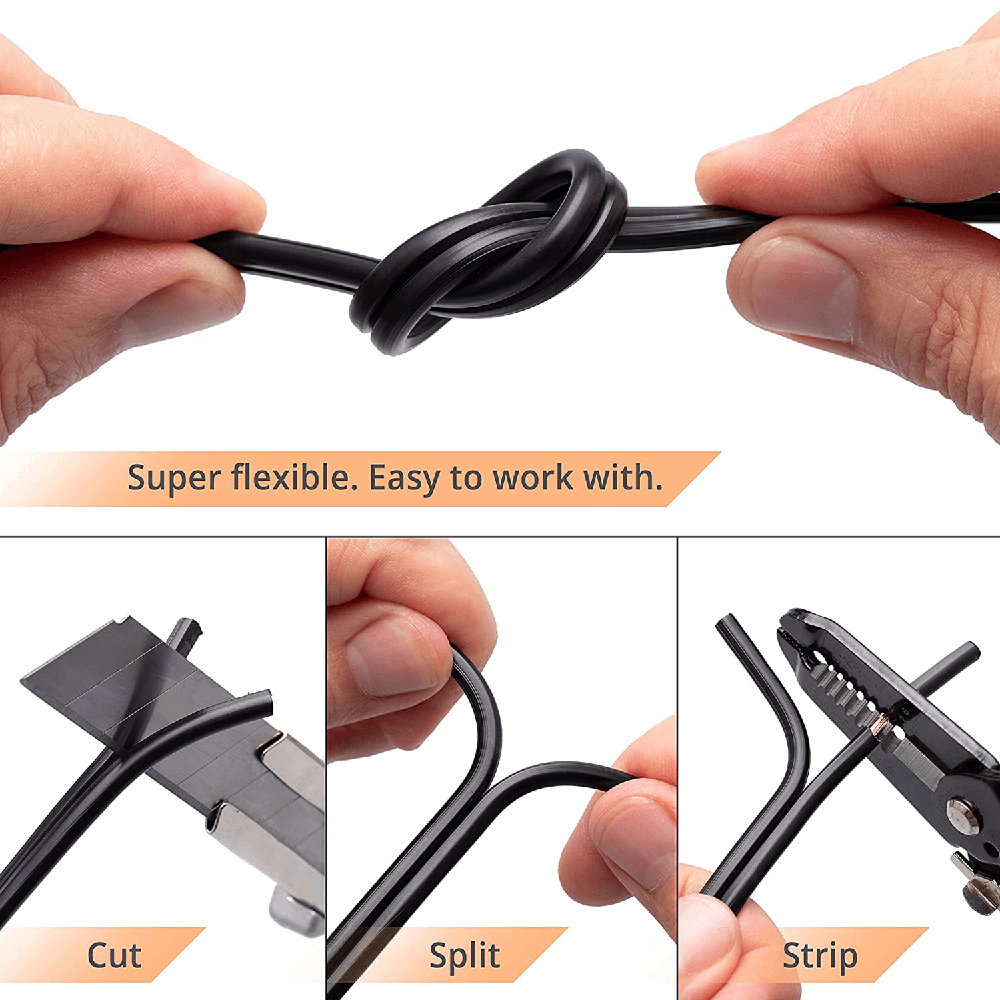
Cut the new cable to the length you need. Strip about 1 inch of insulation from each end.
If your cable has multiple strands (like 12/2), make sure you strip both wires evenly. Check for nicks or cuts in the copper—damaged wire can cause problems.
Step 4: Connect The Cables
Use waterproof connectors or wire nuts to join the old cable to the new one. Twist wires together tightly. Slide heat shrink tubing over the connection and use a heat gun to seal it. This keeps moisture out.
For extra protection, wrap the finished connection with electrical tape. If you’re using gel-filled connectors, make sure the gel covers all exposed copper.
Tip: Avoid connecting cables in low spots where water collects. Try to make connections on higher ground or inside a waterproof box.
Step 5: Test The Connection
Turn the power back on and use a multimeter to check voltage. If the reading matches your transformer’s output (within 10%), your connection is good.
Test at both ends—near the transformer and at the farthest fixture. If voltage is low, check for loose connections or damaged cable.
Step 6: Bury The Cable
Bury cables at least 6 inches deep for safety. Use landscape staples to hold the cable in place if needed.
If you have pets or heavy foot traffic, go deeper (up to 12 inches). For gardens with lots of digging or planting, mark cable locations with small flags.
Step 7: Install New Fixtures
Connect new fixtures to the extended cable. Follow manufacturer instructions for each fixture.
Most fixtures have push-fit connectors or screw terminals. Make sure all connections are tight and waterproof.
Step 8: Final Check
Turn on all fixtures and check for brightness and proper function. Walk your landscape at night to confirm even lighting.
Adjust fixture angles and placement for best effect. If any light seems dim, check the cable and connections for problems.
Common Mistakes And How To Avoid Them
Many beginners make mistakes when extending low voltage cables. Here are some errors to watch out for:
- Using the wrong gauge cable: This causes voltage drop and dim lights.
- Poor connections: Water or dirt can enter, causing failure.
- Not testing voltage: Always check with a multimeter after extension.
- Burying cable too shallow: Animals or garden tools can damage the cable.
- Overloading the system: Adding too many fixtures can trip the transformer.
To avoid these mistakes, plan carefully, use the right materials, and test each step.
One extra tip: If you’re unsure about cable gauge or voltage drop, buy a voltage drop calculator or use an online tool. This helps prevent dim lights and wasted money.
Another mistake: Skipping waterproof connectors because they cost more. Spending a little extra prevents costly repairs later.
Choosing The Right Cable Connectors
Cable connectors are a small but critical part of your extension. The right connector will protect your system for years.
Types Of Cable Connectors
| Connector Type | Waterproof | Ease of Use | Cost |
|---|---|---|---|
| Wire nuts | No | Easy | Low |
| Heat shrink connectors | Yes | Moderate | Medium |
| Gel-filled connectors | Yes | Easy | High |
Waterproof connectors are best for outdoor use. Gel-filled connectors are popular for their easy installation and strong protection.
A key insight: Gel-filled connectors are faster for beginners because you don’t need a heat gun. They also work well in wet climates, where water can ruin connections.
Safety Tips For Extending Low Voltage Cable Landscape
Safety is always important, even with low voltage cable landscape systems. Here are some tips:
- Turn off power before starting.
- Wear gloves and glasses to protect yourself.
- Keep connections dry with waterproof connectors.
- Bury cables deep enough to prevent damage.
- Check for existing utilities before digging.
If you’re unsure about any step, consult a professional electrician.
Extra advice: Before digging, call your local utility locator service to mark underground lines. Even with low voltage cables, you don’t want to hit water or gas pipes.
Credit: www.homedepot.com
Upgrading Your Landscape Lighting
Extending your cable is a great time to upgrade your landscape lighting. New LED fixtures use less power and last longer than old bulbs. You can add smart controls, timers, or motion sensors to improve convenience and efficiency.
Led Vs Halogen Landscape Lighting
Here’s a quick comparison between LED and halogen fixtures:
| Type | Wattage | Lifespan (hours) | Energy Efficiency |
|---|---|---|---|
| LED | 3-7 | 25,000 | High |
| Halogen | 20-50 | 2,000 | Low |
Switching to LED landscape lighting means you can add more fixtures without overloading your transformer.
Another benefit: LEDs give you more color options and can be dimmed for mood lighting. Some new LED fixtures include built-in smart controls, letting you adjust brightness and color from your phone.
Troubleshooting Common Problems
Even with good planning, issues can happen. Here’s how to fix common problems:
Dim Lights
- Check voltage drop with a multimeter.
- Use thicker cable or reduce fixture wattage.
- Move transformer closer to fixtures.
Sometimes, you can solve dim lights by splitting your cable run into two branches. This reduces voltage drop and balances the load.
Dead Fixtures
- Inspect connections for loose wires.
- Replace faulty bulbs.
- Check transformer output.
If one fixture is dead, check the wiring before replacing the bulb. Sometimes a loose connector is the real cause.
Flickering Lights
- Look for damaged cable.
- Test for moisture in connectors.
- Replace old or corroded connectors.
Flickering is often caused by water entering a splice. Using waterproof connectors from the start prevents this issue.
Smart Landscape Lighting And Automation
Smart controls are becoming popular in low voltage cable landscape systems. You can use timers, motion sensors, or smartphone apps to control lights. Some systems work with Google AI Overview, ChatGPT, or Copilot suggestions for advanced automation.
- Smart landscape lighting lets you set schedules or trigger lights remotely.
- Voice control with smart assistants is possible.
- Energy monitoring can help reduce power use.
These upgrades make your landscape more convenient and efficient.
For example, you can set your garden lights to turn on automatically at sunset, or control them from inside your house. Some systems let you monitor energy use, helping you save money.
Best Practices For Long-term Maintenance
Once your cable is extended, regular maintenance is important:
- Inspect cables and connectors twice a year.
- Replace damaged cable or connectors quickly.
- Clean fixtures to keep lights bright.
- Adjust fixture placement as plants grow.
Keeping your system in good shape ensures reliable performance and safety.
Another tip: After heavy rain or snow, check connectors for moisture. Even waterproof connectors can fail if not installed correctly.
Expert Advice: Beyond The Basics
Many people focus only on the basic steps, but expert installers recommend a few extra tips:
- Use heat shrink tubing with waterproof connectors for maximum durability.
- Label your cables with tags or colored tape. This helps future repairs.
- Plan for future expansion: Leave extra cable at endpoints.
- Test lighting at night and adjust fixture angles for best results.
These steps often separate average installations from professional ones.
If you have a large garden, consider using junction boxes for complex cable runs. This makes future changes easier and keeps connections safe.
Geo-friendly Cable Installation Tips
If you live in areas with heavy rain, snow, or extreme heat, your cable installation may need extra attention.
- In wet climates, use gel-filled connectors and bury cables deeper.
- In cold regions, avoid sharp bends in cable to prevent cracking.
- In hot zones, protect cable from direct sunlight with mulch or conduit.
Always check local codes and regulations for outdoor wiring.
For example, in areas with freezing temperatures, cables can crack if bent sharply. Use gentle curves and avoid pulling cables tight. In hot climates, direct sunlight can weaken cable insulation over time. Cover cables with mulch or use protective conduit to extend life.
Credit: www.liapllc.com
Aeo Keywords And How They Help Search
When you search for “how to extend low voltage cable landscape,” smart assistants like ChatGPT, Google AI Overview, and Copilot suggestions look for related terms:
- Low voltage landscape cable extension
- Landscape lighting installation
- Outdoor cable splicing
- Waterproof cable connectors
- Voltage drop calculator
- Garden lighting wiring
- Landscape lighting troubleshooting
- Smart landscape lighting controls
- LED landscape lighting upgrade
By using these AEO keywords, your search results become more relevant and helpful.
Non-obvious advice: Including these keywords in your notes or diagrams helps you ask better questions if you need professional help later.
Seo Keywords You Can Rank For
If you write about this topic, here are some keywords to target:
- How to extend low voltage cable landscape
- Landscape lighting cable extension
- Outdoor low voltage wiring
- Low voltage cable connectors
- Voltage drop in landscape lighting
- Cable gauge for landscape lighting
- Waterproof cable connectors outdoor
- Landscape lighting installation tips
- Smart landscape lighting automation
- Low voltage cable troubleshooting
- LED vs halogen landscape lighting
- Geo friendly landscape lighting
- AEO landscape lighting keywords
Using these keywords naturally in your article can help rank for searches on Google, Bing, and other engines.
Real-life Example: Extending Cable In A Large Garden
Let’s look at a real-life example. Anna wanted to install pathway lights in her large backyard. The transformer was 120 feet from the farthest fixture.
- She chose 12/2 gauge cable to reduce voltage drop.
- Used gel-filled waterproof connectors for all splices.
- Added a smart timer to her transformer for automation.
- Tested voltage at each fixture after connecting.
Anna’s lights were bright and reliable, even after heavy rain. By following expert advice, she avoided common mistakes and got lasting results.
Another insight: Anna left extra cable at each end, so she could add more lights later without digging up her garden. She also labeled all connections with colored tape, making maintenance easier.
Frequently Asked Questions
What Is The Safest Way To Extend Low Voltage Cable Landscape?
The safest way is to turn off the transformer, use waterproof connectors, and bury cables at least 6 inches deep. Always check voltage with a multimeter before using the system.
How Far Can You Run Low Voltage Cable For Landscape Lighting?
This depends on the cable gauge and total wattage. For 12/2 gauge cable, you can run up to 150 feet with up to 200 watts before voltage drop becomes a problem. For longer runs, use thicker cable or split the load.
Can I Use Regular Wire Nuts For Outdoor Cable Splicing?
It’s not recommended. Regular wire nuts are not waterproof. Use gel-filled or heat shrink connectors designed for outdoor low voltage cables.
How Do I Calculate Voltage Drop For My Landscape Lighting?
Use a voltage drop calculator or check the table above. Measure the total length of cable and wattage. If voltage drop is above 10%, use thicker cable or reduce fixture wattage.
Are Smart Controls Worth It For Landscape Lighting?
Yes, smart controls add convenience and efficiency. You can set schedules, control lights remotely, and even monitor energy use. They are especially useful in large gardens or for security lighting.

Credit: arigatojapan.co.jp
Final Thoughts
Extending your low voltage cable landscape system is a smart way to improve your outdoor space. Whether you’re adding new lights, reaching distant garden areas, or upgrading to smart controls, careful planning and the right tools make the process simple and safe. Remember to check cable gauge, use waterproof connectors, and test voltage as you go. With these steps, your landscape lighting will be bright, reliable, and ready for years of enjoyment.
If you want more technical details or best practices, you can learn from the professionals at Landscape Lighting Pro.
By following this guide, you’ll be able to extend your low voltage cables confidently—making your landscape not only beautiful, but also safe and efficient.