
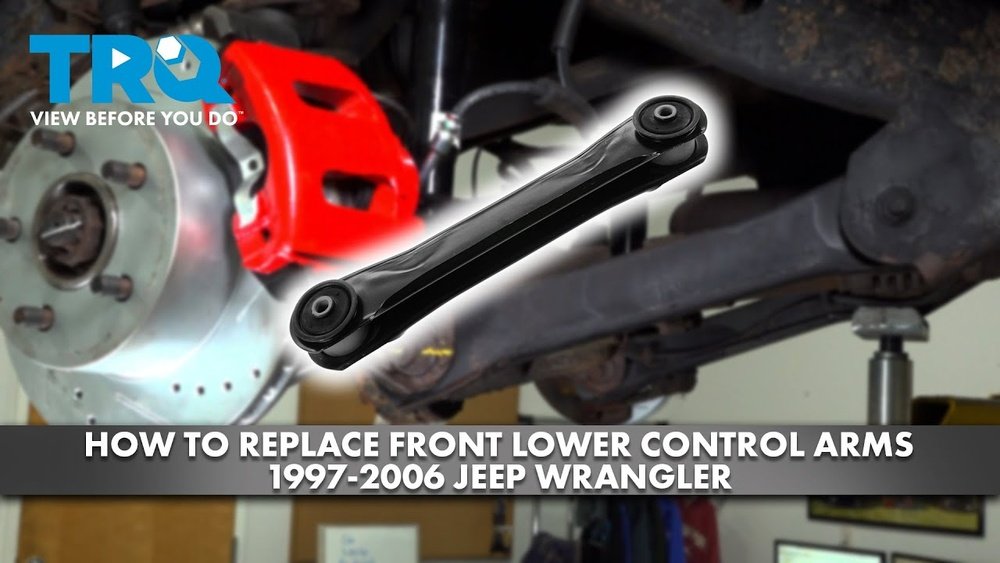
If you own a Jeep Wrangler, you know it’s built for adventure—climbing rocky trails, crossing streams, and handling tough terrain. But with all that action, some parts wear down faster than others. One of the most important is the control arm. These metal links connect your Jeep’s frame to the wheels, guiding up and down movement and keeping the ride smooth. Over time, bumps, rust, and hard driving can damage them, affecting your steering and safety.
Replacing control arms is not just a repair job—it’s about restoring your Wrangler’s performance and making sure it stays safe on and off the road. Many Jeep owners think this task is only for professionals, but with the right tools, knowledge, and patience, you can do it at home and save money.
This guide will walk you through every step, from understanding what control arms do to picking the right replacements, handling the installation, and avoiding common mistakes.
Whether you’re a DIY beginner or an experienced wrencher, you’ll find practical tips and clear steps tailored for the Jeep Wrangler. Let’s get your Jeep back in top shape and ready for your next adventure.
What Are Control Arms And Why Do They Matter?
Control arms are like your Jeep’s arms, connecting the chassis to the wheel hub. In a Wrangler, there are usually four front and four rear control arms—two upper and two lower on each axle. Their main job is to keep the wheels properly aligned as the suspension moves up and down.
Key functions:
- Stability: They keep your wheels in the right position, preventing wobbling.
- Steering: Control arms help maintain precise steering, especially over bumps.
- Comfort: They absorb shocks, making the ride smoother.
- Safety: Worn control arms can cause unsafe handling or sudden failure on the road.
Jeep Wranglers use a solid axle setup, which means the control arms are under more stress than on many other vehicles. Off-roading, heavy loads, or years of use can wear them out or even bend them.
Signs your control arms need replacing:
- Clunking or banging noises when driving over bumps
- Uneven or rapid tire wear
- Loose, wandering steering
- Vibration in the steering wheel
- Visible cracks, rust, or bends in the control arm
Don’t ignore these signs—waiting too long can damage other suspension parts or lead to dangerous driving conditions.
Choosing The Right Replacement Control Arms
Before you start, you need to pick the right control arms for your Jeep Wrangler. The wrong part can cause poor handling, alignment problems, or even break under stress.
Types Of Control Arms
- Factory (OEM) Control Arms
- Built to original Jeep specifications
- Good for daily driving and light off-roading
- Usually cheaper, but less durable for extreme use
- Heavy-Duty or Aftermarket Control Arms
- Made with stronger steel and better bushings
- Designed for lifted Wranglers or heavy off-road use
- May allow for better suspension articulation
- Adjustable Control Arms
- Can change length for custom suspension geometry
- Ideal if you’ve lifted your Jeep or need precise alignment
- Fixed-Length Aftermarket Arms
- Stronger than stock, but not adjustable
- Good for moderate upgrades
What To Consider When Buying
- Model Year: Wrangler suspension parts changed over the years. Double-check the year and trim of your Jeep.
- Lift Height: If your Jeep is lifted, you may need longer or adjustable arms.
- Bushing Type: Rubber bushings are quiet but wear faster. Polyurethane lasts longer but can squeak.
- Brand Quality: Stick with trusted brands—cheaper parts often wear out faster.
- Warranty: Many top brands offer lifetime warranties.
Popular Brands For Jeep Wrangler Control Arms
Here’s a quick comparison of some popular choices:
| Brand | Type | Best For | Warranty |
|---|---|---|---|
| Moog | OEM/Aftermarket | Daily driving, basic off-road | Limited lifetime |
| Teraflex | Adjustable/Heavy-duty | Lifts, heavy off-road | Lifetime |
| Rubicon Express | Adjustable | Lifted Jeeps, articulation | Lifetime |
| MetalCloak | Heavy-duty | Extreme off-road | Lifetime |
Non-obvious tip: If you’re planning future suspension upgrades, go for adjustable arms now—you’ll save money and time.

Credit: www.youtube.com
Tools And Materials You’ll Need
Before you start, gather all the tools and supplies. Having everything ready will save time and reduce frustration.
Required tools:
- Jack and sturdy jack stands (never work under a Jeep supported by only a jack)
- Lug wrench or impact gun
- Socket set (metric and SAE)
- Wrenches (including long-handled or breaker bar for stubborn bolts)
- Pry bar
- Hammer or rubber mallet
- Torque wrench (critical for reassembly)
- Penetrating oil (like PB Blaster) for rusty bolts
- Safety glasses and gloves
Optional but helpful:
- Floor creeper for sliding under the Jeep
- Marker or chalk to mark bolt positions
- Anti-seize compound for threads
- Replacement hardware (bolts and nuts) if originals are very rusty
Replacement parts:
- The correct control arm(s) for your Jeep model and year
- New bushings if not included
Non-obvious tip: Take clear photos before removing anything—this will help with reassembly, especially if you forget which way a part fits.
Preparing Your Jeep Wrangler For Control Arm Replacement
Safety is the number one priority. Jeep Wranglers are heavy, and suspension parts are under tension.
Steps to prepare:
- Park on a level surface. Use a garage floor or driveway. Block the wheels opposite the side you’re working on to prevent rolling.
- Loosen lug nuts on the wheels where you’ll be working—just crack them loose, don’t remove yet.
- Lift the Jeep using a jack under the axle. Place jack stands under the frame, not the axle.
- Remove the wheels for better access. Set them aside out of your workspace.
- Spray all control arm bolts with penetrating oil. Let it soak for 10-15 minutes. Rusty bolts are common on older Jeeps.
Extra tip: If you’re replacing both upper and lower arms on one corner, do them one at a time. This keeps the axle from shifting too much and makes alignment easier.
Step-by-step Guide: Removing And Replacing Control Arms
Here’s a practical guide for most Jeep Wrangler models (YJ, TJ, JK, JL). Always double-check your service manual for specific torque specs and procedures.
1. Identify The Control Arm To Replace
Check if you’re doing front or rear, upper or lower. If you’re replacing all, start with the lower arms—they carry more load but are easier to access.
2. Support The Axle
Place a jack under the axle near the control arm you’re working on. This prevents the axle from moving suddenly when the arm is removed.
3. Remove The Bolts
- Use a wrench and socket to loosen and remove the bolts at each end of the control arm.
- Some bolts may be very tight or rusty; use a breaker bar or penetrating oil.
- If the bolt is stuck, tap gently with a hammer or use a pry bar.
Practical example: On a JK, the lower front control arm bolts are 21mm. Keep these bolts—they’re often reused.
4. Remove The Old Control Arm
- Pull the control arm out. If it’s stuck, wiggle it or use a pry bar.
- Inspect the mounting holes and brackets for damage or rust.
5. Compare Old And New Control Arms
Check the length and bushing style. If you’re using adjustable arms, set them to match the old arm’s length for now. This keeps your alignment close to factory specs.
6. Install The New Control Arm
- Slide the new control arm into the mounts.
- Insert bolts by hand; don’t tighten yet.
- Make sure the arm is oriented the same way as the old one (some have bends or curves).
7. Tighten Bolts To Proper Torque
- Only fully tighten the bolts once the Jeep is back on the ground and at ride height. This prevents bushing preload and premature wear.
- Use a torque wrench—typical specs are 125-140 ft-lbs for lower arms, but check your manual.
8. Repeat For Other Arms
If replacing multiple arms, do one at a time to keep the axle aligned.
9. Reinstall Wheels And Lower Jeep
Put the wheels back on, hand-tighten the lugs, lower the Jeep, then fully tighten the lug nuts.
10. Final Tightening
With the Jeep on the ground, finish torquing all control arm bolts.
Fine-tuning: Checking Alignment And Test Drive
Replacing control arms can affect your Jeep’s alignment. Poor alignment leads to uneven tire wear and poor handling.
What to check:
- Steering wheel position: Should be straight when driving.
- Vehicle pulls: Jeep should track straight.
- Tire wear: Watch for rapid or uneven wear after a few drives.
Get a professional alignment after replacing control arms, especially if using adjustable or aftermarket arms. This ensures safe handling and protects your tires.
Test drive tips:
- Start slow; listen for any unusual noises or clunks.
- Drive over bumps to check for improved ride and steering.
- If you notice vibration, noises, or steering issues, inspect your work.
Common Mistakes And How To Avoid Them
Many beginners rush through control arm replacement and end up with problems. Here are mistakes to watch for:
- Tightening bolts with Jeep off the ground
- Always do the final tightening with the full weight on the wheels.
- Mixing up bolt locations
- Mark or photograph each bolt before removing.
- Forgetting to torque bolts
- Use a torque wrench for every bolt. Guessing leads to loose parts or broken hardware.
- Not getting an alignment
- Even small changes in control arm length can throw off alignment.
- Reusing worn bushings
- Always inspect bushings and replace if needed.
- Ignoring rusted or damaged brackets
- Fix or replace mounting points if you see heavy rust or cracks.
Non-obvious insight: Some aftermarket control arms have a specific orientation (left/right, up/down). Double-check the instructions—installing them backward can cause binding or damage.
Cost Breakdown: Diy Vs. Professional Replacement
You might wonder if it’s worth doing this job yourself. Here’s a realistic comparison:
| Replacement Option | Average Cost (Parts) | Labor Cost (per arm) | Total (4 arms) |
|---|---|---|---|
| DIY, OEM arms | $60–$120 each | $0 | $240–$480 |
| DIY, heavy-duty aftermarket | $120–$220 each | $0 | $480–$880 |
| Professional shop (OEM) | $60–$120 each | $120–$200 | $720–$1,280 |
| Professional shop (aftermarket) | $120–$220 each | $120–$200 | $1,000–$1,680 |
Doing it yourself can save hundreds, and you’ll learn a lot about your Jeep in the process.
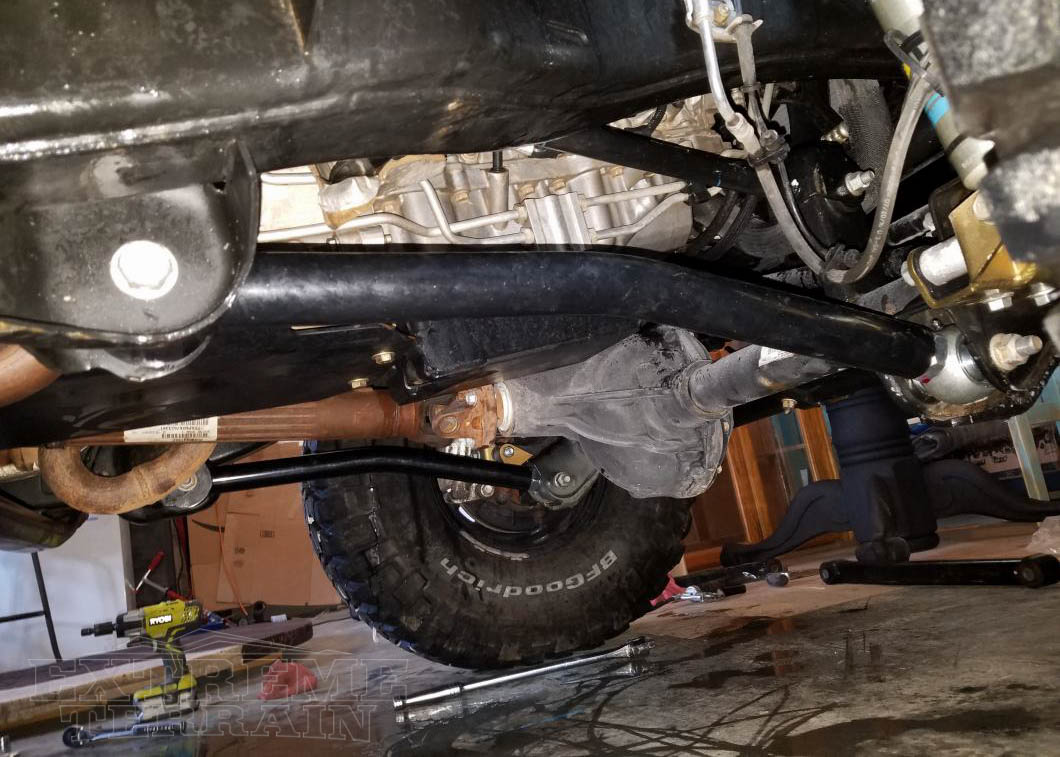
Credit: www.extremeterrain.com
Advanced Tips For Off-road And Lifted Jeeps
If you use your Wrangler for serious off-roading or have installed a lift kit, control arm choice and installation matter even more.
- Adjustable arms allow you to correct axle position and caster angle after lifting. This improves stability at highway speeds.
- Long-arm kits are more complex but give more suspension travel and a smoother ride over rocks.
- High-misalignment bushings or joints can reduce binding and improve articulation, but may require more maintenance.
- Skid plates for lower control arms protect them from rocks and debris.
Example: A 2.5” lift on a JK will benefit from adjustable control arms set to lengthen the wheelbase slightly, which helps with driveline angles.
Pro insight: Aftermarket arms often require greasing—check them every oil change for longer life.
Environmental And Safety Considerations
Replacing control arms involves handling heavy parts, possibly rust, and sometimes chemicals like penetrating oil. Always follow these safety tips:
- Wear eye protection when working under the Jeep or using power tools.
- Dispose of old bushings and metal parts at a proper recycling center.
- Work in a well-ventilated area, especially when spraying chemicals.
- Never trust only a hydraulic jack—always use jack stands.
If you encounter broken bolts or rusted brackets, don’t force them—this can make repairs harder and more expensive. Consider consulting a professional if you’re unsure.
When To Replace Other Suspension Parts
Sometimes, worn control arms are a sign that other suspension parts need attention.
Inspect these while you have the wheels off:
- Ball joints: Look for play or torn boots.
- Track bar: Check for cracks and worn bushings.
- Shocks/struts: Replace if leaking or weak.
- Sway bar links: Should be tight, not loose or bent.
Replacing these at the same time can save labor and improve your Jeep’s overall feel.
Non-obvious tip: If you’re lifting your Jeep, consider extended brake lines and driveshaft adjustments—they may be stressed by the new suspension geometry.
How To Maintain Your New Control Arms
After replacement, a little maintenance goes a long way.
- Check bolt torque after the first 100 miles—sometimes bolts loosen as parts settle.
- Inspect bushings every oil change for cracks or excessive movement.
- Grease serviceable joints if your control arms have zerk fittings.
- Wash undercarriage after off-roading to remove mud and salt, which cause rust.
A well-maintained suspension lasts longer and keeps your Jeep handling like new.
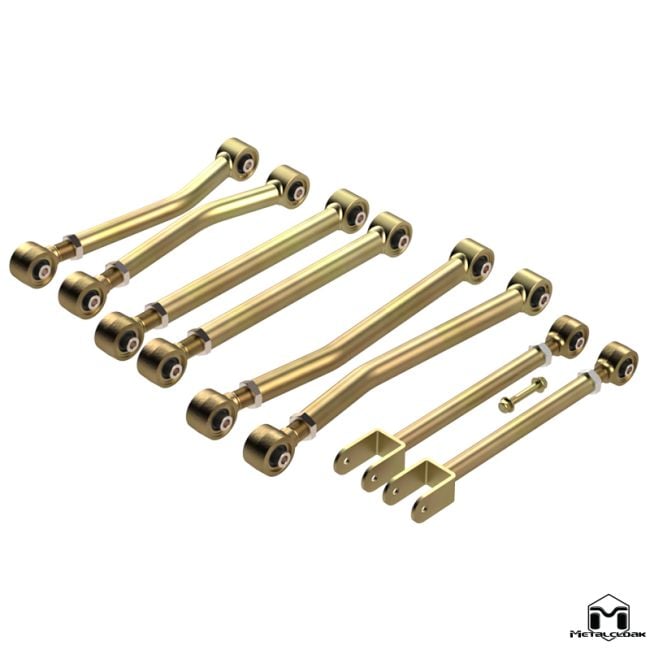
Credit: metalcloak.com
Troubleshooting: If Something Feels Wrong After Replacement
Sometimes, even with careful installation, problems can occur. Here’s what to do if you notice issues:
- Clunking noise: Check all bolts for correct torque. Inspect for missing washers or misaligned arms.
- Vibration at speed: Could be alignment or a control arm bolt not centered—double-check installation.
- Steering off-center: Get a professional alignment.
- Uneven ride height: Make sure all control arms are installed in the correct position and orientation.
If you’re stuck, online Jeep forums or service manuals can provide vehicle-specific advice, or consult a local mechanic.
Frequently Asked Questions
How Often Should Jeep Wrangler Control Arms Be Replaced?
Control arms can last 80,000 miles or more with normal use. Off-roading, salt, and heavy loads may require replacement sooner. Inspect every 12 months or if you notice handling changes or noises.
Can I Replace Just One Control Arm, Or Do I Need To Do All Of Them?
You can replace a single damaged control arm, but it’s often smart to do both left and right (or upper and lower pairs) at the same time. This keeps handling balanced and prevents uneven tire wear.
Do I Need A Professional Alignment After Replacing Control Arms?
Yes, an alignment is highly recommended. Even small changes in control arm length or bushing position can affect steering and tire wear. Always get an alignment after suspension work.
What’s The Difference Between Upper And Lower Control Arms?
Lower control arms handle most of the suspension’s load and connect the axle to the frame. Upper control arms control wheel angle and help keep the axle centered. Both are important for proper alignment and safe handling.
Are Aftermarket Control Arms Better Than Factory Ones?
Aftermarket arms are often stronger and allow for more adjustment, especially for lifted or off-road Jeeps. However, high-quality OEM arms are reliable for daily driving. Choose based on your driving style and needs.
For more details on control arm types and Jeep suspension basics, visit the official Wikipedia Control Arm page.
If you follow these steps, use quality parts, and pay attention to detail, replacing your Jeep Wrangler’s control arms can be a rewarding project. You’ll improve your Jeep’s handling, extend tire life, and be ready for whatever the trail throws at you.
Roll up your sleeves and enjoy the ride—your Wrangler will thank you.