
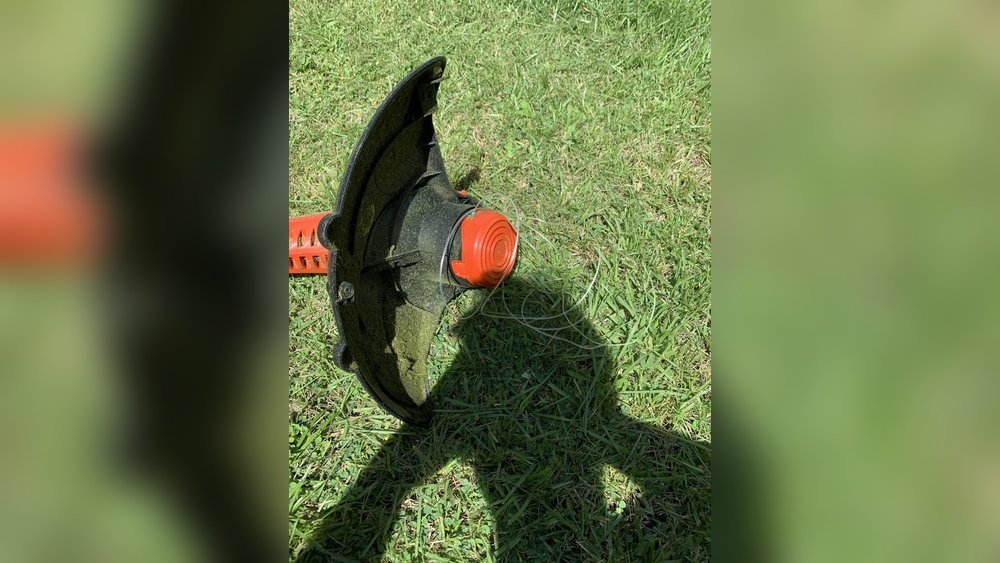
Is your string trimmer refusing to feed line when you need it the most? It’s frustrating to stop your yard work just because the line won’t advance.
But before you reach for a replacement or call a repair service, there are simple fixes you can try yourself. Whether your trimmer line is stuck, tangled, or just not feeding properly, understanding the common causes will help you get back to trimming quickly.
In this guide, you’ll discover easy, step-by-step solutions to fix your string trimmer line feeding issues—saving you time, money, and hassle. Keep reading to take control of your trimmer and enjoy a smooth, uninterrupted trimming experience.
Common Causes
When a string trimmer stops feeding line properly, several common issues might be the cause. Knowing these problems helps you fix the trimmer quickly and get back to work. Understanding what stops the line from feeding prevents future troubles. Here are the main causes to check.
Line Tangling And Jamming
Line tangling happens when the trimmer line winds unevenly inside the spool. This causes the line to jam and stop feeding out. Tangled lines often result from using the wrong line size or poor winding. You might hear a buzzing sound but see no line coming out. Untangling the line or rewinding it carefully solves this problem.
Debris In Trimmer Head
Grass, dirt, and small debris can build up inside the trimmer head. This blockage stops the line from moving freely. Debris also causes the bump feed mechanism to stick or fail. Cleaning the trimmer head regularly removes debris and keeps the line feeding smoothly. Always inspect the head if the line stops feeding suddenly.
Worn Or Incorrect Line
Using old or wrong line types can cause feeding issues. Worn line breaks easily or fails to feed out properly. Lines that are too thick or thin for your trimmer cause jams and poor performance. Always use the right line size and replace it when worn out. Fresh, correct line keeps your trimmer working well.
Damaged Trimmer Head Components
Parts inside the trimmer head wear out or break over time. A cracked spool, broken spring, or damaged bump knob stops the line from feeding. These damaged parts need replacing to restore normal function. Check all trimmer head components if cleaning and rewinding do not fix the problem.

Credit: casp.com.br
Basic Checks
Basic checks are the first step to fix a string trimmer that won’t feed line. These quick inspections help find common problems fast. Simple issues often cause the line to stop feeding properly. Follow these steps to get your trimmer working again.
Inspect Line Thickness
Use the correct line thickness for your trimmer model. Too thick or thin line can cause feeding issues. Check your user manual for the right size. Replace the line with the recommended thickness if needed.
Check For Tangled Line
Remove the spool and look for tangled or knotted line. Tangles block the line from feeding out smoothly. Carefully unwind or cut away any knots. Rewind the line evenly to avoid future tangles.
Clean Line Exit Eyelets
Clear dirt and grass clippings from the eyelets where the line exits. Blocked eyelets stop the line from feeding out. Use a small brush or cloth to clean these openings well. Keep eyelets free for smooth line release.
Verify Spring Position
Check the spring inside the trimmer head. It should sit correctly to push the spool and feed the line. A loose or misplaced spring stops the line from moving. Adjust or replace the spring to restore proper function.
Manual Line Feeding
Manual line feeding helps release more trimmer line when the automatic system fails. It lets you control the line length and keep trimming smoothly. Understanding how to feed the line manually can save time and avoid frustration during yard work.
How To Bump Feed
Bump feeding means tapping the trimmer head on the ground to release line. Hold the trimmer at a slight angle and gently tap the head. This action triggers the mechanism inside to feed more line out. Repeat as needed while trimming.
Advancing Line Manually
Sometimes the line won’t feed by bumping. In this case, turn off the trimmer and remove the spool. Pull the line out manually to the correct length. Check for tangles or jams and rewind the line if needed. Then reinstall the spool carefully.
When To Tap The Trimmer Head
Tap the trimmer head when the line feels short or stops cutting well. Also tap if the trimmer stalls or the line breaks frequently. Regular tapping keeps the line at the right length for an even trim. Avoid tapping too hard to prevent damage.
Cleaning The Trimmer Head
Cleaning the trimmer head is a key step to fix a string trimmer not feeding line. Dirt, grass, and debris can clog the head and stop the line from coming out. Regular cleaning keeps your trimmer working smoothly and extends its life.
Removing The Spool
Turn off the trimmer and disconnect the spark plug. This prevents accidental starting. Locate the trimmer head and press the tabs or unscrew the cover. Gently pull out the spool from the head. Keep the spool safe to avoid losing it.
Clearing Grass And Debris
Use a small brush or cloth to clean the inside of the trimmer head. Remove all grass clippings and dirt. Check the eyelets where the line comes out. Clear any blockages to allow the line to feed properly. Make sure the spool is free from tangled or old line.
Reassembling The Head
Place the spool back into the trimmer head carefully. Align it so the line feeds through the eyelets smoothly. Secure the cover by snapping it back or screwing it in place. Test the trimmer by gently tapping the head on the ground to see if the line feeds correctly.
Replacing The Line
Replacing the line is a key step to fix a string trimmer that won’t feed line. Over time, the trimmer line wears out or breaks. This stops the line from feeding properly. Changing the line will restore the trimming power and keep your tool working smoothly. Follow these simple steps to replace the line correctly.
Choosing The Right Line
Use the line size recommended by your trimmer’s manual. Thicker lines cut tougher grass but need more power. Thinner lines work well for light trimming. Avoid using line that is too thick or too thin. Also, choose a line type suitable for your trimming needs. Nylon lines are common and durable. Some lines have special coatings for longer life.
Winding The Line Correctly
Cut a length of line as instructed in the manual. Insert one end of the line into the spool hole. Wind the line tightly and evenly in the direction shown on the spool. Keep the line flat and avoid overlapping. Leave some line free on each side to feed out easily. Proper winding prevents tangles and feeding problems.
Loading The Spool
Place the wound spool back into the trimmer head. Secure the line ends in the notches to hold them in place. Feed the line through the eyelets on the trimmer head. Snap the spool cover back on tightly. Make sure the line can move freely without catching. Test the feed by bumping or pulling the line gently.

Credit: coloradoclownfish.com
Fixing Auto Feed Issues
Fixing auto feed issues on a string trimmer improves its performance. The auto feed system pushes the cutting line out during use. When this system fails, the line does not advance properly. This section explains how to check and fix common auto feed problems quickly.
Checking Auto Feed Mechanism
Start by inspecting the auto feed mechanism. Remove the trimmer head cover carefully. Look for tangled or jammed line inside the spool. Clear any dirt or grass that blocks the line path. Check the eyelets where the line exits. Clean these holes thoroughly to avoid clogging. Also, examine the spool for cracks or damage. A damaged spool can stop the line from feeding.
Resetting The Feed System
Reset the feed system by manually advancing the line. Press the trimmer head gently on the ground to bump the line out. If this does not work, remove the spool. Rewind the line evenly and tightly on the spool. Make sure the line is not too long or too short. Replace the spool and test the feed again. This reset can often solve feeding problems.
Replacing Faulty Parts
Some parts wear out over time and cause auto feed failure. Inspect the spring inside the trimmer head. A weak or broken spring stops the line from feeding. Replace it with a new spring designed for your model. Also, check the bump knob on the head. If it is cracked or loose, replace it. Using original parts ensures the best fit and function. Replacing faulty parts restores smooth line feeding.
Preventive Tips
Preventive care keeps your string trimmer working smoothly. Small actions can stop line feeding problems before they start. Follow simple tips to avoid clogs, tangles, and wear. These steps save time and keep your trimmer ready for use.
Regular Cleaning Schedule
Clean your trimmer after every use. Remove grass, dirt, and debris from the head and spool. Check for tangled or stuck line inside the spool. Use a soft brush or cloth for cleaning. A clean trimmer feeds line better and lasts longer.
Using Recommended Line Types
Use the line type suggested by your trimmer’s manual. Different models need different line thickness and material. Using the wrong line can cause jams or poor feeding. Buy good quality line to prevent breakage and wear. Proper line choice ensures smooth operation.
Proper Storage Practices
Store your trimmer in a dry place away from sunlight. Avoid damp areas that cause rust or line damage. Remove the line or loosen it before long storage. Keep the trimmer off the ground to prevent dirt buildup. Good storage keeps your trimmer ready and working well.

Credit: www.youtube.com
Frequently Asked Questions
Why Is My Trimmer Line Not Feeding?
Your trimmer line may not feed due to debris clogging, tangled or improperly wound line, or using the wrong line thickness. Clean the trimmer head, remove jams, and ensure correct line size to fix feeding issues. Replace worn parts if needed.
How To Bump Feed String Trimmer?
Tap the trimmer head gently on the ground while running to release more line. Repeat as needed to feed string.
Why Is My Strimmer Wire Not Coming Out?
Your strimmer wire may be tangled or jammed inside the head. Clean debris, check for proper winding, and ensure correct line thickness. Replace worn line or spring if needed. Disconnect power before inspecting to avoid accidents.
Why Is My Auto Feed On My Strimmer Not Working?
Your strimmer’s auto feed may fail due to tangled or improperly wound line. Clean debris from eyelets and spool. Tap the head on the ground to manually advance line. Replace worn or incorrect line thickness to restore proper feeding.
Conclusion
Fixing a string trimmer that won’t feed line is simpler than it seems. Check for tangled or worn line and replace it if needed. Clean the trimmer head to remove dirt and grass buildup. Use the correct line thickness for your specific model.
Tap the trimmer head gently to help the line feed properly. Regular maintenance keeps your trimmer working well longer. Follow these easy steps, and your trimmer will cut smoothly again. Don’t let feeding issues stop your yard work. Keep your tools ready and your lawn looking neat.