
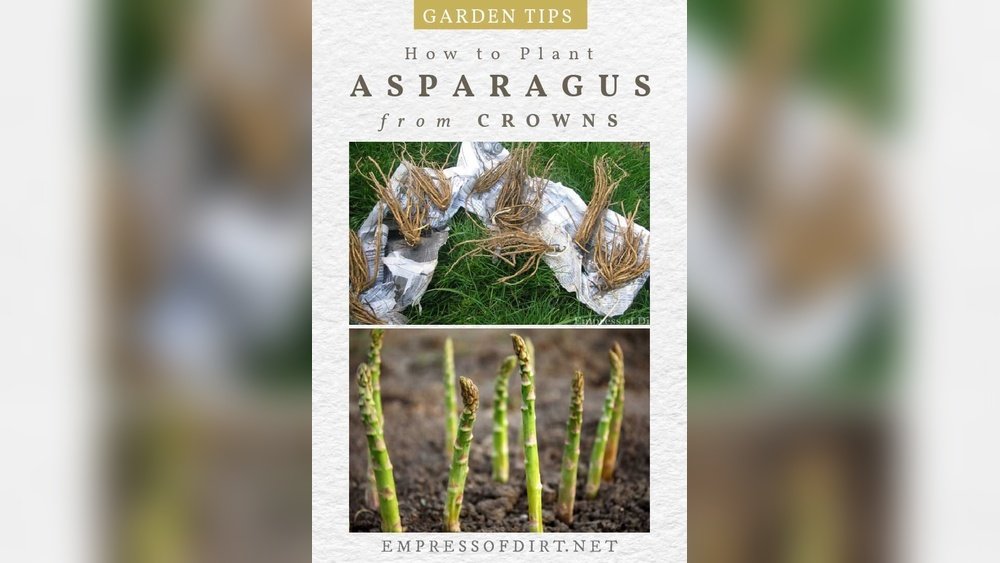
Growing asparagus from crowns is a rewarding journey for home gardeners. Asparagus is one of the few vegetables that returns year after year, offering fresh, tender spears each spring. Yet, many beginners hesitate to try it because it’s a long-term commitment and the planting process feels confusing.
The truth is, starting asparagus from crowns is much easier than from seed, and with the right guidance, you’ll enjoy a healthy, productive patch for decades. This article walks you through everything you need to know—site selection, soil preparation, planting techniques, maintenance, harvesting, and troubleshooting.
Follow these tips, and you’ll soon be harvesting crisp asparagus spears from your own garden.
Understanding Asparagus Crowns
Asparagus crowns are mature roots with dormant buds. Crowns are usually one year old when sold. Planting crowns, instead of seeds, saves time because you skip the slow germination and fragile seedling stage. Crowns usually yield their first edible spears in the second year after planting, rather than waiting three years.
What Makes Crowns Ideal?
Crowns are robust. They have a developed root system and multiple buds, making them stronger against pests and weather. They also adapt to soil faster and need less care in the beginning. Buying quality crowns is critical; poor crowns can lead to weak plants and disappointing harvests.
A crown’s maturity means it has already survived one year’s growing cycle, so it is less vulnerable to sudden changes in temperature or moisture. Crowns with several healthy buds are more likely to produce thicker, tastier spears. Some crowns might even show small white shoots—these are signs of vigor, not damage.
If you’re unsure, look for crowns with roots that are flexible, not brittle, and buds that aren’t mushy.
Where To Buy Crowns
Look for crowns at local nurseries, gardening centers, or reputable online suppliers. Choose crowns that are firm, not dried or moldy. Each crown should have several healthy-looking roots and visible buds.
Some online sources will ship crowns in spring—timing is important, so order early to ensure you get the freshest stock. If you buy crowns in person, check the roots for signs of rot or dryness. Reputable suppliers often offer disease-resistant varieties, which can save you trouble in later years.
A good rule is to buy a few extra crowns in case some don’t survive transplanting.
Choosing The Right Site
Asparagus is a permanent crop. Once planted, it can stay productive for 15–20 years or more. Picking the right site matters a lot.
Sunlight Requirements
Asparagus thrives in full sun. Aim for a spot with at least 8 hours of sunlight per day. Less sunlight reduces spear quality and yield.
Even a bit of shade can lead to thin, weak spears. If your garden has partial shade, choose the sunniest possible area. Many gardeners underestimate the impact of sunlight; asparagus needs it not just for growth, but also for photosynthesis in the tall fern stage after harvest.
Soil Needs
Well-drained, sandy or loamy soil is best. Heavy clay holds water and causes root rot. Soil pH should be between 6.5 and 7.5.
If you’re not sure about your soil type, squeeze a handful. Sandy soil crumbles easily, while clay sticks together. Loam is somewhere in the middle, ideal for asparagus. You can improve clay soil by mixing in sand and compost. If drainage is a problem, raised beds are a great solution.
Avoiding Problems
Do not plant asparagus where tomatoes, potatoes, or other nightshades recently grew. These plants can leave behind diseases that affect asparagus. Also, avoid areas with persistent weeds.
Another common mistake is planting near large trees or shrubs. Their roots compete for moisture and nutrients, slowing asparagus growth. If you have trouble with weeds, consider covering the bed with landscape fabric before planting and cutting holes for each crown.
Preparing The Soil
Preparation before planting is crucial. Asparagus needs rich, loose soil for deep roots.
Testing And Amending
Test your soil for pH and nutrient content. If the pH is too low, add lime to raise it. If it’s too high, add sulfur to lower it.
Soil tests also show if you need to add potassium or phosphorus, both vital for asparagus. Many beginners skip this step, but poor soil can mean years of weak growth. If your soil is low in organic matter, add extra compost or aged manure.
Spread 2–4 inches of compost over the planting area and mix it into the top 12 inches. This deep digging gives crowns plenty of room to send roots downward.
If you have clay soil, break it up with a garden fork and mix in sand. For sandy soils, extra compost helps retain moisture and nutrients.
Removing Weeds
Clear all weeds and grass from the planting site. Perennial weeds are especially troublesome. Asparagus does not compete well with weeds, especially in the first few years.
Dig out roots of stubborn weeds like bindweed or quackgrass. Mulching after planting helps, but starting with a clean bed is best. If weeds return, pull them by hand or use shallow hoeing—never use herbicides directly on the crowns.
Planting Asparagus Crowns
Planting crowns correctly sets the foundation for years of harvest.
Timing
Plant crowns in early spring. Soil should be workable but not waterlogged. In northern regions, wait until the soil warms up slightly.
Crowns can tolerate light frost but not deep freezing. If you’re unsure, check soil temperature with a thermometer; 50°F (10°C) is a good minimum for planting. Planting too early in cold, wet soil can cause rot.
Spacing And Layout
Each crown needs enough room to spread. Standard spacing is:
- 12–18 inches between crowns
- 3–5 feet between rows
This prevents overcrowding and ensures healthy plants.
Spacing also helps with air circulation, reducing disease risk. For small gardens, use the minimum row spacing (3 feet) and stagger crowns for more efficient use of space. Avoid planting crowns too close to the edges of beds, as roots may dry out or be disturbed.
Step-by-step Planting
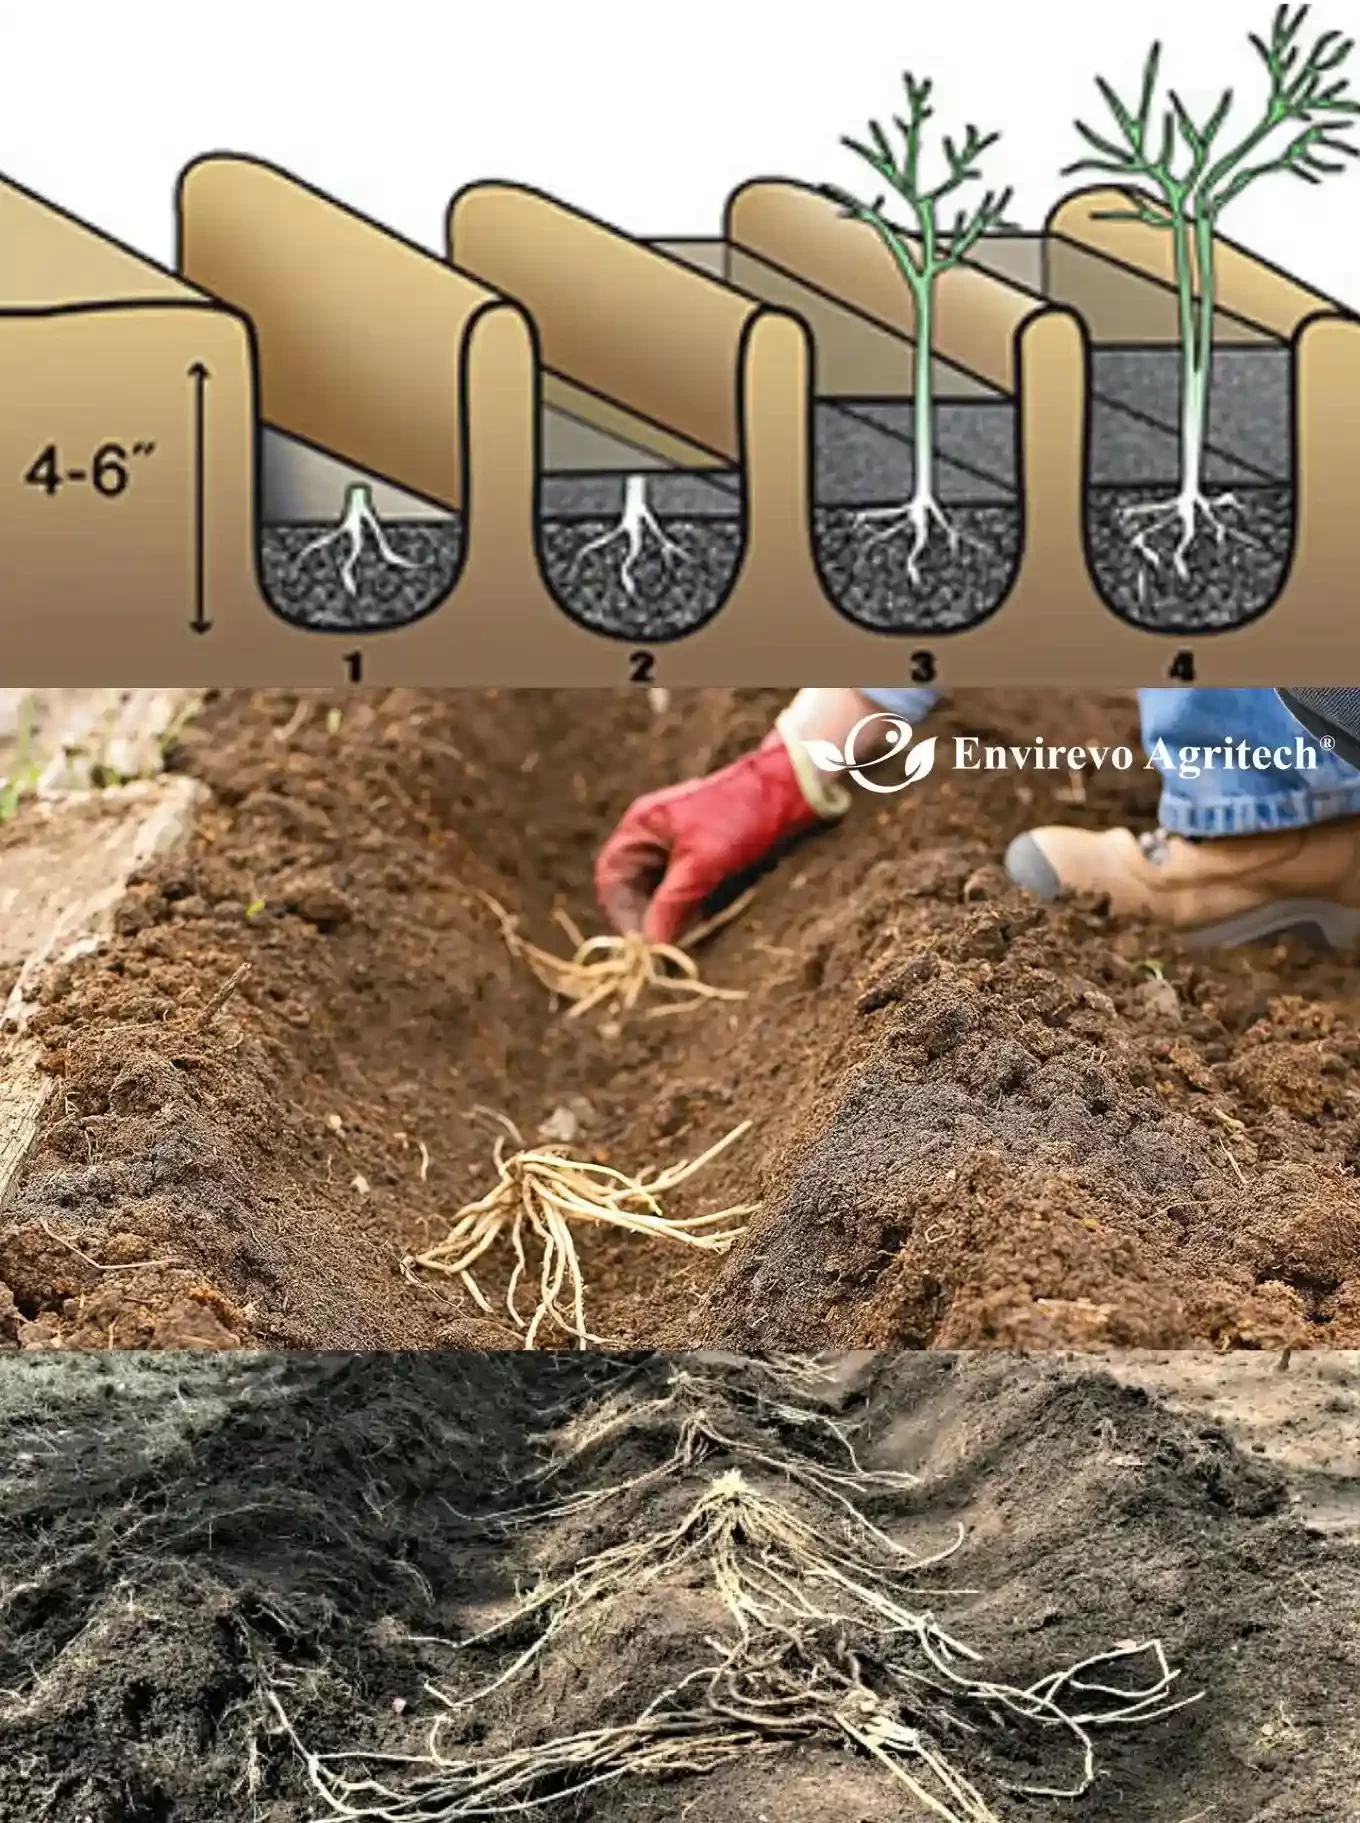
- Dig trenches 12 inches wide and 8 inches deep.
- Form a mound of soil 2 inches high in the center of the trench.
- Place crowns on the mound, roots spread out like octopus arms.
- Cover crowns with 2 inches of soil.
- As spears emerge, gradually fill the trench until it is level with the surrounding soil.
This gradual backfilling prevents the new shoots from being smothered. If you fill the trench all at once, spears may have trouble breaking through.
Example Planting Layout
| Row Spacing | Crown Spacing | Trench Depth | Yield (after 3 years) |
|---|---|---|---|
| 3–5 feet | 12–18 inches | 8 inches | 1/2 lb per crown/year |
Watering After Planting
Water well after planting. Keep soil moist but not soggy. Crowns need steady moisture to establish roots.
A gentle spray works best. Avoid puddling, which can wash soil away from roots. For the first month, check moisture every few days. If your climate is dry, cover the bed with mulch right after watering.
Caring For Young Asparagus Plants
Proper care in the first few years is essential for strong plants.
Watering Routine
Asparagus prefers deep, infrequent watering. Aim for 1 inch per week. Too much water causes rot, while too little stunts growth.
If you’re unsure, stick your finger into the soil. If it feels dry below the surface, water thoroughly. A soaker hose helps keep moisture even, especially during hot spells. In sandy soils, you might need to water twice a week.
Mulching
Apply 2–4 inches of organic mulch, like straw or shredded leaves. Mulch keeps soil moist, suppresses weeds, and protects crowns from temperature swings.
Mulch also helps prevent soil from splashing onto spears, which can cause disease. Replenish mulch as needed, especially after heavy rain or wind. Pine needles, wood chips, or compost can be used, but avoid thick layers that block air.
Fertilizing
Fertilize in early spring and after the harvest season. Use balanced fertilizer (10-10-10 NPK) or compost tea. Avoid high nitrogen; it can cause leafy growth but fewer spears.
Add fertilizer around—but not directly on—crowns. Water after fertilizing to help nutrients reach roots. If using compost tea, apply it with a watering can to soak the soil. A soil test after the first year can guide future fertilizing.
Fertilizer Comparison
| Type | Application | Effect |
|---|---|---|
| 10-10-10 Granular | Early spring | Balanced growth |
| Compost Tea | Post-harvest | Root health |
| High Nitrogen | Anytime | Leafy, poor spears |
Weed Management
Hand-pull weeds or use shallow cultivation. Asparagus roots are close to the surface, so avoid deep digging.
Early weed control is easier than waiting. If weeds get out of hand, they can choke young asparagus and reduce yield for years. Mulch helps, but be alert for weeds growing through gaps.
Common Mistakes And How To Avoid Them
Even experienced gardeners make mistakes when growing asparagus.
- Planting too deep or too shallow: Crowns must be 6–8 inches deep. Too deep, and spears struggle to reach the surface; too shallow, and roots dry out.
- Overcrowding: Tight spacing leads to thin, weak spears.
- Ignoring soil drainage: Asparagus hates wet feet. Poor drainage leads to crown rot.
- Harvesting too soon: Never harvest the first year. Let crowns build strength.
- Neglecting weed control: Weeds sap nutrients from young plants.
- Using fresh manure: Only use well-rotted manure. Fresh manure burns crowns and encourages weeds.
- Skipping soil tests: Unknown pH or nutrient imbalances can ruin your patch.
Another mistake is failing to monitor for pests—beetles and slugs can destroy young shoots quickly. If you notice holes or chewed stems, act fast. Also, avoid planting crowns in a bed that floods during rain; standing water is a recipe for rot.
Seasonal Care For Established Asparagus
After the first year, asparagus requires routine care through the seasons.
Spring
- Clear mulch and debris.
- Fertilize lightly.
- Watch for spear emergence.
- Start harvesting in year two (lightly) or year three (fully).
Spring is also a good time to inspect for pests and diseases. If you see any beetles or wilting shoots, treat quickly. Early spring is when asparagus is most vulnerable to weather swings, so keep an eye on the forecast.
Summer
- Stop harvesting by early summer.
- Let ferns grow tall. These produce food for the roots.
- Water during dry periods.
The ferns can reach 4–5 feet. They look like feathery, green bushes and are essential for next year’s crop. Don’t cut them down until they naturally yellow. If summer is dry, water deeply every week.
Fall
- Cut down ferns after they yellow and die.
- Apply compost or mulch to protect crowns.
This cleanup prevents pests from overwintering in dead stems. Use sharp scissors or pruners to avoid damaging crowns. If winters are harsh, add extra mulch for insulation.
Winter
- Asparagus crowns are hardy but benefit from mulch in cold climates.
- Avoid walking on beds to prevent soil compaction.
You can use straw, leaves, or wood chips as mulch. Mark the bed with stakes so you don’t accidentally step on crowns when snow covers the ground.
Harvesting Asparagus Spears
Harvesting is exciting, but timing is everything.
When To Harvest
Do not harvest in the first year. In the second year, harvest for only 2 weeks. In year three and beyond, harvest for 6–8 weeks.
A common mistake is picking too much, too soon. Early harvest weakens crowns and reduces long-term yield. The best time to harvest is when spears are 6–8 inches tall and about as thick as your finger.
How To Harvest
Use a sharp knife or asparagus spear cutter. Cut spears at ground level when they are 6–8 inches tall.
Be careful not to injure nearby shoots or roots. Harvest every two days during peak season; spears grow quickly, sometimes overnight.
Signs Of Overharvesting
If new spears are thin (pencil-sized), stop harvesting and let ferns grow.
Thin spears signal that crowns need to recharge. Letting ferns grow helps restore energy for next year.
Harvest Timeline
| Year | Harvest Duration | Typical Yield |
|---|---|---|
| 1 | None | 0 lbs |
| 2 | 2 weeks | 1/4 lb per crown |
| 3+ | 6–8 weeks | 1/2–1 lb per crown |

Credit: www.youtube.com
Troubleshooting: Pests And Diseases
Asparagus is hardy, but a few threats exist.
Common Pests
- Asparagus beetle: Red or blue beetles eating spears and ferns. Hand-pick or use organic sprays.
- Cutworms: Larvae that chew stalks. Use collars or encourage natural predators.
- Slugs/snails: Damage young shoots. Use traps or barriers.
Early detection is key. Check plants regularly, especially during warm, wet weather. Asparagus beetles lay eggs on stems; remove them before hatching. Mulch can attract slugs, so monitor closely and remove any you find.
Diseases
- Fusarium wilt: Causes yellowing and stunted growth. Avoid planting in infected soil.
- Crown rot: Caused by waterlogged soil. Improve drainage.
To prevent disease, rotate crops and never compost infected plant material. Most diseases can be managed by keeping beds clean and avoiding overcrowding.
Non-obvious Insights
- Rotating your asparagus bed every 15–20 years prevents soil fatigue and disease buildup, which most beginners overlook.
- Removing old ferns in fall reduces overwintering pests, especially asparagus beetles.
Expanding Your Asparagus Patch
If you want more asparagus, expand your patch smartly.
- Plant new crowns in another area to avoid overcrowding.
- Rotate crops if possible, or use raised beds for new plantings.
- Divide overcrowded crowns after 5–10 years to maintain vigor.
When dividing old crowns, use a sharp spade and replant sections with healthy roots and buds. This keeps plants strong and productive.
Credit: envirevoagritech.com
Varieties Of Asparagus Crowns
Choosing the right variety impacts yield, spear thickness, and disease resistance.
Popular Varieties
- Jersey Giant: High yield, disease-resistant, thick spears.
- Mary Washington: Classic, reliable, good flavor.
- Purple Passion: Unique purple color, sweeter taste.
- Millennium: Cold-hardy, robust growth.
Some varieties are bred for early harvest or resistance to specific diseases. Purple varieties are not only beautiful but also contain more antioxidants.
Choosing The Best Variety
Pick a variety suited for your climate. For cold regions, Millennium is ideal. For warmer climates, Jersey Giant performs well.
Consider your soil and garden goals. If you want thick spears, choose Jersey Giant or Millennium. For unique color, Purple Passion is a great choice. Consult local gardening groups for advice on varieties that thrive in your area.
Asparagus In Raised Beds
Growing asparagus in raised beds is possible and helps with drainage.
- Beds should be at least 12 inches deep.
- Use a mix of loamy soil and compost.
- Space crowns as you would in ground beds.
Raised beds also make weed control easier and reduce soil compaction.
If you have limited space or poor native soil, raised beds are a smart solution. They warm up faster in spring, which means earlier spear emergence. Remember to water more often, as raised beds dry out quickly.

Credit: joegardener.com
Practical Tips For Success
Success with asparagus crowns depends on patience and attention.
- Label your rows: Asparagus beds look empty in winter; labels prevent accidental digging.
- Stagger plantings: Plant crowns over several years for a continuous harvest.
- Monitor for pests: Early detection of beetles saves your crop.
- Keep records: Note harvest dates, yields, and any problems to improve next year.
Other useful tips: Use row covers during cold snaps to protect emerging spears. If you see signs of nutrient deficiency (yellowing leaves), test soil and adjust fertilizer as needed. Don’t forget to share extra spears with neighbors—they’re a springtime treat.
Water Management
Water is crucial during establishment and dry spells.
- Install drip irrigation for consistent moisture.
- Avoid overhead watering; it spreads disease.
- Use rain gauges to track weekly rainfall.
Drip irrigation saves time and reduces fungal problems. If you hand-water, do so early in the day so leaves dry before nightfall. In drought, don’t let beds dry out—crowns can die quickly.
Soil Health And Longevity
Healthy soil is the backbone of a productive patch.
- Add compost annually to replenish nutrients.
- Avoid synthetic chemicals that disrupt soil microbes.
- Rotate asparagus with other crops every 15–20 years for best results.
Also, test soil every few years to catch problems early. Soil health affects not just asparagus, but the whole garden ecosystem.
When To Replace Crowns
Asparagus crowns can decline after 15–20 years.
- If yields drop and spears thin, consider replanting.
- Remove old crowns and plant new ones in fresh soil.
Before replacing, try dividing crowns. If that doesn’t help, start a new bed for best results.
Asparagus Companion Planting
Asparagus benefits from certain companions.
- Plant parsley, basil, or tomatoes nearby to repel pests.
- Avoid planting alliums (onions, garlic) close, as they can compete for nutrients.
Companions also add beauty and diversity to your garden. Tomatoes shade the soil and attract beneficial insects, while parsley deters beetles.
Storage And Use Of Fresh Asparagus
Fresh asparagus tastes best within days of harvest.
- Store spears upright in water or damp paper towels in the fridge.
- Use within 3–4 days for best flavor.
Asparagus is rich in vitamin K, folate, and fiber. One cup (134g) contains about 27 calories and 3 grams of fiber.
For best taste, steam or roast asparagus soon after picking. If you have extra, blanch and freeze spears for later use.
Sustainability And Asparagus
Asparagus is a sustainable crop because it requires less annual tilling and fertilizer than most vegetables. Once established, it needs only minimal intervention.
Homegrown asparagus also reduces your environmental footprint—no packaging or shipping. For more details on asparagus cultivation and sustainability, visit Garden Organic.
Frequently Asked Questions
How Long Does It Take For Asparagus Crowns To Produce Edible Spears?
Asparagus crowns usually produce edible spears in the second year after planting. The first year is for root establishment, and harvesting is not recommended. By the third year, you can expect a full harvest season.
What Is The Best Soil Ph For Asparagus?
The ideal soil pH for asparagus is 6.5 to 7.5. This range encourages healthy root growth and spear production. Test your soil before planting and adjust as necessary with lime or sulfur.
Can I Plant Asparagus Crowns In Containers?
Yes, but containers must be deep (at least 18 inches) and wide enough for roots to spread. Use well-drained soil and provide regular watering. Container-grown asparagus may yield less than ground-planted crowns.
Why Are My Asparagus Spears Thin?
Thin spears often mean overharvesting, young crowns, or poor soil nutrition. Stop harvesting when spears get pencil-thin and let the ferns grow to rebuild crown strength. Feed the bed with compost and ensure proper watering.
How Do I Prevent Asparagus Beetles?
Hand-picking is effective for small infestations. For larger patches, use organic sprays or encourage natural predators like ladybugs. Removing dead ferns in fall also helps reduce overwintering beetles.
Growing asparagus from crowns is a long-term investment, but the rewards are worth the effort. With the right site, soil, and care, you’ll enjoy crisp, flavorful spears every spring. Remember, patience and attention in the early years pay off for decades.
Whether you plant in a garden bed or raised bed, follow these tips, and your asparagus patch will thrive.