Winter can turn a simple driveway into a slippery hazard overnight. If you live in a cold region, you know the struggle—waking up to a thick layer of ice that stops your car and makes walking dangerous. Finding the fastest, safest, and most effective way to melt ice on your driveway isn’t just about convenience; it’s about safety for your family and visitors.
This guide shows you exactly how to melt ice on your driveway quickly, using methods that fit every budget and situation.
You’ll discover proven products, home remedies, and tricks that work in real life—not just in theory. Whether you face sudden freezing rain, stubborn black ice, or a heavy snowstorm aftermath, you’ll find solutions tailored for your needs. Along the way, we’ll clear up common myths and highlight mistakes that can damage concrete or the environment.
If you want to keep your driveway clear, safe, and looking good all winter, keep reading.
Why Fast Ice Removal Matters
Ice isn’t just an inconvenience. In the US, over one million people are injured in slip-and-fall accidents each year, with many happening on icy driveways and sidewalks. Fast ice removal can prevent injuries, protect your car tires and undercarriage, and even avoid lawsuits if someone slips on your property.
If you delay, ice can bond tightly to concrete, making removal more difficult and increasing the risk of cracks when you finally break it up. Using the right method at the right time saves effort, money, and repairs.
Understanding Ice On Driveways
Before melting ice, it helps to know how it forms and why it sticks around. Ice appears when moisture freezes on cold surfaces—often after snow melts during the day and refreezes at night. Driveways made from concrete or asphalt can hold cold temperatures longer, making ice harder to melt. North-facing driveways, shaded by buildings or trees, stay frozen longer.
Not all ice is the same:
- Black ice: Thin, invisible, and very slippery.
- Packed snow ice: Layers of compacted snow that freeze solid.
- Sheet ice: Smooth, thick layers that cover large areas.
Each type may need a slightly different approach for fast removal.

Credit: www.youtube.com
The Fastest Ways To Melt Ice On Driveway
Some methods work in minutes, others take a bit longer. Choose based on your situation—how thick the ice is, what supplies you have, and the outside temperature.
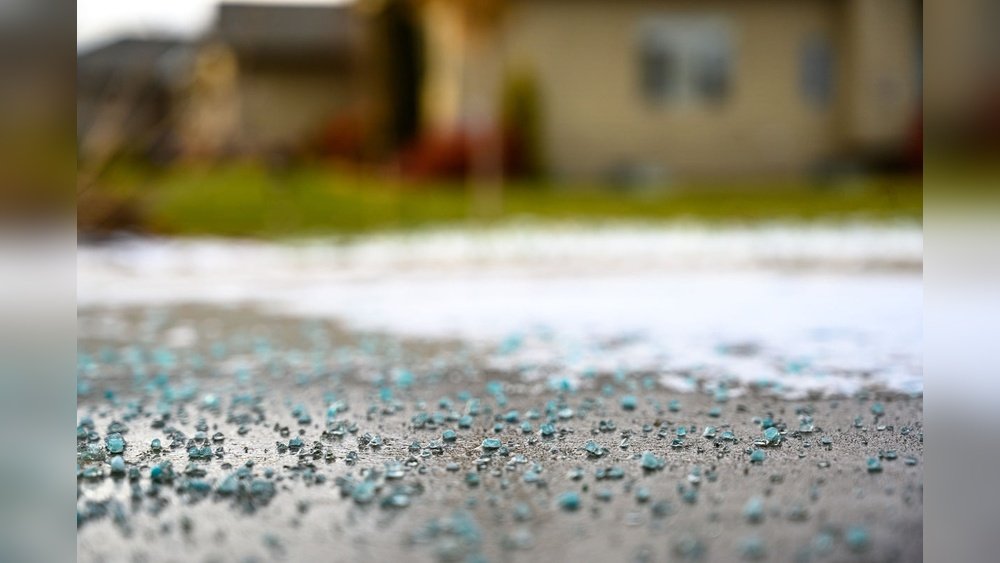
1. Commercial Ice Melts
Ice melt products are designed for speed and effectiveness. The most common types are:
- Calcium chloride: Works down to -25°F, melts ice fast, and generates heat as it dissolves.
- Magnesium chloride: Effective to -13°F, less damaging to plants and concrete.
- Sodium chloride (rock salt): Cheap and widely available, but only works above 15°F and can harm concrete and plants.
- Potassium chloride: Works above 12°F, safer for pets.
Here’s how the main ice melts compare:
| Type | Effective Temperature | Speed | Concrete Safety | Pet Safety |
|---|---|---|---|---|
| Calcium Chloride | -25°F | Very Fast | Moderate | Moderate |
| Magnesium Chloride | -13°F | Fast | Good | Good |
| Sodium Chloride | 15°F | Medium | Poor | Poor |
| Potassium Chloride | 12°F | Medium | Good | Best |
How to use:
Spread the product evenly over the ice, using the amount recommended on the package. More is not better—too much can damage surfaces and plants. Most melts start to work within 15–30 minutes. Scrape slush away with a shovel or broom for best results.
Non-obvious tip: Store your ice melt in a dry container near the door, so you can apply it quickly before ice thickens.
2. Homemade Ice Melt Solutions
If you don’t have commercial ice melt, you can make your own with common household items.
Quick Diy Ice Melt Mixes
- Salt and warm water: Mix 2 cups of table salt in a gallon of warm water. Pour over icy spots.
- Rubbing alcohol and dish soap: Combine 1/2 gallon warm water, 1/4 cup rubbing alcohol (70% or higher), and a few drops of dish soap. Pour onto ice for fast melting.
Alcohol lowers the freezing point and helps break the bond between ice and driveway.
Important: Homemade solutions work best for thin ice or small areas. They are less effective on thick layers.
3. Physical Removal Methods
Sometimes, the fastest way is to break up the ice before melting it. This works especially well for thick or stubborn ice.
Chipping And Scraping
- Use an ice chopper or sturdy metal shovel to crack the ice.
- Work from the edges toward the center.
- After breaking the ice, sweep away the chunks.
Snow Blower With Ice Attachment
Some snow blowers have special blades for ice. They can break up and clear large areas quickly, but they require careful handling to avoid damaging the surface.
Pro tip: Spray your shovel with cooking oil before use—the ice slides off easier.
4. Thermal Methods
Heat can melt ice quickly, but must be used safely to avoid damaging your driveway or causing burns.
Hot Water
Pouring hot (not boiling) water onto ice melts it fast. Boiling water can crack cold concrete, so use water around 120–140°F.
- Pour slowly and evenly.
- Immediately spread sand or non-clumping cat litter for traction, as water may refreeze.
Caution: This method can lead to black ice if the melted water refreezes. Use only when temperatures are rising or you can dry the area afterward.
Heated Mats
Electric heated driveway mats melt ice on contact. Lay them on problem spots and plug in. These mats are reusable, energy efficient, and safe for concrete. They are a good long-term investment if ice is a constant problem.
5. Eco-friendly And Pet-safe Options
Standard ice melts can harm pets, plants, and groundwater. Here are greener alternatives:
- Sand or non-clumping kitty litter: Doesn’t melt ice, but provides instant traction. Spread over slippery areas to prevent falls.
- Sugar beet juice: Used by some cities; it lowers the freezing point and is less corrosive than salt.
- Calcium magnesium acetate (CMA): Works above 20°F, safe for pets and plants, but slower than other melts.
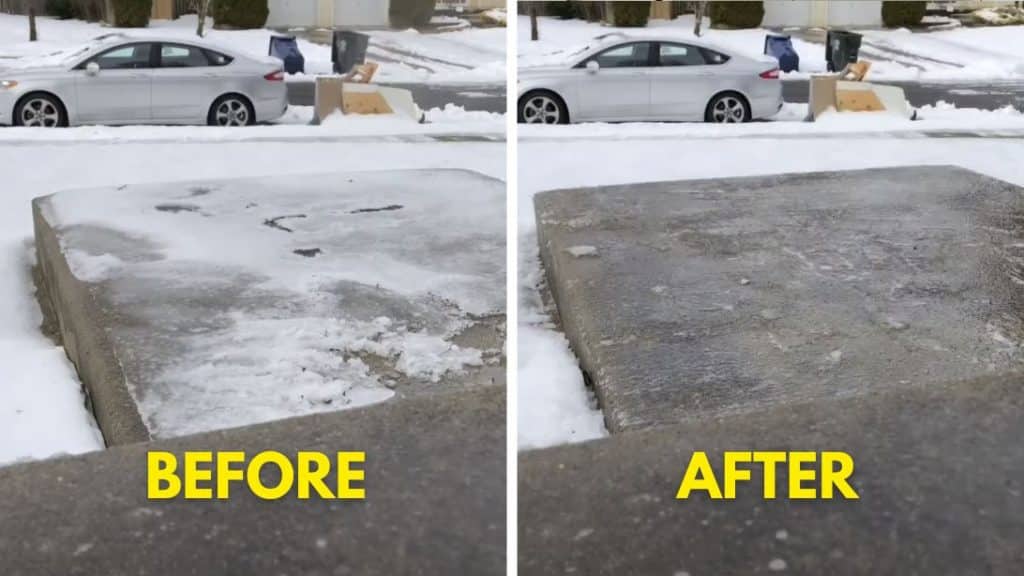
6. Fastest Method: Combination Approach
The absolute quickest method combines several solutions:
- Chip or break the top ice layer with a shovel or chopper.
- Apply a fast-acting ice melt (calcium chloride or magnesium chloride).
- Pour warm water or rubbing alcohol solution for stubborn spots.
- Sweep away slush and broken ice to prevent refreezing.
- Spread sand or traction material on wet patches.
This approach works in under 30 minutes for most driveways, even in extreme cold.
How Different Driveways Affect Ice Melting
Not all driveways are the same. The material changes how you should treat ice.
Concrete Driveways
Concrete is durable, but sensitive to salt and rapid temperature changes.
- Avoid using rock salt (sodium chloride); it can cause scaling and cracks.
- Use calcium chloride, magnesium chloride, or CMA for less damage.
- Never pour boiling water on cold concrete.
Asphalt Driveways
Asphalt handles chemicals better, but can soften with too much heat.
- Most ice melts are safe, but rinse excess chemicals in spring.
- Avoid metal tools that can gouge the surface.
Gravel Driveways
Gravel loses traction quickly under ice.
- Use sand, gravel, or kitty litter for grip.
- Physical removal is safest—chemicals can wash away and damage nearby soil.
Paver And Brick Driveways
Joints can fill with ice and expand, causing shifting.
- Use gentle methods: Magnesium chloride or heated mats.
- Avoid harsh chipping, which can loosen bricks.
Timing: When To Melt Ice For Best Results
The fastest ice melting happens if you act early.
- Apply ice melt before a storm or right after snow stops, before ice forms.
- Morning sun helps; try melting ice when temperatures are above 20°F for faster results.
- Avoid melting ice at night unless you add traction, as water can refreeze and worsen black ice.
Mistakes To Avoid When Melting Ice
Many homeowners unknowingly damage their driveway or create more hazards. Here are common mistakes and how to avoid them:
- Using too much salt: Excess salt damages concrete, kills grass, and pollutes water.
- Pouring boiling water: Causes concrete to crack from thermal shock.
- Ignoring the slush: Melted ice can refreeze; always remove slush quickly.
- Using fertilizer or ashes: These can create a mess or toxic runoff.
- Relying only on sand: Sand gives traction but doesn’t melt ice—combine with other methods for best results.
Expert tip: Mark the edges of your driveway with stakes before winter. This helps you target ice melt and prevents accidental damage to your lawn.
Environmental And Safety Considerations
Some ice melting products can harm pets, plants, and water supplies. Here’s how to minimize the impact:
- Choose pet-safe melts: Look for labels that say “pet-friendly” or use CMA or magnesium chloride.
- Sweep up extra ice melt: After the ice is gone, sweep unused pellets into a bucket for reuse.
- Avoid using salt near storm drains: Salt pollutes rivers and lakes.
- Store chemicals safely: Keep all ice melts out of reach of children and animals.
Insight: Many eco-friendly melts cost more upfront, but cause less long-term damage—saving you money on repairs and landscaping.
Quick Comparison Of Ice Melting Methods
If you’re unsure which method to choose, here’s a side-by-side look:
| Method | Speed | Cost | Surface Safety | Eco-Friendliness |
|---|---|---|---|---|
| Calcium Chloride | Very Fast | $$ | Moderate | Medium |
| Homemade Solution | Fast | $ | Good | Medium |
| Heated Mats | Very Fast | $$$$ | Best | Good |
| Sand/Kitty Litter | Instant Traction | $ | Best | Best |
Step-by-step: How To Melt Ice On Your Driveway Fast
For those who need a quick action plan, here’s a step-by-step guide:
- Assess the ice: Is it thin, thick, or black ice? Thick ice needs breaking, thin ice melts easily.
- Clear snow first: Use a shovel or snow blower to remove snow. Don’t let snow turn to ice.
- Apply ice melt or homemade solution: Spread evenly according to label directions.
- Break up thick ice: Use an ice chopper for stubborn patches.
- Sweep away water and slush: Prevents refreezing.
- Add sand or kitty litter: For immediate traction if ice remains.
- Monitor the area: Reapply as needed, especially after new precipitation.
Insider hint: If a snowstorm is predicted, apply ice melt before snow falls. This creates a barrier that prevents ice from bonding tightly to the surface.
Preparing For Next Winter: Preventing Ice Buildup
Prevention is the most effective way to keep your driveway ice-free.
- Seal cracks in fall: Water seeps in and freezes, creating bigger cracks.
- Install driveway heating cables: These can be placed under new asphalt or concrete.
- Improve drainage: Ensure water flows away from the driveway.
- Keep a supply of ice melt and sand handy before winter starts.
Credit: diyjoy.com
Local Considerations: Melting Ice In Different Climates
Your local weather affects the best method.
- Northern US: Long, cold winters. Calcium chloride or heated mats work best.
- Midwest: Freeze-thaw cycles. Use pet-safe melts and remove slush immediately.
- Pacific Northwest: Occasional ice. Sand or eco-friendly melts are usually enough.
- Mountain West: Dry, heavy snow. Physical removal is most important.
Check with your local city or state website for guidance—some areas restrict certain chemicals for environmental reasons. For example, EPA guidelines offer tips on safe deicing.
Cost Of Melting Ice On Driveways
It’s smart to know what you’ll spend. Here’s a rough breakdown:
- Rock salt (50 lb bag): $10–$20, covers 10–20 applications.
- Calcium chloride (50 lb bag): $25–$35, more effective but pricier.
- Heated mats: $150–$1,000, depending on size.
- Ice chopper or scraper: $25–$50, one-time purchase.
- Pet-safe melts: $20–$30 per bag.
Investing in higher-quality melts or heated mats may cost more upfront but can save on driveway repairs and medical bills from falls.

Credit: www.youtube.com
How To Store And Handle Ice Melting Products
Proper storage keeps products effective and safe.
- Store in a sealed, dry container.
- Keep away from children, pets, and food.
- Check expiration dates—old products may not work as well.
- Wear gloves when spreading ice melt to avoid skin irritation.
When To Call A Professional
Most homeowners can handle ice, but sometimes professional help is best:
- If the ice is extremely thick or covers a steep slope.
- If you have health or mobility issues.
- If melting ice causes flooding or pooling near your foundation.
- If your driveway is damaged and needs repair.
Professionals use commercial-grade melts and equipment for fast, thorough clearing.
Frequently Asked Questions
What Is The Fastest Way To Melt Ice On A Driveway?
The fastest method is a combination: break up thick ice, apply a fast-acting melt like calcium chloride, and remove slush quickly. For thin ice, a homemade solution with rubbing alcohol and warm water works well. Always add sand for extra traction if temperatures are very low.
Is It Safe To Use Salt On All Driveways?
Standard rock salt is not safe for all driveways. It can damage concrete, especially new or unsealed surfaces. For concrete, use calcium chloride or magnesium chloride. For asphalt, almost all melts are safe, but rinse in spring to avoid residue.
What Are The Best Pet-safe Ice Melts?
Calcium magnesium acetate (CMA), magnesium chloride, and potassium chloride are all safer for pets and plants. Avoid traditional rock salt, which can irritate paws and be toxic if ingested. Always check the label for pet safety.
Can I Use Hot Water To Melt Driveway Ice?
Yes, but use hot (not boiling) water—around 120–140°F. Pour slowly to avoid cracking concrete. Always sweep away water immediately, as it can refreeze and create black ice. This method is best for quick, small patches.
How Can I Prevent Ice From Forming On My Driveway?
Prevention includes sealing cracks, applying ice melt before storms, improving drainage, and using heated driveway mats. Remove snow promptly to stop meltwater from freezing overnight. Preparation is the key to an ice-free winter.
Staying ahead of winter’s challenges means knowing your options, acting fast, and choosing solutions that fit your driveway and your values. With these tips and tricks, you can keep your driveway clear, safe, and ready for any weather—without damage or stress.