
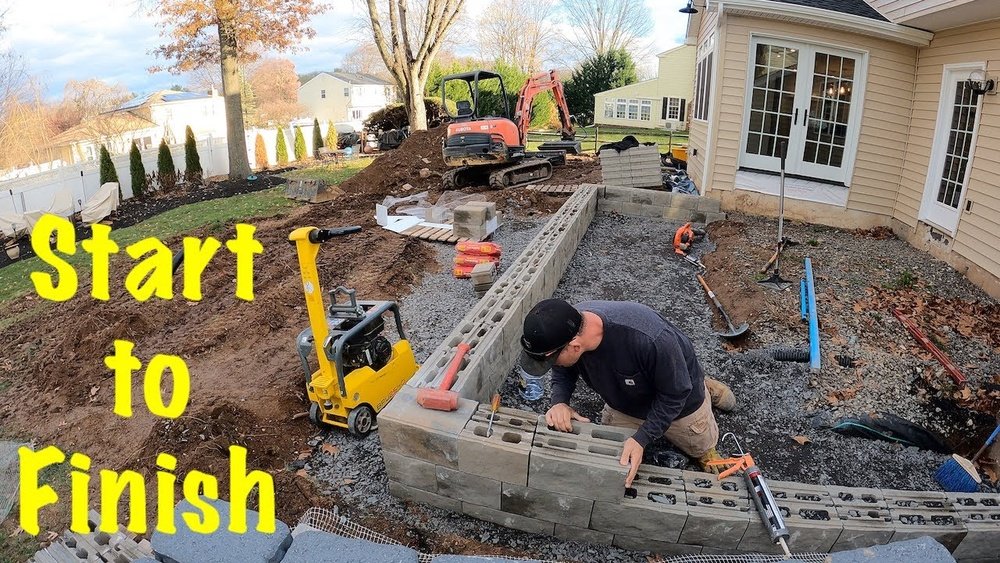
Building a raised patio with pavers can transform your outdoor space into a beautiful area for relaxing, entertaining, or dining. Many homeowners dream of adding a patio, but worry about the complexity or cost. Luckily, a raised patio is achievable with careful planning, the right materials, and some determination.
This guide walks you through each step, offering practical advice and key insights that most beginners miss. Whether you’re doing it yourself or working with a contractor, you’ll learn what’s involved, how to avoid common mistakes, and how to ensure your patio lasts for years.
Why Choose A Raised Patio With Pavers?
A raised patio offers several advantages over a ground-level patio or deck. It creates a level surface in sloped yards, gives your outdoor area a more finished look, and can be easier to maintain. Pavers are durable, attractive, and come in many shapes, sizes, and colors. Unlike poured concrete, they won’t crack easily and can be replaced individually if damaged.
Raised patios can also help improve drainage and prevent flooding. By elevating the area, water flows away from your house instead of pooling near the foundation. This is especially important in regions with heavy rain or clay soils. If your yard is uneven, a raised patio can create a usable space where you otherwise couldn’t.
Planning Your Raised Patio
Before you start building, careful planning is essential. Rushing into construction without a solid plan can lead to costly mistakes and frustration.
Deciding On Location And Size
Ask yourself:
- Where do you want your patio? Near the house, or in a separate corner?
- How will you use the space? Dining, relaxing, entertaining?
- What size fits your needs and yard?
Measure your space and mark it out with stakes and string. Walk around inside the area to check if it feels right. Remember, furniture and walkways need extra room. A typical patio for four people is at least 12 x 12 feet. If you want a dining table, add more space for chairs.
Checking Local Regulations
Many cities require permits for patios, especially if you’re raising the ground level. Contact your local building department to check rules. Some places also require setbacks from property lines, or have restrictions on height.
If you’re unsure, ask a professional. Skipping this step can lead to fines or being forced to remove the patio later.
Choosing Pavers And Materials
There are several types of pavers:
- Concrete pavers: Affordable, strong, come in many styles.
- Clay brick pavers: Classic look, good for traditional homes.
- Natural stone pavers: Luxurious, but more expensive.
For a raised patio, you’ll also need:
- Retaining wall blocks or stones
- Gravel for base
- Sand for bedding
- Geotextile fabric to separate soil and base
- Drainage pipes (optional, for tricky sites)
Choose materials that match your home’s style and withstand your local weather. If you live in a freeze-thaw climate, use pavers rated for durability.
| Material | Cost per sq ft | Durability | Appearance |
|---|---|---|---|
| Concrete Pavers | $4–$8 | High | Versatile |
| Clay Brick | $8–$12 | Medium | Classic |
| Natural Stone | $15–$30 | Very High | Elegant |
Calculating Materials
Estimate materials carefully to avoid running short. Calculate:
- Paver area: Multiply length x width, add 10% extra for cutting and errors.
- Retaining wall blocks: Measure the perimeter and height.
- Base material: Usually 4-6 inches deep, plus sand layer (1 inch).
A typical 12 x 12 foot patio needs about 144 sq ft of pavers, plus extra.
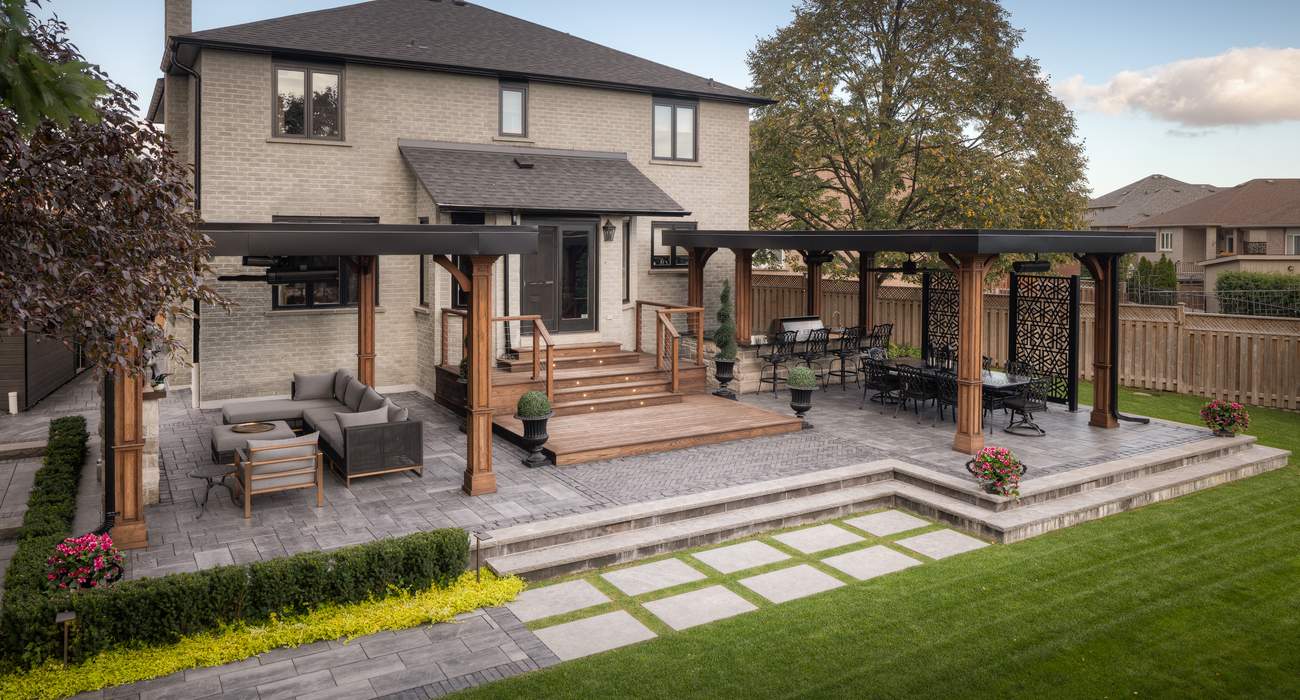
Credit: unilock.com
Preparing The Site
Site preparation is the foundation of a strong, long-lasting patio. Skipping steps or rushing leads to settling, movement, or drainage problems.
Marking Out And Excavating
Use stakes and string to outline your patio. Mark the area clearly. For a raised patio, you’ll need to dig a trench around the perimeter for the retaining wall.
- Trench depth: Usually 6-12 inches below ground, depending on wall height.
- Width: Slightly wider than your wall blocks.
Excavate the patio area itself. Remove sod, roots, and loose soil. If your yard slopes, you may need to dig deeper at one end to keep the patio level.
Installing Geotextile Fabric
Lay geotextile fabric over the excavated area and trench. This stops soil mixing with your base gravel, preventing settling and weeds.
Building The Retaining Wall Base
Fill the trench with compacted gravel. Use a plate compactor (rentable) to pack it tight. The base should be level—use a spirit level to check. This step is crucial; a crooked wall will ruin your patio.
Place the first row of wall blocks. Make sure they’re level and tightly fitted. If your wall is taller than 2 feet, consider extra reinforcement or consult an expert.
| Wall Height | Reinforcement Needed? | DIY Difficulty |
|---|---|---|
| Under 2 ft | No | Easy |
| 2–4 ft | Maybe | Medium |
| Over 4 ft | Yes | Hard |
Building The Raised Patio Base
A raised patio needs a strong base to prevent movement and support weight.
Adding And Compacting Gravel
Fill the patio area with gravel (also called crushed stone or road base). The depth should be:
- At least 4 inches for patios
- 6 inches or more for heavier use
Spread gravel evenly and compact in layers. Don’t dump all at once—compact each 2-inch layer for best strength. Use a plate compactor for good results.
Installing Drainage (if Needed)
If your patio sits against the house, or you have heavy rain, consider installing drain pipes (French drains) at the base. This helps water flow away and prevents pooling.
Slope the base slightly (about 1/8 inch per foot) away from structures.
Adding Sand Bedding
Once the gravel is compacted, spread a 1-inch layer of coarse sand on top. This cushions the pavers and allows for minor adjustments. Smooth it with a screed board or straight 2×4.
Don’t walk on the sand—lay pavers directly on it to keep it flat.
Laying Pavers
Now comes the creative part: placing your pavers to build the patio surface.
Choosing A Pattern
Paver patterns affect both appearance and strength. Popular choices:
- Running bond: Simple, looks like brickwork
- Herringbone: Strong, resists movement
- Basket weave: Decorative, classic look
For raised patios, herringbone or running bond are often best. Complex patterns may require more cutting.
Laying The Pavers
Start at one corner and work outward. Place each paver gently onto the sand, fitting tightly. Use spacers if needed for consistent gaps.
Check alignment often with a string line or straight edge. Minor errors can grow as you move across the patio.
If you need to cut pavers, use a wet saw or angle grinder with a diamond blade. Wear safety gear—eye protection and gloves are essential.
Filling Joints
Once all pavers are laid, pour polymeric sand or regular sand into gaps. Sweep it into joints and compact with a plate compactor. Polymeric sand hardens when wet, helping keep weeds out.
Mist the sand lightly with water to set it.
Finishing Touches
Your raised patio is almost ready, but a few finishing steps help it last and look great.
Edging And Sealing
Install edge restraints along the patio border. These keep pavers from shifting over time. Secure them with spikes into the base.
For extra protection, consider sealing the pavers. Sealers can help resist stains, fading, and freeze-thaw damage. Choose a sealer made for your paver type.
Landscaping Around The Patio
Add soil and mulch around the retaining wall to blend the patio into your yard. Plant low shrubs, flowers, or grass for a natural look. If your wall is tall, consider adding steps or a small ramp.
Common Mistakes To Avoid
Many beginners make errors that shorten the life of their patio or cause frustration later.
- Skipping compaction: Uncompacted base leads to settling and uneven pavers.
- Ignoring drainage: Poor drainage can cause flooding, movement, or damage.
- Not checking level: Walls and base must be perfectly level for a professional finish.
- Using the wrong sand: Only use coarse sand for bedding; fine sand doesn’t drain well.
- Rushing the process: Take time with each step—especially wall base and compaction.
One non-obvious mistake: not planning for future maintenance. Leave access points for drainage pipes and avoid locking in utilities under the patio.
Cost Breakdown And Budgeting
Building a raised patio is a significant investment, but doing it yourself can save thousands. Costs depend on size, materials, and whether you hire help.
Typical Costs
- Pavers: $4–$30 per sq ft (see earlier table)
- Wall blocks: $5–$15 per linear ft
- Gravel and sand: $1–$3 per sq ft
- Labor: $10–$20 per sq ft (if hired)
Total DIY cost for a 12 x 12 ft patio:
- Materials: $2,000–$4,500
- Tools (rental): $100–$300
Hiring a contractor: $5,000–$10,000+ for same size.
Saving Money
- Buy materials in bulk for discounts.
- Use standard-size pavers to reduce cutting.
- Rent tools instead of buying.
- Ask neighbors to share rental equipment.
Maintenance And Longevity
A well-built raised patio can last 20+ years with minimal upkeep. Here’s how to keep it looking good.
Regular Maintenance
- Sweep debris weekly
- Check for weeds and remove quickly
- Inspect for shifting pavers or wall blocks
- Reseal pavers every 2–3 years (if desired)
- Clean stains with mild detergent and water
Repairing Common Problems
If a paver cracks, lift it and replace with a new one. If the wall settles or shifts, check drainage and compaction. Serious movement may require rebuilding part of the wall.
Long-term Durability
Quality materials and careful construction are the keys to a patio that lasts decades. Avoid shortcuts, especially with base and wall construction. If you live in a region with freezing winters, use pavers and materials rated for freeze-thaw cycles.
Real-world Examples
Let’s look at some real-life projects to help visualize the process.
Example 1: Sloped Backyard Transformation
A homeowner in Pennsylvania had a 15-degree sloped yard. They built a raised patio using concrete pavers and a 30-inch retaining wall. The project took two weekends and cost about $4,200 (DIY). Drainage pipes routed water away, and edge restraints kept pavers in place.
Example 2: Luxury Patio With Natural Stone
In California, a couple wanted a high-end patio for entertaining. They chose natural stone pavers and a matching stone wall, adding steps for easy access. Materials cost $8,500; labor added $6,000. The result was a stunning patio that increased home value.
Example 3: Small Urban Patio
A city homeowner built a 10 x 10 ft raised patio using clay bricks. With careful planning, they finished in three days. Total cost: $2,200. The patio created a cozy outdoor space for morning coffee.
Comparing Raised Patios With Other Options
How does a raised patio with pavers compare to other choices like decks or concrete patios?
| Feature | Raised Paver Patio | Deck | Concrete Patio |
|---|---|---|---|
| Durability | High | Medium | Medium |
| Maintenance | Low | Medium/High | Low |
| Appearance | Customizable | Varies | Plain |
| Cost | Medium/High | Medium | Low/Medium |
| Weather Resistance | Excellent | Fair | Good |
Decks are popular for elevated spaces but require more maintenance and may not last as long. Concrete patios are cheaper but can crack and don’t offer the same visual appeal or flexibility as pavers.
Advanced Tips For A Professional Finish
Here are some insights that most beginners miss:
- Stagger wall joints: When building your retaining wall, stagger blocks so joints don’t line up. This increases strength.
- Use polymeric sand: It reduces weed growth and ant infestations compared to regular sand.
- Plan for lighting: If you want patio lights, run wires before laying pavers. Retrofitting is much harder.
- Leave expansion gaps: If your patio is large, leave small gaps every 15 feet to handle expansion and contraction.
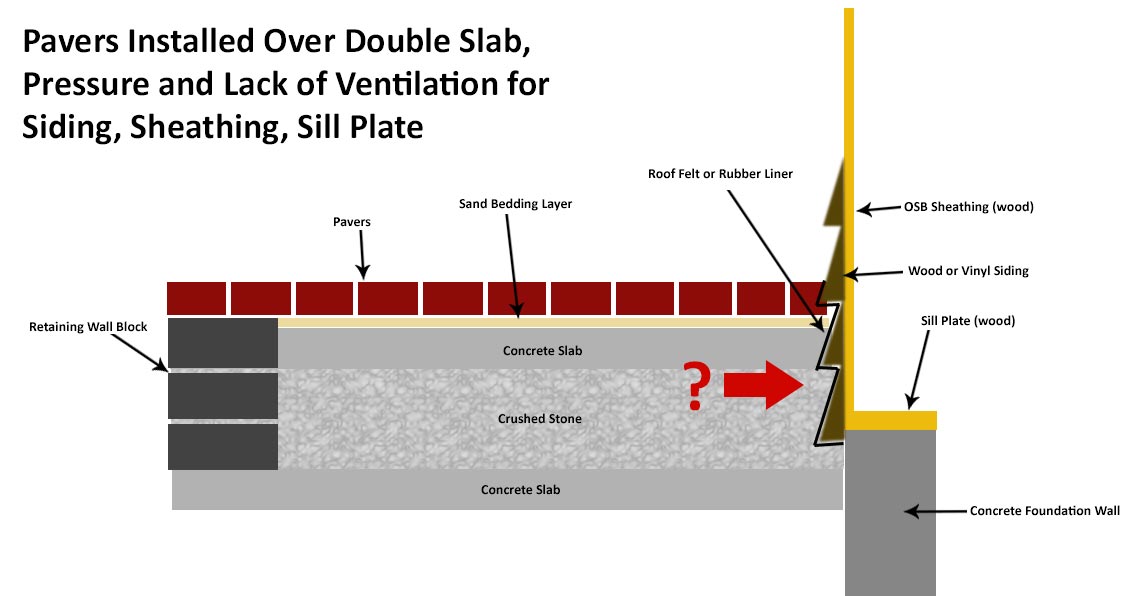
Credit: stonehengebpl.com
When To Hire A Professional
Some raised patios are simple enough for DIY, but others require expert help.
- If your wall is over 2 feet high
- If your yard has complex drainage issues
- If you need permits or inspections
- If you want advanced features (curves, steps, lighting)
Hiring a pro costs more but can save headaches and ensure a lasting result. For inspiration and technical advice, see Family Handyman.
Frequently Asked Questions
How Long Does It Take To Build A Raised Patio With Pavers?
Most DIY raised patios take 3–5 days for a medium size (12 x 12 feet). This includes excavation, wall building, base installation, and laying pavers. Larger patios or those with complex walls can take longer. Hiring a contractor may speed up the process.
What Tools Do I Need For This Project?
Essential tools include:
- Shovel and wheelbarrow (for excavation)
- Plate compactor (for base and sand)
- Spirit level
- Masonry saw or angle grinder
- Rubber mallet
- Screed board
- Tape measure
You may also need spikes for edge restraints and basic safety gear.
Can I Build A Raised Patio Myself, Or Do I Need A Contractor?
Many homeowners can build a raised patio themselves, especially if the wall is under 2 feet. For taller walls, complex designs, or tricky drainage, hiring a contractor is wise. If you’re comfortable with basic construction and have help, DIY is possible.
How Do I Prevent Weeds From Growing Between Pavers?
Use polymeric sand to fill gaps—it hardens and blocks weeds. Lay geotextile fabric under the base to stop weeds from coming up. Regular sweeping and spot treatment help too.
What Is The Best Base Material For A Raised Patio?
Crushed stone or gravel is best for the base. It offers excellent drainage and compacts well. Avoid sand or soil as base—they don’t provide enough strength. Compact in layers and use geotextile fabric for best results.
Building a raised patio with pavers is a rewarding project that adds value and beauty to your home. With careful planning, quality materials, and attention to detail, you can create a durable, attractive space for years of enjoyment.

Credit: howtohardscape.com