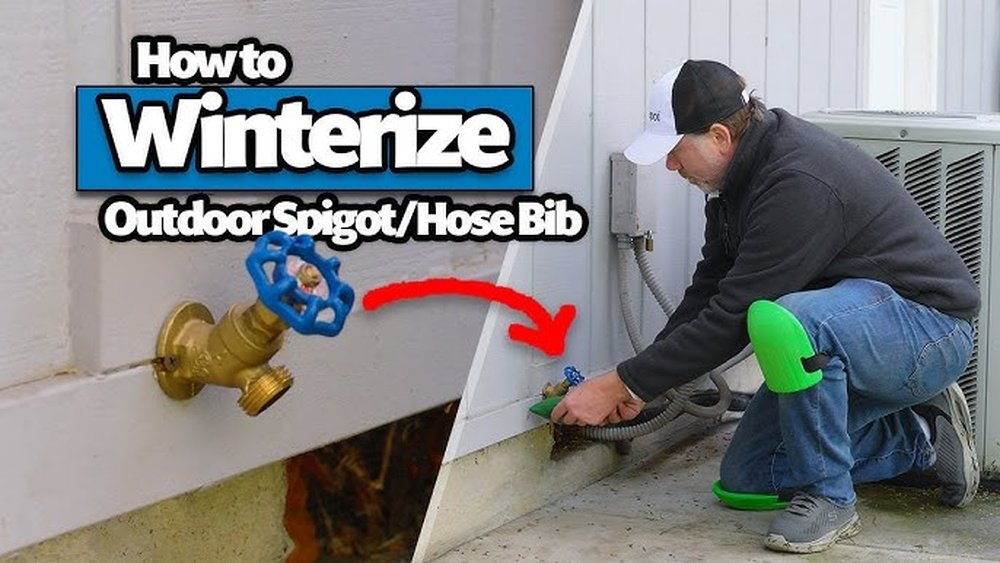
Every year, as the cold weather arrives, many homeowners worry about frozen pipes and water damage. One of the most vulnerable parts of your plumbing is the outdoor spigot (also called hose bib or faucet). If you don’t prepare your spigots for winter, freezing water can crack pipes, cause leaks, and lead to expensive repairs. Luckily, with a few simple steps, you can protect your outdoor faucets from the cold, keep your plumbing safe, and avoid headaches when spring returns.
In this guide, you’ll learn how to winterize outdoor spigots, understand why it matters, and discover practical tips for every climate. We’ll explain which tools you need, common mistakes, and how to check if your spigot is really safe. Whether you live in a mild or harsh winter area, these methods will keep your home secure. Let’s get started and make sure your outdoor water supply survives the freeze.
Why Winterizing Outdoor Spigots Is Essential
Winterizing your spigots isn’t just a precaution—it’s a must for anyone living in areas where temperatures drop below 32°F (0°C). When water freezes, it expands. This pressure can crack pipes, damage valves, and ruin your plumbing system. The cost of repairing a burst pipe can run from $200 to $2,000, depending on how much damage occurs. Even a small leak can cause mold, rot, and water stains.
Outdoor spigots are exposed to the elements. They don’t have insulation like indoor pipes, and cold air can reach them easily. If your spigot is connected to a pipe that runs through an outside wall, the risk is higher. By winterizing outdoor faucets, you prevent freezing, save money, and avoid emergencies.
When To Start Winterizing Outdoor Spigots
Timing is important. You should winterize your spigots before the first freeze. In the US, this usually means late October or early November, but it depends on your local climate. If you’re unsure, check your weather forecast for overnight lows near 32°F. It’s better to be early than late—once water freezes in the pipe, damage may already be done.
Tools And Materials Needed For Winterizing
You don’t need expensive equipment to winterize outdoor faucets. Here’s what you’ll need for most homes:
- Adjustable wrench
- Screwdriver
- Garden hose
- Pipe insulation foam
- Outdoor faucet cover
- Towel or rag
- Bucket
- Optional: Shut-off valve key (if your system has one)
Buying a faucet cover or insulation foam costs less than $10-$20 and can prevent hundreds of dollars in damage.
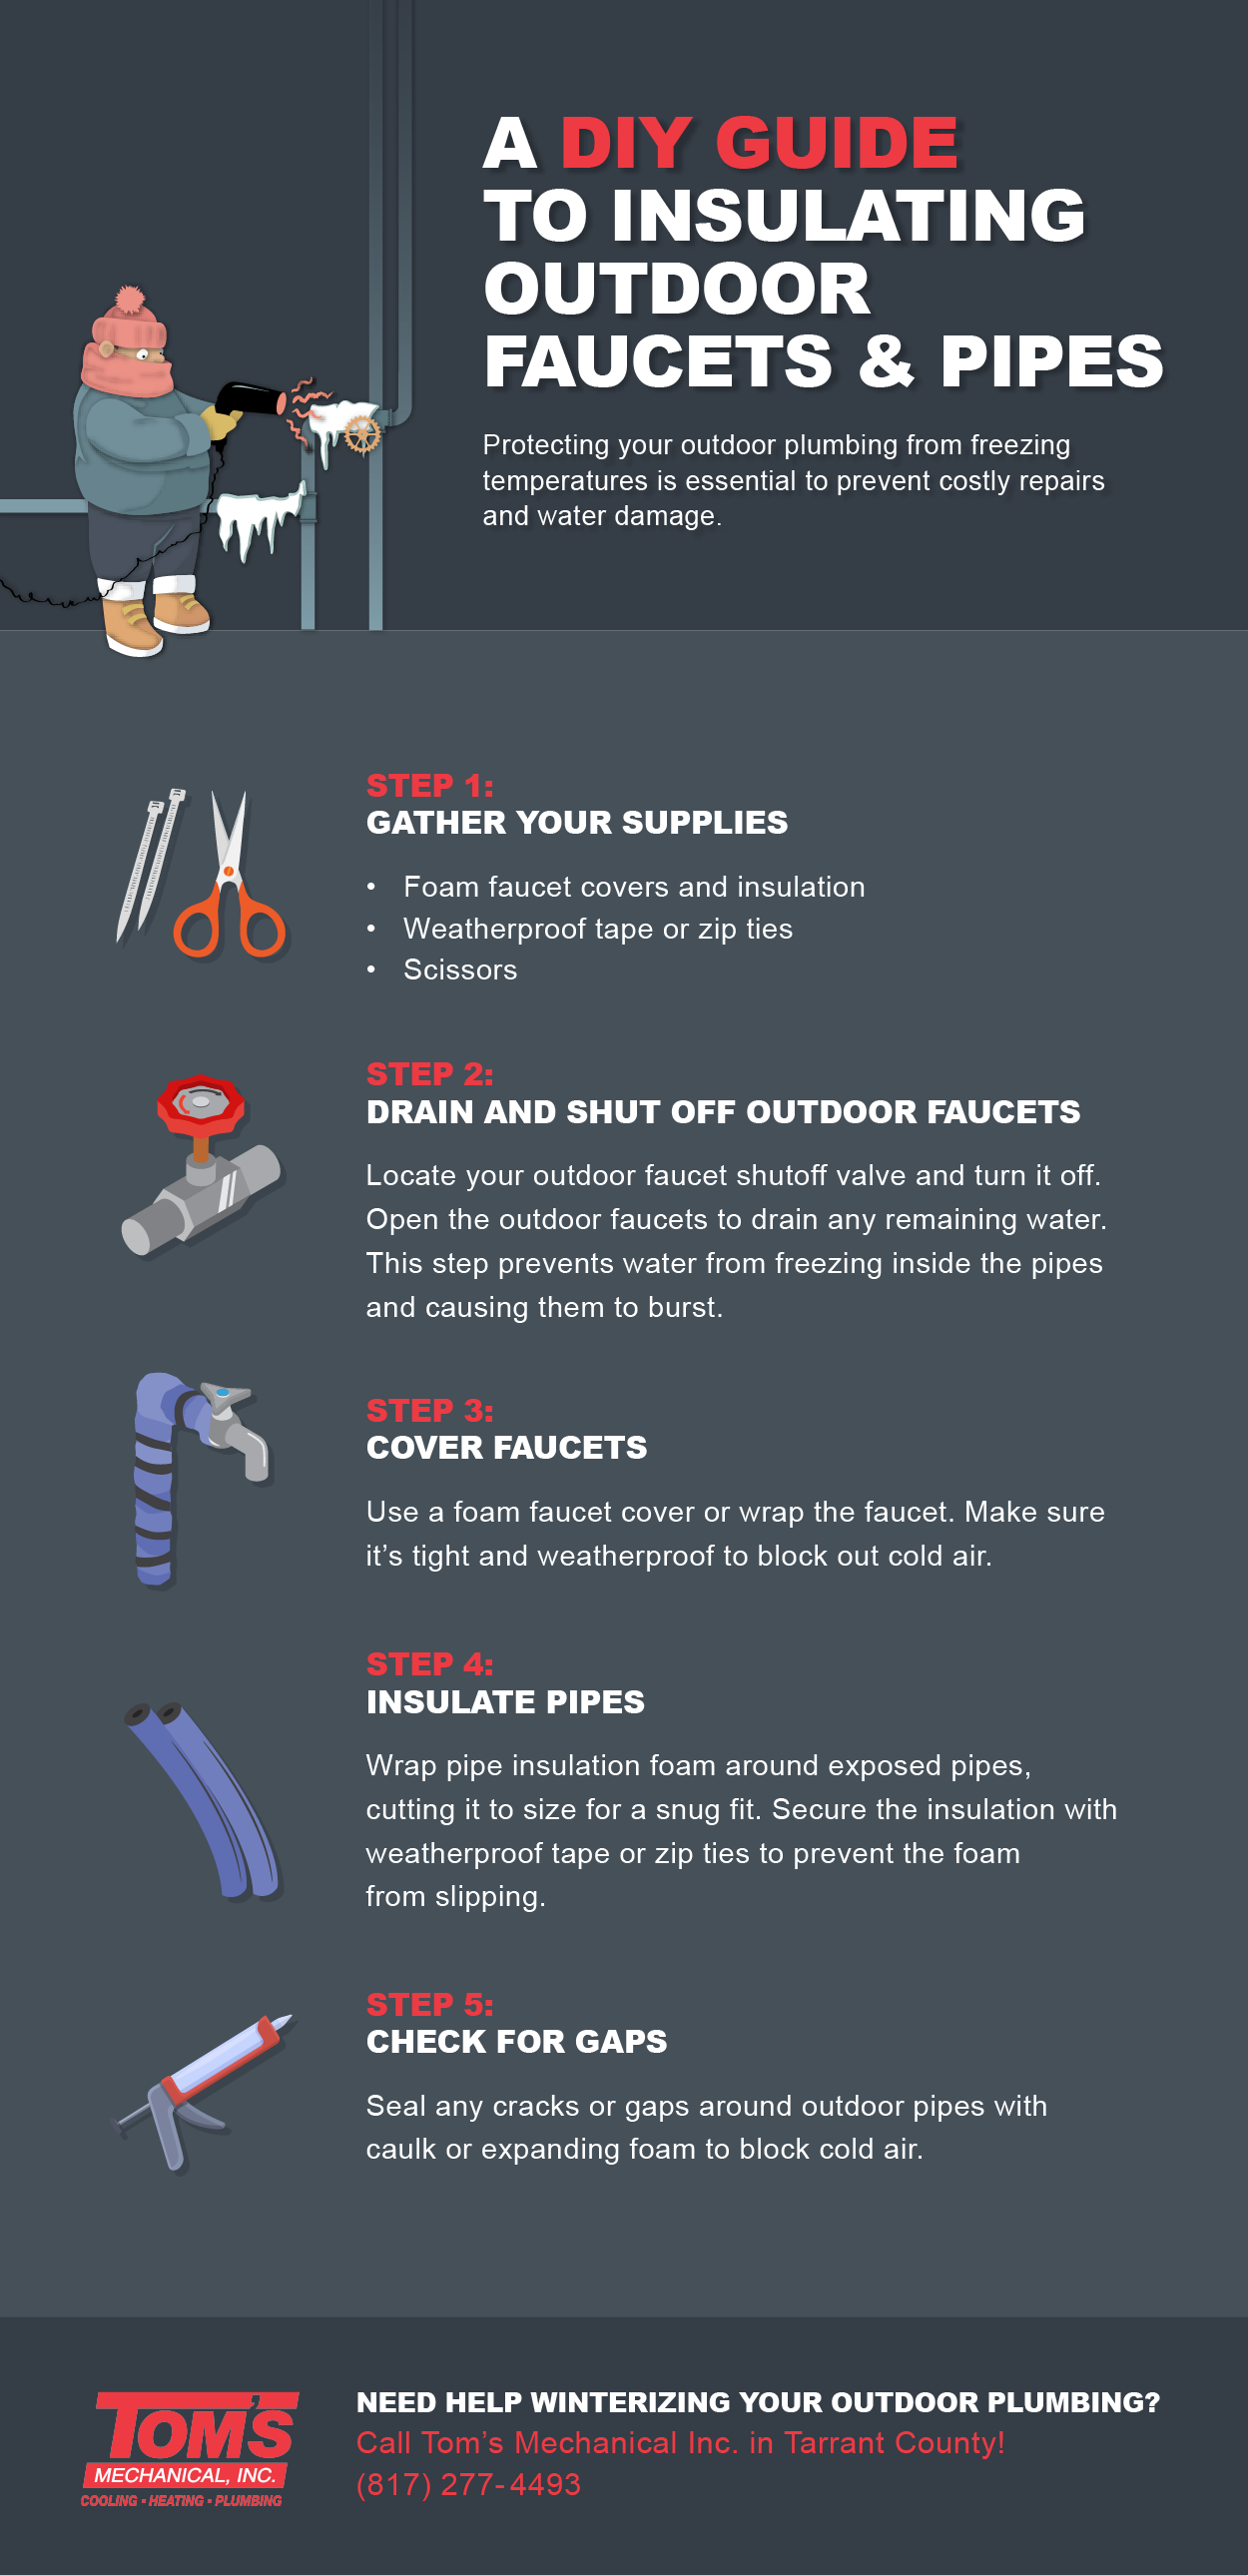
Step-by-step Guide: How To Winterize Outdoor Spigots
Let’s walk through the process. Each step is simple, but skipping any of them can leave your pipes exposed.
1. Disconnect And Drain Garden Hoses
Always start by removing any garden hoses attached to your outdoor spigots. Water left in a hose can freeze, expand, and cause pressure back into the faucet.
- Unscrew the hose from the spigot.
- Drain any water left inside.
- Store hoses indoors, in a garage or shed, to keep them from cracking in the cold.
Leaving a hose connected is a common mistake. It traps water and increases the risk of frozen pipes.
2. Shut Off The Water Supply To Outdoor Spigots
Most homes have a shut-off valve for outdoor faucets. This valve is usually located in the basement, crawl space, or near where the pipe enters the house.
- Find the shut-off valve labeled for the outdoor faucet.
- Turn it clockwise to shut off water flow.
- If you don’t have a dedicated valve, consider adding one for future safety.
Some older homes may not have this valve. If so, you must rely more on insulation and faucet covers.
3. Drain Remaining Water From Outdoor Pipes
Once the water supply is off, open the outdoor spigot fully. Let any remaining water drain out. This step is key: even a small amount of water can freeze and damage pipes.
- Open the faucet until water stops flowing.
- Leave the faucet open all winter to allow expansion if any water remains.
If you hear air, that’s good—it means the pipe is empty.
4. Add Insulation To Pipes And Faucets
Protecting pipes with insulation foam is a smart move, especially in colder climates. Insulation slows heat loss and prevents freezing.
- Wrap foam pipe insulation around exposed pipes leading to the spigot.
- Secure the foam with tape or zip ties.
- Cover the faucet itself with an outdoor faucet cover. These covers are made of thick foam and seal tightly against the wall.
- If you don’t have a cover, use a towel or rag, but a proper cover is safer and more effective.
5. Check For Leaks And Repair If Needed
Before finalizing winterization, check the area for leaks or drips. Even small leaks can freeze and worsen during winter.
- Inspect joints, valves, and the faucet for moisture.
- If you spot leaks, fix them now. Tighten connections or replace washers as needed.
6. Seal Cracks Around The Spigot
Cold air can enter through gaps around the outdoor faucet. Sealing these cracks adds extra protection.
- Use silicone caulk to fill any gaps between the faucet and the wall.
- Check for holes in brick, siding, or stucco around the spigot.
This step is especially helpful if your spigot is mounted on a windy or north-facing wall.
Comparing Spigot Types: Which Are Easier To Winterize?
Different homes use different types of outdoor faucets. Some are more freeze-resistant than others. Here’s a comparison:
| Spigot Type | Freeze Protection | Ease of Winterizing | Cost |
|---|---|---|---|
| Standard hose bib | Low | Moderate | $10-$20 |
| Frost-free spigot | High | Easy | $30-$50 |
| Automatic drain valve | Very high | Very easy | $40-$80 |
Frost-free spigots have a longer stem. The valve shuts off inside the wall, where it’s warmer. If your home has these, winterizing is easier. Still, you should disconnect hoses and use covers for extra safety.
Common Mistakes To Avoid When Winterizing Outdoor Faucets
Even experienced homeowners sometimes make errors. Here are mistakes to watch out for:
- Leaving hoses attached: Always remove all hoses.
- Not shutting off the supply: Forgetting this step leaves pipes full of water.
- Skipping insulation: Pipes can freeze even if the faucet is covered.
- Ignoring small leaks: Leaks freeze and worsen in winter.
- Failing to drain pipes fully: Open the faucet after shutting off the supply.
- Using makeshift covers: Towels or plastic bags may not provide enough insulation.
- Not checking weather forecasts: Early freezes can catch you off guard.
The most common mistake is simply forgetting to start early. Set a reminder each fall to avoid costly problems.
Climate Factors: Winterizing In Different Regions
Your winterizing strategy depends on where you live. Some areas get deep freezes, while others have mild winters. Here’s how to adjust:
Cold Climates (northern Us, Midwest)
- Use pipe insulation and faucet covers.
- Shut off water supply and drain pipes.
- Seal cracks carefully.
- Check pipes monthly during winter for signs of freezing.
Mild Climates (southern Us, Coastal Areas)
- Covers alone may be enough if freezes are rare.
- Consider adding a shut-off valve if you don’t have one.
- Drain pipes after unexpected cold snaps.
Mountain Or High Altitude Regions
- Insulate pipes heavily.
- Use frost-free spigots if possible.
- Monitor for deep freezes and heavy snow.
Urban Vs Rural Homes
- Urban homes may have better insulation and newer spigots.
- Rural homes often have exposed pipes and need extra care.
Data: How Many Homes Suffer From Frozen Pipes?
Statistics show that frozen pipes are a widespread problem. According to the Insurance Information Institute, about one in every 50 homes files a water damage claim each year, many caused by freezing. The average claim costs $10,849. In colder states, claims spike during winter months.
Here’s a quick look at pipe-freezing risk by region:
| Region | Average Winter Temperature (°F) | Frozen Pipe Claims per 1,000 Homes |
|---|---|---|
| Northeast | 20-35 | 14 |
| Midwest | 10-30 | 17 |
| South | 30-50 | 6 |
| West | 25-40 | 8 |
The risk is real, even in warmer regions during unexpected cold snaps.
Credit: www.tomsmechanical.com
How To Check If Your Spigot Is Properly Winterized
After you finish winterizing, it’s smart to double-check your work. Here’s how:
- Touch the faucet and pipe. If they feel cold, but not icy, insulation is working.
- Look for moisture or drips. Dry surfaces mean leaks are fixed.
- Check the faucet cover. It should fit snugly and not move in the wind.
- After the first freeze, inspect pipes for signs of frost or condensation.
- If you see ice or hear cracking, call a plumber right away.
Upgrading To Frost-free Spigots: Is It Worth It?
Some homeowners ask if they should replace standard spigots with frost-free models. These are designed to prevent freezing, but they cost more.
Pros:
- Valve shuts off inside the warm wall.
- Less risk of freezing.
- Easier to winterize (just disconnect hose and cover).
Cons:
- Higher cost ($30–$50 per faucet).
- Installation requires plumbing work.
- Not foolproof—still need to disconnect hoses.
If you live in a very cold area, or your spigots have frozen before, upgrading is a smart investment.
Tips For Protecting Outdoor Plumbing Beyond Spigots
Winterizing spigots is just one part of protecting your outdoor plumbing. Here are extra steps:
- Insulate all exposed pipes, including sprinkler lines.
- Drain and shut off irrigation systems.
- Cover well heads and pump houses.
- Seal gaps in basement or crawl space walls.
- Use heat tape for pipes in extreme cold.
Neglecting any outdoor water line can lead to problems when the thaw comes.
Emergency Steps If Your Spigot Freezes
Sometimes, despite your best efforts, a spigot may freeze. Here’s what to do:
- Do not turn on the faucet. This can cause a burst.
- Warm the pipe slowly. Use a hair dryer (not an open flame) on the pipe, moving back and forth.
- Wrap the pipe with towels soaked in warm water. This helps thaw ice gently.
- Check for leaks after thawing. If you see water, shut off the supply and call a plumber.
Never use a torch or heat gun—these can damage pipes or cause fires.
How To Winterize Outdoor Spigots In Rental Properties
If you rent out homes, you have extra responsibility. Frozen pipes can cause big insurance headaches. Here’s how to manage:
- Add winterizing instructions to your tenant handbook.
- Supply faucet covers and insulation foam.
- Schedule annual maintenance before winter.
- Remind tenants to disconnect hoses.
- Consider hiring a plumber for large properties.
Landlords who ignore winterization often face big repair bills and angry tenants.
Smart Home Devices For Winterizing Outdoor Faucets
Technology can help. Smart sensors and devices monitor temperatures and alert you if pipes are at risk. Some products include:
- Pipe temperature sensors: Send alerts to your phone if pipes are too cold.
- Smart shut-off valves: Automatically stop water if a leak is detected.
- WiFi-enabled irrigation controllers: Prevent accidental watering during freezes.
These tools cost $30–$100, but can prevent disasters in modern homes.
/winterize-outside-faucets-2718702-07-ae0c2696cdc44fcbae9422ec3588c7e3.jpg)
Credit: www.thespruce.com
Comparing Insulation Materials For Outdoor Pipes
Choosing the right insulation makes a difference. Here’s a comparison:
| Material | R-Value (Insulation Effectiveness) | Durability | Cost |
|---|---|---|---|
| Foam pipe wrap | 3.0-3.5 | Medium | $1/foot |
| Fiberglass wrap | 4.0 | High | $1.50/foot |
| Rubber insulation | 3.7 | Very high | $2/foot |
Foam pipe wrap is most common for outdoor faucets. It’s easy to install and affordable. In very cold areas, fiberglass or rubber offer more protection.
Local Codes And Regulations: What Homeowners Should Know
Some cities and states require winterizing outdoor plumbing, especially in multi-unit buildings. Check your local regulations for:
- Required insulation thickness
- Mandatory shut-off valves
- Approved faucet covers
If you’re unsure, contact your local building department for guidance. Following codes keeps your insurance valid and prevents fines.
Winterizing Spigots For Commercial Properties
Commercial buildings have unique needs. Outdoor faucets may be used for landscaping or cleaning. Here’s what to do:
- Install frost-free spigots where possible.
- Use industrial-grade covers and insulation.
- Schedule regular inspections.
- Train staff on winterizing procedures.
The cost of a burst pipe in a commercial building can reach tens of thousands of dollars.
Eco-friendly Tips For Winterizing Outdoor Faucets
Protecting your plumbing doesn’t have to harm the environment. Here are sustainable ideas:
- Use recycled foam covers and insulation.
- Store hoses to extend their life, reducing waste.
- Seal cracks with low-VOC caulk.
- Choose faucet covers made from natural materials.
These steps help the planet while keeping your pipes safe.
Non-obvious Insights: What Most Beginners Miss
- Leaving the faucet open after draining: Many people close the faucet after draining pipes. Instead, leave it open so any remaining water can expand without cracking the pipe.
- Sealing wall cracks: Beginners focus on covering the faucet but forget that cold air enters through wall gaps. Sealing these makes insulation much more effective.
- Checking insulation every winter: Insulation foam can degrade or slip off. Check and replace it each year for best results.
How To Spot Freeze Damage Before It Gets Worse
After winter, check your outdoor spigots for signs of damage:
- Water stains or moisture around the faucet
- Low water pressure when you turn the faucet on in spring
- Visible cracks in pipes or the faucet body
- Rust or corrosion on fittings
If you see any of these, call a plumber before using the faucet heavily.
Cost Analysis: Winterizing Vs Repairing Frozen Pipes
Winterizing outdoor spigots costs $10–$50 per faucet. Repairing damage from a frozen pipe can cost $200–$2,000 for a single line, and $10,000+ for major water damage. Insurance may cover some costs, but deductibles and loss of property are common.
Preventing problems is always cheaper and easier than fixing them.
Where To Buy Winterizing Materials
You can find faucet covers, insulation, and shut-off valves at:
- Home improvement stores (Home Depot, Lowe’s)
- Plumbing supply shops
- Online retailers (Amazon, eBay)
- Local hardware stores
Look for products rated for below-freezing temperatures and choose covers that fit tightly.
Resources For More Information
If you want to learn more about protecting your plumbing, check out this helpful resource: Family Handyman. They offer step-by-step guides and expert advice for homeowners.
Frequently Asked Questions
How Do I Know If My Outdoor Spigot Is Frost-free?
A frost-free spigot has a long stem (about 8–12 inches) that shuts off the water inside the wall, not at the outside faucet. If your spigot is short and turns off at the outside, it’s a standard hose bib. Frost-free models often have a label or stamp on the handle.
Can I Use A Towel Or Plastic Bag Instead Of A Faucet Cover?
While a towel or bag gives some insulation, it’s not enough for deep freezes. Faucet covers are made of thick foam and seal tightly, protecting against wind and cold. In mild climates, a towel may work, but for best safety, use a proper cover.
What Happens If I Forget To Winterize My Spigot?
If you forget to winterize, water in the pipe can freeze and expand. This may crack pipes, cause leaks, and lead to expensive repairs. You might not notice the damage until spring, when water starts leaking inside walls or outside.
Are There Smart Devices That Can Help Prevent Frozen Pipes?
Yes, smart pipe sensors and shut-off valves can alert you if pipes are getting too cold or start leaking. These devices connect to your phone and can be installed for $30–$100. They’re a good option for modern homes or frequent travelers.
Should I Call A Plumber To Winterize My Outdoor Faucets?
Most homeowners can winterize outdoor spigots themselves using simple steps. If you have old plumbing, leaks, or no shut-off valve, a plumber can help. Professional help is smart for large properties or if you’re unsure about the process.
Protecting your outdoor faucets is one of the easiest ways to prevent winter plumbing disasters. With the right steps, tools, and a little attention, you’ll keep your home safe, save money, and enjoy peace of mind all winter long.
:max_bytes(150000):strip_icc()/winterize-outside-faucets-2718702-07-ae0c2696cdc44fcbae9422ec3588c7e3.jpg)
Credit: www.thespruce.com