
Last updated: October 2026 · Written by the LawnVibe editorial team.
Knowing how to season a new gas grill helps your first cookout taste like food rather than factory residue. The process is simple: wash the grates, check the gas connections for leaks, run the grill on high with the lid closed to burn off manufacturing oils, then wipe the grates with a thin coat of high smoke point oil and heat them again. Cast-iron grates benefit most, but every new grill gains from a proper burn-off.
These steps follow common manufacturer guidance and grilling best practices. Always follow your grill's manual where it differs. If you are still shopping, see our guide to the best gas grill under $1,000.
Why Season a New Gas Grill?
New grills often carry protective oils, coatings, dust and residue from manufacturing, shipping and assembly. Heating the grill burns these off so they do not flavor your food. Seasoning the grates creates a light polymerized oil layer that reduces sticking and, on cast iron, helps protect against rust. It is also a chance to confirm that every burner lights and heats evenly before you cook for guests.
What You Need
Gather mild dish soap, a sponge or soft brush, paper towels or a lint-free cloth, tongs, a heat-resistant brush or folded towel for applying oil, a high smoke point oil and a spray bottle of soapy water for the leak test.
Step 1: Finish Assembly and Read the Manual
Double-check that all parts are installed, including heat shields, flavorizer bars or heat tents, grease tray and drip pan. Skim the manual for the maker's first-use instructions, since some recommend specific burn-off times or say certain grates should not be oiled.
Step 2: Check for Gas Leaks
Before lighting a new grill, check the connections. Brush or spray soapy water on the regulator, hose and valve connections with the tank valve open and burners off. Bubbles that grow indicate a leak; turn off the gas and tighten or replace the part. The National Fire Protection Association recommends checking the gas tank hose for leaks before the first use each year.
Step 3: Wash the Grates
Remove the cooking grates and warming rack and wash them with warm, soapy water to remove dust and any coatings. Rinse and dry completely. Cast iron must be dried right away to prevent flash rust.
Step 4: Burn Off the Grill
Reinstall the grates, open the lid and light the burners following the manual. Close the lid and run all burners on high for about 15 to 30 minutes, or as the manual recommends. You may notice smoke or an odor as residues burn away; this is normal. Turn off the burners and let the grill cool slightly.
Step 5: Oil the Grates
While the grates are warm but not dangerously hot, apply a thin coat of high smoke point oil. Use tongs to hold a folded paper towel dipped in oil, or a heat-resistant brush. Coat the tops and sides of the bars. A thin layer is key; excess oil becomes sticky and can cause flare-ups.
Step 6: Heat Again to Set the Seasoning
Close the lid and run the grill on medium-high for another 15 to 20 minutes until the oil stops smoking. This bonds the oil to the grates. For cast iron, you can repeat the oil-and-heat cycle two or three times to build a stronger base layer.
Step 7: Cool, Clean and Cover
Let the grill cool, empty any drips from the grease tray and cover it once fully cool. Your grill is ready for its first cook.
Seasoning Different Grate Materials
Cast Iron Grates
Bare cast iron benefits most from seasoning. Build several thin layers, re-oil after cleaning and never leave it wet. Our guide on how to season cast iron grill grates goes deeper.
Porcelain-Enameled Cast Iron and Steel
The enamel coating protects the metal, so seasoning is mostly about reducing sticking. Oil lightly before cooking and avoid metal scrapers that can chip the coating.
Stainless Steel Grates
Stainless resists rust and needs less maintenance. A light coat of oil before the first few cooks helps food release more easily. Stainless can discolor with heat; this is cosmetic.
Best Oils for Seasoning a Grill
| Oil | Smoke Point | Notes |
|---|---|---|
| Canola | High | Inexpensive and neutral |
| Vegetable | High | Widely available |
| Peanut | High | Neutral flavor; consider allergies |
| Grapeseed | High | Light, clean flavor |
| Avocado | Very high | More expensive, very heat tolerant |
| Unrefined olive oil | Lower | Not ideal for seasoning |
Smoke points vary by brand and refinement; refined oils generally have higher smoke points than unrefined versions.
Your First Cook on a New Gas Grill
Start with forgiving foods such as burgers, sausages or chicken thighs, which help add flavor and a little natural fat to the grates. Preheat for 10 to 15 minutes, oil the grates lightly, and learn where the hot and cool zones are. Every grill has its own heat pattern. For better searing, read how to sear steak on a gas grill.
Keeping Your Grill Seasoned
Before each cook, preheat and brush the grates clean, then wipe on a thin coat of oil. After cooking, burn off residue for a few minutes and brush again. Deep clean periodically following our guide on how to clean a gas grill properly, and re-season cast iron after deep cleaning.
How Hot Should the Burn-Off Be?
Run every burner on high so the whole cook box reaches high temperature, typically well above 500°F on many grills, though readings vary by model and lid thermometer placement. The goal is to heat every surface, including the flavorizer bars or heat tents and the underside of the lid, so all residues burn away. If one burner does not light or heats noticeably less than the others, stop and check the burner, igniter and gas flow before you cook.
Smoke and Smells During the First Burn
Light smoke and a chemical or paint-like smell during the first burn-off are common as manufacturing oils and coatings cure. The smoke should fade within the burn-off period. Heavy, persistent smoke, flames coming from around the knobs or a strong gas smell are not normal. Turn off the gas and inspect the grill, and consult the manufacturer if the problem continues.
Seasoning Griddle Inserts and Side Burners
If your grill includes a cast-iron griddle insert, season it separately, similar to a cast-iron pan: wash, dry thoroughly, apply a very thin coat of oil across the entire surface, heat until it stops smoking and repeat several times to build a dark, slick finish. Side burners do not need seasoning, but light them once to confirm they work and burn off residue.
Seasoning a Used or Restored Grill
The same process works for a secondhand grill or one that has been sitting unused. Clean it thoroughly first, scraping out old grease and carbon, replacing rusted flavorizer bars or burners if needed, and checking every connection for leaks. Then burn off and season as if it were new. Rusty cast iron can be scrubbed back to bare metal with steel wool and re-seasoned in several thin coats.
How Weather Affects Seasoning
Humidity and rain are hard on bare cast iron. If you live in a damp or coastal area, oil cast-iron grates after every cook and keep the grill covered once cool. Stainless and porcelain-coated grates are more forgiving but still benefit from a cover. In winter, a quick burn-off before cooking removes any moisture that has settled on the grates.
Safety Tips for the First Lighting
Always open the lid before lighting to avoid gas buildup. Keep your face away from the grill when lighting, especially with match lighting. Make sure the grill is outdoors, on a stable, level surface, well away from walls, railings and overhanging branches. Keep children and pets back, and have a fire extinguisher suitable for grease fires nearby.
Understanding Your New Grill's Hot and Cool Spots
After seasoning, use the first few cooks to learn your grill's heat map. A simple bread test works well: preheat on medium, lay slices of white bread across the grates and check after a minute or two. Darker slices show hotter zones, paler ones cooler zones. Many grills run hotter at the back or near the sides. Knowing this helps you place thick cuts, delicate fish and vegetables in the right spots and makes two-zone cooking more precise.
Do You Need to Season the Inside of the Lid and Firebox?
No special seasoning is needed for the lid or firebox. The burn-off cleans them, and grease from normal cooking will naturally coat interior surfaces over time. What matters is keeping grease from building up excessively, since heavy deposits can flake onto food or cause flare-ups. Scrape and clean the firebox periodically.
Tools That Make Seasoning Easier
A long pair of tongs and a heat-resistant silicone basting brush let you oil grates safely. A grill-safe oil sprayer is convenient, but never spray oil directly onto a lit grill because of flare-up risk; spray it onto a towel or onto cool grates before lighting. A stiff nylon or bristle-free brush works for porcelain grates, while stainless or cast iron can handle a stainless brush or scraper. Inspect any wire brush regularly and replace it if bristles loosen, because stray wire bristles can stick to grates and end up in food.
When to Re-Season Your Gas Grill
Plan to re-season cast-iron grates after any deep cleaning with soap or degreaser, after a long period of storage, or whenever you see rust, dull gray patches or food starting to stick more than usual. A quick re-season follows the same steps: clean, dry, oil thinly and heat until the smoking stops. Many owners also do a light seasoning at the start of each grilling season after a winter under the cover.
How Long Does Seasoning Last?
Seasoning is not permanent. Each cook adds a little, while high heat, scraping and cleaning remove some. With regular light oiling, a well-seasoned cast-iron grate keeps improving over time. Porcelain and stainless grates rely more on oiling before each cook than on a built-up layer.
Tools for Seasoning and Caring for a New Grill
These tools make seasoning safer and easier. Details come from Amazon listings; we have not hands-on tested them.

OXO Outdoor Grilling Basting Brush
Best for: Applying thin coats of oil safely
A high-heat silicone basting brush for oiling grates and basting.
- Heat-resistant silicone
- Easy to clean
- Silicone holds less oil than natural bristles
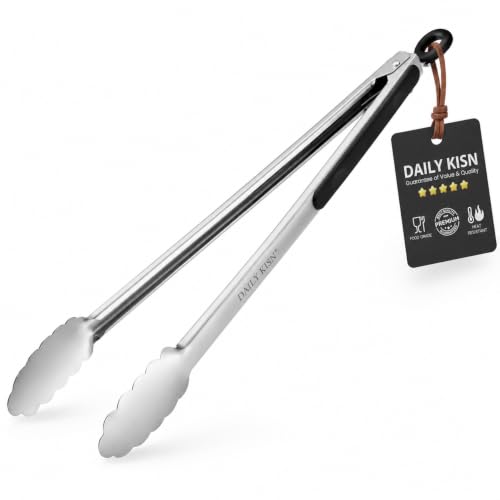
DAILY KISN 17-Inch Stainless Steel Grill Tongs
Best for: Holding oiled towels and food
Extra-long stainless tongs to keep hands away from heat.
- Long reach
- Stainless
- Single pair
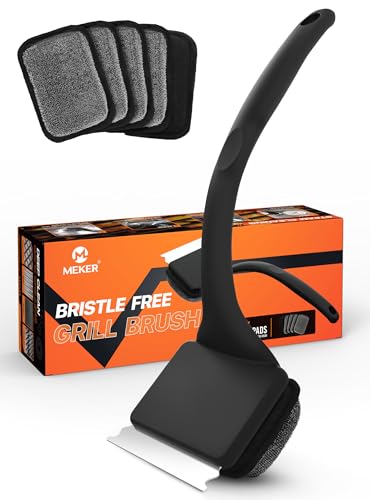
MEKER Bristle-Free Grill Brush with Replacement Heads
Best for: Cleaning grates without wire bristles
A bristle-free grill brush with five replacement heads to avoid loose wire bristles.
- No wire bristles to shed
- Replacement heads
- Less aggressive on heavy buildup

SunPatio 52-Inch Grill Cover for Weber Spirit 200 and 300
Best for: Protecting seasoned grates
A waterproof grill cover sized for Weber Spirit 200 and 300 series grills.
- Weather protection
- Fits popular Spirit sizes
- Check fit for other brands
Still choosing a grill? Compare models in our best gas grill under $1,000 guide.
Common Mistakes When Seasoning a Gas Grill
Common mistakes include skipping the leak test, not washing grates before the first burn-off, using too much oil, using low smoke point oils or butter, spraying oil onto a lit grill, letting cast iron sit wet and scraping porcelain grates with harsh metal tools.
Final Thoughts on How to Season a New Gas Grill
Seasoning a new gas grill takes less than an hour: check for leaks, wash the grates, burn off residue on high, oil the grates thinly and heat again to set the coating. Your first cook will taste cleaner and food will stick less. If you are still choosing a grill, compare options in our best gas grill under $1,000 guide.
More Questions People Ask
Can I use cooking spray to season my grill?
Yes, on cool grates before lighting, or onto a towel. Never spray aerosol oil onto a lit grill.
Should I season my grill every time I use it?
A quick wipe of oil after preheating and brushing is enough for each cook. Full seasoning is only needed when new or after deep cleaning.
Why is my new grill smoking so much?
Smoke during the first burn-off is normal as residues burn away. If heavy smoke persists, check for grease buildup or packaging materials left inside.
Do I need to season a Weber gas grill?
Weber recommends a burn-off before first use; check your manual for model-specific guidance on grate care.
Frequently Asked Questions
Do you need to season a new gas grill?
Yes, it is a good idea. A burn-off removes oils and residues left from manufacturing, and oiling the grates helps prevent sticking and, on cast iron, protects against rust.
How long should I burn off a new gas grill?
Many manufacturers suggest running the grill on high with the lid closed for about 15 to 30 minutes for the first burn-off. Check your manual.
What oil is best for seasoning grill grates?
Use an oil with a high smoke point, such as canola, vegetable, peanut, grapeseed or avocado oil. Avoid butter and low smoke point oils like unrefined olive oil.
Should I season porcelain-coated grates?
Porcelain-enameled grates do not need seasoning in the cast-iron sense, but a light coat of oil before cooking reduces sticking. Avoid harsh scraping that chips the coating.
How often should I re-season grill grates?
Lightly oil grates before cooking, and re-season cast iron after deep cleaning or if you see dull, dry or rusty spots.