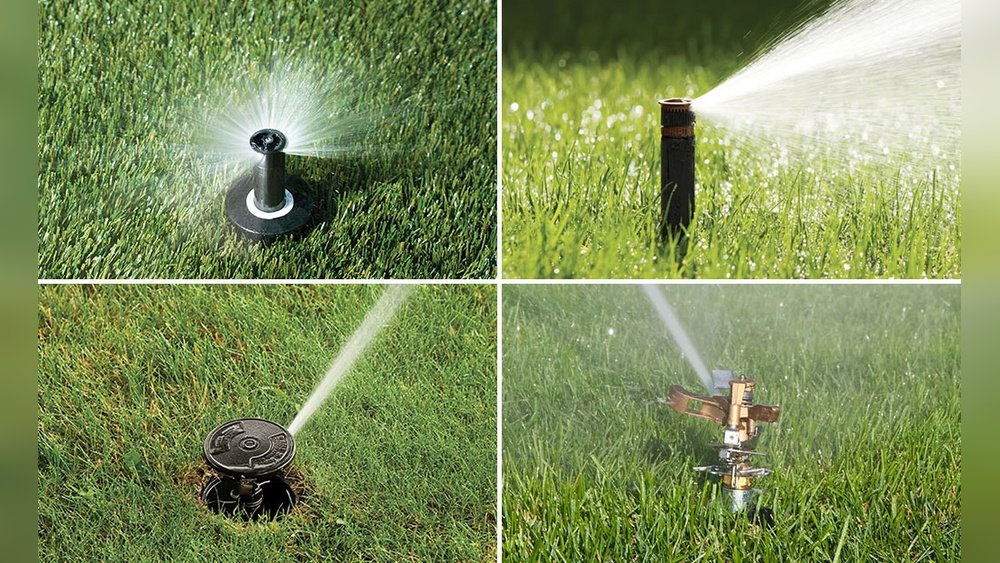
Is your lawn looking patchy or your garden dry despite regular watering? A broken sprinkler head might be the hidden culprit draining your irrigation system’s efficiency.
But don’t worry—you don’t need to call in a pro or spend a fortune to fix it. With just a few simple tools and easy steps, you can repair your broken sprinkler head yourself and get your lawn back to its lush, green best.
Keep reading, and you’ll learn exactly how to spot the problem, what parts you’ll need, and the straightforward repair process that anyone can follow. Ready to save water, money, and time? Let’s dive in!
Tools And Materials Needed
Fixing a broken sprinkler head needs the right tools and materials. Having these ready saves time and effort. This list covers all basics for a smooth repair job.
Replacement Sprinkler Head
Choose a sprinkler head that fits your system. Match the size and spray pattern. This ensures proper watering after repair.
Shovel Or Trowel
Use a shovel or trowel to dig around the sprinkler head. This helps access the broken part without damaging nearby pipes.
Pipe Wrench Or Adjustable Pliers
A pipe wrench or adjustable pliers loosen and tighten the sprinkler head. They provide a good grip and avoid slipping during repair.
Teflon Tape
Wrap Teflon tape around the sprinkler head threads. It prevents leaks by sealing the connection tightly.
Bucket Or Container
Keep a bucket nearby to catch water from the sprinkler line. This avoids flooding the repair area.
Gloves
Wear gloves to protect your hands. They keep dirt and sharp objects from causing injury.
Towel Or Rag
Use a towel to clean dirt and water off parts. This makes it easier to see and fix the sprinkler head.
Credit: www.youtube.com
Shutting Off The Water Supply
Shutting off the water supply is the first step in repairing a broken sprinkler head. Stopping the water flow prevents leaks and keeps the area dry. It also makes the repair process safer and easier. Without turning off the water, the sprinkler system will keep spraying, wasting water and making a mess.
Locate The Main Water Valve
Find the main valve that controls water to the sprinkler system. It is often near the water meter or where the irrigation system connects to your home’s water line. This valve can be a gate valve or a ball valve.
Turn The Valve To Shut Off Water
Turn the valve handle clockwise to close it. This action stops water from flowing to the sprinkler heads. Make sure the valve is fully closed to avoid any water flow during repairs.
Check The Sprinkler Head
After shutting off the water, test the sprinkler head to see if water still comes out. Press the sprinkler head or turn on the system briefly. No water should spray if the valve is properly closed.
Use The System Controller To Confirm
Turn off the irrigation system using the controller or timer. This step prevents the system from turning back on while you repair the sprinkler head. Confirm the system is off before starting any work.
Removing The Broken Sprinkler Head
Removing a broken sprinkler head is the first step in repairing your irrigation system. This process clears the damaged part and prepares the area for a new sprinkler head. Proper removal avoids damage to the surrounding pipes and soil. It also ensures a secure fit for the replacement.
Careful removal makes the repair easier and faster. Use the right tools to avoid extra work. Follow these simple steps to remove the broken sprinkler head safely and cleanly.
Turn Off The Water Supply
Stop water flow to the sprinkler system. Locate the main water valve or the zone valve that controls the broken sprinkler. Turn it off completely. This prevents water from spraying out during removal.
Clear The Area Around The Sprinkler Head
Remove dirt and grass near the broken sprinkler head. Use a small shovel or your hands to expose the base of the sprinkler. Clearing space helps you see the connection and work more easily.
Unscrew The Broken Sprinkler Head
Grip the sprinkler head firmly. Turn it counterclockwise to unscrew it. Use pliers if it is tight. Avoid using too much force to prevent pipe damage. If the head is stuck, try gently rocking it back and forth.
Check For Damage On The Pipe
Inspect the pipe threads after removal. Look for cracks or dirt that may cause leaks. Clean the threads with a cloth or brush. Repair or replace the pipe if damaged before installing the new head.
Credit: www.reddit.com
Cleaning And Flushing The Pipe
Cleaning and flushing the pipe is a crucial step when repairing a broken sprinkler head. Dirt, debris, and small particles can clog the pipe. This blockage stops water flow and affects sprinkler performance.
Flushing the pipe clears out any buildup inside. This ensures water moves freely and the sprinkler works properly after repair. Follow simple steps to clean and flush the pipe efficiently.
Turn Off The Water Supply
Start by shutting off the main water valve to the sprinkler system. This prevents water flow while you work. Make sure no water pressure remains in the pipe before proceeding.
Remove The Broken Sprinkler Head
Unscrew the damaged sprinkler head carefully. Use pliers or a wrench if needed. Keep the pipe opening clear and ready for flushing.
Flush The Pipe With Water
Turn the water back on briefly. Let water flow through the open pipe to flush out dirt and debris. Hold a bucket or cloth around the pipe to catch water and particles.
Inspect And Clean The Pipe Opening
Look inside the pipe for leftover dirt or blockage. Use a small brush or a thin wire to clean the inside gently. Clear any visible debris to avoid future clogs.
Dry The Pipe Before Installing New Head
Turn off the water again. Use a dry cloth to remove moisture from the pipe opening. This helps the new sprinkler head fit tightly and prevents leaks.
Choosing Between Repair And Replacement
Deciding whether to repair or replace a broken sprinkler head depends on the damage extent. Some issues are simple to fix by replacing parts inside the sprinkler. Other times, replacing the whole sprinkler head is the best choice. Choosing the right method saves time and money.
Replacing The Entire Sprinkler Head
Replace the whole sprinkler head if it is cracked or broken badly. A damaged head may leak or spray water unevenly. Unscrew the old head and screw in a new one. Make sure the new head fits your system. This method is quick and ensures reliable performance.
Replacing The Internal Components
Sometimes the sprinkler head looks fine but does not work well. Internal parts like the nozzle or the spring may be worn out. Remove the top part of the sprinkler head carefully. Replace broken or clogged parts with new ones. This repair can save money and avoid full replacement.
Installing The New Sprinkler Head
Installing the new sprinkler head is a crucial step in fixing your irrigation system. This process ensures water flows correctly and your lawn stays healthy. Proper installation prevents leaks and damage to the system.
Start by preparing the connection point. Clean any debris from the pipe threads. This helps create a secure and watertight fit.
Using Plumber’s Tape
Wrap plumber’s tape around the sprinkler head threads before installation. This tape seals the connection and stops leaks. Wrap it clockwise, covering the threads evenly.
Use two to three layers of tape. Press the tape into the threads gently to make sure it sticks well. Avoid using too much tape as it may cause fitting issues.
Securing The Head Without Over-tightening
Screw the new sprinkler head onto the pipe by hand. Turn it clockwise until it feels snug. Use a wrench for a final quarter turn.
Do not over-tighten the sprinkler head. Over-tightening can crack the plastic or damage the threads. Tighten it just enough to hold firmly and stop leaks.
Check the alignment of the sprinkler head. It should sit straight and flush with the ground. Adjust if necessary before fully securing it.
Adjusting And Testing The Sprinkler
Adjusting and testing the sprinkler is a crucial step after repairing or replacing a broken sprinkler head. Proper adjustment ensures the water covers the intended area without wastage or dry spots. Testing confirms the sprinkler works correctly and avoids future problems.
Take your time to fine-tune the sprinkler’s spray pattern and reach. Small changes can make a big difference in lawn health and water efficiency.
Adjusting The Spray Pattern
Start by turning the sprinkler on at low pressure. Observe the water spray direction. Use the adjustment screw on the sprinkler head to change the arc. Turn clockwise to narrow the spray. Turn counterclockwise to widen it. Make sure the spray covers the lawn area evenly.
Setting The Spray Distance
Check how far the water sprays from the head. If the spray goes too far, reduce the distance by adjusting the screw or nozzle. If it falls short, increase the distance slightly. Ensure the spray does not reach sidewalks or driveways to avoid water waste.
Testing The Sprinkler Function
Run the sprinkler for several minutes. Watch for leaks or uneven spray patterns. Check that the water pressure is steady. Look for any blockage or damage on the head. Fix any issues before leaving the system on.
Dealing With Common Issues
Sprinkler heads often face small problems that affect your lawn’s watering. Fixing these common issues can save water and keep your grass green. Understanding each problem helps you repair quickly and easily.
Leaks And Drips
Leaks cause water waste and can damage your lawn. Check the sprinkler head for cracks or loose parts. Tighten any loose connections using a wrench. Replace cracked heads with new ones from a hardware store. Clean debris around the head to prevent leaks.
Uneven Spray Patterns
Uneven spray leaves dry spots in your yard. Clear dirt or grass blocking the sprinkler nozzle. Adjust the spray angle by turning the head gently. Replace worn nozzles to restore even water flow. Test the spray pattern after each fix for best results.
Broken Risers
Broken risers cause low water pressure or no spray at all. Turn off the water supply before repairs. Remove the damaged riser by unscrewing it from the pipe. Install a new riser that matches the old one’s size. Tighten it well to avoid future breaks.
Preventive Maintenance Tips
Preventive maintenance plays a crucial role in keeping sprinkler heads working well. Regular care stops small problems from turning into costly repairs. It also keeps your lawn green and healthy by ensuring even water distribution.
Simple steps taken often can extend the life of your sprinkler system. These tips help you avoid broken heads and leaks, saving water and money. Following a maintenance routine is easy and effective.
Inspect Sprinkler Heads Regularly
Check sprinkler heads at least once a month. Look for cracks, clogs, or misalignment. Clear dirt and debris around heads to keep water flow steady. Replace damaged heads before they break completely.
Adjust Sprinkler Head Position
Make sure sprinkler heads point in the right direction. Avoid watering sidewalks or driveways. Proper adjustment saves water and prevents damage to plants. Fix any heads that stick out too far above the ground.
Clean Nozzles And Filters
Remove nozzles and rinse them with clean water. Use a soft brush to clear dirt and mineral buildup. Clean filters inside sprinkler heads to stop clogs. Clean parts improve spray pattern and water pressure.
Check Water Pressure
Test the water pressure monthly. Too high pressure can damage heads and pipes. Too low pressure reduces coverage and efficiency. Use a pressure regulator if needed to keep pressure steady.
Protect Sprinkler Heads From Lawn Equipment
Mark sprinkler locations clearly to avoid damage from mowers. Raise mower blades to prevent hitting heads. Use protective covers during heavy yard work. Careful handling reduces broken or cracked parts.
Winterize Your Sprinkler System
Drain water before cold weather arrives. Use an air compressor to blow out remaining water. Frozen water can crack heads and pipes. Proper winterizing prevents costly repairs in spring.
Credit: www.youtube.com
Frequently Asked Questions
How Do You Fix A Broken Sprinkler Head?
Turn off the water supply. Unscrew and remove the broken sprinkler head. Insert a new head and tighten it securely. Restore the soil around it. Turn water back on and test for proper spray.
What To Do If You Break A Sprinkler Head?
Turn off the water supply first. Remove the broken sprinkler head carefully. Install a compatible replacement head. Tighten it securely. Test the sprinkler to ensure proper function. Restore the surrounding soil or grass.
What Is The 3 Times Rule For Sprinkler Heads?
The 3 times rule for sprinkler heads means placing sprinklers at least three times the largest obstruction dimension away. This ensures water covers areas shadowed by obstacles like beams or ducts. It prevents fire hazards by avoiding sprinkler shadows caused by vertical or horizontal obstructions.
Can You Replace Just The Pop-up Part Of A Sprinkler?
Yes, you can replace just the pop-up part of a sprinkler by swapping its internal components without changing the entire unit.
Conclusion
Fixing a broken sprinkler head is simple and saves money. Start by turning off the water to avoid leaks. Remove the damaged head carefully without hurting pipes. Replace it with a new, compatible sprinkler head. Tighten the connections to prevent water waste.
Test the sprinkler to ensure it sprays evenly. Regular checks help catch problems early. A working sprinkler keeps your lawn green and healthy. Taking small steps leads to big savings and less hassle. Now, your irrigation system runs smoothly again.