If you love vibrant flowers and want to expand your garden without buying new bulbs every season, learning how to grow bulbs from offsets is a game-changer. Offsets are tiny baby bulbs that grow around the parent bulb, ready to become new plants.
By using these natural little helpers, you can multiply your flower power and enjoy more blooms year after year. You’ll discover simple, step-by-step tips to successfully grow bulbs from offsets in your garden. Whether you’re a beginner or looking to boost your gardening skills, you’ll find practical advice that makes the process easy and rewarding.
Ready to see your garden flourish like never before? Let’s dive in!
Choosing Bulbs For Offsets
Choosing the right bulbs for propagation from offsets is the first step to success. Healthy bulbs produce strong offsets, which grow into new plants. Some bulbs naturally form offsets better than others. Selecting bulbs that grow well in your garden environment helps ensure good results. Understanding how to identify healthy offsets will save time and effort.
Best Bulbs For Propagation
Some bulbs produce offsets more easily and quickly. Tulips, daffodils, and lilies are popular choices. They create many small bulbs around the parent bulb. Hyacinths and alliums also form good offsets. These bulbs are easy to divide and replant. Choose bulbs that suit your climate and soil. This will help your offsets grow strong.
Identifying Healthy Offsets
Look for firm, plump offsets without soft spots or mold. Healthy offsets have smooth, unbroken skin. They should be about one-third to one-half the size of the parent bulb. Avoid any bulbs that look shriveled or dry. Check for signs of pests or disease. Good offsets will have small roots or root buds. These ready offsets grow faster once planted.
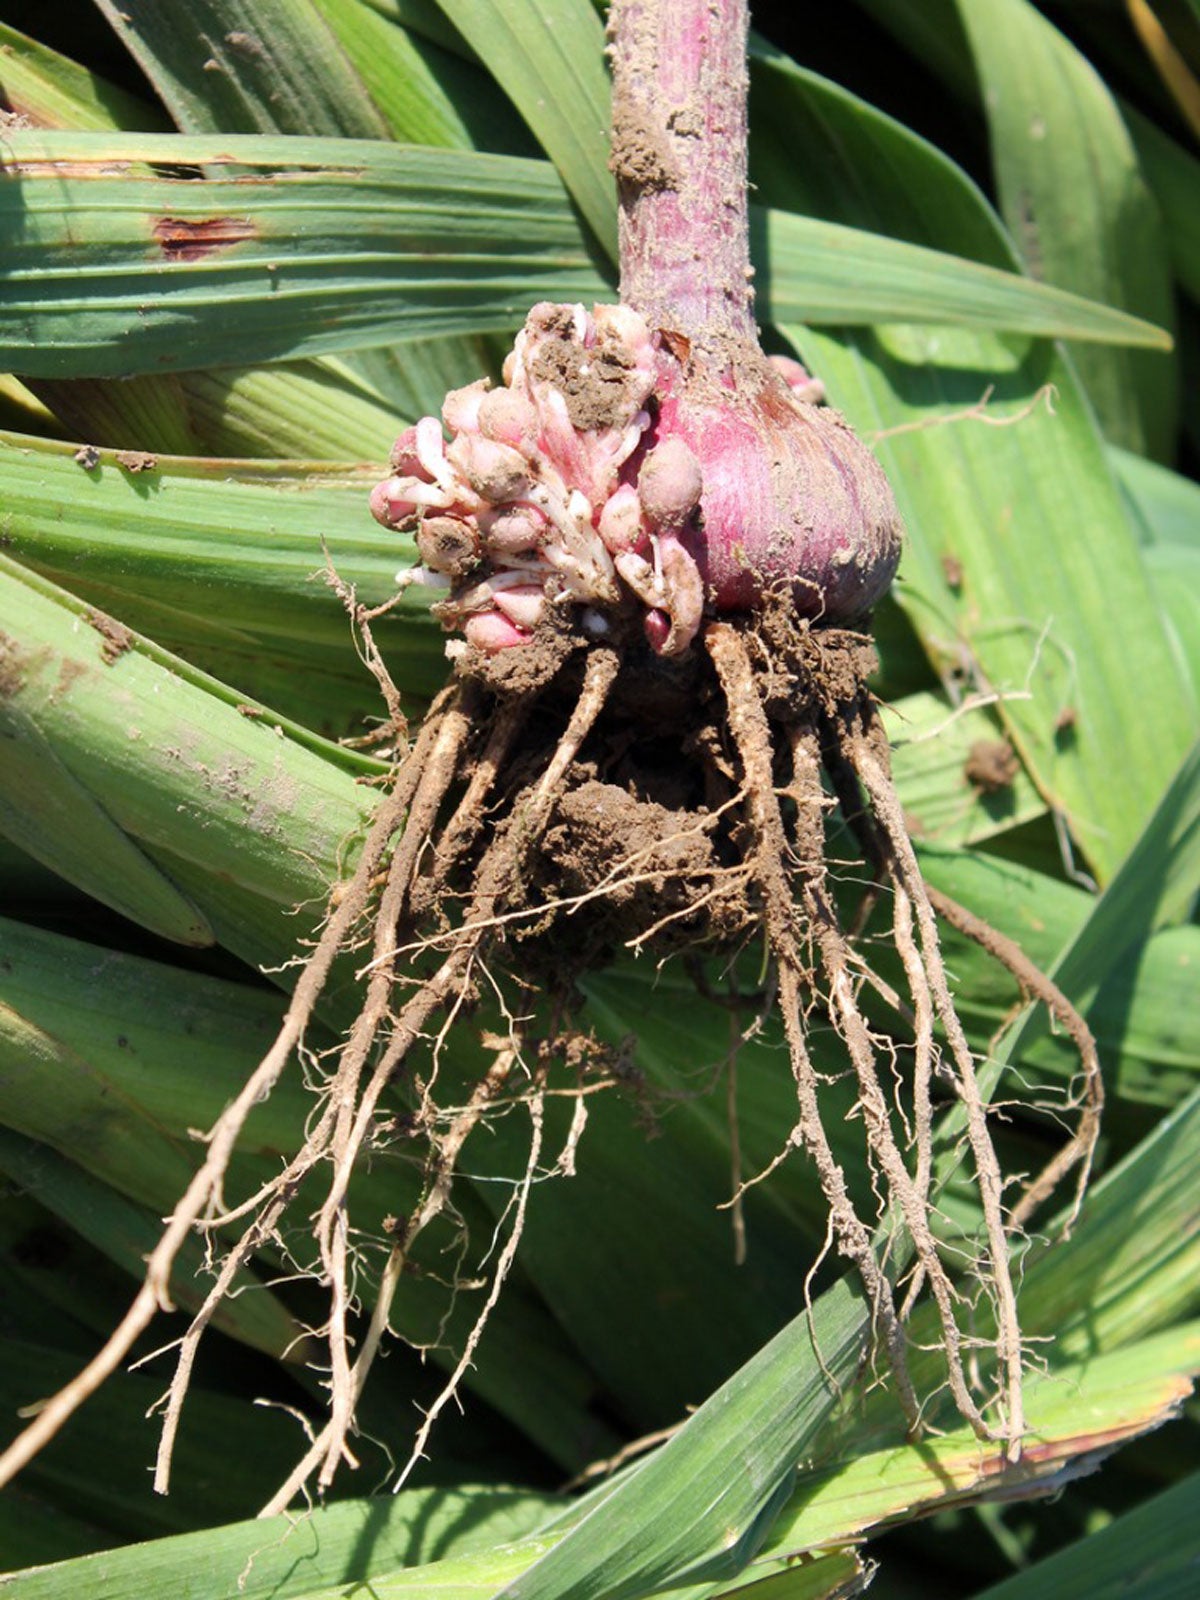
Credit: www.gardeningknowhow.com
When To Separate Offsets
Knowing the right time to separate offsets is vital for healthy bulb growth. Separating offsets too early or too late can harm the bulbs or stunt their growth. Timing affects how well the offsets will grow once replanted. Watch your bulbs closely to pick the best moment.
Ideal Timing In The Growing Cycle
Separate offsets during the bulb’s dormant period. This usually happens after the foliage dies back naturally. The bulb stores energy during dormancy, helping offsets grow strong. Avoid separating offsets during active growth; it can stress the plants. Late summer to early fall often works best. The soil is still warm enough to encourage root development.
Signs Your Bulbs Are Ready
Look for clusters of small bulbs attached to the main bulb. These are the offsets, ready to be separated. The main bulb should be firm and healthy. Foliage will have turned yellow or brown, showing dormancy. Offsets will separate easily without damage. If bulbs feel soft or moldy, do not separate them yet. Healthy offsets have their own roots or root buds visible.
Preparing Bulbs And Offsets
Preparing bulbs and offsets is the first step to successful growth. Healthy bulbs give your plants the best start. Proper preparation prevents disease and promotes strong roots. This process includes cleaning, inspecting, and dividing bulbs carefully.
Taking time to prepare bulbs correctly helps them thrive in your garden. It also ensures you get many new plants from offsets. Follow simple steps to get the best results.
Cleaning And Inspecting Bulbs
Start by gently removing soil from the bulbs. Use your hands or a soft brush to clean them. Avoid using water, as wet bulbs can rot quickly.
Check each bulb for signs of damage or disease. Look for soft spots, mold, or discoloration. Discard any bulbs that seem unhealthy to protect your garden.
Inspect offsets carefully too. These small bulbs should be firm and free of blemishes. Healthy offsets will grow into strong new plants.
Tools Needed For Division
Gather clean, sharp tools to divide bulbs and offsets. A small garden trowel or knife works well for this job. Use scissors or pruning shears to trim roots if needed.
Disinfect your tools before use to prevent spreading diseases. A mix of water and mild bleach or rubbing alcohol works best. Keep tools close by to work efficiently.
Use gloves to protect your hands while handling bulbs. This also helps keep the bulbs clean and undamaged. Prepare a clean surface to sort and divide bulbs carefully.
Credit: www.gardeningknowhow.com
Separating Offsets Safely
Separating offsets from bulbs is a key step in growing healthy new plants. Doing it carefully helps the bulbs stay strong and ready to grow. This process requires patience and gentle handling to avoid damage. Proper separation encourages better growth and more flowers in your garden. Below are easy steps to divide and handle your bulbs safely.
Step-by-step Division Process
First, dig around the parent bulb gently to avoid cutting it. Lift the bulb cluster from the soil with care. Shake off the soil to see the bulbs clearly. Look for small bulbs, called offsets, attached to the main bulb. Use your fingers to separate offsets from the parent bulb softly. If they are hard to remove, use a clean knife to cut them apart. Make sure each offset has roots or a growth point. After separation, let the offsets dry for a day in a shaded area. This helps wounds heal and reduces rot risk. Finally, plant the offsets in prepared soil at the right depth.
Handling Delicate Bulbs
Bulbs can be fragile and bruise easily. Avoid dropping or squeezing them during separation. Use clean tools to prevent spreading diseases. Wash your hands before touching the bulbs to keep them healthy. Store bulbs in a cool, dry place before planting. Protect offsets from direct sun and strong winds. Water the soil lightly after planting, not the bulbs themselves. Check the bulbs regularly for signs of mold or damage. Treat any problems quickly to save your new plants.
Planting Offsets In The Garden
Planting offsets in the garden is a simple way to grow more bulbs and enjoy vibrant blooms. Offsets are small bulbs that form next to the parent bulb. Planting them properly helps establish healthy plants that will bloom year after year. Follow these steps for best results in your garden.
Choosing The Right Location
Pick a spot that gets plenty of sunlight. Most bulbs need at least six hours of sun daily. Avoid areas with heavy shade or standing water. Good air circulation helps prevent diseases. Make sure the location suits the type of bulb you are planting.
Soil Preparation Tips
Use well-draining soil to keep bulbs from rotting. Loosen the soil to about 12 inches deep. Mix in organic matter like compost to improve fertility. Avoid heavy clay or waterlogged soils. Proper soil preparation gives offsets a strong start.
Proper Planting Depth And Spacing
Plant offsets at a depth twice their size. Small bulbs need shallow planting, while larger bulbs go deeper. Space bulbs about three times their width apart. This allows room for growth and good airflow. Cover with soil and water gently to settle the soil.

Credit: www.gardenersworld.com
Caring For New Bulbs
Caring for new bulbs is essential for a healthy garden. After planting offsets, these bulbs need proper attention. This care helps them grow strong roots and vibrant blooms. Small steps make a big difference in their development.
Watering Guidelines
Water new bulbs gently but thoroughly after planting. Keep the soil moist but not soggy. Overwatering can cause bulbs to rot. Check soil moisture regularly, especially during dry spells. Reduce watering once shoots appear above ground.
Fertilizing For Strong Growth
Use a balanced fertilizer to support bulb growth. Apply fertilizer in early spring as growth starts. Avoid high nitrogen fertilizers, which can harm bulbs. Follow package directions for safe application rates. Fertilizing helps bulbs build energy for next season.
Protecting From Pests And Diseases
Watch new bulbs for signs of pests like slugs and rodents. Use natural repellents or barriers to protect bulbs. Remove dead leaves and debris to prevent disease. Avoid planting bulbs too close together to improve air flow. Healthy bulbs resist pests and disease better.
Encouraging Flowering
Encouraging your bulbs to flower from offsets takes care and attention. Offsets need the right conditions to bloom well. You must help them build energy and strength first. Proper care ensures vibrant flowers in your garden’s next season.
Focus on natural processes like chilling and protecting young bulbs. These steps prepare offsets to produce healthy blooms. Understanding these needs improves your success with bulb propagation.
Chilling Requirements For Bulbs
Many bulbs need a cold period to start flowering. This chilling time triggers growth inside the bulb. Without enough cold, flowers may fail to form or be weak.
Plant offsets in late fall or early winter for natural chilling. The soil cools gradually, giving bulbs time to rest. In warmer areas, you can refrigerate bulbs for 10 to 12 weeks before planting.
Keep bulbs dry and away from fruits during refrigeration. Fruits release gases that can harm bulbs. After chilling, plant bulbs in well-drained soil and wait for shoots to appear.
Using Mulch And Shade
Mulch helps keep soil temperature steady during cold months. It protects bulbs from frost and sudden freezes. Use straw, shredded leaves, or bark as mulch around offsets.
Shade bulbs from harsh afternoon sun, especially after planting. Young offsets can dry out quickly under strong sunlight. Use light shade cloth or plant where natural shade occurs.
Mulch also retains moisture, which bulbs need for root growth. Avoid waterlogging by using loose, breathable mulch materials. This balance supports healthy flowering later.
Common Challenges
Growing bulbs from offsets is rewarding but comes with challenges. Gardeners often face problems that can stop the new bulbs from growing well. Knowing these common issues helps you prepare and care for your bulbs better. This section explains key challenges and how to manage them for healthy growth.
Dealing With Bulb Rot
Bulb rot is a common issue caused by too much moisture. It makes bulbs soft and brown inside. Poor drainage in soil often leads to this problem. Plant bulbs in well-drained soil to avoid water buildup.
Remove any damaged bulbs quickly to stop rot from spreading. Use a fungicide if you notice early signs of rot. Always handle bulbs gently to prevent wounds where rot can start.
Preventing Offset Failure
Offsets sometimes fail to grow due to weak roots or poor care. Plant offsets at the right depth, usually two times their height. This helps them get enough nutrients and stay stable.
Avoid planting offsets in direct, harsh sunlight at first. They need some shade to develop strong roots. Water offsets moderately to keep soil moist but not wet.
Check offsets for pests or diseases before planting. Healthy offsets have a better chance to grow into strong plants.
Tips For Success Year After Year
Growing bulbs from offsets is a rewarding way to expand your garden each year. Consistent care ensures your bulbs thrive season after season. Follow these simple tips to maintain healthy bulbs and enjoy vibrant blooms every spring.
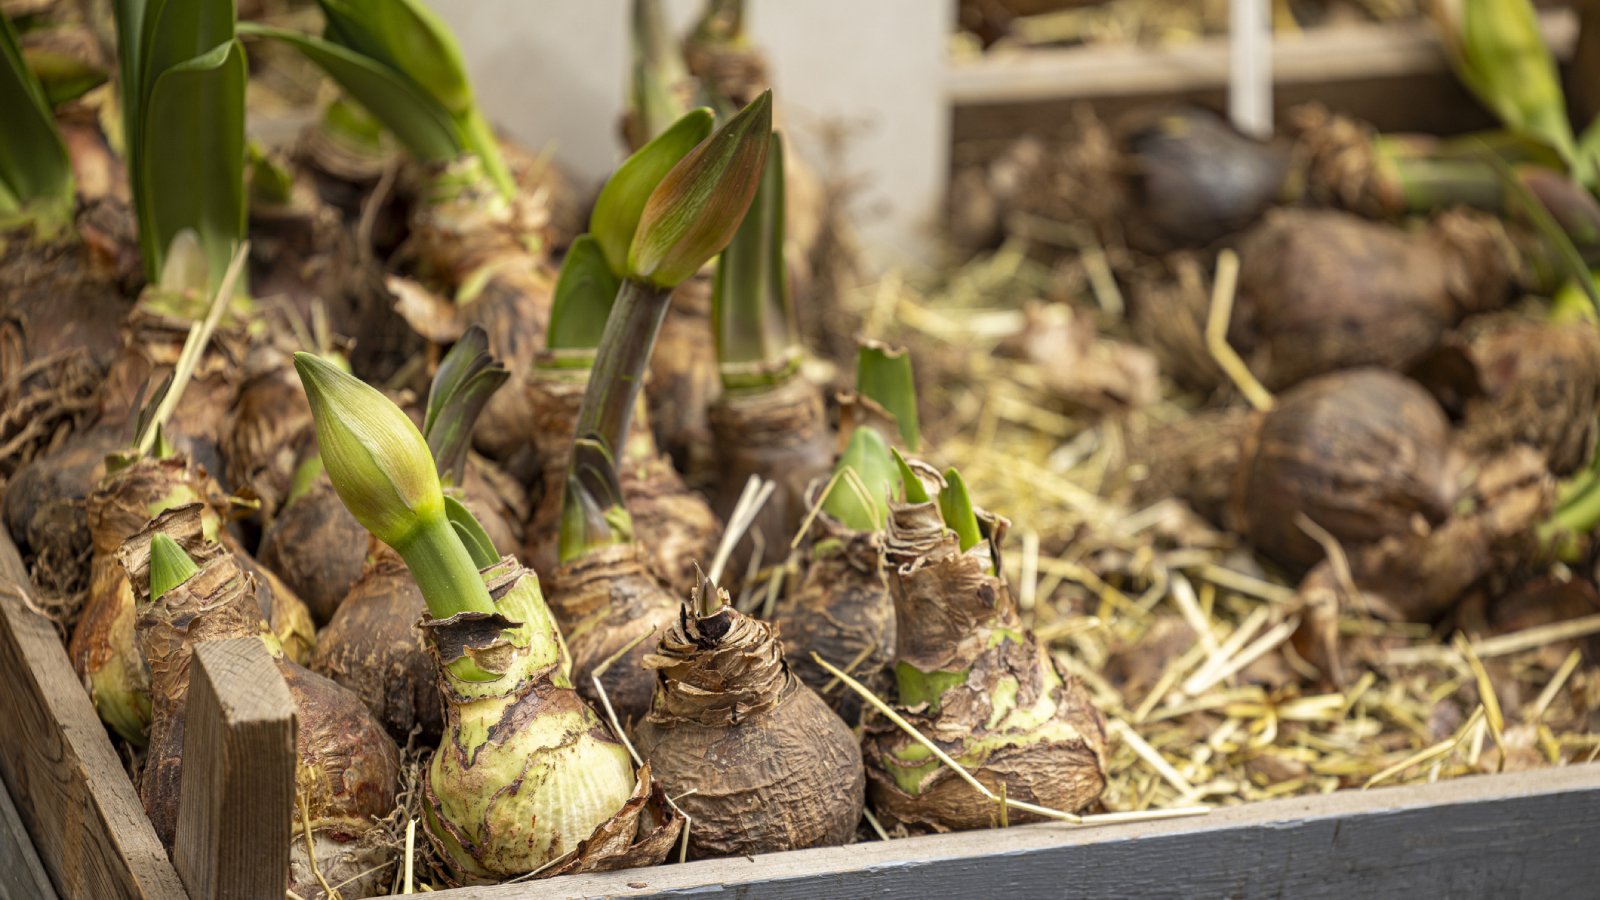
When To Lift And Store Bulbs
Lift bulbs after the foliage has fully died back. This signals that the bulb has stored enough energy. Carefully dig around the bulb to avoid damage. Gently brush off excess soil but do not wash the bulbs. Let them dry in a cool, shaded spot for a few days. Store bulbs in a mesh bag or paper bag with good air circulation. Keep them in a cool, dry place until it is time to plant again.
Rotating Planting Sites
Change the bulb planting location each year to prevent soil diseases. Rotating sites also helps avoid nutrient depletion. Choose spots with similar sunlight and soil conditions to support growth. This simple step keeps your bulbs healthy and encourages better flowering. Avoid planting bulbs in the same spot for at least three years. This practice helps reduce pests and improves overall garden health.
Frequently Asked Questions
What To Do With Tulip Offsets?
Tulip offsets should be separated carefully after foliage dies. Plant them in well-drained soil at 10-15 cm depth. Water moderately and allow several years to mature before blooming.
Is October Too Late To Plant Tulips?
October is a good time to plant tulip bulbs. Plant before the soil freezes to ensure root development. Tulips tolerate cool soil well. You can still plant in November if the ground is workable. Mulch after planting to protect bulbs from temperature swings.
How To Trick Bulbs Into Growing?
Chill bulbs in the fridge for 12-16 weeks to mimic winter. Then plant them in warm soil with light to trigger growth and blooming.
Can You Leave Bulbs In Pots All Year Round?
Bulbs in pots rarely flower well year after year. Replace bulbs annually for best blooms. Lift, dry, and replant bulbs in the garden each autumn.
Conclusion
Growing bulbs from offsets is a simple way to expand your garden. Start with healthy offsets and plant them in well-prepared soil. Water regularly and give them enough sunlight. Over time, these bulbs will grow into beautiful flowers. Patience brings rewarding blooms each season.
Try this method to enjoy more colorful plants without buying new bulbs. Your garden will thrive with a little care and attention. Happy gardening!