Is your garden hose leaking and wasting water every time you turn on the tap? A leaky hose can be frustrating, messy, and costly, especially when you need it the most.
But don’t worry—you don’t have to buy a new one or call a plumber. You can fix your garden hose quickly and easily with a few simple tools and tricks. Keep reading, and you’ll learn exactly how to stop those leaks, save water, and get your hose working like new again.
Ready to take control of your garden watering? Let’s dive in!
Credit: www.youtube.com
Identify Leak Location
Finding the exact spot of a leak is the first step to fix your garden hose. Leaks waste water and reduce pressure. Careful inspection helps save water and money. Start by examining the hose ends and then check the hose body. This way, you can spot damage quickly and know how to repair it.
Check Hose Ends
Look closely at both ends of the hose. These areas often have connectors that wear out. Check for cracks or loose fittings. Turn the water on and see if water sprays from the ends. Tighten any loose connectors by hand. If leaks continue, the ends may need replacement.
Inspect Hose Body
Run your hand along the full length of the hose. Feel for wet spots or soft areas. Look for holes, cracks, or splits on the surface. Turn on the water and watch carefully for dripping. Mark any problem spots with a piece of tape. These areas need patching or cutting out.

Credit: www.youtube.com
Tools And Materials Needed
Fixing a leaky garden hose requires the right tools and materials. Having these on hand makes the repair quick and effective. This section covers the essential items to prepare before starting.
Replacement Connectors
Replacement connectors fix leaks at hose ends. These connectors replace damaged or worn-out fittings. They come in different sizes and types to match your hose. Choose brass or plastic connectors based on durability needs. Using new connectors ensures a tight, leak-free seal.
Hose Clamps And Menders
Hose clamps hold hoses tightly to connectors. They prevent water from escaping at joints. Menders repair leaks in the hose body itself. Menders splice two hose sections together securely. Both clamps and menders are easy to install. They help extend the life of your garden hose.
Sealants And Tape
Sealants and tape stop small leaks and drips. Teflon tape wraps around threaded connections for a better seal. Rubber or silicone sealants fill cracks and gaps. These materials add extra protection against leaks. Applying them correctly improves hose performance and durability.
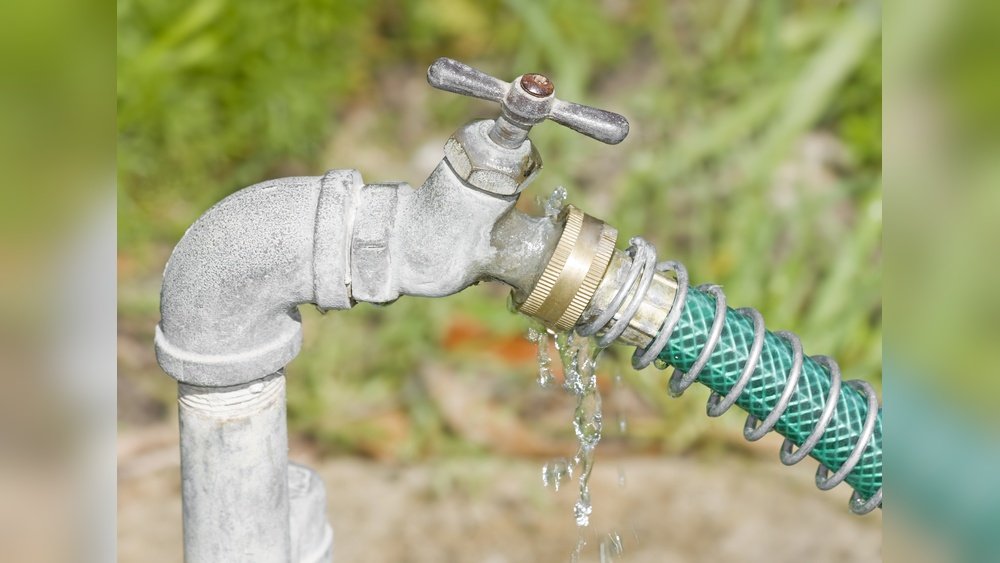
Fix Leaks Near Connectors
Leaks near connectors are common problems with garden hoses. These leaks reduce water flow and waste water. Fixing them is simple and saves money. The key is to remove damaged parts and replace connectors. This restores a tight seal and stops leaks quickly.
Cut Off Damaged End
Start by turning off the water supply. Drain the hose to avoid spills. Use a sharp utility knife or garden shears. Cut off the damaged end cleanly and straight. Make sure the cut is smooth to prevent future leaks. Remove any old connector pieces still attached.
Attach New Connector
Choose a new connector that fits your hose size. Slide the connector onto the freshly cut hose end. Push it firmly to ensure a tight fit. Some connectors need clamps to hold them in place. Tighten the clamp securely with a screwdriver or wrench. Check for leaks by turning on the water.
Credit: reddilawnmaintenance.com
Repair Leaks In Hose Body
Repairing leaks in the hose body is essential to keep your garden hose working well. Small holes or cracks in the middle of the hose cause water to spray out. This wastes water and lowers pressure. Fixing these leaks extends the hose’s life and saves water.
Two simple steps can fix most leaks in the hose body. First, you remove the damaged part. Then, you join the hose back together with a hose mender. These tools are cheap and easy to use. The repair work can be done in minutes.
Trim Out Damaged Section
Start by finding the leaking part of the hose. Use a sharp knife or scissors to cut out the damaged section. Cut straight across both ends to make a clean edge. Make sure no cracks or holes remain. This step prepares the hose for a smooth repair.
Use Hose Mender To Splice
Take a hose mender, a small plastic or metal connector. Insert one end of the hose into one side of the mender. Push it in firmly until it fits tight. Do the same for the other hose end on the opposite side. Tighten any clamps or screws on the mender. This seals the connection and stops leaks.
Test the hose by turning on water. Check for any drips near the repair. If needed, tighten the clamps more. Your hose is ready to use again without leaks.
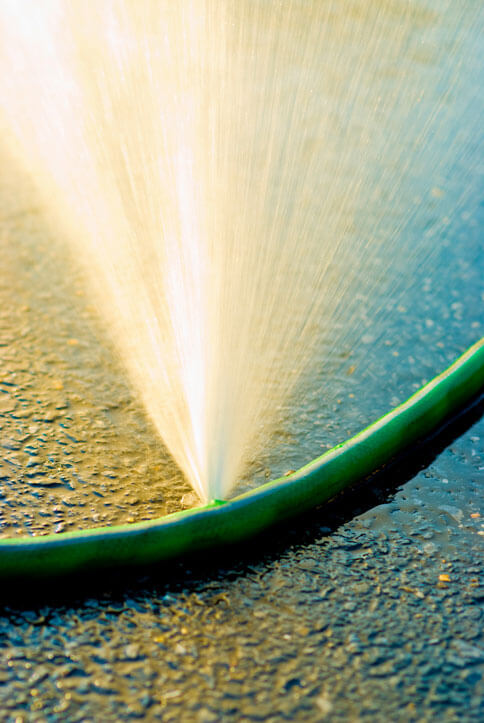
Seal Small Punctures
Small punctures in a garden hose cause water to leak and reduce pressure. Fixing these holes quickly saves water and extends the hose life. Simple tools and materials can seal these leaks at home. Follow the steps below to seal small punctures effectively.
Apply Waterproof Sealant
Clean the area around the puncture with a dry cloth. Apply a waterproof sealant designed for garden hoses. Use a small brush or your finger to spread the sealant evenly. Let the sealant dry completely before using the hose. This method stops water from escaping through tiny holes.
Wrap With Repair Tape
Cut a piece of waterproof repair tape longer than the puncture. Wrap it tightly around the hole with several layers. Press the tape firmly to remove any air bubbles. This creates a strong, flexible barrier against leaks. Repair tape works well for temporary or quick fixes on the hose.
Prevent Future Leaks
Preventing future leaks in your garden hose saves time and money. Proper care keeps the hose strong and functional for longer. Small steps help avoid damage that causes leaks. Follow simple habits to extend your hose’s life.
Store Hose Properly
Always store your garden hose in a cool, dry place. Avoid leaving it under direct sunlight for long hours. Heat weakens the hose material and causes cracks. Coil the hose neatly without kinks or twists. Use a hose reel or hanger to keep it off the ground. This prevents dirt and moisture buildup that can cause damage.
Avoid Excessive Bending
Bending the hose too much creates weak spots. These weak spots turn into cracks and leaks over time. Keep the hose straight or gently curved during use and storage. Avoid sharp bends near connectors and joints. Use hose guides around corners to reduce stress. Handle the hose gently to maintain its shape and strength.
Quick Temporary Fixes
Quick temporary fixes for a leaky garden hose can save water and frustration. These solutions work fast and need few tools. They are perfect for small leaks or while waiting for a permanent repair. Keep your garden watering without delay.
Use Compression Menders
Compression menders are easy to use and cost-effective. Cut out the damaged hose section using a sharp knife. Insert both hose ends into the mender. Tighten the compression nuts by hand or with pliers. This seals the leak quickly and stops water loss.
Compression menders work well for leaks in the middle of the hose. They do not require special tools or skills. Make sure the hose ends fit snugly inside the mender. This ensures a strong seal and prevents future leaks.
Tighten Loose Connectors
Loose connectors often cause leaks near the hose ends. Check both the male and female connectors. Turn the connectors clockwise to tighten them. Use your hand first, then a wrench if needed.
Do not over-tighten connectors. This can cause damage and worsen leaks. A tight but gentle twist usually stops the dripping. If water still escapes, check the rubber washers inside the connectors. Replace worn washers for a better seal.
Frequently Asked Questions
How Do I Stop My Garden Hose From Leaking?
To stop leaks, first identify the leak source. Tighten connectors or replace damaged washers. For holes, use hose repair kits or sealants. Regular maintenance prevents future leaks and extends hose life.
Can I Repair A Punctured Garden Hose Myself?
Yes, you can repair a punctured hose easily. Cut out the damaged section, then use a hose mender or coupling. Secure tightly to prevent leaks and restore full function.
What Tools Are Needed To Fix A Leaky Garden Hose?
Basic tools include a utility knife, hose repair kit, pliers, and replacement washers. These help you cut, seal, and secure connectors quickly for an effective fix.
How Do I Fix A Leaking Hose Connector?
Turn off water supply. Unscrew the connector, check and replace worn washers. Reattach and tighten by hand, then test for leaks. Avoid overtightening to prevent damage.
Conclusion
Fixing a leaky garden hose is simple with the right steps. Cut damaged parts or replace connectors as needed. Use hose menders or sealants for small holes. Regular checks help catch leaks early and save water. A well-maintained hose lasts longer and works better.
Now, watering your garden will be easier and less wasteful. Keep tools handy, and you can fix leaks anytime. Enjoy a healthy garden with a drip-free hose!