
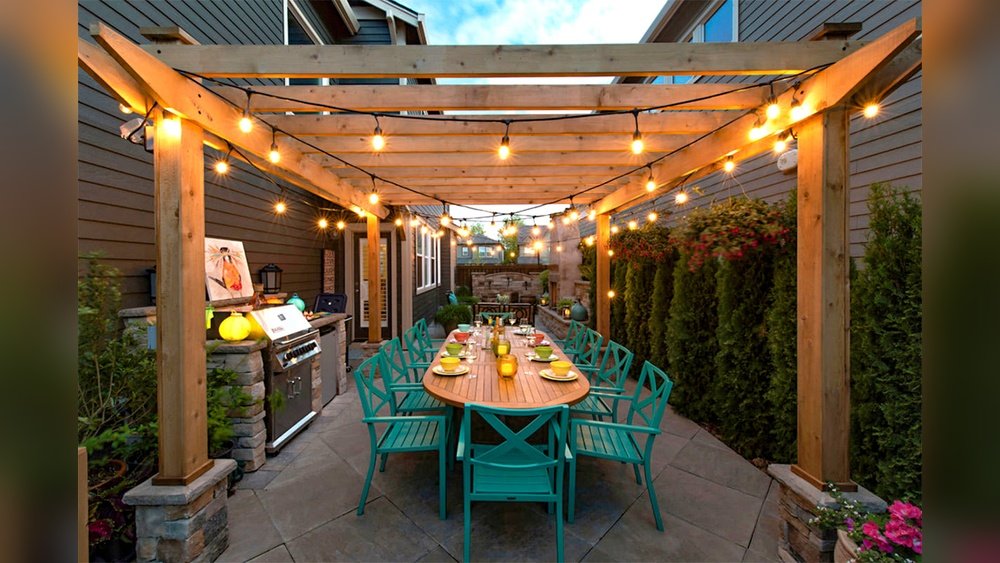
Bringing a pergola to life at night can completely change your outdoor experience. String lights are a simple but powerful way to add warmth, style, and function to any pergola. With the right approach, you can turn your backyard into a magical space for dining, relaxing, or entertaining. But if you’ve never installed string lights before, the process can seem overwhelming. Worry not. This guide will walk you through every step, from choosing the right lights to safe installation, so your pergola shines bright all year.
Why Install String Lights On A Pergola?
Adding string lights to your pergola does more than just illuminate the area. Well-placed lights can create a cozy atmosphere, highlight architectural features, and make the space usable after dark. Recent surveys found that over 75% of homeowners prefer outdoor lighting for ambiance rather than just visibility. It’s a small change with a big impact.
String lights are also flexible. They work for parties, quiet evenings, or even as a permanent feature. Plus, the installation is often less expensive and complex than building-in electrical fixtures. If you rent your home or want a non-permanent solution, string lights are an ideal choice.
Choosing The Right String Lights
Before you start hanging anything, it’s important to pick the best string lights for your pergola. The wrong choice can lead to poor lighting, safety hazards, or a look you don’t love.
Types Of String Lights
There are several types you’ll see when shopping:
| Type | Best For | Typical Lifespan | Weather Resistance |
|---|---|---|---|
| LED Bulb String Lights | Energy efficiency, durability | Up to 50,000 hours | High |
| Incandescent String Lights | Warm glow, classic look | Up to 2,000 hours | Medium |
| Solar String Lights | Eco-friendly, low power use | Up to 10,000 hours | Varies |
| Smart String Lights | Color control, app features | Up to 25,000 hours | High |
LED string lights are the most popular for pergolas because they are durable, energy-efficient, and cool to the touch. Incandescent bulbs are less expensive but use more power and break more easily. Solar-powered lights are a great choice if you want to avoid running wires, but they may not shine as brightly or consistently, especially in cloudy weather.
Bulb Size And Shape
String lights come with different bulb sizes. Common types are G40 (globe-shaped), Edison-style, and mini fairy lights. Edison bulbs create a vintage look, while globe bulbs are classic and versatile. Mini lights offer a delicate twinkle.
Weatherproofing
Not all string lights are meant for outdoor use. Look for IP ratings on the packaging:
- IP44 or higher: Safe for outdoor use, protects against splashing water.
- IP65 or higher: Withstands heavy rain.
Never use indoor-only lights outside. This is a common beginner mistake that can cause short-circuits or fires.
Power Source
- Plug-in: Most reliable, but you’ll need a nearby outlet.
- Solar: No wires, but less brightness and depends on sun.
- Battery-operated: Good for small areas, but batteries need frequent changing.
Length And Number Of Strands
Measure your pergola before buying. Most string lights come in 25 to 100 feet strands. For full coverage, you may need multiple sets. Always check if the lights are connectable (able to plug into each other) and the maximum number of strands you can safely connect.
Color Temperature
The warmth of the light matters. Most people prefer warm white (2700K–3000K) for a cozy feel. Cool white (4000K+) can look harsh outdoors.
Table: Quick Comparison Of Popular String Light Specs
| Feature | LED | Incandescent | Solar |
|---|---|---|---|
| Energy Use | Low | High | None (solar-powered) |
| Brightness | High | Medium | Low-Medium |
| Upfront Cost | Medium-High | Low | Medium |
| Operating Cost | Low | High | None |
| Smart Features | Optional | No | No |
Planning Your Layout
Good installation starts with a clear lighting plan. Rushing into hanging lights often leads to tangled wires, uneven spacing, or running out of length mid-project.
Measure Your Pergola
Use a tape measure to get the exact dimensions of your pergola (length, width, and height). Sketch a quick diagram. Mark where you want the lights to go—along the beams, across the top, or zig-zag.
Choose A Pattern
Popular string light patterns include:
- Parallel lines: Simple and modern, with lights hung in straight lines across the pergola.
- Zig-zag/“W” pattern: Adds visual interest and covers more space.
- Perimeter: Lights follow the outer edge of the pergola.
- Canopy (tent): Lights start at one central point and radiate out.
Decide which look fits your style and how much light you want.
Calculate How Many Lights You Need
A common formula is to multiply the length of one run by the number of runs you want. Add 10–20% extra for slack or mistakes. For example, a 12’ x 16’ pergola with four parallel lines would need about 60–70 feet of lights.
Plan For Power
Decide where you’ll plug in the lights. Most outdoor outlets are near the house. If you need to run a cord, plan a safe path along a beam or under decking. Never let cords stretch across walking paths.
Tools And Materials Needed
Gather all your supplies before you start. Here’s what you’ll need for a standard project:
- String lights (length and style of your choice)
- Outdoor extension cord (if needed)
- Hooks or screw eyes (stainless steel for outdoor use)
- Cable ties or zip ties
- Measuring tape
- Ladder (tall enough for your pergola)
- Drill and drill bits
- Pencil or chalk
- Weatherproof timer or smart plug (optional)
- Protective gloves
- Safety glasses
If you want to support the lights better, consider stainless steel wire (guy wire) and turnbuckles for tension.
Step-by-step Installation Guide
Now, let’s get to the main part: installing your string lights safely and securely.
Step 1: Mark Your Attachment Points
Start by marking where each hook or screw eye will go. Use your layout sketch and measuring tape for accuracy. Mark both ends of each light run. For long runs, add support points every 4–6 feet to prevent sagging.
Pro tip: If your pergola is wood, screw eyes work well. For metal or vinyl, look for adhesive hooks rated for outdoor use.
Step 2: Install Hooks Or Eyes
Drill small pilot holes at each mark. Then screw in the hooks or eyes by hand or with pliers. Make sure they are tight and facing the right way.
For extra-long spans (over 20 feet), install a support wire first. Thread the wire through the eyes, pull tight with a turnbuckle, then attach the lights to the wire with zip ties or S-hooks. This prevents sagging and keeps the lights straight.
Step 3: Hang The Lights
Start at the power source. Uncoil the lights and plug them in to check that all bulbs work before hanging. Begin attaching the lights to your first hook or wire.
- Move slowly, and support the strand as you go to avoid tangling or pulling.
- Use zip ties or twist ties every few feet for extra support.
- Check alignment as you move—step back and look from a distance.
Don’t pull the lights too tight. Leave a little slack for temperature changes and wind.
Step 4: Secure The Plug And Cords
Route the power cord neatly along a beam or down a post. Use zip ties to keep it out of the way. If you need an extension cord, use one rated for outdoor use. Keep all connections off the ground and protected from rain.
If you want to automate your lights, plug them into a weatherproof smart plug or timer. Some smart plugs can be controlled from your phone for easy on/off.
Step 5: Test And Adjust
Plug in the lights and turn them on. Walk around your pergola at night to check for dark spots, sagging, or loose wires. Adjust spacing or add more support as needed. Replace any burnt-out bulbs.
Step 6: Weatherproof Everything
Outdoor lights need protection from water and wind. Use weatherproof electrical covers on outlets and secure all wires so they don’t flap in the wind. If you live in a high-wind area, consider extra cable ties.
For permanent installations, use UV-resistant zip ties and stainless steel hardware. This prevents cracking or rust over time.
Safety Tips For Outdoor String Light Installation
Safety is often overlooked. Here’s how to keep your pergola shining safely:
- Always use outdoor-rated lights and extension cords.
- Don’t overload circuits—check the maximum wattage your lights draw.
- Keep all electrical connections off the ground and away from water.
- Replace broken bulbs immediately (a broken seal lets in water).
- Never staple or nail through the wires.
- If you’re unsure about electricity, consult a licensed electrician.
A little planning can prevent accidents and protect your investment.

Credit: backyardoas.com
Creative Ways To Hang String Lights
There’s no single “correct” way to hang string lights. Here are some creative ideas to inspire you:
- Criss-cross pattern: For a playful, dynamic look.
- Double-layer canopy: Hang two sets at different heights for depth.
- Mix with greenery: Weave lights through climbing plants or artificial vines.
- Draped waterfall: Let lights hang vertically from the beams for a curtain effect.
- Clustered bulbs: Group several bulbs together at intervals for a dramatic focal point.
Try different patterns with a temporary setup (use tape or removable hooks) before making anything permanent.
Troubleshooting Common Problems
Even with careful planning, you might run into some issues. Here’s how to solve the most common problems:
Lights Sagging
- Add more support points (hooks or guy wire).
- Use heavier-duty string lights designed for longer spans.
Lights Not Turning On
- Test the outlet with another device.
- Check all connections and fuses (many string lights have a small fuse in the plug).
- Replace any broken bulbs.
Uneven Lighting
- Adjust bulb spacing.
- Add a second strand to fill gaps.
- Try a different pattern for better coverage.
Bulbs Burning Out Quickly
- Make sure you’re not overloading the circuit.
- Use LED bulbs for longer life.
Wind Or Rain Damage
- Use extra zip ties.
- Choose higher IP rating lights.
- Remove lights during severe weather if they’re not rated for storms.
Costs And Budget Considerations
How much will this project set you back? Costs vary depending on the size of your pergola, type of lights, and hardware.
| Item | Low Cost | High Cost | Notes |
|---|---|---|---|
| String Lights (25 ft.) | $15 | $60 | LED, weatherproof |
| Extension Cord | $10 | $30 | Outdoor-rated |
| Hooks/Eyes & Zip Ties | $5 | $20 | Stainless steel, UV safe |
| Guy Wire Kit | $15 | $35 | Optional for support |
| Smart Plug/Timer | $12 | $40 | Optional |
For a medium-sized pergola, the total cost usually ranges from $60 to $200. High-end smart lights or designer bulbs can increase your budget.
Mistakes To Avoid
Even experienced DIYers can make mistakes. Here are some to watch for:
- Using indoor lights outdoors: Always check the rating.
- Not measuring carefully: Guessing leads to running out of lights or uneven patterns.
- Overloading outlets: Calculate wattage before plugging in multiple sets.
- Using weak or rusty hardware: Only use stainless steel or coated hooks.
- Ignoring weather: If you live in a snowy or wet area, buy the highest weather-rated lights you can afford.
Bonus tip: Always keep a few spare bulbs and fuses. Replacements are much easier to find if you use popular brands.
Maintenance Tips For Long-lasting String Lights
To keep your pergola glowing year after year, follow these maintenance steps:
- Clean bulbs with a damp cloth every few months—dust can dim the light.
- Inspect wires and connections for cracks or wear, especially after storms.
- Replace burnt-out bulbs right away to prevent the rest from failing (on incandescent strands).
- Store lights indoors during extreme winter if they’re not rated for year-round outdoor use.
- Check hardware for rust and tighten zip ties as needed.
- Test the timer or smart plug occasionally to ensure it’s working.
With a few minutes of care each season, your string lights will last much longer.
Non-obvious Tips For A Professional Finish
Beginners often skip these details, but they make a big difference:
- Stagger the bulbs: If your pergola is large, start each strand a few bulbs apart for more even coverage and no “dark spots” at the ends.
- Paint zip ties to match: Use spray paint or buy colored zip ties that blend in with your pergola.
- Use command hooks for temporary setups: If you’re renting or not ready for permanent screws, high-strength adhesive hooks can work for a season or two.
- Create “swag” with extra length: Let the string lights dip gracefully between supports for a relaxed, festive look.
- Hide the plug: Use a planter, small box, or cable cover to keep the plug and extension cord out of sight.
These small touches help your lighting look intentional and polished.

Credit: www.wikihow.com
Sustainable And Smart Lighting Options
If you want to save energy or add convenience, consider these options:
- Solar string lights: Great for sunny areas and zero energy cost. Look for models with a large solar panel and replaceable battery.
- Smart LED string lights: Control brightness, color, and on/off times from your phone or voice assistant.
- Dimmable lights: Use a dimmer switch (outdoor rated) to adjust mood.
- Low-voltage systems: Safer around kids and pets, though more expensive to install.
A good resource for solar and smart outdoor lighting is the U.S. Department of Energy, which offers guidelines on efficiency and safety.
Example Project: Transforming A 12×12 Pergola
Let’s look at a real-world example:
- Pergola size: 12 ft. x 12 ft.
- Pattern: Zig-zag across the top, 4 runs.
- String lights needed: 4 x 14 ft. = 56 ft. (buy two 30 ft. strands)
- Hooks/eyes: 10 total (one at each start and end, plus two for the middle support)
- Guy wire: One 60 ft. spool for added support
- Extension cord: 15 ft., outdoor-rated
Installation time: About 2–3 hours with two people
Cost: Around $90 (LED lights, hardware, cord)
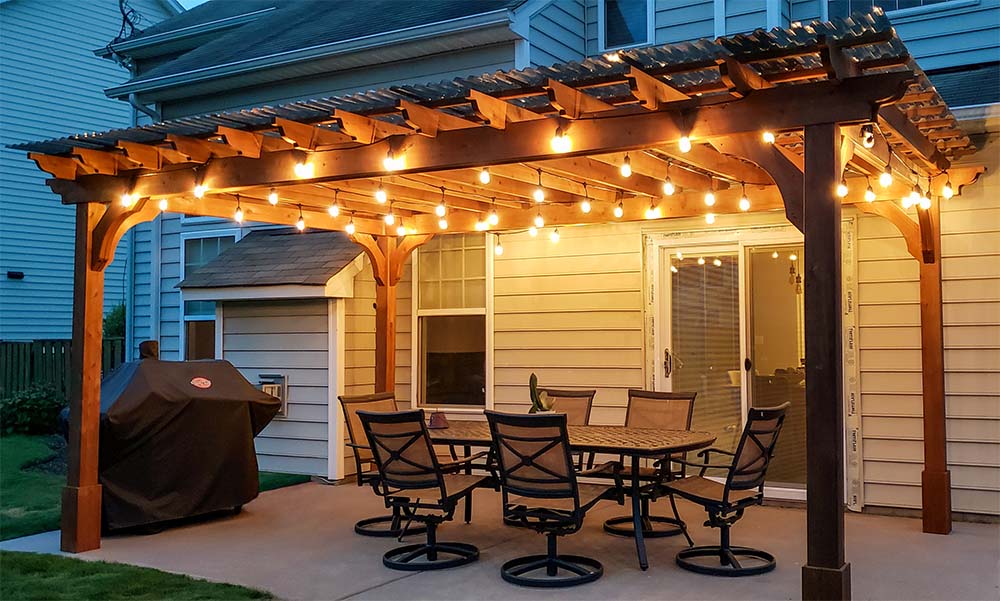
The result: A bright, inviting space for dinner parties or quiet evenings outdoors. The zig-zag pattern provides even lighting and a playful look.
Credit: www.pergolakitsusa.com
Frequently Asked Questions
What’s The Safest Way To Hang String Lights On A Pergola?
Always use outdoor-rated string lights and hardware. Attach lights with stainless steel hooks or UV-resistant zip ties. Avoid metal staples or nails, which can cut the wire. If your pergola is metal, use adhesive-backed hooks rated for outdoor use. Keep all electrical connections off the ground and protected from rain.
How Many String Lights Do I Need For My Pergola?
It depends on the size and your pattern. Measure the total length of each run (across, around, or zig-zag), then add 10–20% extra for slack. For a 10×12 pergola with three parallel lines, you’d need about 40 feet. Always buy a bit more than you think you need.
Can I Leave String Lights Up All Year?
Yes—if they are rated for permanent outdoor use (check for IP44 or higher). Even then, inspect them every few months for wear, especially after bad weather. If your area has heavy snow or storms, consider taking them down for winter.
What’s The Difference Between Led And Incandescent String Lights?
LED string lights use less power, last much longer (up to 50,000 hours), and stay cool. Incandescent lights are less expensive but use more energy and burn out faster. LED bulbs also come in more colors and smart options.
How Do I Keep String Lights From Sagging?
Install a support wire (guy wire) first, especially for spans over 20 feet. Attach the string lights to the wire with zip ties or clips. Add support hooks every 4–6 feet. Avoid pulling the strand too tight—leave a little slack to handle wind and temperature changes.
—
Installing string lights on your pergola is a rewarding project that brings beauty and function to your outdoor space. With the right planning, supplies, and attention to detail, you’ll enjoy your glowing pergola for years to come. Remember to measure carefully, use proper hardware, and choose weatherproof lights for the best results.
Now, all that’s left is to sit back, relax, and enjoy your transformed backyard retreat.