
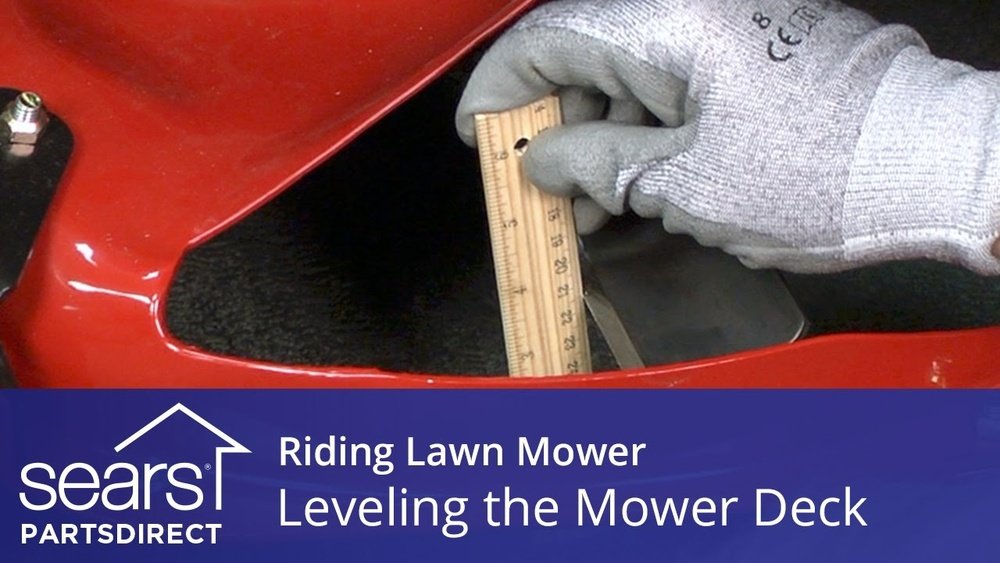
Every homeowner with a riding mower knows how much a smooth, even cut depends on one thing: the mower deck. An unlevel deck can turn your beautiful lawn into a patchwork of uneven grass, leaving you frustrated and your yard looking messy. Getting the deck level isn’t just for looks—it also keeps your mower in good shape and helps the blades last longer. Many people think leveling the deck is difficult, but with the right steps and tips, it’s a job anyone can handle at home.
If you’ve ever noticed your riding mower leaving stripes or missing patches, or if you see one side of your lawn is always shorter, chances are your deck isn’t level. Many beginners forget to check the deck after hitting a bump or changing blades, but it’s one of the most important maintenance tasks. Let’s go through everything you need to know about how to level the deck on a riding mower, with practical tips, common mistakes, and solutions that really work.
Why Deck Leveling Matters
A level deck is more than just a detail; it’s what makes your mower perform at its best. When the deck is uneven, the blades cut at different heights, leaving your lawn looking ragged. Over time, this can damage your grass and even your mower.
Benefits of a level deck:
- Healthier grass – Even cuts help the grass grow back stronger and resist disease.
- Better looking yard – No more stripes or uneven patches.
- Longer blade life – Blades wear evenly, so you sharpen and replace less often.
- Less mower wear – An unlevel deck puts extra stress on belts and pulleys.
Many new users think the deck comes perfectly leveled from the factory. In reality, it can shift during shipping, and after a few hours of mowing, bumps and vibrations can knock it out of alignment.
Tools And Materials You Will Need
Before you start, gather the right tools. Having everything ready saves time and makes the job easier.
| Tool | Purpose |
|---|---|
| Socket wrench set | For adjusting deck linkages and bolts |
| Measuring tape or ruler | Measures deck height from ground |
| Level (optional) | Checks blade or deck surface |
| Flat, smooth surface | Essential for accurate leveling |
| Work gloves | Protects hands from sharp edges |
Most riding mowers also have a deck adjustment tool or rod in the owner’s kit. Check your manual—using the tool designed for your mower makes adjustments easier.
Step-by-step Guide To Leveling A Riding Mower Deck
Leveling your deck is all about accuracy and patience. Here’s how to get it right.
1. Park Safely And Prepare
- Move your mower to a flat, hard surface like a garage floor.
- Turn off the engine, remove the key, and set the parking brake.
- For extra safety, remove the spark plug wire to prevent accidental starting.
2. Inflate Tires Correctly
An often-overlooked step is tire pressure. Uneven tires will throw off your measurements and make the deck impossible to level correctly.
- Check all four tires with a gauge.
- Inflate to the pressure listed in your mower’s manual (usually between 10–14 psi for fronts, 12–16 psi for rears).
- Don’t guess—use a proper tire gauge.
3. Set Mower Height To Mid-position
Set the deck lift lever to the middle cutting height. This is where the mower does most of its work and gives the most accurate results.
4. Check Blade Condition And Position
- Rotate the blades so that one is facing side-to-side (left to right).
- Make sure blades are sharp and not bent. A bent blade will give false readings.
5. Measure Side-to-side Level
- Place the measuring tape at the edge of the blade tip (not the deck) on the left side, then the right.
- Measure from the blade tip down to the ground.
- The difference should be less than 1/8 inch (3 mm). If it’s more, adjust.
6. Adjust Side-to-side Level
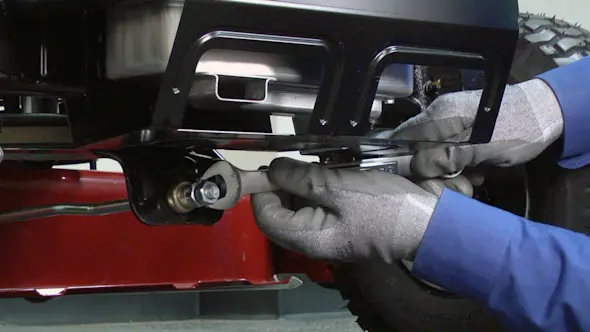
- Most mowers have adjustment nuts or rods on each side of the deck.
- Turn the nut on the low side clockwise to raise, or counterclockwise to lower.
- Make small adjustments, then re-measure.
7. Check And Adjust Front-to-back Pitch
- Rotate a blade so it points front to back.
- Measure from the blade tip (front), then the tip (rear), down to the ground.
- The front should be 1/8 to 1/2 inch (3–12 mm) lower than the rear for best cutting.
- Adjust the front linkage rod (usually near the front wheels) as needed.
8. Re-check All Measurements
After adjusting, measure everything again. Sometimes, changing one side can affect the other. Repeat steps until both sides and the pitch are within specs.
9. Reconnect Spark Plug And Test
Put the spark plug wire back, start the mower, and do a short test cut on a small patch of grass. Check results and make minor tweaks if needed.
Common Deck Leveling Mistakes
It’s easy to make a few simple mistakes when learning how to level your riding mower deck. Avoid these:
- Skipping tire pressure checks – Even a few pounds off can make everything look off.
- Measuring from the deck, not blade – The deck shell can be bent or uneven; always measure from the blade tip.
- Forgetting blade condition – Bent or dull blades give false measurements and poor cuts.
- Adjusting with engine running – Always turn off and disconnect the spark plug for safety.
- Not rechecking after adjustments – Adjusting one side can slightly change the other; always double-check.
Many beginners also don’t realize that adjusting the front-to-back pitch is just as important as the side-to-side level. Too much pitch can scalp the lawn, while too little can leave grass uncut.
Credit: www.searspartsdirect.com
How Often Should You Level Your Mower Deck?
Decks can go out of alignment over time, especially if you hit roots, rocks, or curbs. Here’s a quick guide:
| Situation | Check Level? |
|---|---|
| After first 10 hours of use | Yes |
| Every 25 mowing hours | Recommended |
| After hitting obstacles | Always |
| After changing blades | Recommended |
If your lawn starts looking uneven, or you hear strange noises, check the deck level right away.
Troubleshooting: When The Deck Won’t Level
Sometimes, no matter what you do, the deck won’t level. Here are some hidden problems to look for:
- Worn or missing deck hangers – These small parts can stretch or break, making adjustments impossible.
- Bent deck shell – If you’ve hit something hard, the deck itself may be bent. This needs repair or replacement.
- Damaged blade spindle – A bent spindle wobbles and gives wrong measurements.
- Loose or missing hardware – Check all nuts, bolts, and linkage rods.
If you find a bent or broken part, replace it before leveling. No adjustment will fix a mechanical fault.
Deck Leveling Tips For Different Mower Brands
While the basics are similar, every brand has its own quirks. Here’s what to watch for with popular brands:
John Deere
- Uses a unique deck-leveling gauge tool.
- Side-to-side adjustments are under the footrest area.
- Make sure the gauge wheels are set at the right height.
Cub Cadet
- Many models use a single front adjustment rod.
- The deck tends to drop more in the front, so check pitch carefully.
Husqvarna
- Look for quick-adjust levers on newer models.
- The deck shell is thin—avoid overtightening, which can bend it.
Craftsman
- Some models have a deck-leveling port for fast checks.
- Double-check the manual for where to measure (some use deck edge, others blade tip).
Advanced Tips For A Perfect Cut
If you want your lawn to look like a golf course, try these expert tips:
- Sharpen Blades Regularly – Dull blades tear the grass, leaving brown tips.
- Clean Deck After Each Use – Grass buildup can throw off balance and affect cut height.
- Use Deck Wheels – Set gauge wheels just above the grass to prevent scalping.
- Mow When Grass Is Dry – Wet grass bends under the blades and doesn’t cut evenly.
- Mow in Different Patterns – Changing direction each mow keeps the grass standing up straight.
These small habits add up to a perfect cut and a healthier lawn.

Credit: www.mowmore.com
Table: Quick Troubleshooting For Uneven Cuts
If you notice a problem after leveling, use this guide:
| Problem | Possible Cause | Solution |
|---|---|---|
| Scalping patches | Deck too low, uneven yard | Raise deck, mow slower |
| Striped look | Unlevel deck, bent blade | Re-level, check blade |
| Missed grass streaks | Blade overlap too small | Sharpen/replace blades |
| Vibration or noise | Bent spindle or loose part | Inspect and repair |
Final Thoughts
Leveling the deck on your riding mower isn’t just about looks—it’s about keeping your mower working its best and your grass healthy. With the right tools, a careful approach, and the tips above, you can get professional-quality results at home.
Always check the manual for your specific mower, and don’t rush the process. If you take your time, your lawn will thank you with a perfect, even cut all season long.
If you want to see a video example or need more details, the official John Deere support site has excellent resources.

Credit: www.youtube.com
Frequently Asked Questions
What Is The Correct Pitch For A Riding Mower Deck?
The front of the blade should be 1/8 to 1/2 inch lower than the back. This helps lift and cut the grass cleanly. Too much pitch can scalp the lawn, while too little can leave grass uncut.
Can I Level The Deck Without Special Tools?
Yes. While some brands include special gauges, you can use a simple measuring tape or ruler. Just measure from the blade tip to the ground, not from the deck shell.
How Do I Know If My Deck Is Bent?
If you can’t get the deck level no matter how you adjust, and the cut is always uneven, the deck shell or a blade spindle may be bent. Compare both sides visually or have a technician inspect it.
Why Does My Mower Cut Lower On One Side?
Usually, it’s from an unlevel deck, low tire pressure, or a bent blade. Check tires and blade condition first, then follow the leveling steps.
How Often Should I Check My Deck Level?
Check after the first 10 hours of mowing, then every 25 hours, after hitting any obstacle, or if you see uneven cuts. Regular checks keep your lawn looking its best.