Are you tired of dragging hoses around your garden or worrying about whether your plants are getting enough water? Installing an automatic irrigation system could be the game-changer your garden needs.
Imagine having your garden watered precisely and efficiently without lifting a finger—saving you time, water, and effort. In this guide, you’ll discover easy, step-by-step instructions to set up your own automatic irrigation system. Whether you’re a beginner or just looking for smart tips, you’ll learn how to plan, install, and customize a system that keeps your garden thriving all year long.
Ready to make your garden care simpler and more effective? Let’s dive in!

Credit: www.youtube.com
Planning Your Irrigation System
Planning your irrigation system is the first step to a healthy garden. It helps save water“>save water and ensures plants get enough moisture. Careful planning avoids common mistakes and extra costs. Start by understanding your garden’s needs and water supply.
Assessing Your Garden Layout
Look closely at your garden’s shape and size. Note where plants and trees are located. Identify areas that need more water. Mark sunny and shady spots because they affect watering needs. Create a simple map to guide your irrigation system design.
Measuring Water Pressure
Check your water pressure to ensure proper irrigation. Use a pressure gauge on an outdoor faucet. Ideal pressure usually ranges between 30 and 50 PSI. Low pressure means fewer sprinklers or drip emitters. High pressure may require pressure regulators to protect pipes and sprinklers.
Checking Local Regulations
Contact your local water authority or city office. Learn about any permits or restrictions for irrigation systems. Some areas limit watering times or methods. Following rules avoids fines and helps conserve water“>conserve water. Always confirm before starting installation.
Choosing The Right Components
Choosing the right components is essential for a successful automatic irrigation system. The right parts ensure efficient water use and long-lasting performance. Each component plays a specific role in delivering water to your garden effectively. Careful selection helps avoid leaks, clogs, and uneven watering. This section covers the main components you need to pick for your system.
Selecting Pipes And Fittings
Pipes carry water from the source to your garden plants. Choose durable pipes made from PVC or polyethylene. PVC pipes are strong and resist pressure well. Polyethylene pipes are flexible and easier to install. Use the right diameter pipe to maintain water pressure. Fittings connect pipes and change water direction. Use quality fittings to prevent leaks. Make sure all pipes and fittings match in size and type. This avoids water loss and system damage.
Picking Sprinkler Heads
Sprinkler heads control water distribution. Choose heads based on your garden’s shape and plant types. Fixed spray heads work well for small, flat areas. Rotating or rotor heads cover larger zones with adjustable arcs. Drip emitters deliver water directly to plant roots. They are perfect for flower beds and vegetable gardens. Match sprinkler heads with your water pressure to ensure even coverage. Proper placement avoids watering sidewalks or driveways.
Considering Smart Controllers
Smart controllers automate watering schedules. They save water by adjusting to weather and soil conditions. Choose a controller that fits your system size and complexity. Look for models with easy programming and smartphone apps. Some controllers connect to local weather stations for real-time updates. This helps prevent watering during rain or high humidity. Smart controllers make irrigation efficient and stress-free.
Preparing The Installation Site
Preparing the installation site is the first step to a successful automatic irrigation system. Clear the garden area of debris and obstacles. This makes it easier to work and prevents damage to the system later. Take time to plan carefully. A well-prepared site saves effort and ensures even water coverage.
Mapping Sprinkler Locations
Start by drawing a simple map of your garden. Mark where plants and grass areas need water. Place sprinkler heads so their spray overlaps slightly. This avoids dry spots. Consider obstacles like trees or fences that block water. Mark these on your map to adjust sprinkler positions.
Digging Trenches Safely
Use a shovel or trenching tool to dig trenches for pipes. Keep trenches about 6 to 12 inches deep. Check for underground utilities before digging. Call local utility services to locate pipes or cables. Wear gloves and sturdy shoes for safety. Work slowly to avoid damaging existing systems.
Warming Flexible Tubing
Flexible tubing can be stiff in cold weather. Leave the tubing in the sun for 20 to 30 minutes before installation. Sunlight warms the plastic, making it easier to bend. This reduces the risk of cracks or breaks during installation. Handle tubing gently to keep it in good condition.
Installing The Water Connection
Installing the water connection is a key step in setting up your automatic irrigation system. This step connects the system to your home’s main water supply. Proper installation ensures steady water flow and prevents leaks. Take your time to follow each task carefully for a durable setup.
Safety and accuracy are important during this phase. Use the right tools and turn off the water before starting any work. This avoids water waste and damage to your pipes.
Turning Off The Main Water
Locate the main water valve for your home. This is usually near the water meter or where the water line enters your house. Turn the valve clockwise to shut off the water supply. Check faucets to confirm no water is flowing. This step protects your home from flooding during the installation.
Cutting Into The Main Line
Measure and mark the spot where the irrigation system will connect to the main line. Use a pipe cutter or saw designed for your pipe type. Cut carefully to avoid jagged edges or cracks. Remove any burrs with a file or sandpaper. Clear the area of debris before fitting new parts.
Installing Tee Fittings
Select a tee fitting that matches your pipe size and material. Apply plumber’s tape to threaded ends for a tight seal. Insert the tee fitting into the cut section of the main line. Secure it with clamps or couplings as needed. Check all connections to ensure they are tight and leak-free.
Laying Pipes And Connecting Valves
Laying pipes and connecting valves form the backbone of your automatic irrigation system. This step delivers water efficiently to every part of your garden. Proper installation ensures long-lasting performance and prevents leaks. Use the right materials and tools for a smooth setup.
Running Pvc And Flexible Pipes
Start by digging shallow trenches along your planned irrigation route. Use PVC pipes for main water lines due to their durability. Flexible pipes work well for bends and tight spaces. Cut pipes to fit, making sure ends are clean and smooth. Lay pipes in trenches without sharp bends to maintain water flow. Cover pipes with soil once all connections are secure.
Attaching Valves To Main Line
Valves control water flow to different garden zones. Attach valves directly to the main PVC line using tees or adapters. Ensure valves are positioned above ground for easy access. Tighten connections to avoid leaks but avoid overtightening. Test each valve by turning water on and off. Label valves to identify garden areas they serve.
Using Push Fittings
Push fittings simplify pipe connections without glue or tools. Insert pipe ends firmly into the fitting until they click. They create a watertight seal and allow quick changes if needed. Use push fittings for flexible pipes and small PVC sections. Check all fittings for tightness before burying pipes. Push fittings save time and reduce installation errors.
Credit: www.twinoakslandscape.biz
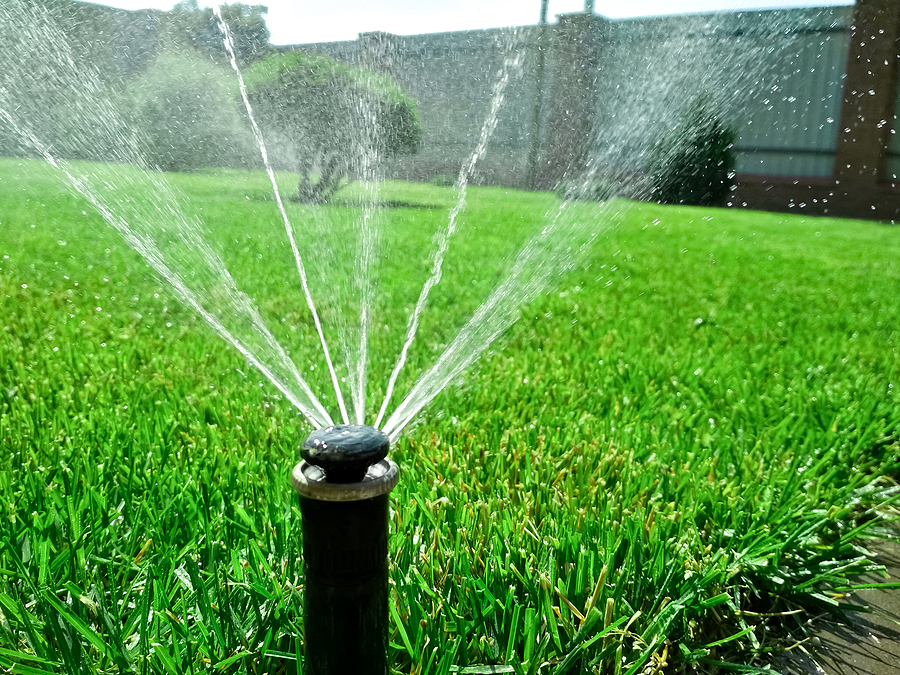
Setting Up Sprinkler Heads
Setting up sprinkler heads is a vital step in installing an automatic irrigation system. Proper placement and installation ensure your garden receives the right amount of water. This helps plants grow healthy and saves water by avoiding waste. Understanding the types of sprinkler heads and how to position them will make your system effective and efficient.
Positioning And Installing Heads
Start by marking where each sprinkler head will go. Space them evenly to cover all garden areas. Avoid placing heads too close to walls or fences to prevent water loss. Dig small holes for the heads and connect them to the pipes. Make sure each head is flush with the soil surface. Test the system to check the water flow and adjust the heads if needed.
Choosing Between Pop-up And Rotary
Pop-up heads rise from the ground when watering and hide when off. They suit lawns and flat areas well. Rotary heads spray water in a circle or part-circle pattern. They work best for larger gardens or uneven terrain. Pick the type that fits your garden layout and plant needs. Using the right head type improves water use and garden health.
Ensuring Even Water Coverage
Place heads so their spray patterns overlap slightly. This overlap avoids dry spots and helps spread water evenly. Adjust the spray distance and angle for full coverage. Use heads with adjustable nozzles to fine-tune water flow. Check the system regularly to fix any uneven watering. Even coverage keeps your garden lush and green without wasting water.
Wiring And Programming The Controller
Wiring and programming the controller is a critical step in setting up your automatic irrigation system. This process ensures your garden receives the right amount of water at the right time. Proper wiring connects the controller to the valves, which control water flow to different zones. Programming the controller sets the watering schedules and durations. Modern systems often include app-based controls, making management easier and more flexible.
Running Wires To Valves
Start by running wires from the controller to each valve in your garden. Use waterproof wire connectors for safety and durability. Keep wires neat and secure by burying them underground or using clips. Label each wire clearly to match its valve zone. This helps during future maintenance or troubleshooting. Avoid sharp bends in wires to prevent damage.
Programming Watering Cycles
Set your watering schedules based on your garden’s needs and climate. Program the controller with start times and run durations for each zone. Use short watering cycles to prevent water runoff and encourage deep root growth. Adjust the frequency depending on the season or rainfall. Save your settings and test the system to ensure valves open and close correctly.
Using App-based Controls
Many controllers offer app-based control for remote management. Download the app and connect it to your irrigation system via Wi-Fi. Use the app to monitor watering schedules and make changes instantly. Some apps provide weather updates to adjust watering automatically. This feature helps save water and keeps your garden healthy.
Testing And Finalizing Installation
Testing and finalizing your automatic irrigation system is the last important step. This stage ensures your garden gets water efficiently without wasting any. Careful checks help find any problems before covering the pipes and sprinklers. Take your time to confirm everything works as planned. Proper testing saves water and protects your garden plants.
Checking For Leaks
Turn on the water supply to the system. Watch all pipes and connections closely. Look for water dripping or spraying outside the intended areas. Even small leaks can waste water and reduce pressure. Tighten fittings or replace damaged parts if you find leaks. Repeat the process until no leaks appear. Leaks can also cause soil erosion or damage nearby structures.
Adjusting Sprinkler Angles
Switch on each sprinkler zone one at a time. Observe the water coverage carefully. Aim the sprinklers so water reaches all plants evenly. Avoid watering sidewalks, driveways, or buildings. Adjust the spray distance and angle as needed. Proper adjustment prevents water waste and keeps your garden healthy. Test during different times to check for wind impact.
Backfilling Trenches
After confirming no leaks and proper spray, it is time to cover the trenches. Gently fill the trenches with soil, making sure not to damage pipes or sprinkler heads. Compact the soil lightly to prevent sinking later. Leave sprinkler heads slightly above ground for easy access. Check again for leaks after backfilling. Proper backfilling protects your system and keeps your garden neat.
Tips For Long-term Success
Ensuring your automatic irrigation system works well for years requires smart care. Simple steps help avoid common issues. These tips keep your garden healthy and your system efficient. Follow these strategies to protect your investment and save water.
Planning For Future Expansion
Think about your garden’s growth before installing the system. Leave space for adding more sprinklers or drip lines. Use valves that allow easy connection of new zones. This saves time and money later. Planning ahead prevents digging up your lawn again.
Using Cycle And Soak Method
Water your plants in short cycles with breaks in between. This helps soil absorb water deeply. It reduces runoff and waste. Especially useful on slopes or compacted soil. Set your timer for multiple short watering sessions instead of one long one.
Maintaining System Components
Check pipes, valves, and sprinkler heads regularly. Clean filters and remove debris to avoid clogs. Replace worn parts as soon as possible. Winterize the system before cold weather to prevent damage. Proper upkeep extends system life and ensures even watering.
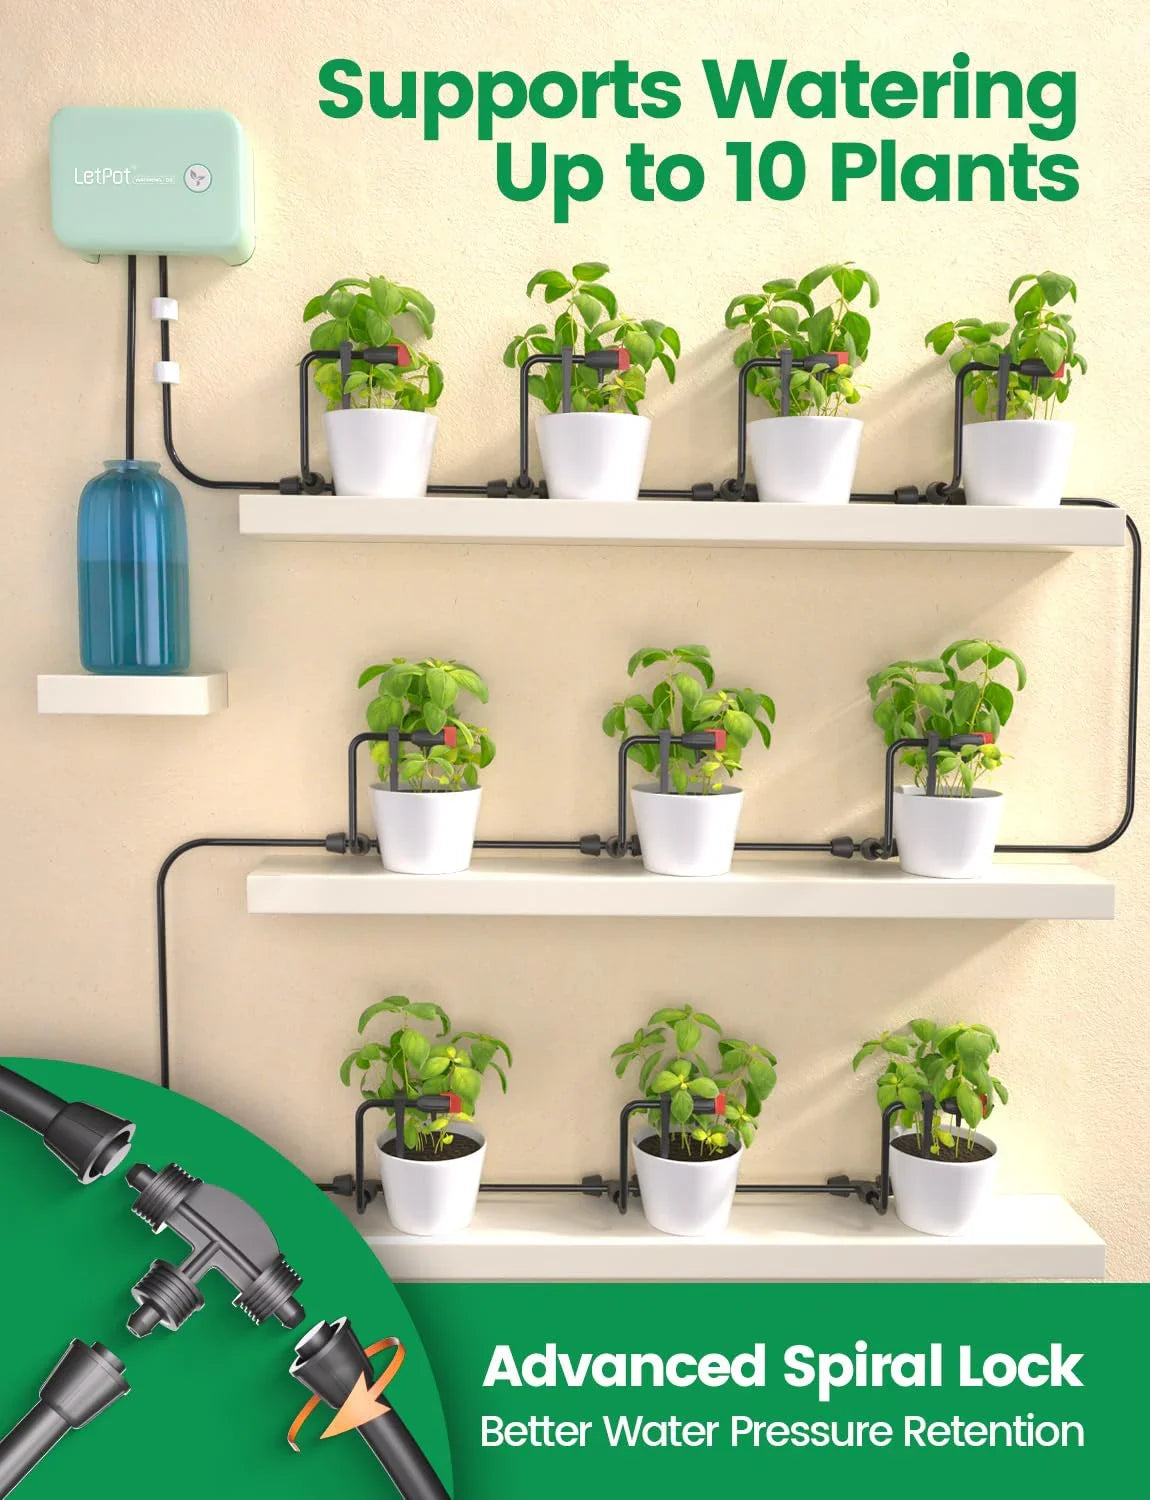
Credit: letpot.com
Frequently Asked Questions
How To Install An Automatic Irrigation System For A Garden?
Map your garden layout and check local water regulations. Gather pipes, sprinkler heads, valves, and a controller. Dig trenches, lay pipes, and connect to the water supply. Install sprinkler heads and wire the controller. Test the system for leaks, program the timer, then backfill trenches.
What Is The 30/30 Rule For Irrigation?
The 30/30 rule for irrigation means watering for 30 minutes, then waiting 30 minutes before watering again. This prevents runoff and promotes deep soil absorption.
Can I Install An Irrigation System Myself?
Yes, you can install an irrigation system yourself. It requires planning, digging, and following local codes. Using flexible pipes and smart controllers simplifies the process. Ensure to map your yard, gather materials, connect to water, install components, test for leaks, and program the controller for efficient watering.
How To Build An Automatic Irrigation System For Your Garden?
Plan your garden layout and water needs. Gather pipes, valves, sprinkler heads, and a controller. Dig trenches and lay pipes. Connect to the water supply and install sprinklers. Program the controller for automatic watering. Test the system and fix leaks.
Use smart controllers for easy management.
Conclusion
Installing an automatic irrigation system saves you time and water. It keeps your garden healthy and green all year. Planning your layout carefully ensures even watering everywhere. Use quality materials and follow local rules for safety. Test the system well to find and fix leaks.
Regular checks help your system work smoothly for years. With patience and care, your garden will thrive effortlessly.