
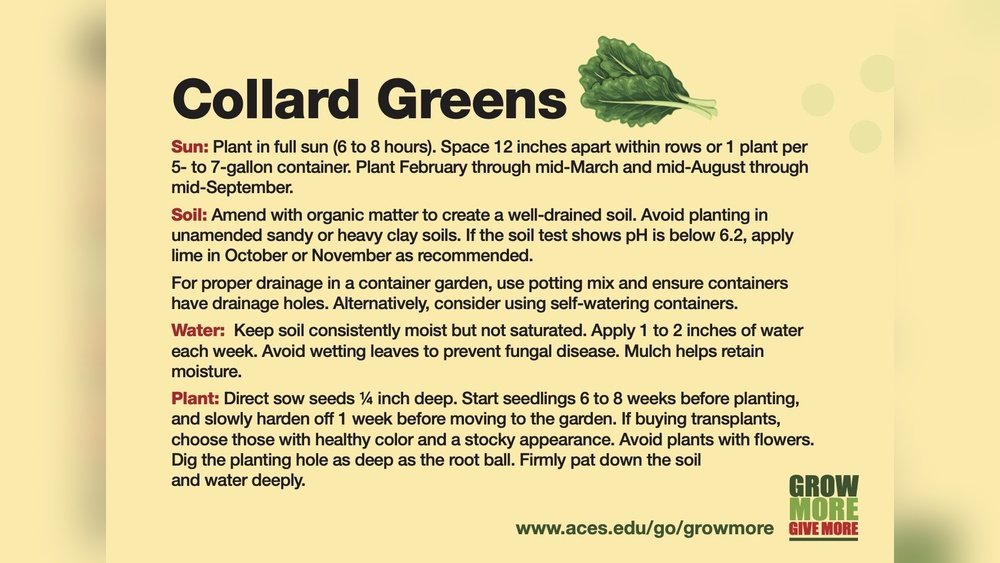
Growing your own collard greens from seed is rewarding. These leafy vegetables are tough, nutritious, and loved by gardeners for their long harvest season and resilience in cooler weather. Whether you’re aiming for big harvests or just a few leaves for a healthy meal, starting with seed puts you in full control.
You’ll know exactly what’s gone into your soil, your plants, and your food. Many people are surprised at how simple the process can be, but there are some details and strategies that make all the difference.
If you’re new to growing collard greens, this guide will show you each step in clear, plain English. We’ll cover seed selection, soil preparation, sowing, caring for your plants, handling pests, and harvesting. Along the way, you’ll learn practical tips and common mistakes to avoid.
You’ll also find answers to the questions that most beginners never think to ask until it’s too late.
Let’s dig into the journey from tiny seed to big, healthy leaves you can be proud of.
Why Grow Collard Greens From Seed?
Collard greens, sometimes called Brassica oleracea (Acephala Group), are a staple in Southern cooking and healthy diets. Growing from seed offers benefits you simply don’t get when you buy seedlings or mature plants at a nursery.
First, you’ll have more variety. Seed catalogs and online stores offer dozens of collard types, from classic ‘Georgia Southern’ to heirlooms like ‘Morris Heading’ and ‘Vates’. This lets you choose for taste, leaf size, or heat tolerance.
Second, growing from seed is less expensive. For the cost of a single nursery plant, you can often buy a packet containing hundreds of seeds. This means more plants for less money, and the freedom to re-sow if something goes wrong.
Third, your plants are adapted to your garden from day one. Seeds sown directly or started indoors experience your own soil, water, and weather, which makes them tougher and less likely to bolt or fail in the heat or cold.
Lastly, starting from seed means you avoid possible pests or diseases sometimes hidden in store-bought transplants.
Choosing The Right Collard Green Varieties
Picking the best variety for your climate, taste, and harvest goals is the first key decision.
| Variety Name | Days to Maturity | Leaf Type | Key Features |
|---|---|---|---|
| Georgia Southern | 75-85 | Large, crinkled | Classic flavor, heat tolerant |
| Vates | 60-80 | Smooth, tender | Slow to bolt, compact |
| Morris Heading | 75 | Loose heads | Sweet taste, good for small spaces |
| Champion | 70-80 | Broad, blue-green | Cold hardy, disease resistant |
| Flash | 55-60 | Smooth | Fast growing, good for early harvests |
Non-obvious tip: Some varieties are bred for heat tolerance (‘Tiger’, ‘Top Bunch’), while others excel in cold (‘Champion’, ‘Vates’). If your summers are hot, look for heat-tolerant types to avoid bitterness and bolting.
If you’re experimenting, plant two or three varieties side by side. This not only increases the chance of success but also helps you discover which type you and your soil prefer.

Credit: sowrightseeds.com
When To Plant Collard Greens
Collard greens are cool-weather crops. They do best with temperatures between 55°F and 75°F (13°C to 24°C). However, they can survive light frosts and even taste sweeter after a chill.
You have two main planting windows:
- Spring Planting: Start seeds indoors 4 to 6 weeks before your last expected frost. Or, sow seeds outdoors 2 to 4 weeks before the last frost date.
- Fall Planting: Sow seeds outdoors in late summer, about 6 to 8 weeks before the first expected fall frost.
If you live in a mild-winter area (USDA Zones 8-10), you can plant in fall for harvests all winter.
Timing Table
| Climate Zone | Spring Sowing | Fall Sowing |
|---|---|---|
Cool (| March–April |
July–August |
|
| Warm (Zone 7–8) | February–March | August–September |
| Hot (Zone 9+) | January–February | September–October |
Insider advice: Fall-grown collards often taste sweeter and are less likely to be attacked by pests like cabbage worms, which are more active in spring.
Preparing Your Planting Site
Collard greens grow best in full sun (at least 6 hours a day) but can tolerate partial shade, especially in hot climates. They need fertile, well-drained soil with a slightly acidic to neutral pH (6.0–7.0).
Steps For Soil Preparation
- Clear the area of weeds, rocks, and debris.
- Loosen soil to a depth of 12–15 inches using a shovel or garden fork.
- Mix in compost or well-rotted manure (2–4 inches thick) to boost fertility and drainage.
- Test your soil’s pH using a kit. Add garden lime if your soil is too acidic, or sulfur if it’s too alkaline.
- Add a balanced fertilizer (10-10-10 or similar) if your soil is poor. Follow label rates.
Non-obvious insight: Collards are heavy feeders. If you’ve grown broccoli or cabbage in the same spot the previous year, rotate locations to avoid soil diseases and nutrient depletion.
How To Start Collard Greens From Seed
You can start seeds indoors or sow them directly outdoors. Each method has advantages.
Starting Seeds Indoors
Why start inside? Early sowing indoors gives you a head start, especially in areas with late frosts or short growing seasons.
Steps:
- Fill seed trays or small pots with sterile seed-starting mix.
- Sow seeds ¼ to ½ inch deep, about 1 inch apart.
- Water gently to moisten the soil but avoid soggy conditions.
- Place trays in a warm spot (65–75°F). Use a heating mat if needed.
- Keep the soil evenly moist.
- When seedlings have 2–3 true leaves, thin to one per cell or pot.
Seedlings are ready to transplant outdoors when they have 4–5 true leaves and all danger of frost has passed.
Pro tip: Expose seedlings to outdoor conditions gradually (a process called “hardening off”) by placing them outside for a few hours each day for a week before transplanting.
Sowing Seeds Directly Outdoors
Direct sowing is simple and works well in most gardens.
Steps:
- Mark rows 18–24 inches apart.
- Sow seeds ¼ to ½ inch deep, spacing them 2–4 inches apart in the row.
- Cover lightly with soil and water gently.
- Keep soil moist until seedlings emerge (5–10 days, depending on temperature).
- Once plants are 2–3 inches tall, thin to 12–18 inches apart.
Common mistake: Crowding seedlings. Collards need space for large leaves and airflow. Overcrowding invites disease and stunted growth.
Transplanting Collard Seedlings
If you started seeds indoors or bought young plants, transplanting is the next step.
- Prepare holes spaced 12–18 inches apart in rows 18–24 inches apart.
- Water seedlings well before transplanting.
- Plant seedlings at the same depth they grew in pots.
- Firm the soil gently around each plant.
- Water immediately after planting.
Extra tip: Mulch around the base with straw or compost to conserve moisture and suppress weeds.
Caring For Collard Greens
Once your collards are in the ground, regular care ensures strong, healthy growth.
Watering
Collard greens need consistent moisture. Aim for 1–1.5 inches of water per week, either from rain or irrigation. Water at the base to avoid wetting leaves, which can lead to disease.
During hot spells or dry periods, water more often but avoid waterlogging the soil.
Fertilizing
Collards are heavy feeders. Feed with a balanced fertilizer (10-10-10) every 3–4 weeks, or side-dress with compost or well-rotted manure. Too little nutrition results in pale, stunted plants.
Insider tip: A light application of high-nitrogen fertilizer (like blood meal) can boost leaf production, but avoid excess, which can make leaves taste bitter.
Mulching
A 2–3 inch layer of organic mulch (straw, wood chips, or leaves) helps retain moisture, suppress weeds, and regulate soil temperature. Keep mulch 1–2 inches away from stems to prevent rot.
Thinning And Spacing
If you sowed seeds thickly, thin seedlings to the recommended spacing (12–18 inches). Use thinned plants in salads or as microgreens.
Weeding
Weeds compete with collards for nutrients and water. Hand-pull weeds regularly, especially when plants are small. Mulching reduces the need for constant weeding.
Staking (optional)
In windy locations or with top-heavy varieties, gentle staking helps prevent wind damage.
Common Pests And Diseases
Collards are tough, but they’re not immune to problems. Knowing what to watch for makes it easier to stop issues early.
Pests
- Cabbage Worms and Loopers: Green caterpillars that chew holes in leaves. Check leaf undersides regularly.
- Aphids: Tiny, sap-sucking insects that cluster on new growth.
- Flea Beetles: Small, jumping beetles that cause tiny “shot hole” damage.
- Slugs and Snails: Munch on leaves, especially in damp weather.
Organic Pest Control
- Hand-pick caterpillars and destroy them.
- Spray with neem oil or insecticidal soap for aphids.
- Use row covers to keep insects off young plants.
- Encourage beneficial insects like ladybugs and lacewings.
Diseases
Collards can be affected by:
- Downy mildew (yellow spots, fuzzy growth under leaves)
- Black rot (yellow V-shaped lesions)
- Clubroot (swollen, deformed roots)
Prevention: Rotate crops each year, avoid overhead watering, and space plants for good airflow. Remove and destroy infected plants promptly.
Little-known insight: Collards are less prone to clubroot than other brassicas but can still suffer if soil stays wet and acidic. Liming acidic soils helps reduce risk.
Harvesting Collard Greens
Knowing when and how to harvest is vital for the best taste and yield.
When To Harvest
Collard greens are ready about 60 to 85 days after sowing, depending on variety and weather. You can start picking leaves when they reach 6–10 inches long.
Younger leaves are more tender and mild. Older, larger leaves are tougher but ideal for slow-cooked dishes.
How To Harvest
- Pick outer leaves first, leaving the central growing point intact. This allows the plant to keep producing.
- Harvest regularly to encourage new growth.
- Use clean scissors or snap leaves off by hand.
If a hard freeze is predicted, harvest most leaves to avoid damage. Plants can survive light frost but may not recover from deep freezes.
Storage
Fresh leaves keep in the refrigerator for 5–7 days. For longer storage, blanch and freeze collard greens.
Tip: Don’t wash leaves until ready to use—moisture speeds spoilage.
Saving Collard Green Seeds
If you want to produce your own seeds, let a few healthy plants grow through winter (collards are biennials). In the second spring, they’ll flower and set seed pods. Let pods dry on the plant, then collect and store seeds in a cool, dry place.
Important: Collards can cross-pollinate with other brassicas (like cabbage or kale), so keep different types separate if you want pure seed.

Credit: www.youtube.com
Collard Greens In Containers
Short on space? Collard greens do well in large pots, barrels, or raised beds.
Container Growing Tips
- Use pots at least 12–18 inches wide and deep.
- Fill with rich, well-draining potting mix.
- Water regularly, as containers dry out faster than garden beds.
- Fertilize every 2–3 weeks.
- Stake or support tall plants as needed.
Surprising fact: Container collards often experience fewer pest problems, especially if grown on a balcony or patio.
Troubleshooting Common Problems
Even experienced gardeners sometimes run into issues. Here’s how to recognize and fix the most frequent problems.
| Problem | Symptoms | Solution |
|---|---|---|
| Yellow Leaves | Oldest leaves turn yellow, stunted growth | Feed with a balanced fertilizer; check for root rot |
| Bolting | Sudden flower stalk, bitter leaves | Plant earlier or choose bolt-resistant varieties |
| Holes in Leaves | Chewed spots, frass (caterpillar poop) | Inspect and remove caterpillars; use row covers |
| Wilting | Plants limp despite moist soil | Check for root pests; avoid overwatering |
| Stunted Growth | Small leaves, poor harvest | Improve soil fertility; thin seedlings for space |
Non-obvious troubleshooting tip: Collards can “sulk” and stop growing after transplanting due to root shock. Keep them well-watered and avoid disturbing roots.
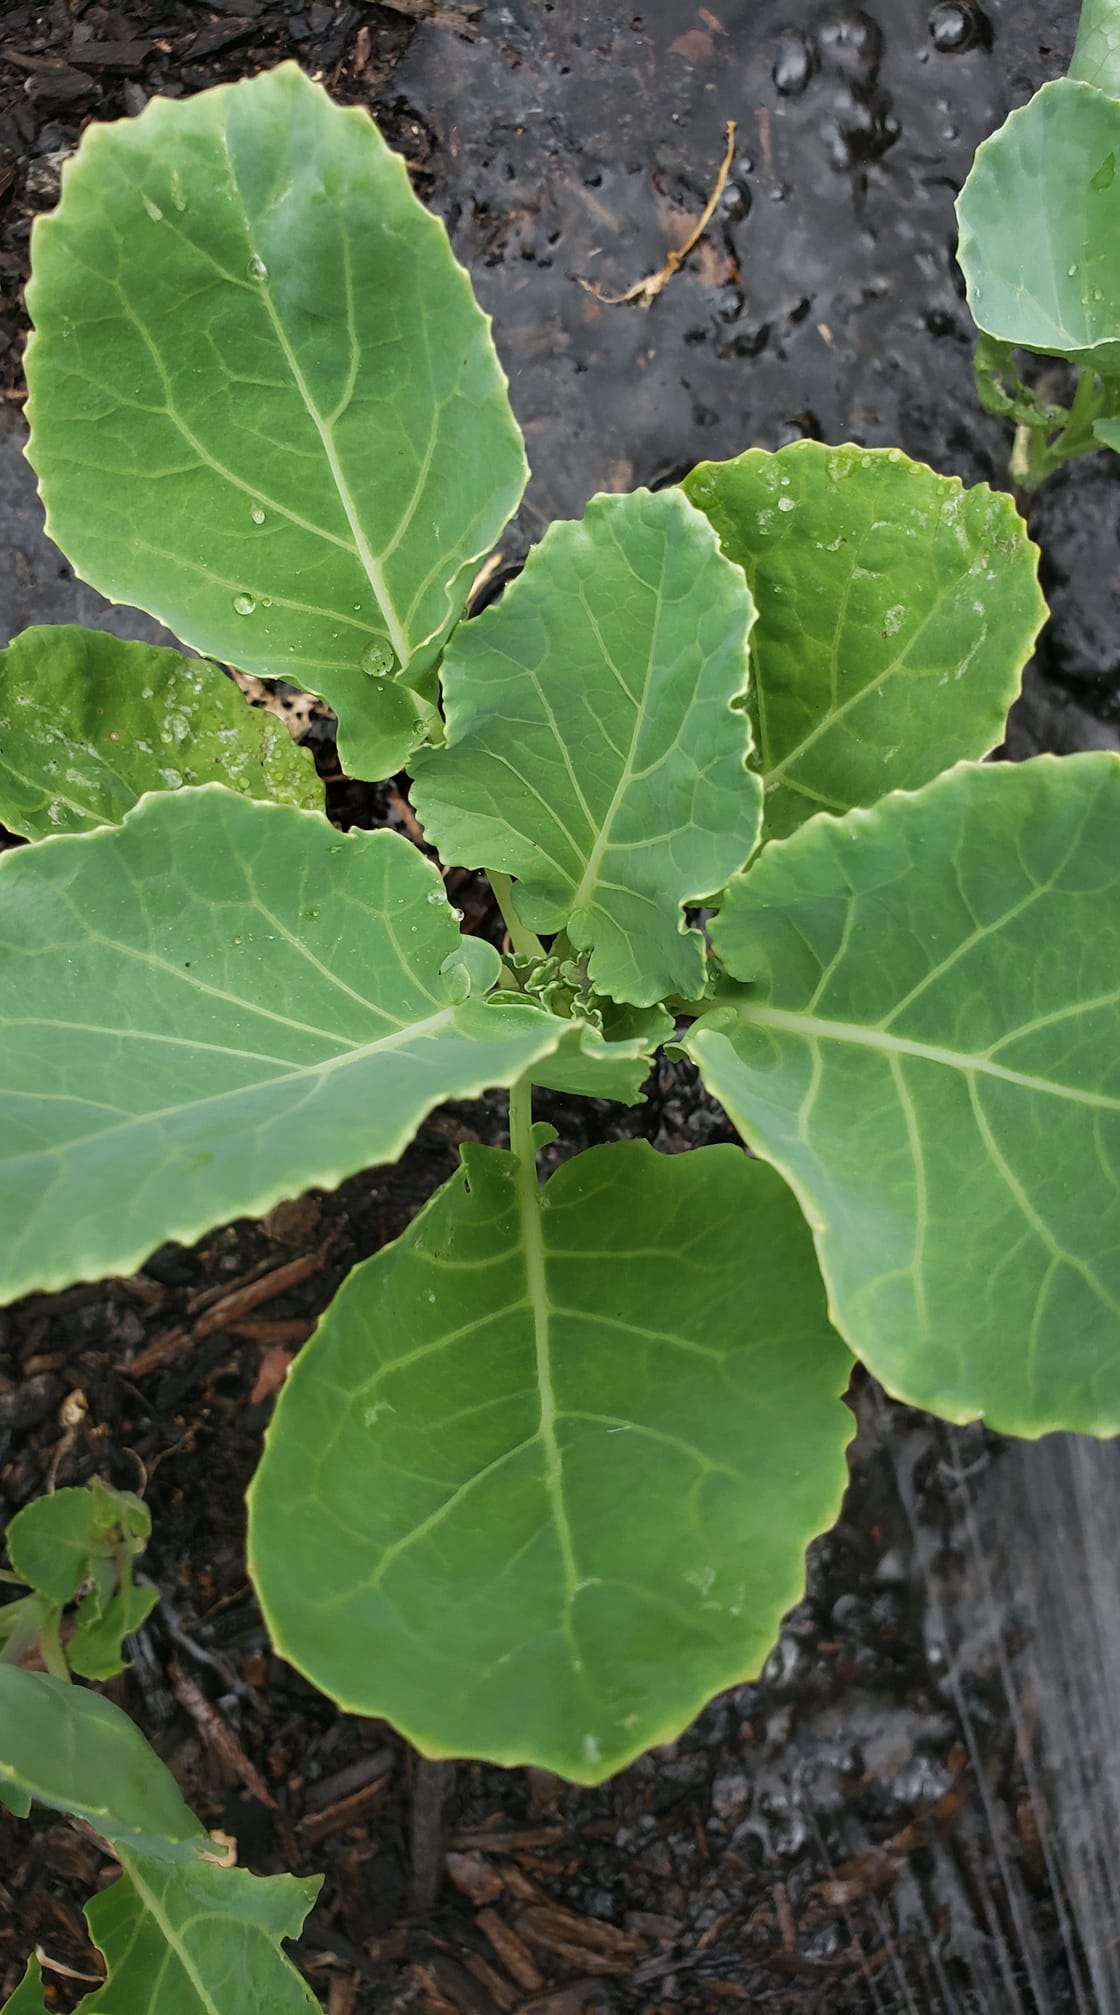
Credit: www.marysheirloomseeds.com
Companion Planting With Collard Greens
Collard greens benefit from being planted with certain other crops that help deter pests and boost growth.
Good Companions
- Onions and garlic: Their smell repels aphids and some beetles.
- Marigolds: Help deter nematodes and attract beneficial insects.
- Herbs like dill and mint: Distract pests and encourage pollinators.
What To Avoid
Don’t plant collards with other brassicas (cabbage, broccoli, kale) in the same spot year after year. This increases risk of soil-borne diseases and pest buildup.
Maximizing Your Collard Greens Harvest
Want more greens from the same space? Here are a few advanced tips:
- Succession sowing: Plant small batches every 2–3 weeks for a longer harvest window.
- Interplanting: Grow fast crops like radishes or lettuce between young collard plants; harvest them before collards get big.
- Cut-and-come-again: Instead of harvesting whole plants, pick leaves as needed to keep plants producing.
Advanced insight: In climates with mild winters, leave mature plants in the ground. They’ll often survive and re-grow for a second spring harvest.
Cooking And Nutrition
Collard greens are packed with vitamins A, C, K, and calcium. They’re famous in Southern cooking but fit into stir-fries, soups, wraps, and salads.
Raw collard leaves are sturdy enough for wraps. Young, tender leaves can be chopped for salads. Most often, collards are braised or sautéed to soften their texture and flavor.
Nutritional data per 100g cooked collard greens:
- Calories: 32
- Protein: 3g
- Fiber: 4g
- Vitamin K: 388% daily value
- Calcium: 23% daily value
Hidden benefit: Collards are among the few leafy greens that don’t lose much nutritional value when cooked.
The Environmental Benefits Of Growing Collards
Growing your own collard greens is good for you and the planet.
- Reduced food miles: Homegrown greens don’t need trucking or packaging.
- Less pesticide use: Gardeners use fewer chemicals than large farms.
- Soil health: Rotating collards with legumes or cover crops improves your garden’s long-term fertility.
Extra insight: Because collards are perennial in mild climates, a single planting can feed you for years with minimal effort.
Frequently Asked Questions
How Long Do Collard Greens Take To Grow From Seed?
Most varieties take 60 to 85 days from sowing to first harvest, depending on variety and weather. You can start picking baby leaves much sooner, around 30–40 days.
Can I Grow Collard Greens In Hot Climates?
Yes, but choose heat-tolerant varieties like ‘Top Bunch’ or ‘Tiger’. Provide partial shade and water more often. Collards may taste stronger in hot weather, but regular watering and mulching help keep leaves tender.
Why Are My Collard Leaves Bitter?
Bitterness usually comes from heat stress, drought, or over-mature leaves. Plant in cooler months, water consistently, and harvest young leaves for the mildest flavor.
How Do I Prevent Holes In My Collard Leaves?
Check for cabbage worms, loopers, and flea beetles. Use row covers, hand-pick pests, and encourage beneficial insects. Neem oil or insecticidal soap can help with severe infestations.
Where Can I Find More Information On Growing Collard Greens?
For more details and research-backed advice, visit the University of Georgia Extension.
—
Growing collard greens from seed is both simple and satisfying. With good soil, careful timing, and a little patience, you’ll enjoy harvest after harvest of fresh, healthy leaves. Whether in a garden bed, raised planter, or container, collards reward the gardener with resilience and nutrition.
Use the tips above to avoid common mistakes, and soon you’ll be enjoying the taste and pride of collards you grew yourself.