
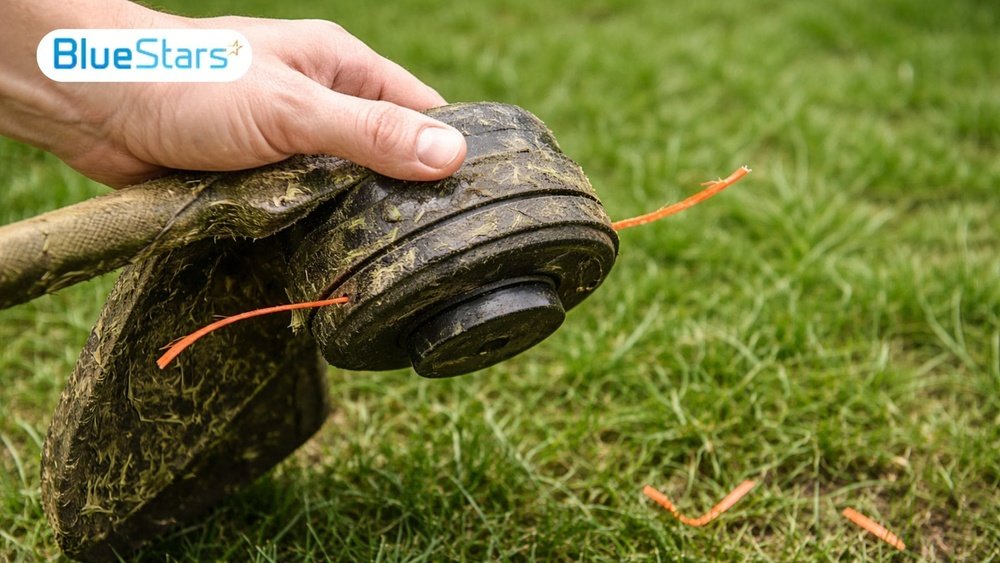
A string trimmer—also called a weed eater, weed whacker, or line trimmer—is a must-have for anyone who wants a tidy yard. But even the best trimmer will frustrate you when the trimmer line jams. This is one of the most common problems for both beginners and experienced gardeners. A jammed line wastes time, causes uneven trimming, and can even damage your equipment. Luckily, most line jams are easy to fix and prevent if you know what to look for.
If you’re tired of stopping every few minutes to untangle your trimmer line, you’re in the right place. In this guide, you’ll learn why string trimmer lines jam, how to fix them step by step, what tools you need, and the best ways to prevent future jams. You’ll also find answers to the most common questions about line jams, along with tables comparing different trimmer head types and line materials. Whether you use a gas, electric, or battery-powered trimmer, these tips will help you get back to smooth, fast yard work.
Why Does String Trimmer Line Jam?
Before you learn how to fix a jam, it helps to know why it happens. Most jams are caused by a few basic issues:
- Improper winding: If the line isn’t wound tightly or evenly on the spool, it can tangle and stick.
- Wrong line size or type: Using the wrong diameter or a low-quality line can cause feeding problems.
- Overfilled spool: Too much line makes it harder for the head to spin and feed the line smoothly.
- Dirty or damaged trimmer head: Dirt, debris, or worn parts inside the head can block the line.
- Old or brittle line: Line that’s been stored in sunlight or moisture often becomes stiff and breaks easily.
- Incorrect installation: Not following the trimmer’s instructions for loading new line often leads to jams.
Some people think jams only happen with cheap trimmers, but even top brands like Stihl, Husqvarna, Echo, and Black+Decker can jam if not used or maintained correctly.
Signs Of A Jammed String Trimmer Line
A jam isn’t always obvious. Here are some signs your trimmer line is jammed:
- The trimmer head spins, but no line comes out.
- The line is too short and doesn’t advance when you tap or bump the head.
- You hear a rattling or grinding sound from the trimmer head.
- The motor seems to strain or slow down.
- You see pieces of broken line inside the spool.
If you notice these problems, it’s time to stop and check for a jam before you damage your trimmer.
Essential Tools And Materials For Fixing Trimmer Line Jams
Fixing a jammed trimmer line usually doesn’t require special tools, but having the right items on hand will make the job easier and safer.
- Safety gloves: Protect your hands from sharp line ends and debris.
- Safety glasses: Prevent dust or line fragments from getting in your eyes.
- Small screwdriver: Useful for opening some trimmer heads or clearing debris.
- Needle-nose pliers: Helps grab or pull out stuck line.
- Clean cloth: Wipe away dirt or grass from the head.
- Replacement trimmer line: Have the correct size and type for your model.
- User manual: Always check your trimmer’s instructions for specific steps.
Having these items ready before you start will help you fix jams quickly and safely.
Step-by-step: How To Fix A Jammed String Trimmer Line
Let’s walk through the process to fix a jammed line. The steps are similar for most brands and models, but always check your manual if you’re unsure.
1. Turn Off And Unplug The Trimmer
Safety first. For electric or battery trimmers, unplug or remove the battery. For gas trimmers, turn off the engine and let it cool. Never work on the head while the trimmer is running or plugged in.
2. Remove The Trimmer Head Cover
Most trimmer heads have a cap or cover that holds the spool inside. This usually twists off or unclips. If it’s stuck, use a small screwdriver to gently pry it open.
3. Take Out The Spool
Gently pull the spool out of the head. Be careful, as some lines may spring out or tangle when released.
4. Inspect For Jams And Tangles
Look for knots, tangles, or broken pieces of line. Remove any debris, grass, or dirt from the inside of the head. If the line is knotted, use pliers to untangle or pull it free.
5. Rewind Or Replace The Line
If the line is still long enough and in good shape, rewind it neatly and tightly onto the spool. Follow the arrows or guides on the spool for the correct direction. If the line is damaged or too short, remove it completely and install a new piece.
Pro tip: Leave about 6 inches of line sticking out of each hole in the spool, so it’s easy to thread through the eyelets in the head.
6. Clean The Trimmer Head
Wipe inside the head and around the spool with a clean, dry cloth. Make sure no dirt or debris is left, as this can cause future jams.
7. Reassemble The Trimmer Head
Put the spool back into the head, making sure the line feeds through the eyelets or holes. Replace the cover or cap, locking it in place.
8. Test The Line Feed
Turn the trimmer on (or reconnect the battery/power). Tap or bump the head (for bump-feed models) to test if the line advances smoothly. If it works, you’re ready to trim again.
If the jam returns quickly, double-check the line size, winding direction, and spool capacity. If you have a fixed-line head, make sure each piece is the correct length.
Credit: www.homedepot.com
Common Mistakes When Fixing String Trimmer Jams
Even experienced users make mistakes that cause new jams. Here are some things to avoid:
- Overfilling the spool: More line isn’t better. Too much line makes it stick and jam.
- Using the wrong line diameter: If the line is too thick, it won’t feed. If it’s too thin, it breaks easily.
- Not winding the line tightly: Loose coils tangle faster.
- Ignoring the winding direction: Most spools have arrows. If you wind the wrong way, the line won’t feed.
- Forgetting to clean the head: Dirt and grass inside the head act like glue and block the line.
- Mixing old and new line: Different types or ages of line can tangle more easily.
Take your time and follow the correct steps. A few minutes now will save you a lot of hassle later.
Preventing String Trimmer Line Jams: Pro Tips
Fixing a jam is good, but preventing one is even better. Here are proven ways to avoid most line jams:
Choose The Right Line
Always use the correct diameter and type of line for your trimmer. This information is usually in your manual or printed on the trimmer head. For most home trimmers, .065″ to .095″ line is common. Heavy-duty jobs may need thicker line.
Store Line Properly
Line that sits in the sun or gets wet can become stiff or brittle. Store your replacement line in a cool, dry place. Some professionals soak new line in water for 24 hours before installing, which keeps it flexible and reduces breakage.
Wind The Line Carefully
Take your time when winding line onto the spool. Keep the coils tight and even, and don’t cross the lines over each other. Leave about 6 inches free on each end.
Clean The Trimmer Head Often
After each use, tap the head to clear out grass and dirt. Wipe the inside with a cloth before reloading new line. This simple habit prevents most jams.
Replace Worn Parts
If the spool, eyelets, or cap are cracked or worn, replace them. Damaged parts snag the line and cause jams.
Use The Trimmer Correctly
Don’t force the trimmer into thick weeds or brush. Let the line do the cutting. Forcing or overloading the trimmer bends or snaps the line, increasing the chance of a jam.
Avoid Overheating
Continuous use can heat up the trimmer head and melt the line together. Take short breaks during heavy use.
Types Of String Trimmer Heads And Jam Risk
Not all trimmer heads are the same. Some are more likely to jam than others. Here’s a comparison of common trimmer head types and their risk of line jamming:
| Trimmer Head Type | Jam Risk | Line Loading Method | Common Brands |
|---|---|---|---|
| Bump Feed | Medium | Wound spool, line feeds by tapping head | Echo, Husqvarna, Troy-Bilt |
| Automatic Feed | Low to Medium | Line feeds automatically as needed | Black+Decker, Greenworks |
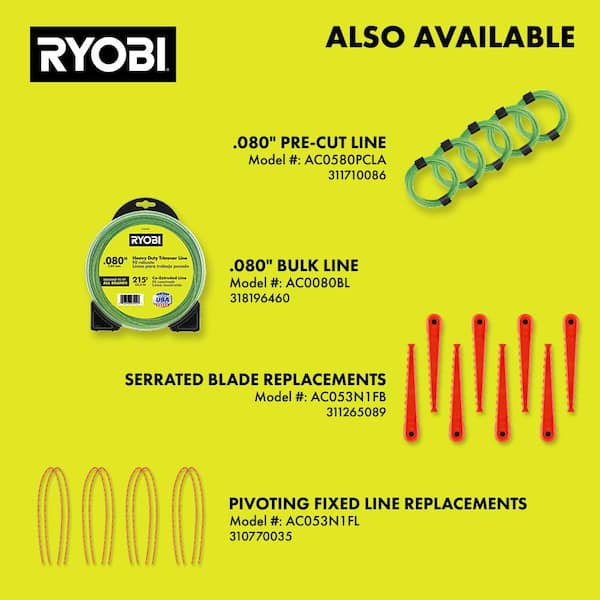
| Fixed Line | Low | Pre-cut lines inserted into head | Stihl, Ryobi |
| Manual Feed | High | Line pulled out by hand | Old models, budget brands |
Bump feed heads are the most common and easy to use but tend to jam if not wound well. Automatic feed heads are convenient but sometimes feed too much or too little line. Fixed line heads rarely jam but require pre-cut lines. Manual feed heads are outdated and more likely to jam.
Choosing The Right String Trimmer Line To Prevent Jams
The type and thickness of line you choose make a big difference. Here’s how different trimmer line materials compare:
| Line Material | Durability | Jam Risk | Best For |
|---|---|---|---|
| Nylon | Good | Medium | Standard grass trimming |
| Copolymer | Very good | Low | Thick weeds, edging |
| Twisted/Serrated | Excellent | Very low | Heavy-duty, commercial use |
| Square/Star Shaped | Good | Medium | Clean cuts, less noise |
Non-obvious tip: Twisted and serrated lines not only cut better but are less likely to fuse together in the spool, reducing jams. Copolymer lines are more flexible and last longer, which means fewer reloads and fewer chances for mistakes.
Credit: seacoastpower.com
Advanced Fixes For Persistent Trimmer Line Jams
If you follow all the basic steps and still get jams, you may need to try some advanced fixes:
Check For Damaged Spool Or Eyelets
A cracked spool or worn eyelets (the holes where the line exits the head) can snag the line. Replace any damaged parts right away.
Lubricate The Spool
Some experts use a tiny amount of dry silicone spray on the spool and inside the head. This helps the line slide smoothly and prevents sticking. Never use oil-based lubricants, as they attract dirt and grass.
Upgrade To A Better Head
If your trimmer head jams often, consider replacing it with an upgraded model. Some universal heads are designed to reduce jams and make loading easier.
Switch To Pre-wound Spools
Many brands sell pre-wound replacement spools. These are tightly and evenly wound by machine, reducing the chance of tangles or knots.
Inspect The Driveshaft
If you notice vibration, abnormal noises, or repeated jams, the problem may be deeper inside the trimmer. A bent or damaged driveshaft can twist the spool and jam the line. In this case, take your trimmer to a professional repair shop.
String Trimmer Line Jam: Real-world Examples
Let’s look at two real situations:
- Case 1: Bump Feed Jam
Maria, a homeowner, used her string trimmer for edging. Suddenly, the line stopped feeding. She opened the head and found the line was wound unevenly and had fused together because of heat. Maria rewound the line neatly, used a better quality twisted line, and the problem was solved.
- Case 2: Automatic Feed Trouble
John bought a new electric trimmer with automatic feed. It kept feeding out too much line and jamming. He checked the manual and realized he’d used a line that was too thick. After switching to the recommended size, his trimmer ran smoothly.
These examples show that most jams come from small mistakes, not faulty equipment.

Credit: www.amazon.com
Key Maintenance Tips To Keep Your Trimmer Jam-free
- Replace line regularly: Don’t wait until the line breaks. Fresh line feeds better.
- Clean after each use: Dirt and grass buildup cause most jams.
- Inspect before reloading: Check for cracks, worn eyelets, or loose covers.
- Store trimmer and line indoors: Sun and moisture weaken line material.
- Follow the manual: Each trimmer is a bit different; always check your model’s instructions.
Eco-friendly And Safety Considerations
Using your trimmer correctly not only prevents jams but is also better for the environment and your safety.
- Use biodegradable line if available. It breaks down faster and is less harmful to the environment.
- Always wear gloves and eye protection.
- Never try to fix a jam while the trimmer is plugged in or running.
- Dispose of old line pieces properly; animals can mistake them for food.
When To Seek Professional Help
Most line jams can be fixed at home, but there are times when you should see a pro:
- The trimmer head is damaged or cracked.
- The line jams every time, no matter what you try.
- The driveshaft or motor makes unusual noises.
- You see sparks, smoke, or burning smells.
A certified repair shop can check for deeper problems and make sure your trimmer is safe to use.
Comparison: Gas Vs. Electric Vs. Battery String Trimmers And Jam Frequency
Some people believe gas trimmers jam less than electric or battery models, but this isn’t always true. Here’s a quick comparison:
| Trimmer Type | Jam Frequency | Maintenance Needs | Best For |
|---|---|---|---|
| Gas | Medium | High | Large yards, thick brush |
| Electric (Corded) | Medium | Low | Small yards, near power sources |
| Battery (Cordless) | Medium | Low | Medium yards, portability |
Non-obvious insight: Jam risk is more about line type and user care than the power source. However, gas models tend to be more powerful, which can melt line faster if used without breaks.
Expert Advice: How Often Should You Replace The String Trimmer Line?
Most homeowners change their trimmer line once or twice per season. But if you notice any of these signs, replace it right away:
- The line breaks easily or becomes brittle.
- It doesn’t feed smoothly, even after rewinding.
- The line looks faded, cracked, or uneven.
For heavy users, consider changing the line every month or after every 5-10 hours of use. Always keep extra line handy.
The Role Of Weather In String Trimmer Line Jams
Hot, humid, or rainy weather can affect your trimmer line. High heat can soften the line and make it fuse together inside the spool. Humid or wet conditions can cause the line to swell or stick.
Practical tip: If you live in a humid area, store your line in a sealed bag with a silica gel packet. This keeps it dry and flexible.
The Best Brands And Aftermarket Products For Easy Line Loading
Some brands make trimmer heads and replacement lines that are easier to use and less likely to jam. Look for:
- Easy-load heads: These let you load line without taking the head apart.
- Pre-wound spools: Factory-wound for even, tangle-free feeding.
- Universal heads: Fit most trimmers and are designed to reduce jams.
If you want more details on trimmer heads and accessories, you can check out Consumer Reports for expert reviews.
Frequently Asked Questions
How Do I Know What Size Trimmer Line To Use?
Check your user manual or look for markings on the trimmer head. Most home models use. 065″ to. 095″ line. Using the right size prevents jams and extends the life of your trimmer.
Can I Use Any Brand Of Trimmer Line In My Trimmer?
Usually, yes, as long as the diameter and shape match your trimmer’s requirements. However, some brands make lines that work better with their own heads. Always test a new line slowly to check for jams.
Why Does My Trimmer Line Keep Breaking?
Common reasons are using old or brittle line, hitting hard objects (rocks, fences), or using a line that’s too thin for your trimmer. Also, winding the line too loosely can cause it to snap during use.
What Should I Do If The Trimmer Head Won’t Open?
First, make sure the trimmer is off and unplugged. Use a small screwdriver to gently pry the cap. If it’s stuck, clean around the cap with a brush and try again. If it still won’t open, the head may be damaged and need replacement.
How Can I Make My Trimmer Line Last Longer?
Store line in a cool, dry place. Soak new line in water before loading to keep it flexible. Avoid hitting rocks, concrete, or metal, and use the correct line size for your trimmer.
If you follow these tips and understand your trimmer’s design, you can fix and prevent most string trimmer line jams. With a little care and the right line, you’ll spend less time untangling and more time enjoying a neat, healthy yard.