
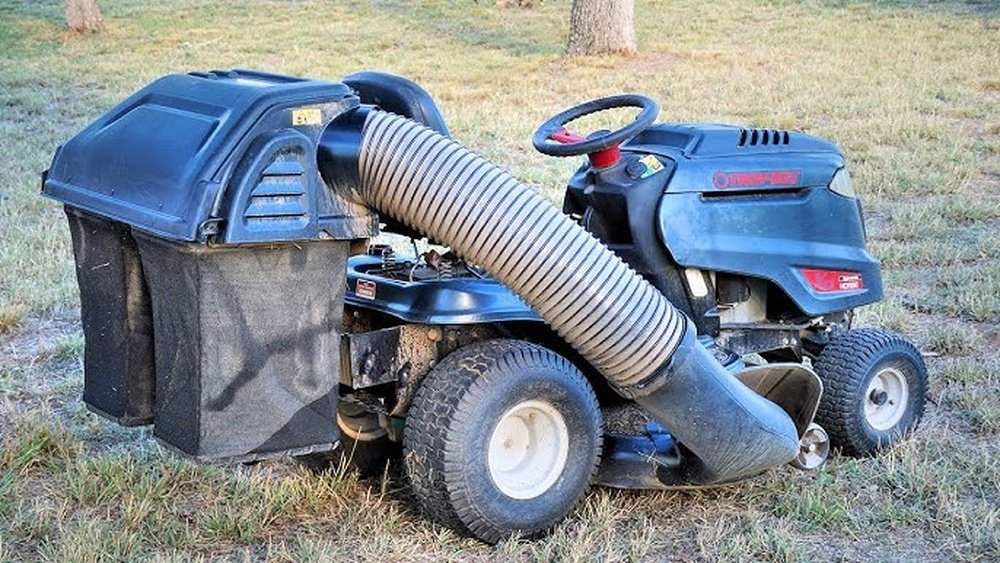
Attaching a bagger to your riding mower can make lawn care much easier and cleaner. Baggers help collect grass clippings, leaves, and debris, saving you from raking or cleaning up by hand. But many people find the process tricky, especially if they’re new to riding mowers.
Mistakes can lead to poor performance or even damage. This guide explains, in simple language, how to attach a bagger to your riding mower, including practical tips, safety steps, and common problems to avoid. If you want a perfect-looking lawn with less effort, keep reading.
Why Attach A Bagger To Your Riding Mower?
A bagger is more than just a fancy add-on. It helps keep your yard tidy, prevents thatch buildup, and can even improve your mower’s performance. Baggers are especially useful for larger properties, fall leaf cleanup, or if you want to prevent grass clippings from spreading onto driveways or garden beds.
Many baggers fit specific mower models. Always check compatibility before buying or installing a bagger. Using the wrong bagger can cause blockages, uneven cutting, or even damage your mower.
What You Need Before Starting
Before you attach a bagger, gather these essential items:
- The correct bagger kit for your mower’s make and model
- Basic hand tools (wrenches, pliers, screwdrivers)
- Work gloves for safety
- Safety glasses to protect your eyes from debris
- The mower’s manual and bagger instructions
Having everything ready saves time and helps you avoid frustration.

Credit: www.youtube.com
Step-by-step: How To Attach A Bagger To A Riding Mower
Let’s break down the process into clear, easy steps. While details can vary by model, these instructions cover most situations.
1. Park And Prepare Your Mower
- Park your riding mower on a flat, hard surface such as a driveway or garage.
- Turn off the engine and remove the ignition key.
- Allow the mower to cool down if it was running.
- Engage the parking brake for extra safety.
This step is often rushed, but it’s crucial for safety and making your work easier.
2. Gather And Inspect Bagger Parts
Open your bagger box and lay out all parts. Most kits include:
- Mounting brackets
- Discharge chute
- Collection bags (usually two or three)
- Support rods or frames
- Hardware (bolts, nuts, washers)
- Instructions
Check for missing or damaged parts before starting. Trying to install a bagger with missing parts is a common mistake and leads to frustration.
3. Install Mounting Brackets
- Locate the mounting points on the rear of your mower frame.
- Attach the mounting brackets using the supplied bolts and hardware.
- Tighten all connections securely, but do not overtighten—this can strip threads or break plastic parts.
Mounting brackets are the “backbone” of your bagger system. If they’re loose, the whole bagger can wobble or fall off.
4. Assemble And Attach The Bagger Frame
- Slide or snap the bagger frame into the installed brackets.
- Secure with pins or bolts as directed.
- Ensure the frame is stable before continuing.
Some frames are adjustable. Make sure yours sits level and does not block the mower’s lights or safety features.
5. Attach The Grass Collection Bags
- Hang the collection bags on the bagger frame hooks or supports.
- Make sure each bag is fully open and securely attached.
- Check that the bags can easily be removed for emptying.
If the bags are not attached properly, clippings can spill out or clog the chute.
6. Connect The Discharge Chute
- Open the mower’s side discharge port (if it has a cover, prop it open or remove it).
- Slide the discharge chute into place, connecting the mower deck to the bagger frame.
- Secure with clamps, latches, or pins. Some chutes have rubber seals—make sure these are seated correctly to prevent leaks.
The discharge chute must fit tightly. Any gaps can cause clogs or blow clippings back onto the lawn.
7. Check Alignment And Safety Features
- Walk around your mower and make sure nothing blocks the tires, hitch, or safety switches.
- The bagger should not drag or tilt.
- Test the safety interlock if your mower has one (some mowers will not run if the bagger is not attached correctly).
Missing this step is a beginner’s mistake—it can lead to bagger damage or mower malfunction.
8. Test Run And Adjust
- Start your mower at low speed.
- Engage the blades and drive a short distance on your lawn.
- Watch for vibration, rattling, or grass clippings escaping the system.
- Stop and check all connections. Adjust or retighten as needed.
If you see clippings on the ground, check the discharge chute and bag connections for gaps or blockages.
Common Problems And Solutions
Attaching a bagger is not always smooth. Here are issues people often face and how to fix them:
- Clippings not going into bags: Check if the chute is clogged or if the bags are full. Clean out the chute and empty the bags.
- Bagger feels loose or wobbly: Inspect all bolts, pins, and brackets. Tighten or replace any that are missing or loose.
- Grass blowing out: Make sure the chute is sealed tightly to the deck and the bags are not torn.
- Mower engine bogs down: Bags may be too full, or the chute may be blocked. Stop and clear the system.
- Difficult to attach chute: Sometimes grass buildup on the deck rim makes it hard to fit the chute. Clean the deck thoroughly first.
Comparing Bagger Types
Not all baggers are the same. Here is a quick comparison of single-bag vs dual-bag and triple-bag systems:
| Bagger Type | Capacity (Gallons) | Best For | Weight (Full) |
|---|---|---|---|
| Single-Bag | 6-8 | Small yards | Light |
| Dual-Bag | 12-16 | Medium yards | Medium |
| Triple-Bag | 18-24 | Large yards | Heavy |
Dual and triple-bag systems allow you to mow longer without stopping to empty, but they can be heavier and affect mower balance.
Bagger Attachment Speed: Manual Vs. Tool-free
Different bagger kits have different attachment methods. Here’s how they compare:
| Attachment Method | Time Needed | Tools Required | Skill Level |
|---|---|---|---|
| Manual Bolting | 20-30 min | Wrenches | Moderate |
| Tool-Free Quick Attach | 5-10 min | None | Easy |
Many new baggers offer quick-attach features, making installation much faster and easier.
Important Safety Tips
Never skip these safety steps:
- Always turn off the mower and remove the key before working.
- Wear gloves and safety glasses.
- Keep hands and tools away from hot or moving parts.
- Never reach into the chute or under the deck while the engine is running.
- Store the bagger parts safely when not in use.
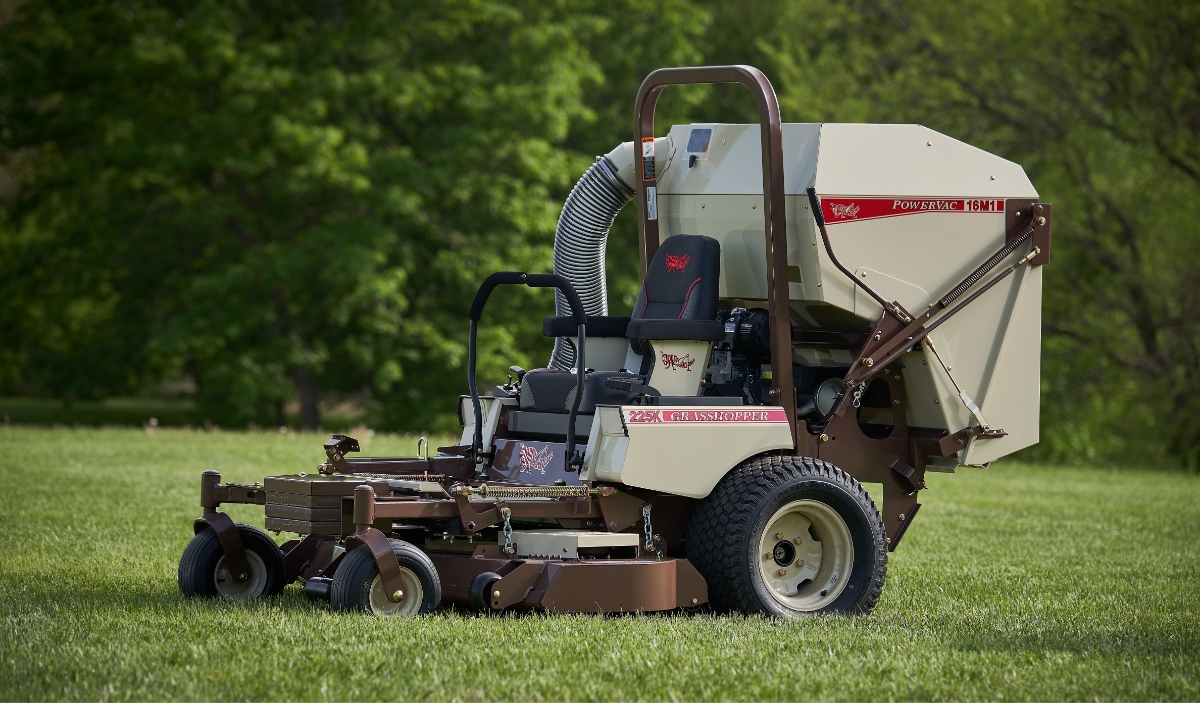
Maintenance Tips For Long-lasting Baggers
A well-maintained bagger lasts for years. Here’s how to keep yours in good shape:
- Clean the bags and chute after every use. Wet grass can rot and create bad smells.
- Check for tears or holes in the bags. Patch or replace damaged bags.
- Lubricate moving parts like hinges and latches once a season.
- Store indoors when possible. Sun and rain can weaken plastic and fabric.
- Inspect mounting brackets for rust or cracks.
Regular maintenance prevents sudden failures and keeps your bagger working smoothly.
Credit: www.grasshoppermower.com
Non-obvious Tips Most Beginners Miss
- Check tire pressure before attaching a heavy bagger. Extra weight from a full bagger can make your mower harder to steer or cause uneven cutting.
- Balance the load. If one bag fills up much faster, it may cause the mower to pull to one side. Stop and empty the fuller bag first.
- Mow when grass is dry. Wet clippings clog chutes and bags quickly. If you must mow when grass is damp, empty the bags more often.
Seasonal Tips For Bagger Use
- In fall, empty bags often as wet leaves are heavier and can overfill bags quickly.
- In spring, check for leftover debris in the chute from winter storage.
- In summer, bag clippings less often—mulching may be better in hot, dry weather.

Credit: www.ebay.com
Environmental Benefits
Bagging isn’t just for looks. It helps keep weeds and disease from spreading. Removing clippings can reduce the need for extra lawn treatments. You can also compost the clippings for garden use.
Where To Find Bagger Kits And Parts
Buy bagger kits from authorized dealers, home improvement stores, or the mower brand’s website. Always match the model number exactly. For parts and repair guides, the Wikipedia Lawn Mower page is a solid resource.
Frequently Asked Questions
How Do I Know If A Bagger Fits My Riding Mower?
Check your mower’s manual or the bagger kit’s compatibility chart. The model number is key. Universal baggers are rare—most fit only certain brands or models.
Can I Attach A Bagger By Myself, Or Do I Need Help?
Most baggers can be attached by one person, but larger triple-bag systems can be heavy. Having a second person can make lifting and alignment easier and safer.
Why Does My Bagger Keep Clogging?
Clogs often happen if grass is wet, the chute is not attached tightly, or the bags are too full. Mow when grass is dry, empty bags often, and check all seals and connections.
Does Using A Bagger Affect My Mower’s Engine?
A bagger adds weight and slight resistance, but a healthy mower should handle it easily. Clean the chute and bags regularly to avoid engine strain.
How Do I Clean My Bagger System?
Remove the bags and chute, shake out dry clippings, and rinse with a hose. Let all parts dry completely before storing to prevent mold or odor.
Attaching a bagger to your riding mower takes a little time, but the rewards are a cleaner, easier mowing experience. With the right tools, some basic care, and these expert tips, you’ll keep your yard looking its best season after season.