
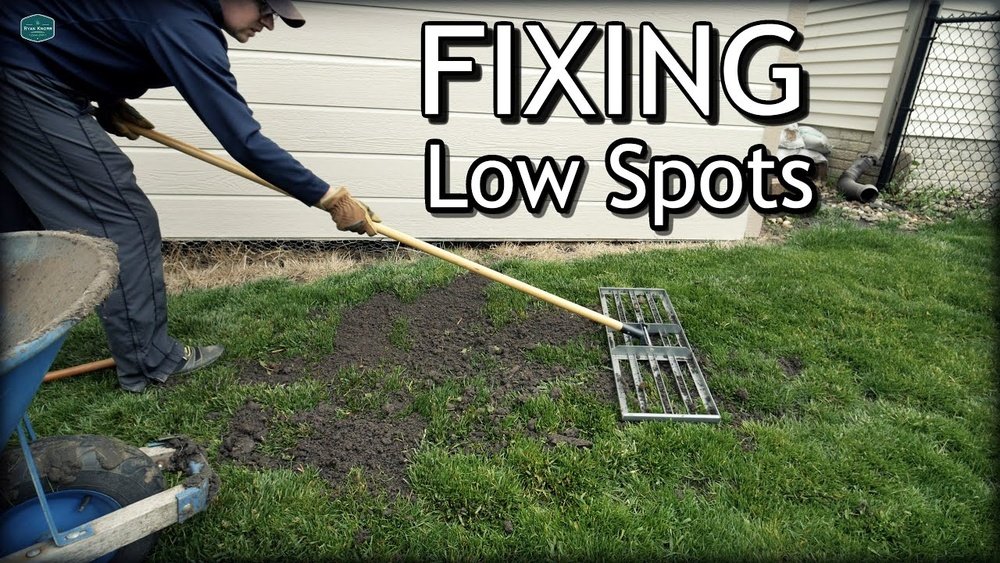
Every homeowner dreams of a smooth, healthy lawn. But sometimes, you notice uneven patches or small dips—these are called low spots. Low spots in your lawn don’t just look bad; they can cause water to pool, make mowing difficult, and even hurt your grass’s health. Fixing them is important for both appearance and function. But how do you do it right? This guide will show you how to fill in low spots in your lawn with practical tips, clear steps, and expert advice. Whether you have a few shallow dips or deeper holes, you’ll learn everything you need to get your lawn back to level.
Why Do Low Spots Happen?
Understanding what causes low spots helps you fix the problem for good. Common reasons include:
- Soil settling after construction or landscaping
- Heavy foot traffic that compacts the soil
- Poor drainage or water runoff
- Burrowing animals like moles
- Tree roots that die and decompose
- Thatch buildup that creates uneven ground
Sometimes, low spots are just natural as soil shifts over time. Other times, they signal deeper issues, like underground water leaks. Always check for the cause before you start leveling.
When Is The Best Time To Fix Low Spots?
Timing matters if you want the best results. Fill in low spots when your grass is growing fast. For cool-season grasses (like fescue or bluegrass), this means spring or early fall. For warm-season grasses (like bermuda or zoysia), late spring to early summer is ideal. Avoid hot summer days or the middle of winter, since grass is stressed or dormant.

Credit: ngturf.com
Tools And Materials You’ll Need
Before you start, gather the right tools and materials. Here’s a comparison of common choices:
| Tool/Material | Purpose | Recommended For |
|---|---|---|
| Shovel | Digging and moving soil | All lawns |
| Rake (bow or landscape) | Spreading soil and leveling | Medium/large areas |
| Wheelbarrow | Transporting soil mix | Large lawns |
| Topsoil/Sand/Compost | Filling material | All low spots |
| Grass seed or sod | Restoring grass cover | Bare or thin areas |
| Watering can or hose | Watering new soil/seed | All repair jobs |
| Garden roller (optional) | Firming soil after filling | Large, flat lawns |
How To Fill In Low Spots In Your Lawn: Step-by-step
1. Find And Mark The Low Spots
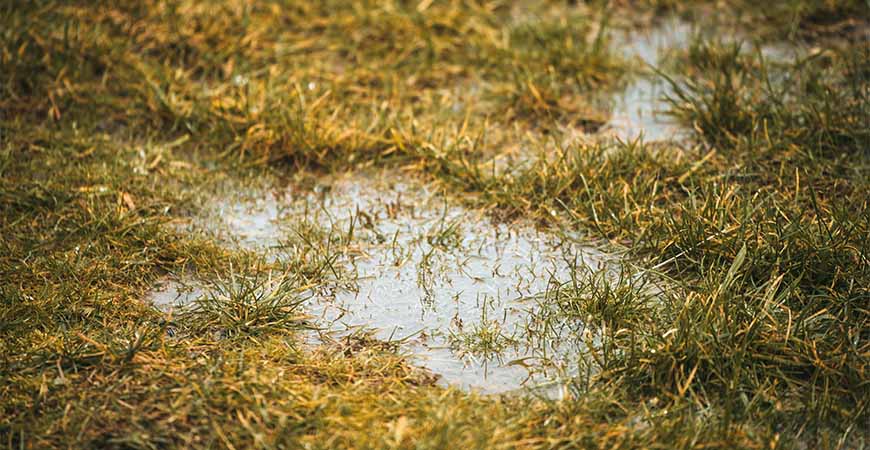
Walk over your lawn after a rain when the ground is soft. Look for puddles or areas where water collects. These are your low spots. Use small flags or stakes to mark them. Don’t just guess; sometimes, low spots are hard to see when the grass is dry.
2. Choose The Right Soil Mix
Not all soil mixes work the same. The best mix is usually topsoil and sand (50/50) or topsoil, sand, and compost (40/40/20). Here’s why:
- Topsoil gives nutrients for grass
- Sand helps drainage and prevents compaction
- Compost feeds microbes and improves soil structure
Never use pure sand or heavy clay. Pure sand can dry out and create hard layers, while clay holds water and suffocates roots.
3. Remove Thatch And Debris
If your lawn has a thick layer of thatch (dead grass), remove it with a rake before filling. Thatch acts like a sponge and can make leveling less effective. Also, clear away any rocks, sticks, or weeds from the low spot.
4. Fill Shallow Low Spots (under 1 Inch Deep)
For small dips, spread a thin layer of your soil mix over the low spot. Use the back of a rake to spread it evenly. Don’t bury the grass completely—leave the blades showing. This helps the grass grow up through the new soil.
Water the area well. Grass usually grows through a thin layer (up to ½ inch) in 2–4 weeks. For areas slightly deeper, you can repeat this process after 4–6 weeks.
5. Fill Deeper Low Spots (over 1 Inch Deep)
For deeper holes or larger sunken areas:
- Use a sharp shovel to cut around the low spot in a square or rectangle.
- Gently remove the grass layer (called sod) and set it aside.
- Fill the hole with your soil mix, tamping it down lightly as you go. Overfill the spot by ¼ inch to allow for settling.
- Place the sod back on top and press it firmly.
- Water well.
If you don’t have enough good sod, sprinkle grass seed or lay new sod after filling.
6. Level And Smooth The Area
After filling, use a landscape rake to blend the soil with the surrounding lawn. The goal is a smooth transition—no bumps or sharp edges. For larger areas, a garden roller can help make the ground even.
7. Water And Care For The Filled Area
Keep the repaired area moist but not soggy. Water once or twice a day for the first week, then reduce as the grass grows. Avoid heavy foot traffic until the area is fully recovered.
8. Reseed Or Patch Bare Spots
If the grass in the filled area is thin or missing, reseed right after filling. Choose a seed that matches your existing lawn. Lightly rake the seed into the top layer and water gently. Cover with a thin layer of straw if birds are a problem.
Tips For Best Results
- Don’t overfill: Adding too much soil at once can smother grass.
- Work in layers: For deep low spots, fill in stages (no more than 1 inch at a time).
- Use sharp tools: Clean cuts make it easier to lift and replace sod.
- Check for drainage: If water pools after rain, adjust the soil mix or add more sand.
- Be patient: Grass may take several weeks to recover fully.
Common Mistakes And How To Avoid Them
Using the wrong soil mix is a frequent problem. Too much clay or sand can harm your lawn long-term. Always use a balanced mix. Another mistake is filling too deep at once, which can kill the grass and create new dips as the soil settles.
Also, avoid compacting the soil too much. Press it down lightly, but don’t stomp or roll heavily, or you’ll prevent roots from growing.
Comparing Lawn Leveling Methods
There are different ways to fix low spots. Here’s a quick comparison:
| Method | Best For | Pros | Cons |
|---|---|---|---|
| Topdressing | Shallow dips | Simple, low stress to grass | May need repeated applications |
| Sod removal & refill | Deeper holes | Fast, fixes big problems | More labor, may disturb roots |
| Power leveling rake | Large uneven areas | Efficient for big lawns | Expensive, needs equipment |
How To Prevent Future Low Spots
Fixing low spots is one thing, but keeping your lawn even is better. Here’s how:
- Aerate regularly: Aeration prevents compaction and improves drainage.
- Monitor water flow: Make sure downspouts and sprinklers don’t cause erosion.
- Limit heavy traffic: Use stepping stones or paths in high-use areas.
- Treat for pests: Control moles, grubs, and other animals that tunnel underground.
- Fertilize and overseed: Strong grass roots hold soil in place.
Signs Of Bigger Problems
Sometimes, low spots are a warning. If you notice these signs, consider professional help:
- Constant standing water that never drains
- Sudden large holes or rapid sinking
- Foul smells (could mean a broken pipe)
- Multiple new dips after a heavy rain
These issues may need grading, drainage work, or plumbing repairs.
Real-world Example
John, a homeowner in Ohio, noticed several dips in his backyard after a wet spring. He marked the low spots after a rain, then used a mix of topsoil and sand. For shallow dips, he spread the mix thinly and let the grass grow through. For deeper holes, he cut out the sod, filled the spot, and replaced the grass. After a month of watering and care, the lawn was level and thick. The key lesson: working in layers and not rushing gave the best results.

Credit: ngturf.com
How Long Does It Take For The Lawn To Recover?
Grass recovery depends on the season, type of grass, and depth of the repair. For shallow topdressing, you’ll see improvement in 2–4 weeks. Deep repairs can take 6–8 weeks for full recovery. Warm, moist weather helps grass grow faster. Be patient and keep the area watered.
Professional Help: When To Call Experts
DIY is fine for small or medium low spots. For large, sloping, or waterlogged lawns, hiring a professional might be better. Experts use laser leveling, specialized soil mixes, and can solve drainage issues. It costs more, but saves time and avoids mistakes.
Cost Of Filling Low Spots
Here’s a cost comparison for different approaches:
| Method | DIY Cost (per 100 sq ft) | Professional Cost |
|---|---|---|
| Topdressing | $30–$70 | $150–$300 |
| Sod replacement | $50–$120 | $250–$500 |
| Leveling with equipment | $80–$200 (rental & mix) | $400–$1,000 |
DIY saves money, but requires time and effort. Professionals cost more, but offer speed and expertise.
Non-obvious Insights
Many beginners miss that filling low spots in stages is more effective than doing it all at once. Another detail: the type of sand matters—a coarse, washed sand is best, not play sand, which can pack too tightly. Also, always check for hidden roots or buried debris before filling; these can rot and cause new dips later.
Where To Learn More
For more details on lawn care and soil mixes, visit Gardeners’ World.
Frequently Asked Questions
How Often Should I Fill Low Spots In My Lawn?
You should check your lawn every spring and fall. If you see new low spots, fill them as needed. Most lawns need touch-ups every 2–3 years, but heavy foot traffic or poor drainage may require more frequent repairs.
Can I Use Only Sand To Fill Low Spots?
No, using only sand is not recommended. It can cause compaction, poor drainage, and root problems. Always mix sand with topsoil (and compost, if possible) for the best results.
Will Grass Grow Through The Soil I Add?
Yes, as long as you add soil in thin layers (no more than ½ inch at a time) and keep the grass moist. For deeper fills, you may need to reseed or replace sod.
What If I Have Clay Soil?
If your lawn has heavy clay, add more sand and organic matter to your mix. This improves drainage and prevents further low spots. Avoid adding more clay.
How Can I Tell If My Lawn Has Drainage Problems?
Signs include standing water after rain, yellow or thin grass, and soil that feels sticky. If you see these problems, improve drainage before filling low spots.
A level, healthy lawn is possible with the right approach. Fixing low spots takes a little time, but the results are worth it—better looks, easier mowing, and healthier grass for years to come.
Credit: askwetandforget.com