
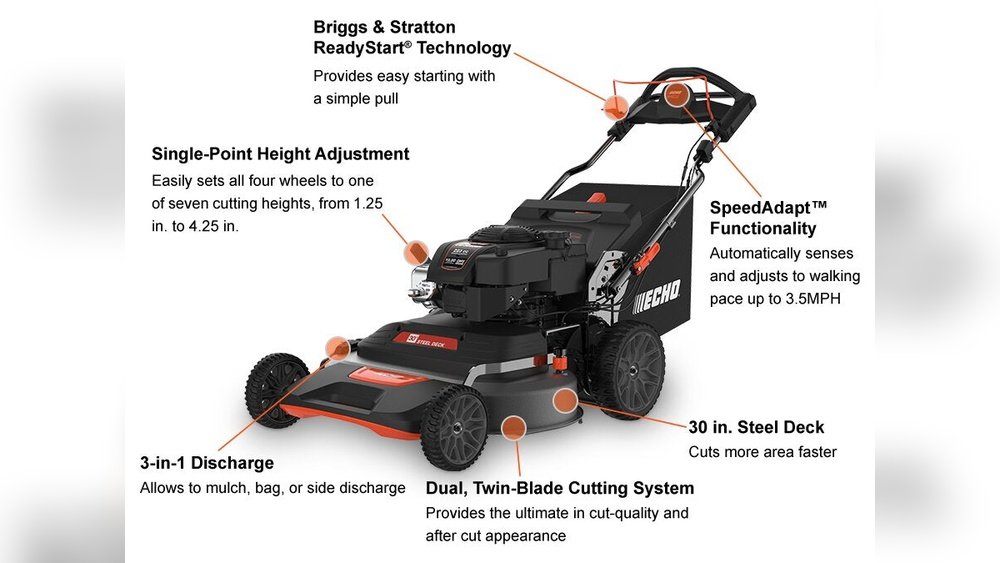
If you want your lawn to look neat and professionally maintained, adjusting the cutting height on your lawn edger is a crucial step you can’t overlook. Getting this setting just right not only protects your grass but also ensures clean, sharp edges that make your yard stand out.
But if you’ve ever wondered how to easily adjust your edger’s cutting height without guessing or causing damage, you’re in the right place. This guide will walk you through simple, clear steps so you can confidently set the perfect height for your lawn edges every time.
Keep reading to transform your outdoor space with precision and ease!
Credit: www.walmart.com
Tools Needed
Adjusting the cutting height on a lawn edger requires some basic tools. Having the right tools makes the task easier and safer. Prepare these tools before starting to save time and avoid frustration.
Wrench Or Socket Set
A wrench or socket set helps loosen and tighten bolts. Most edgers have bolts securing the blade or height adjustment parts. Choose the correct size to avoid damaging bolts.
Screwdriver
A screwdriver is useful for removing screws that hold guards or covers. Some edgers use screws to secure the height adjustment mechanism. Flathead or Phillips head screwdrivers are common.
Measuring Tape Or Ruler
Use a measuring tape or ruler to check the cutting height. Accurate measurement ensures even trimming. Measure from the ground to the blade for the best result.
Work Gloves
Wear work gloves to protect your hands. Edger blades are sharp and can cause cuts. Gloves also provide better grip on tools and parts.
Owner’s Manual
Keep the owner’s manual nearby. It offers specific instructions for your edger model. Manuals often include diagrams and safety tips.
Safety Tips
Safety is the top priority when adjusting the cutting height on a lawn edger. Taking proper precautions reduces the risk of injury and damage. Follow these tips to keep yourself safe while working with your edger.
Wear Protective Gear
Always wear safety glasses to protect your eyes from debris. Use gloves to shield your hands from sharp edges. Closed-toe shoes with good grip help prevent slips and foot injuries.
Turn Off And Unplug The Edger
Before making any adjustments, switch off the edger. Unplug it or remove the battery to avoid accidental starts. This step is critical for your safety.
Check The Edger’s Stability
Place the edger on a flat surface before adjusting the cutting height. Ensure it is stable and won’t tip over during the process. This prevents accidents and keeps you steady.
Use Proper Tools
Use the manufacturer-recommended tools for height adjustments. Avoid makeshift tools that can slip or cause damage. Proper tools make the task safer and easier.
Follow Manufacturer Instructions
Read and follow the user manual carefully. Each model has specific steps for adjusting height. Correct procedure avoids mistakes that could harm you or your equipment.
Locate The Adjustment Mechanism
Start by finding the adjustment mechanism, usually near the edger’s wheel or blade area. It often looks like a knob or lever that controls blade height. Check your model’s manual for the exact location to make precise changes.
Finding the adjustment mechanism is the first step to set the cutting height. This part controls how deep or shallow the blade cuts into the ground.
The location varies by model. Usually, it sits near the blade or on the handle.
Look for a lever, knob, or dial. These are common types of adjustment controls.
Check Near The Edger Blade
The adjustment mechanism often sits close to the blade housing. This placement makes it easy to change the height quickly.
Inspect the base of the edger. You might see a small wheel or a lever attached there.
These parts help raise or lower the blade for the perfect cutting depth.
Inspect The Handle Area
Some lawn edgers have the height control on the handle. This lets you adjust the height while standing up.
Look for a lever or knob near the grip. Turning or sliding this changes the blade height.
This setup is convenient for making quick adjustments during edging.
Identify The Type Of Adjustment
Know what kind of mechanism your edger uses. It can be a dial, lever, or knob.
Each type works differently but aims to move the blade up or down.
Understanding the mechanism helps you adjust the height smoothly and safely.
Credit: thejoshproject.com
Loosen The Adjustment Knob
Loosening the adjustment knob is the first step to change the cutting height on your lawn edger. This knob holds the height setting in place. By loosening it, you allow the edger’s blade to move freely up or down. This makes it easy to select the perfect cutting height for your lawn edges.
Make sure to locate the adjustment knob before starting. It is usually near the blade or the guide wheel. Turning the knob in the correct direction will unlock the height setting. After loosening, you can raise or lower the blade smoothly. Tightening the knob again will secure the new height.
Find The Adjustment Knob
Look closely around the blade area to spot the knob. It often has a textured grip for easy turning. Some models label it as a height or depth adjustment knob. Knowing its exact location saves time and avoids confusion.
Turn The Knob Carefully
Turn the knob slowly to loosen it. Do not force it, as this might damage the threads. Follow the unlocking arrow, if available, for the correct direction. Once loose, the blade or guide wheel should move easily.
Check Blade Movement
After loosening, gently move the blade or guide wheel up and down. This confirms the knob is fully loosened. If it feels tight, try loosening the knob a bit more. Free movement is key for easy height adjustment.
Secure The Knob After Adjustment
Once the blade is set at the desired height, turn the knob clockwise to tighten. Make sure it is firm but not over-tightened. A secure knob keeps the blade stable during edging. This ensures clean and even cuts every time.
Set The Desired Cutting Height
Setting the desired cutting height on your lawn edger ensures clean, precise edges without damaging grass or soil. It controls how deep the blade cuts along sidewalks and flower beds. Proper height adjustment improves your lawn’s appearance and protects your yard’s health.
Choosing The Right Height
Select a cutting height that suits your lawn type and edging style. Shorter cuts create sharp, neat edges but may harm delicate grass. Taller heights preserve grass but leave a wider strip uncut. Aim for a balance that keeps edges tidy without stressing plants.
Consider the season and weather too. Dry conditions call for higher cuts to avoid grass damage. Wet soil allows for lower cuts but may cause uneven edges. Adjust height carefully for best results.
Adjusting For Different Edger Types
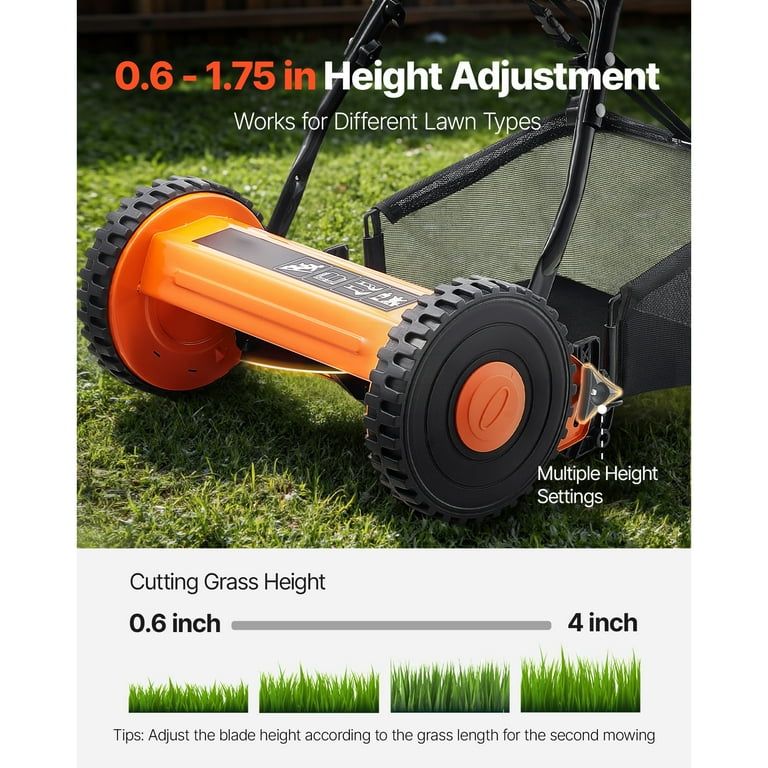
Manual edgers usually have a simple lever or screw to change height. Loosen the knob, slide the blade or wheel up or down, and tighten it again. Check the blade position before starting.
Power edgers often feature multiple height settings or a depth adjustment dial. Use the controls to set the blade height evenly. Follow the manufacturer’s instructions for smooth operation.
Some edgers have guide wheels that affect cutting depth. Moving these wheels up raises the blade, while lowering them deepens the cut. Test adjustments on a small area before edging the whole lawn.
Credit: www.hlouwa.com
Secure The Adjustment
Securing the cutting height adjustment on your lawn edger is essential for safe and effective use. This step stops the blade from moving during operation. A firm adjustment ensures a clean edge without damaging your lawn or the edger itself.
Always double-check the adjustment after setting the height. Loose settings can cause uneven cuts and unsafe conditions. Take time to make sure everything is tight and locked in place before you start edging.
Check The Adjustment Lever Or Knob
Locate the lever or knob used to set the cutting height. Turn or push it to lock the height firmly. You should feel or hear a click when it locks correctly. If it does not, adjust it again until secure.
Tighten The Locking Mechanism
Most lawn edgers have a bolt, screw, or knob to tighten the height setting. Use the right tool, like a wrench or screwdriver, to tighten this part. Make sure it is snug but do not overtighten to avoid damage.
Test For Stability
Try to move the blade or guide wheel by hand. If it shifts, the adjustment is not secure. Tighten again and test once more. The blade should stay firmly in place without wobbling.
Inspect Before Each Use
Regularly check the cutting height adjustment before you edge. Vibration can loosen parts over time. Keeping the adjustment tight maintains cutting quality and safety.
Test The Cutting Height
Testing the cutting height on your lawn edger is essential for a clean, sharp edge. It helps you see if the blade is set correctly. This step ensures you do not cut too deep or too shallow.
Start by edging a small section of your lawn. Check how the blade cuts through the grass and soil. Look for evenness and smoothness along the edge.
Adjust the height if the cut is uneven or if the blade digs too deep into the soil. Testing lets you avoid damage to your lawn and keeps the edges neat.
Check The Initial Cut
Begin by edging a short strip. Watch how the blade interacts with the ground. Note if the cut is clean or jagged. A clean cut means the height is good.
Look For Turf Damage
Observe the grass near the edge. If you see torn or damaged grass, the blade is too low. Raise the cutting height slightly to protect your lawn.
Adjust And Retest
Make small changes to the cutting height. Test again on a different spot. Keep adjusting until the edge looks even and smooth without harming the grass.
Consider Soil Type
Soft soil needs a higher setting to avoid deep cuts. Hard soil allows for a lower cut. Testing helps find the best height for your lawn’s soil condition.
Maintenance Tips
Proper maintenance helps your lawn edger work well and last longer. Keeping the cutting height correct depends on regular care. Simple steps can prevent damage and keep your edges sharp and clean. Here are some key maintenance tips to follow.
Blade Care
Check the blade for dirt and grass after every use. Clean it with a brush or cloth to avoid buildup. Inspect the blade for nicks or dull spots. Sharpen dull blades to ensure smooth cutting. Replace damaged blades to protect your lawn and machine. Always wear gloves when handling blades for safety.
Regular Adjustments
Check the cutting height before each use. Adjust the height based on the lawn’s condition and grass type. Use the height adjustment knob or lever carefully. Make small changes and test the cut to find the best setting. Regular adjustments prevent uneven edges and improve lawn health. Keep the adjustment parts clean and free of debris for smooth operation.
Frequently Asked Questions
How To Set Edger Height?
Loosen the depth adjustment knob. Move the guide wheel or blade up or down to set desired edge height. Tighten the knob securely.
How To Set Lawn Mower Height To 3 Inches?
To set your lawn mower height to 3 inches, locate the height adjustment lever. Move the lever to the 3-inch setting. Ensure all wheels are set evenly. Lock the lever in place. Check the mower deck to confirm the height is correct before mowing.
Do You Push Or Pull An Edger?
Push a lawn edger forward along the edge for clean, precise cuts. Pulling may cause uneven trimming.
What Setting On The Lawn Mower Is 2 Inches?
A 2-inch lawn mower setting cuts grass to a height of 2 inches. Adjust the mower deck lever or knob to this position for optimal lawn health.
Conclusion
Adjusting your lawn edger’s cutting height is simple and effective. Start by loosening the adjustment knob. Move the blade or guide wheel to the desired height. Tighten the knob securely before use. This small step improves your lawn’s appearance and health.
Regular checks keep your edger working well. Enjoy clean, precise edges every time you work outside. Taking time to adjust properly saves effort later. Your lawn will look neat and well cared for. Keep practicing these steps for best results.